Microsoft Azure is a platform created to facilitate the management of resources, such as virtual machines or applications, in a scalable, secure and accessible environment from anywhere in the world; thanks to it being hosted in the cloud..
Azure provides us as administrators various utilities and tools to centralize the control of each resource created and thus know in detail the consumption of each aspect of the infrastructure, since Microsoft Azure offers various pricing plans based on the type of resource to use . But it is certainly worth it for its usage and configuration options.
You can know more about Microsoft Azure if you click on the following link:
One of the most common tasks in Azure is the creation of virtual machines , and therefore the cloning of these is one of the most common actions we can perform, either to avoid all the configuration of roles and services or simply because you want to count With an original machine stand..
For this reason, in this tutorial TechnoWikis will explain how we can clone a virtual machine in Azure in a practical way, but first we must take into account the following:
Aspects to consider before cloning Azure virtual machine
- To clone a virtual machine in Azure, we must be administrators or a delegated administrator on the server or a self-service user.
- When cloning a virtual machine, the origin of the existing virtual machine will not be deleted. Therefore, it is best to clone a virtual machine that has been prepared and generalized with the Sysprep tool. In case of not using a generalized virtual hard disk, the identity of the new virtual machine will be identical to the origin.
- A virtual machine that is deployed to a host can be cloned and the machine can be online, stopped or in a saved state, but it is advised that it be turned off.
- You can clone a virtual machine stored in the VMM library.
1. How to clone a virtual machine in Azure
Step 1
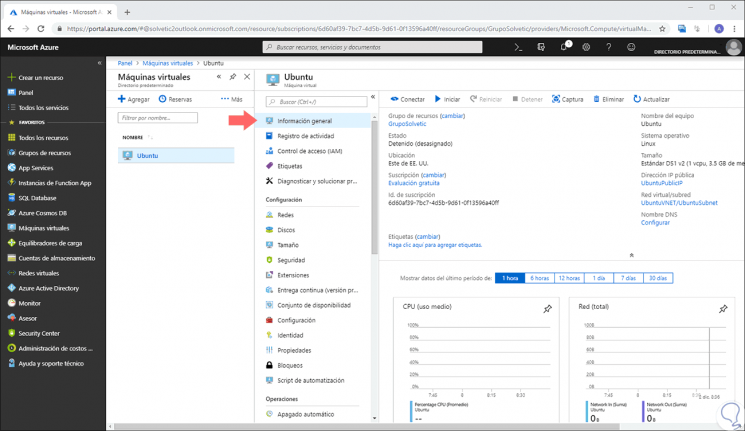
As we have indicated, it is recommended that the virtual machine to be cloned be turned off. Once this is done, we select the "Virtual machines" option on the left side of Azure, select our machine and see the following. By default it opens in the "General information" section.
Step 2
There we must click on the "Capture" option located at the top and the following will be displayed:
Note
We have said that for the cloning of Microsoft virtual machines we must use before the action:
sysprep
In the case of Linux machines we must execute the following before cloning:
sudo waagent –provision
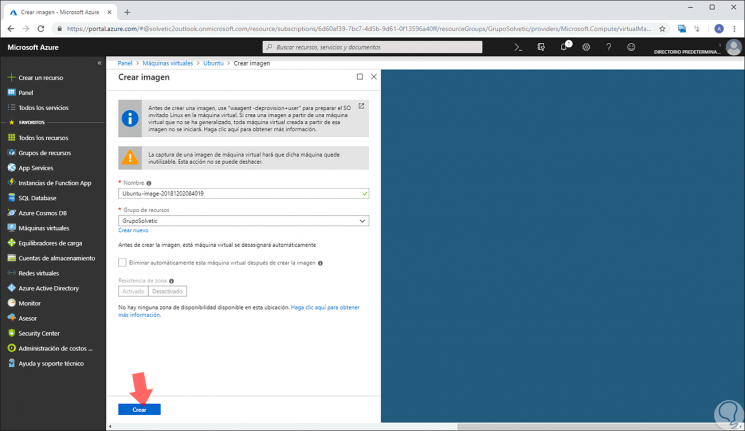
In this window we define the following:
- Name of the image to create.
- Resource group to use, we can take an existing group or create a new one.
Note
Recall that the resource group in Azure is a container where resources related to some Azure option are stored. The resource group can include all resources or only those that you want to manage as a group
In this window it is possible to activate the box "Automatically delete this virtual machine after creating the image" if we wish that the original machine is no longer available in Azure.
Once this is defined, click on the "Create" button..
Step 3
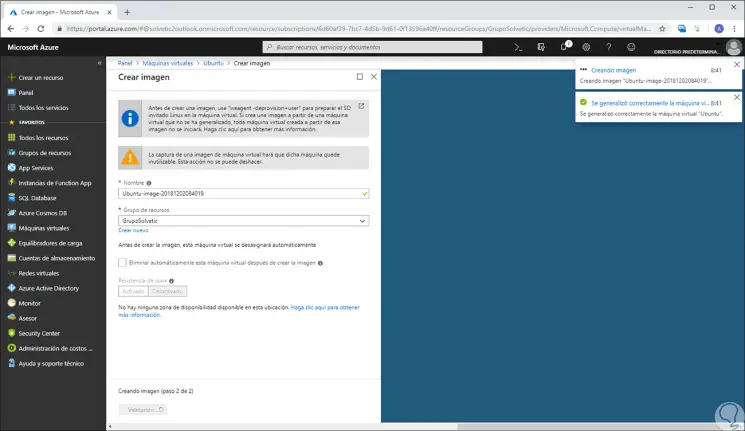
The following will be displayed. There we can see on the right side the actions executed in real time in Azure.
2. How to access the image created in Azure
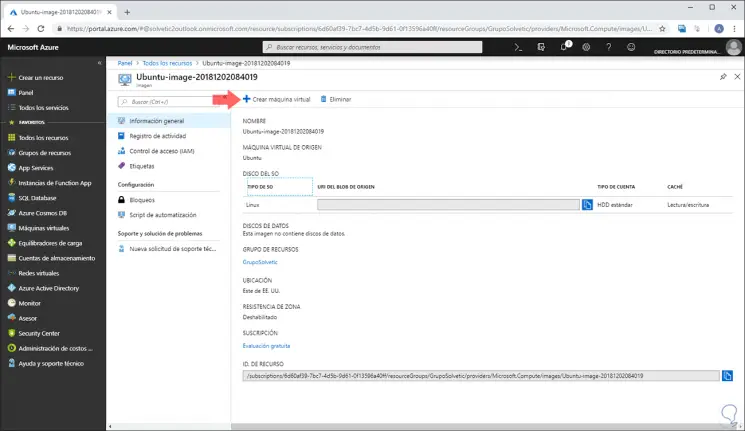
For this, we will go to the "All resources" option and in the search box enter "image" and the results that match this value will be displayed. There we can see our created image, click on it.
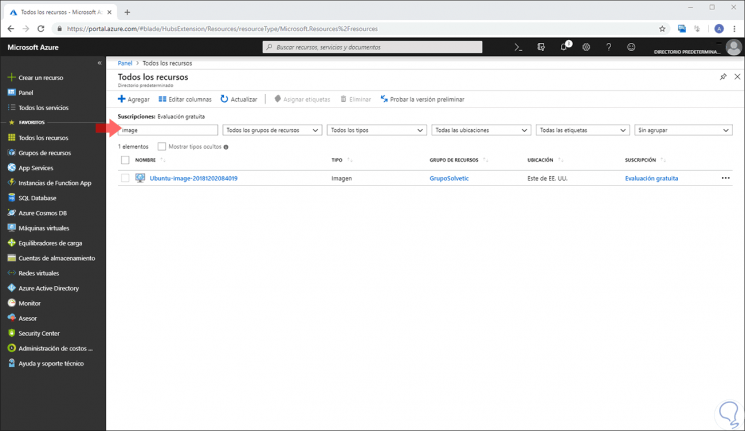
Here we can access more specific details of it such as:
- Image source virtual machine
Now, to clone the virtual machine, we click on the "Create virtual machine" button at the top
3. How to create virtual machine from the image in Azure
Step 1
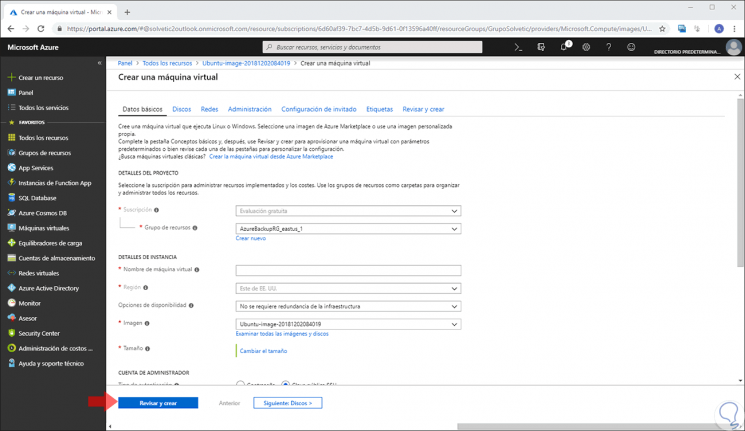
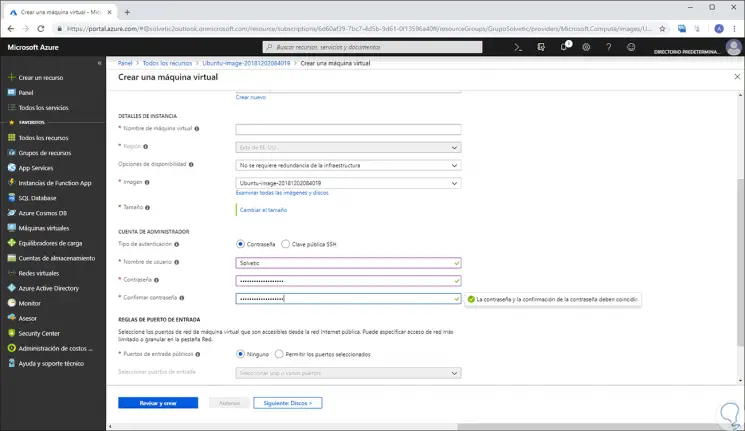
The following window will be displayed. There we enter the basic data of the machine such as:
- Username and password, etc.
Once we configure these values, click on the "Review and create" button
Note
It will also be possible to define additional values ​​at the level of hard drives, network, etc.
Step 2
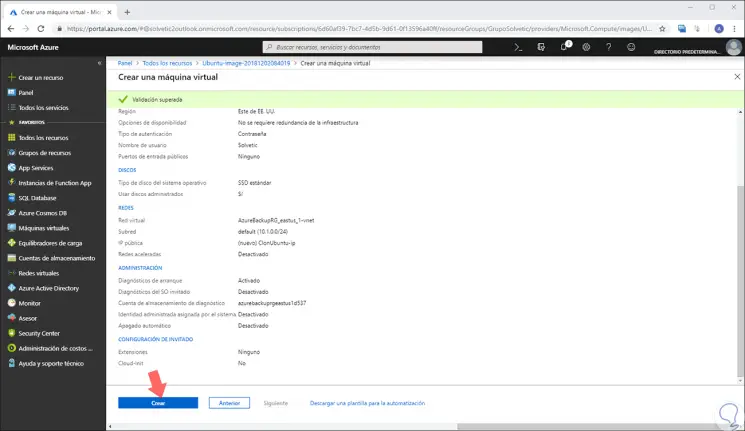
Azure will validate if we meet all the conditions to create such a machine:
Step 3
Once approved, click on the "Create" button
Step 4
It will begin the process of creating the virtual machine, which will be the clone of the machine from where the image has been taken. There we see that it is in the process of implementation.
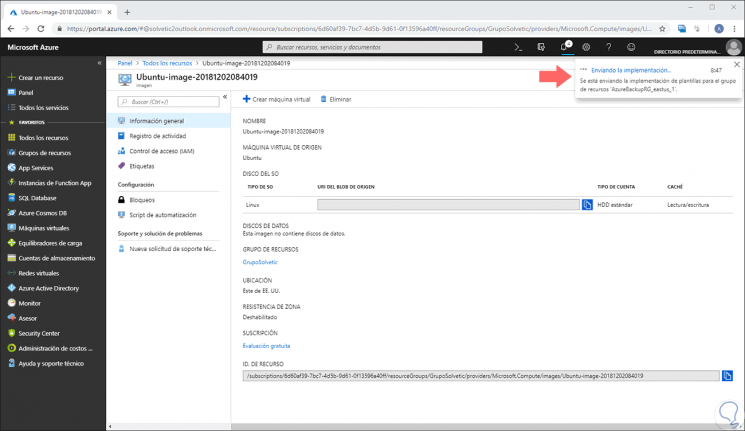
Step 5
Once finished, it will redirect us to the "Virtual machines" section and there we will see our cloned machine.
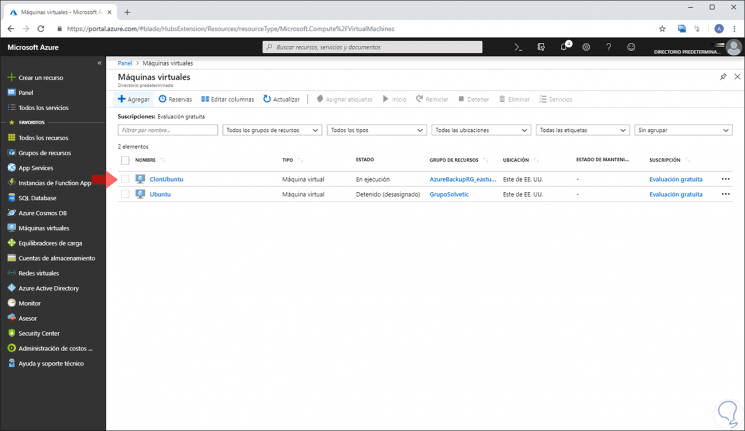
Step 6
We can click on the resource group of this machine to verify that our virtual machine is there:
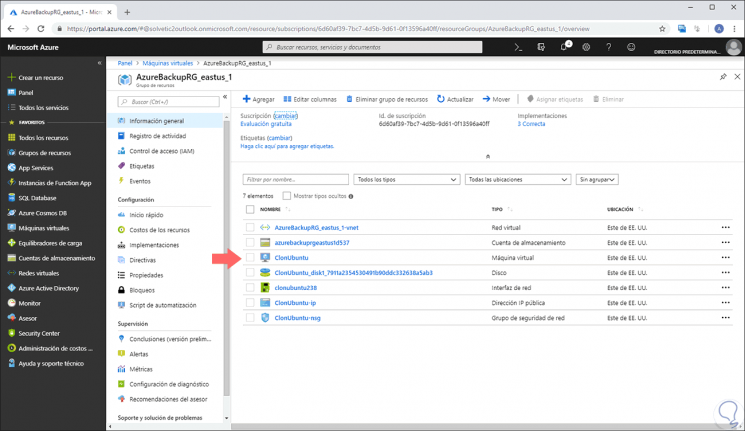
Step 7
If we access the properties of the machine we can see details of its use, as well as each parameter assigned to it:
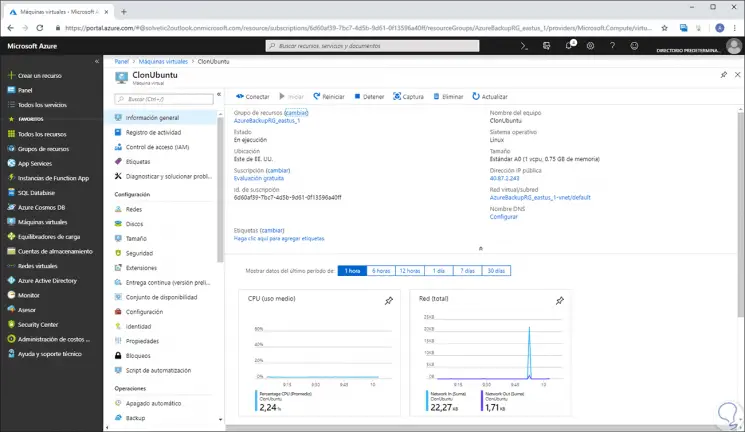
4. How to connect to the virtual machine cloned in Azure
Step 1
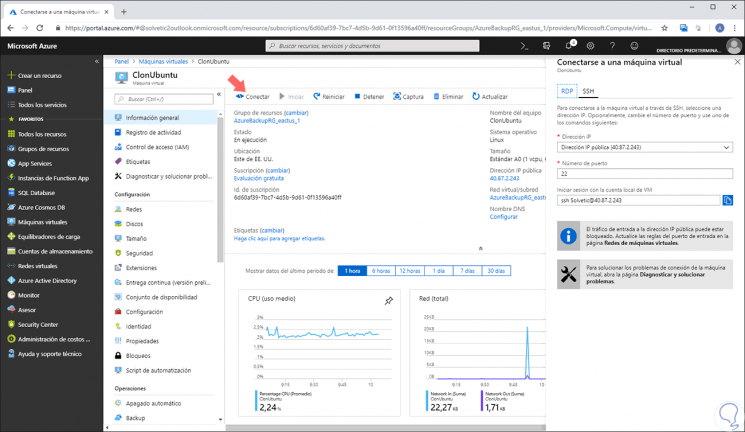
To access this machine we click on "Connect".
Step 2
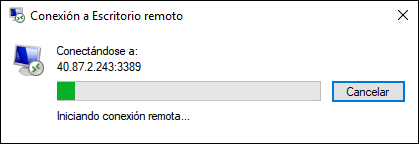
The following will be displayed. There we can access this cloned machine through the RDP protocol:
Step 3
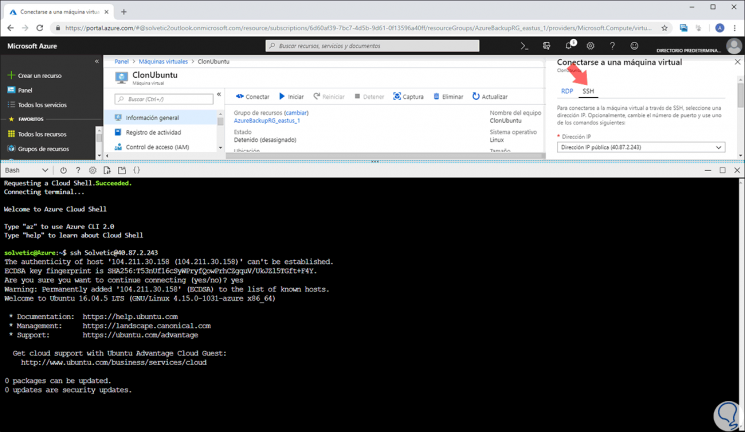
Or we can also access through SSH directly from the bash of Azure:
As we can see, thanks to this process it will be possible to clone our virtual machines in Azure to carry out the necessary actions on them.