Microsoft is the company that leads the development and sale of operating systems and applications in many areas of use, not for nothing have more than 70% of the global coverage with their products as technology and demand is increasingly demanding. They must be one step ahead of these requirements so that each of its millions of users is satisfied with the products purchased, well, one of the technologies that helps most general users, administrators , support personnel and all those who are enthusiastic is the virtualization
Tell us if it is not good to test a system before it is launched, right ?. Thanks to virtualization we can know the behavior of a new system, a new application or the integration of both before it is implemented in a productive environment which will avoid mistakes that will make us spend a not very pleasant time..
Today we have some applications or integrated virtualization platforms but, as we said, Microsoft does not lose the thread and therefore has implemented the Hyper-V platform since the Windows 8 version which gives us the opportunity to both create and manage the virtual machines that we want in a safe environment full of features.
Hyper-V versions
Hyper-V is available in versions such as:
- Hyper-V for Windows Servers
Each one fulfills a specific role based on the family where it is used and logically it is activated to create virtual machines and thus know their performance. Therefore we can perform some tasks on these machines but before this TechnoWikis will explain a little more about Hyper-V so that we are all in the same environment and we do not lose every step of this tutorial..
What is Hyper-V
As its name says it all, Hyper-V virtualizes our hardware so that the machines that are created can be fully functional in said virtual hardware. When we enable Hyper-V in Windows, in this case Windows 10, we will be able to carry out some tasks such as:
- Create virtual hard drives .
- Integrate various virtual devices which in turn can be added to virtual machines and many other tasks.
At this point perhaps someone is still wondering well, why virtualize ?, TechnoWikis will give you some important reasons:
- Know the news of a new operating system either in beta (test) or stable.
- Install programs and applications to validate compatibility.
- Test new general configurations before applying them in a real environment.
- Run comprehensive software that needs previous versions of Windows or operating systems other than Microsoft Windows and much more.
Something very important that we must keep in mind is that Hyper-V is available for the Windows 10 Pro, Enterprise and Education editions, but not for the Windows 10 Home version.
Hardware level
In addition to this, at the hardware level, we require the following:
- A 64-bit processor or CPU with the Second Level Address Translation (SLAT) function.
- The CPU or processor must support VM Monitor Mode Extension technology (VT-c in Intel CPUs).
- A minimum of 4 GB at the RAM level.
To help you understand everything you can do with Hyper-V, here are some of the compatible operating systems you can try and use there:
In the case of Windows
- Windows 7 with Service Pack 1 (SP 1)
- Windows 7 Ultimate, Enterprise and Professional
- Windows Vista with Service Pack 2 (SP2)
- Windows Small Business Server 2011
At Linux level we can execute
- CentOS and Red Hat Enterprise Linux
- Debian virtual machines on Hyper-V
Characteristics of use
When we decided to use Hyper-V these are some of its characteristics of use:
- Nested virtualization which allows us to create virtual machines using a hypervisor host.
- Secure boot of Linux (Linux secure boot), which allows to start the machine with the safe boot option enabled by default.
- Possibility of adding or removing hot (that is, with the active machine) the memory and network adapters.
- Compatibility with the connected standby mode.
- Encryption support for the operating system virtual disk only in virtual machines that have been created in generation 1.
- Protection of host resources.
- Improvements in the Hyper-V administrator.
- Integration services offered through Windows Update and many more features
If you noticed we have mentioned the term "generations", well, when we are creating a new virtual machine we come to a section where we must select the generation of the machine:
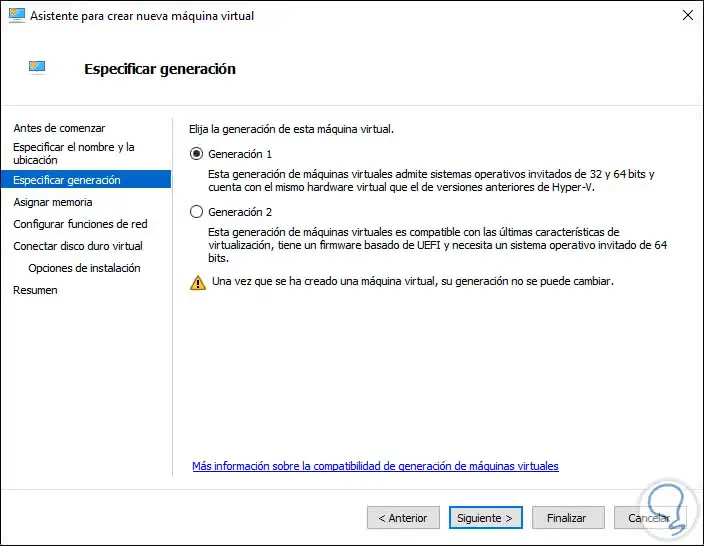
These generations are:
Generation 1
It is the most versatile and recommended since this generation supports operating systems of 32 and 64 bit architectures and in itself is a machine with inherited BIOS / MBR.
Generation 2
It is the update of generations since it only supports 64-bit systems and to complete it only supports UEFI and its execution can be given from several options such as PXE boot, boot from a virtual SCSI hard disk or boot from a virtual SCSI DVD
Important note
Once we select the generation it can not be modified.
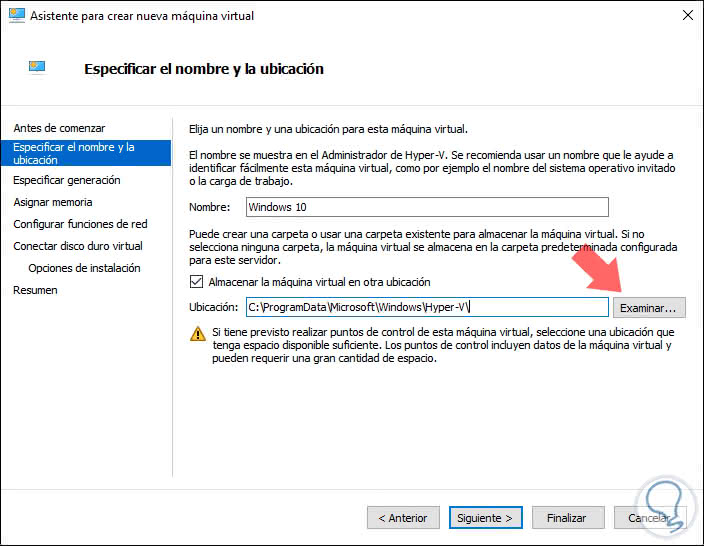
When a virtual machine is created in Hyper-V, it is made up of several files where global configurations of the machine are housed, such as the virtual hard disk files or the general configuration of the same. By default in Windows Hyper-V will store all these files in the hard drive partition in the following path:
"C: \ ProgramData \ Microsoft \ Windows \ Hyper-V",
But we can specify another if we wish:
A key point in this whole process is that the creation of our virtual machines involves the use of resources such as disk space, CPU usage , memory and more so if these resources are limited in your case, TechnoWikis advises you to eliminate the machines that you no longer use or move them to another location, how to do it ?, for that TechnoWikis is to the rescue.
To stay up to date, remember to subscribe to our YouTube channel! SUBSCRIBE
1. How to delete a virtual machine in Hyper-V
Step 1
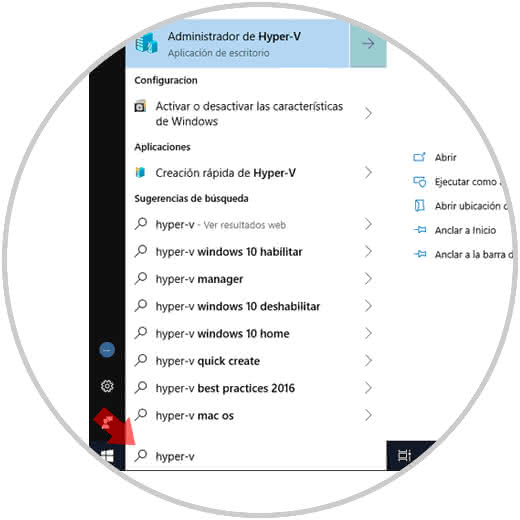
We basically have two options to perform this task and we will explain each of them, for this we must first go to the Hyper-V Administrator from the Start menu or using the search box:
Step 2
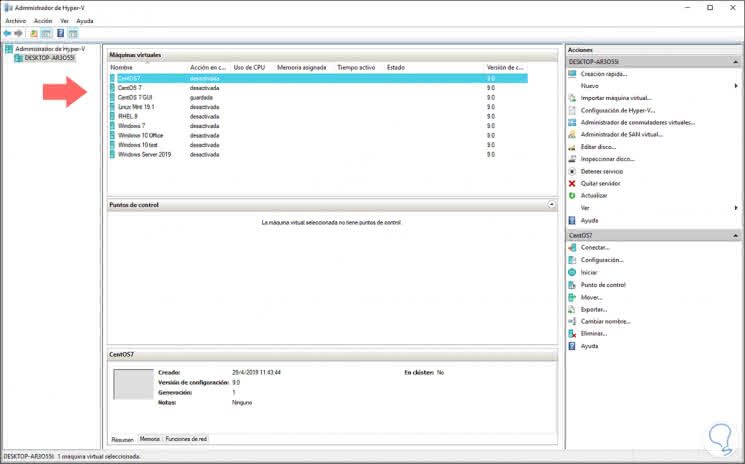
Once the administrator is deployed, we can see in detail the virtual machines that we have created:
Step 3
If we want to eliminate one of the virtual machines created there, we have 3 different ways in the Administrator, these are:
- Right clicking on the virtual machine and selecting Delete.
- Selecting the virtual machine and in the right side panel choose "Delete" in the options of the selected machine.
- Selecting the virtual machine and from the Action menu select Delete.
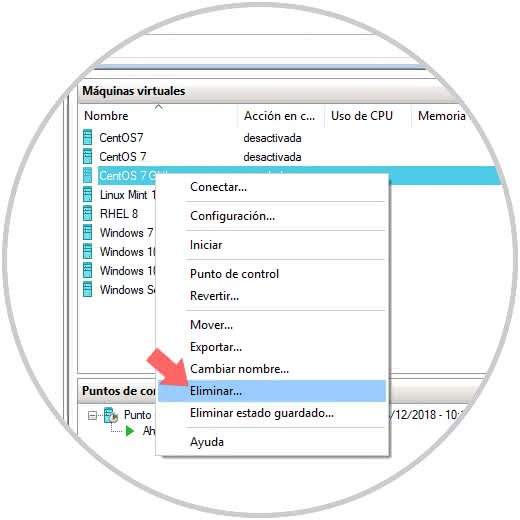
Step 4
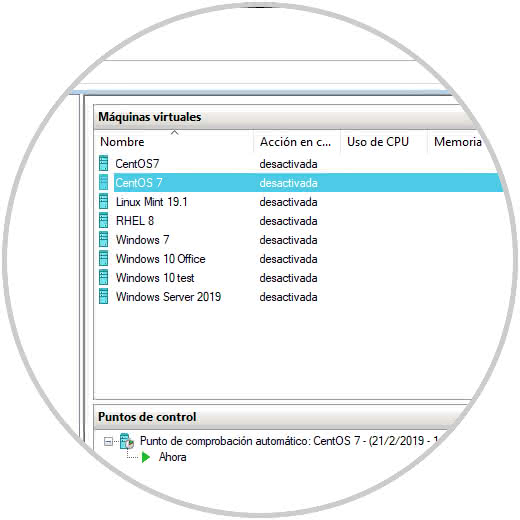
When selecting this option, the following message will be displayed:
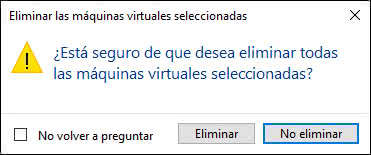
Step 5
There we click on the Delete button to confirm the action and we will notice that the selected machine has been removed from the system:
2. How to remove Hyper-V virtual machine using Windows PowerShell
Step 1
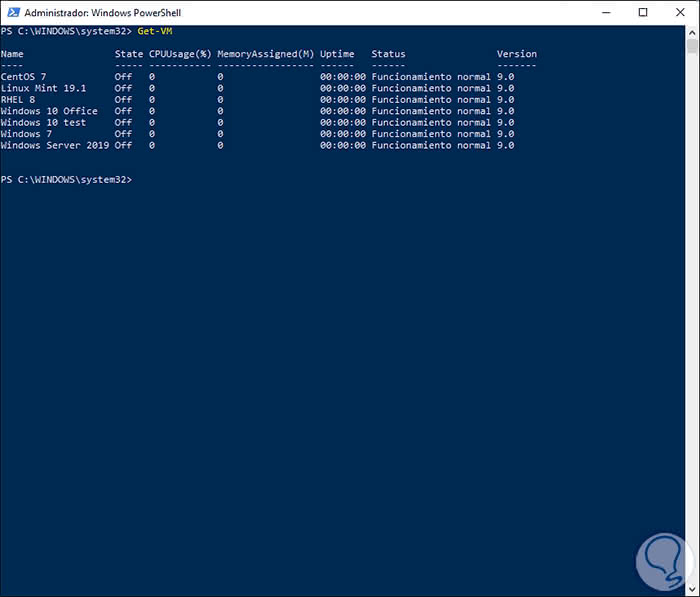
If you also want to know more, below we will explain how you can delete a Hyper-V virtual machine using Windows PowerShell. It is simple, for this you access Windows PowerShell as administrator and execute the following command to see the virtual machines created:
Get-VM
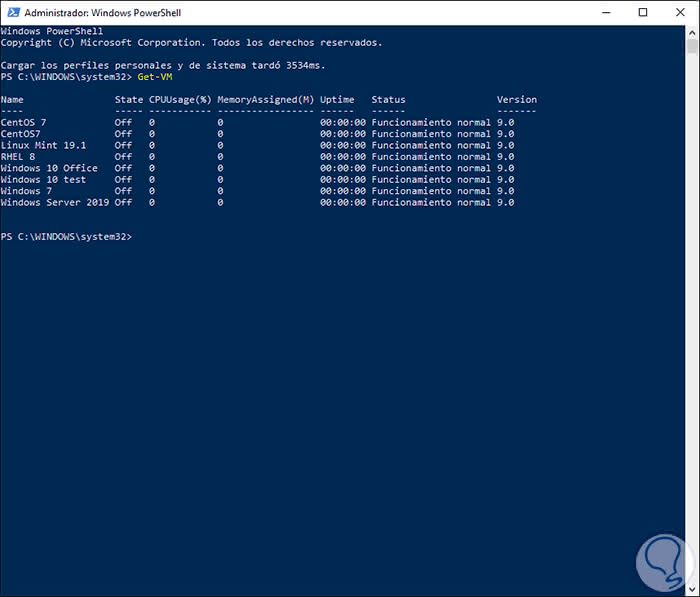
Step 2
There we must pay attention to the "Name" line since based on this name we will eliminate the machines with the following syntax:
Remove-VM "Name" -Force
For example, we will delete the following machine:
Remove-VM "CentOS7" -Force
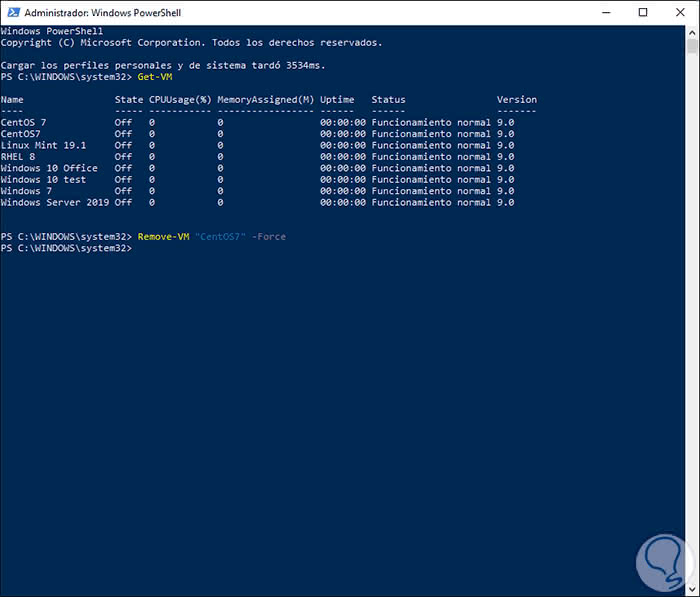
As we can see, automatically the selected virtual machine has been eliminated, in this way we have checked the available ways to eliminate a Hyper-V virtual machine..
3. How to move a Hyper-V virtual machine
In case the space on our hard disk is limited, TechnoWikis recommends moving the virtual machine to another location and this will preserve all the configurations that have been applied to the selected machine.
Step 1
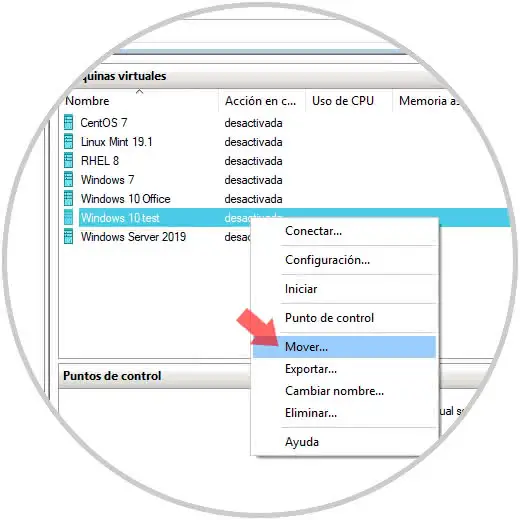
The simplest method to move our Hyper-V virtual machine is to access the Hyper-V Manager, select the virtual machine and choose one of the following options:
- Right click on the virtual machine and select the Move option.
- Select the virtual machine and in the side panel of this select "Move"
- Selecting the virtual machine and from the Action menu choose Move.
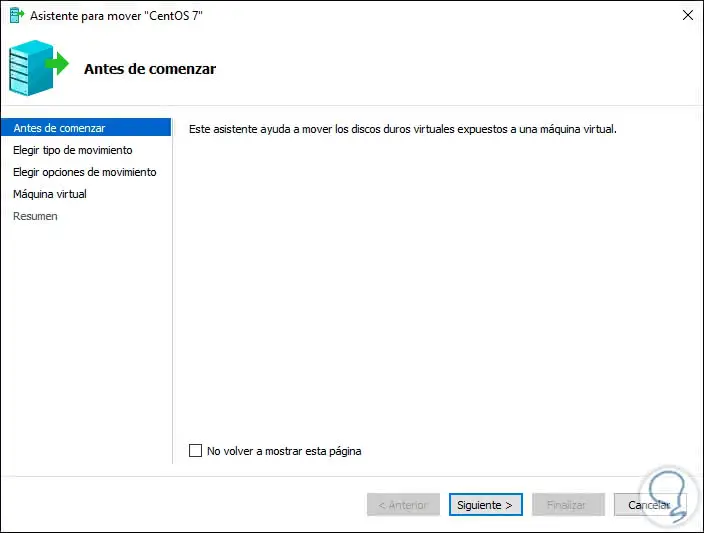
Step 2
The following wizard will be displayed where we will observe that the data of the selected machine is loaded:
Step 3
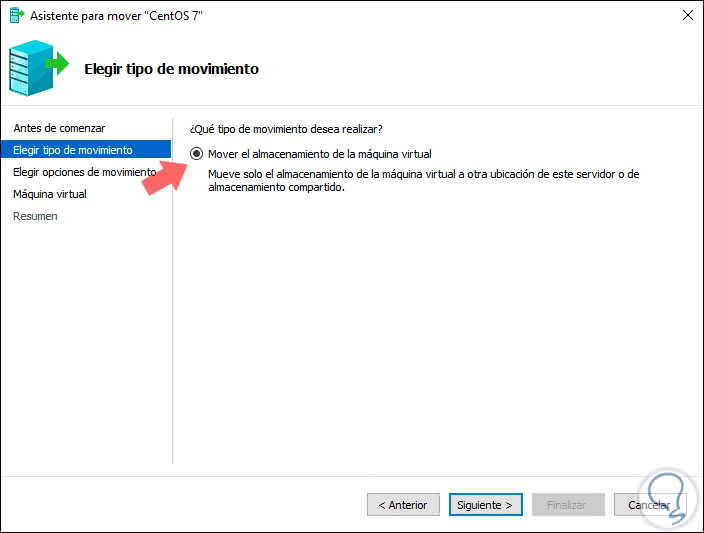
Click on Next and in the next window we can see the type of movement to be executed:
Step 4
Again we click Next and now we can define which parameters of the machine will be moved:
- All the files of the virtual machine to a single route.
- All the files of the virtual machine in various locations.
- Only virtual hard drives.
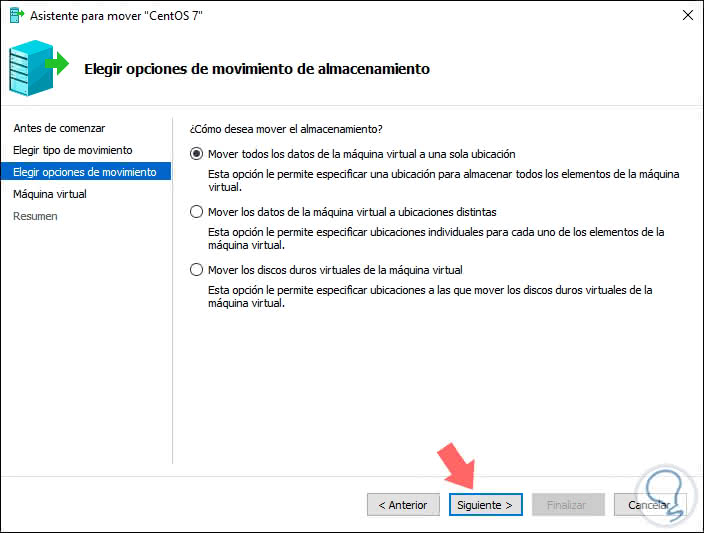
Step 5
We define the appropriate option and click on Next, now we define the path where the virtual machine will move, we can observe its current size and the available space in the destination:

Step 6
In the next window we will see a summary of the action to be carried out:
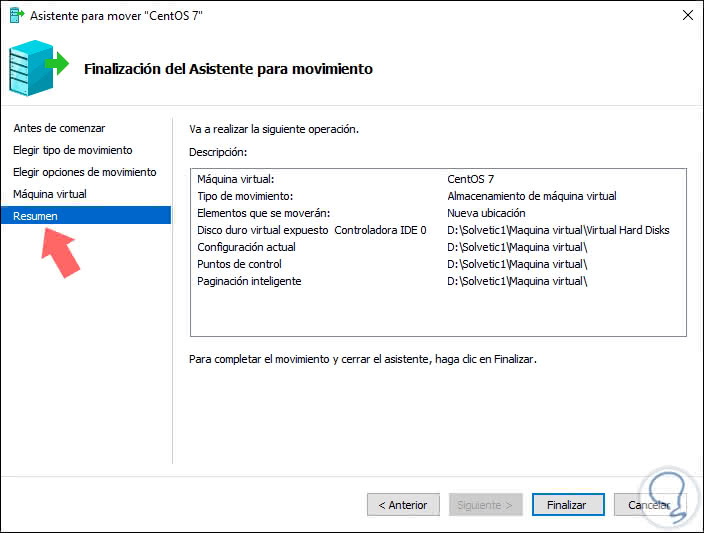
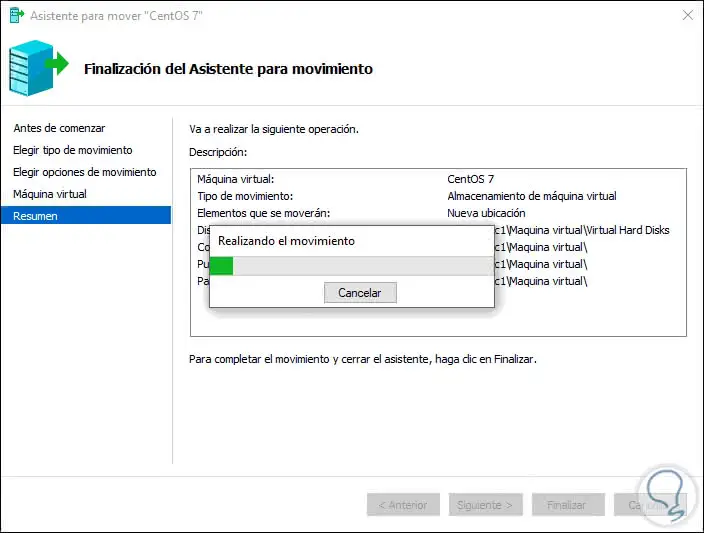
Step 7
Click on Finish to carry out the movement of the Hyper-V virtual machine:
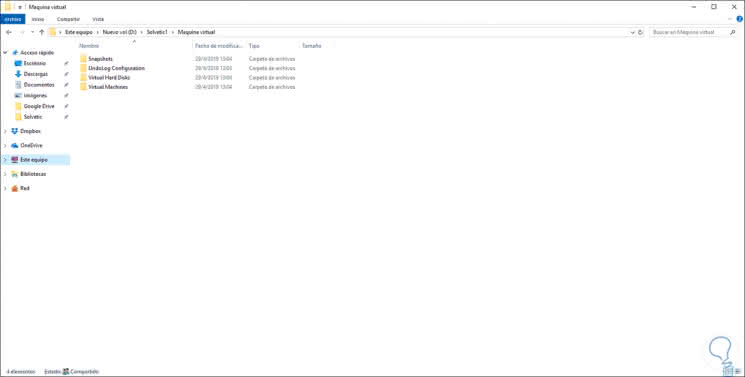
Step 8
Once this finishes we will see that the files of the machine have been moved to the specified route:
Step 9
This same process can be carried out from the Windows Powershell console, for this we access as administrators and first we will see what are the machines we have created using the following command:
Get-VM
Step 10
Now we proceed to move the desired machine using the following syntax:
Move-VMStorage "VM Name" -DestinationStoragePath "Target_path"
For example, we execute the following.
Move-VMStorage "Windows7" ​​-DestinationStoragePath "D: \ TechnoWikis1 \ Virtual Machine"
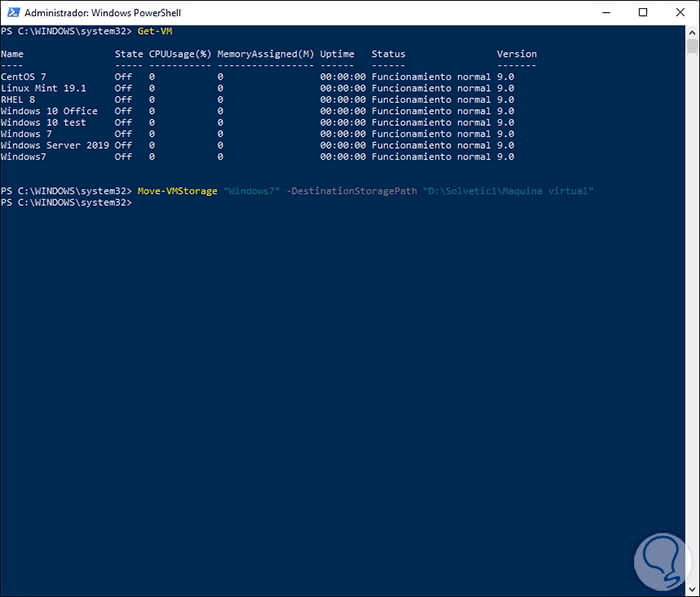
This will move that virtual machine to the selected destination path.
We have learned how to move or eliminate a Hyper-V virtual machine in Windows 10 in simple, practical and safe ways remembering the advantages offered by virtualization and everything we can achieve if we apply it correctly for personal use or in our places of work.