Azure is Microsoft's commitment to implement virtualization solutions in the cloud, with Azure we cover important aspects such as:
Azure Features
- Infrastructure as a service (IaaS)
- Platform as a service (PaaS)
- Software as a service (SaaS)
By creating virtual machines in Azure , we are creating a secure environment, available and with all the benefits of Microsoft, since from anywhere we can access said platforms and thus go to our virtual machines. Azure gives us the possibility of creating, managing and implementing applications within various systems such as Windows or Linux..
When we create a machine in Azure , we configure all its basic aspects, one of them super important is the hard disk, it is possible that due to the information we handle, it is necessary to add one or more disks there and it is for this reason that TechnoWikis It will explain how to add a hard drive to a virtual machine in Azure.
We leave you the video tutorial to add disk to Azure virtual machine..
To stay up to date, remember to subscribe to our YouTube channel! SUBSCRIBE
How to add a hard drive in Azure to a virtual machine
Step 1
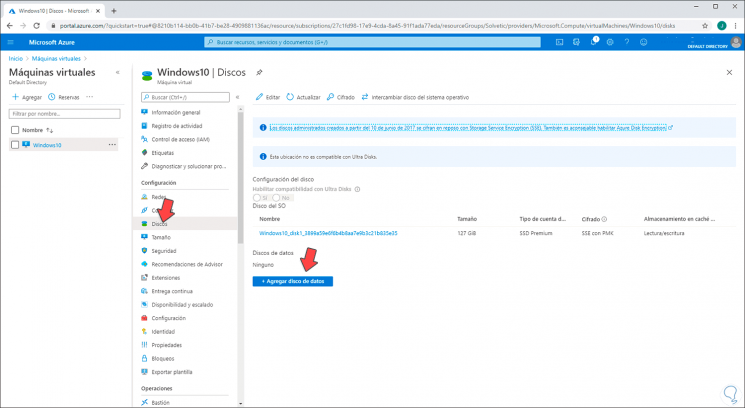
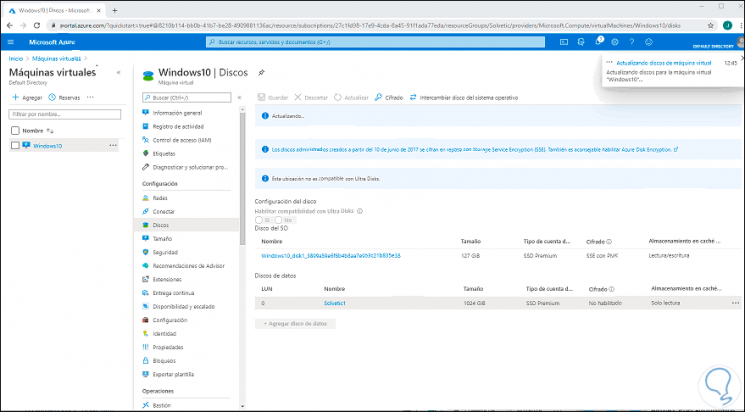
To carry out this process, we go to the Azure platform, select the virtual machine and then go to the "Disks" section:
Step 2
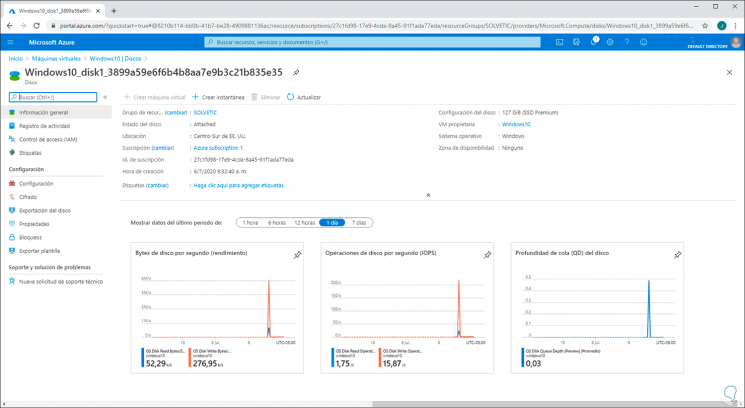
We can click on the current disc to access complete details such as:
- Disc operating percentages, queue depth and more
Step 3
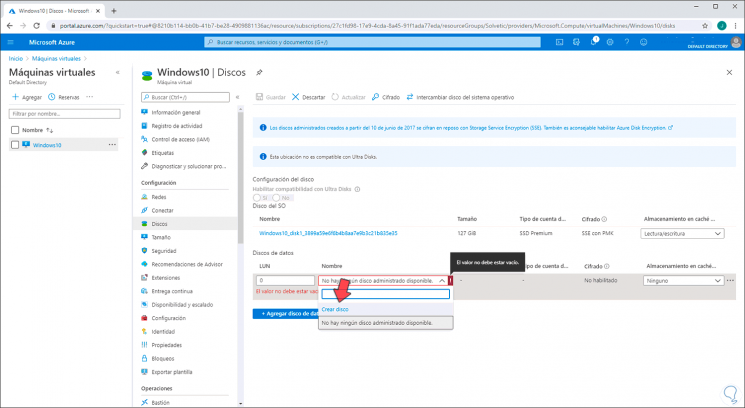
To add the new disk we click on the button "Add data disk" and we will see the following:

Step 4
We display the "Name" field and select the "Create disk" option:
Step 5
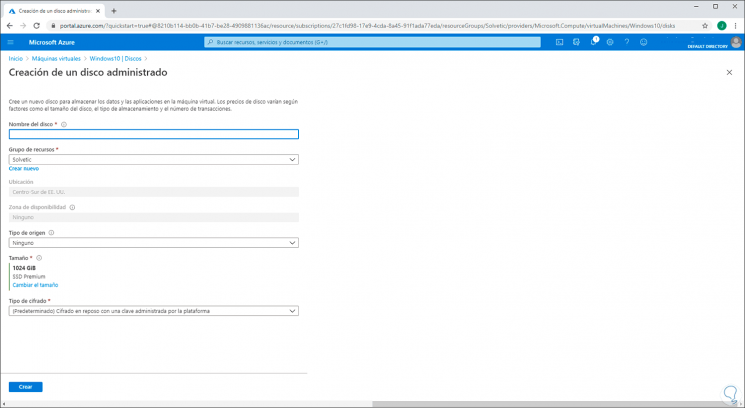
The following will be displayed:
Step 6
There we enter the following data:
- Resource group to which it belongs (can be an existing one or create a new one)
- Encryption to use (key managed by the platform or by the client)
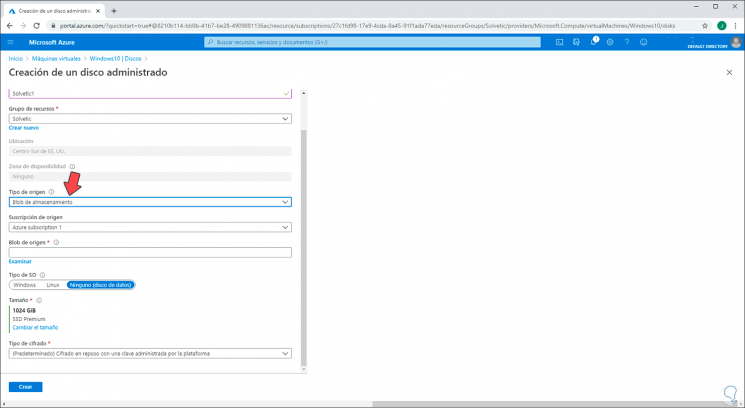
Step 7
If we select “Storage Blob” in Origin we must integrate additional data such as:
- Azure Source Subscription
- Type of operating system, etc.
Step 8
If we select “Snapshot” the virtual machine must have an available snapshot.
For this example we leave the option “None” and it is possible to change the size of the hard disk, by default it is a 1 TB SSD, if we click on “Change size” we will see the different options to select:
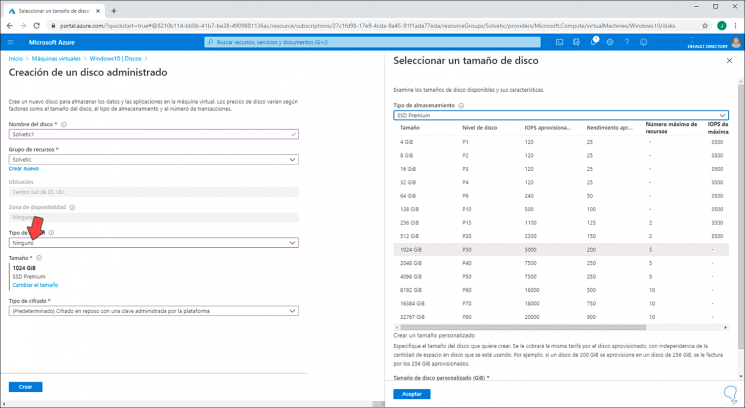
Step 9
We define all the parameters:
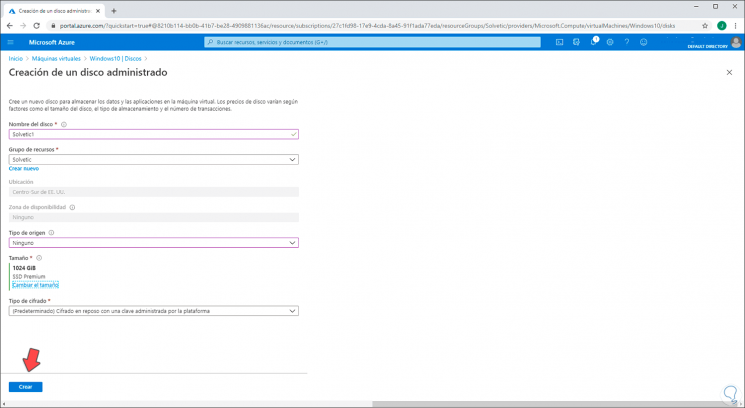
Step 10
We click on "Create" to make way for the creation and integration of the hard disk in the selected machine:
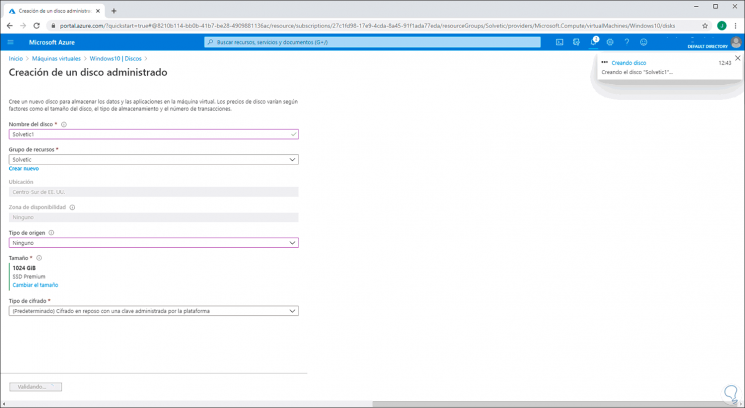
Step 11
When this process ends we will see the following:

Step 12
We click "Save" at the top to apply the changes to the virtual machine:
Step 13
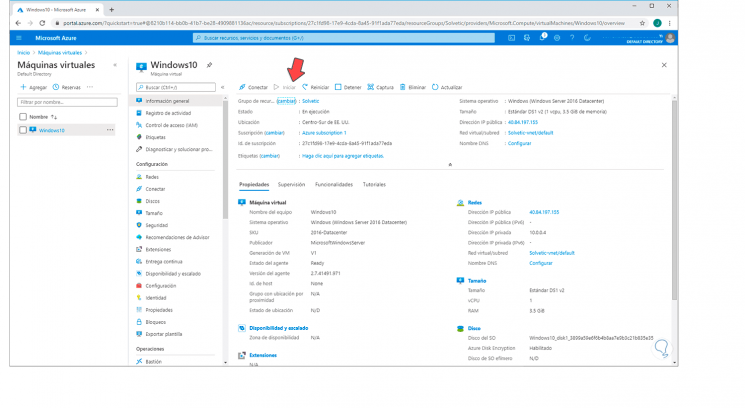
After this we go to the "General Information" section and start the machine:
Step 14
We copy the public IP address and from Windows 10 we open the Remote Desktop and enter it there:
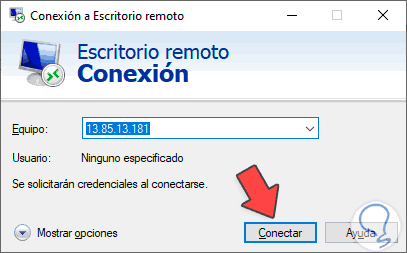
Step 15
We click "Connect" and when the connection is established we enter the user credentials:
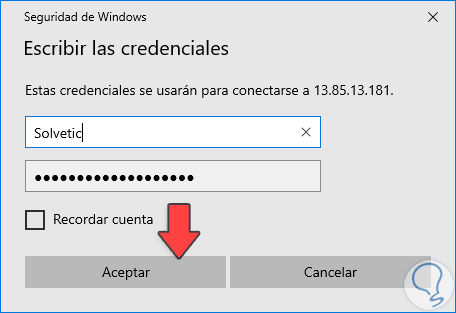
Step 16
We click OK and the following security message will be displayed:
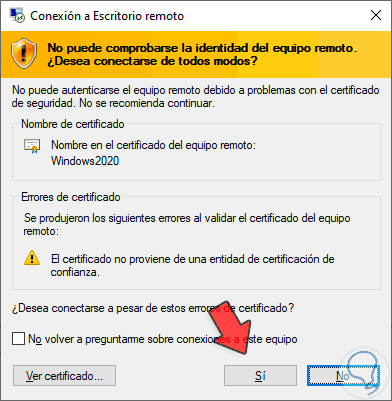
Step 17
We click Yes and access the virtual machine:
Step 18
Being the first time we must configure it in the traditional way of Windows 10.
Step 19
Now there we go to the Disk Manager and when accessing we can see that the warning of an existing disk is launched:
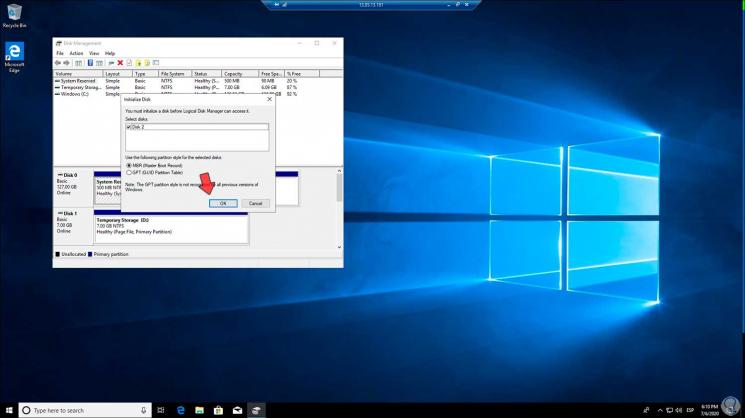
Step 20
We click Ok and we see that the disk is ready to be configured:
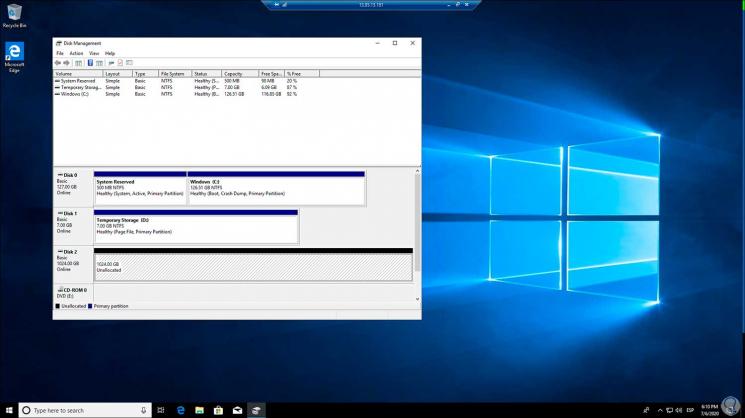
Step 21
We right click on the new disk and select "New Simple Volume":

Step 22
The following wizard will be activated:
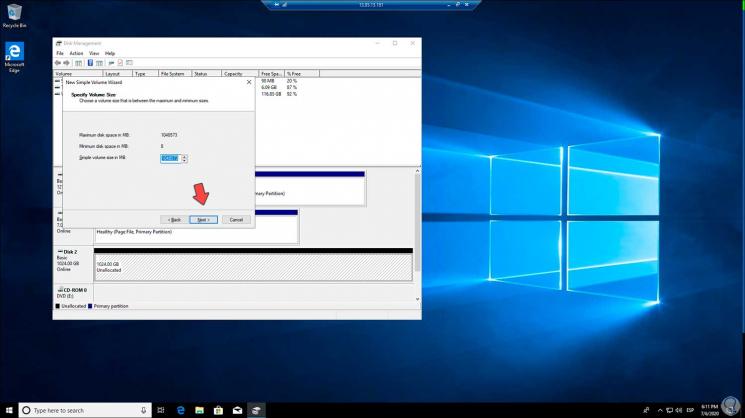
Step 23
We click Next and define the letter to assign for the disk:
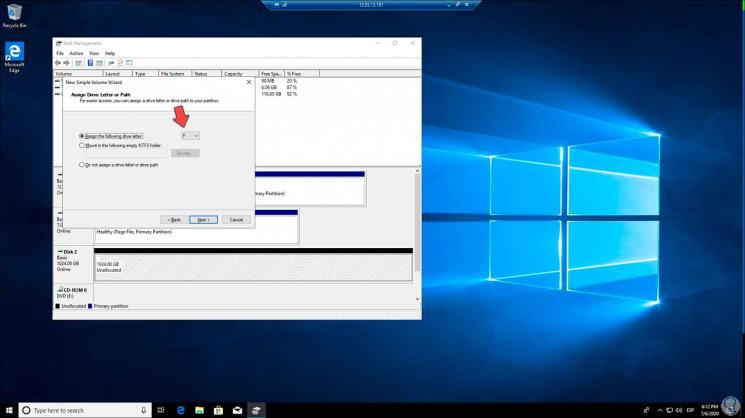
Step 24
In the following window we will define the file system and the name of the drive:
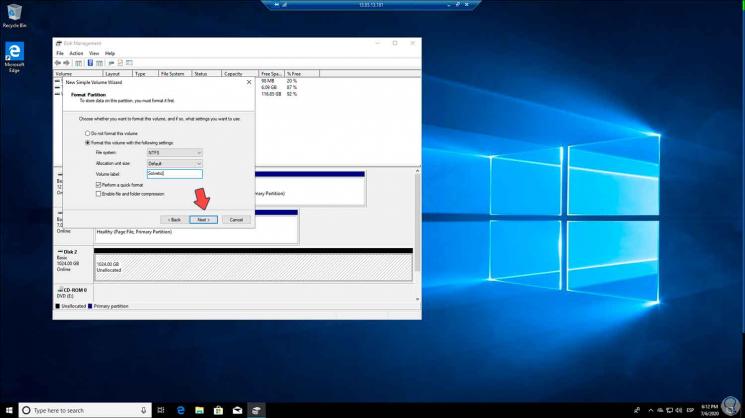
Step 25
In the next window we find a summary of the task to be carried out:
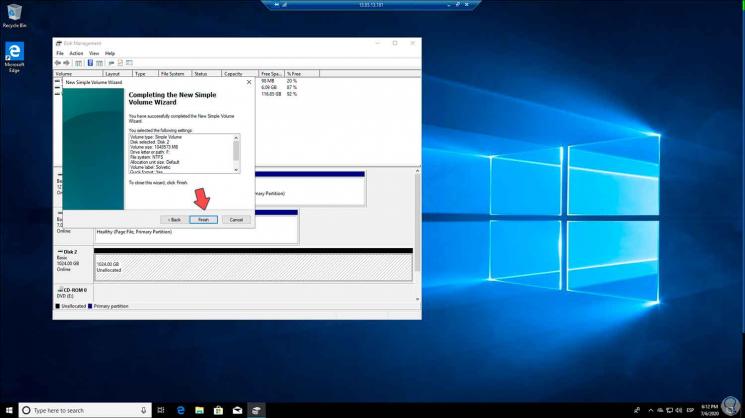
Step 26
We click Finish to complete the process and see the disk ready to be used in Azure:
Step 27
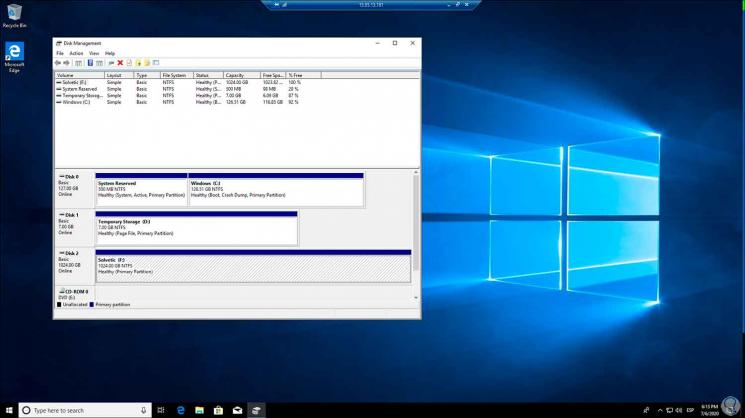
If we access the Explorer we can see it available there:

With this process we are ready to add a new hard disk in an Azure virtual machine and thereby increase the capacity of said machine at the storage level. Remember that the use options are wide and each one of them depends on the required storage needs.