One of the great advantages of Linux operating systems is its wide scalability thanks to free code. Not only do we have numerous applications , but it will also be possible to make the server fulfill many more roles for which it was initially implemented. One of the best known functions, and actually one of the most used, is the implementation of the LAMP stack . This is nothing more than a group of several open source programs that are usually installed simultaneously with a clear objective: to allow our server to be enabled and have the necessary roles and services to act as a server where hosting services are hosted. Dynamic web pages, as well as web applications..
LAMP elements
When we talk about LAMP we mean 4 elements that are:
- L: It is the Linux operating system.
- A. Indicates the Apache application server.
- M: This refers to the location where site data is stored which is a MySQL database.
- Q: Indicates that dynamic content is processed through PHP.
Now, in a world in constant growth, we have a payment platform, but it offers a free year. We talk about Microsoft Azure , where all the resources created, both virtual machines and applications, will be hosted on various servers around the world, guaranteeing not only their availability but also their integrity and security. Through this tutorial we will learn to install the LAMP stack on an Ubuntu server created in Microsoft Azure . To know more about Microsoft Azure we can visit the following link:
1. Access Azure Cloud Shell on Linux
Step 1
Once we go to the Azure portal and enter our credentials, the first step is to access Azure Cloud Shell which offers us a Bash environment or a PowerShell environment, in this case we will use the Bash environment and to access it we have with the following options:
- Select the "Test it" option in the upper right corner of a code block.
- Go to a browser and enter the following line:
https://shell.azure.com/bash
- Click on the image icon located at the top of the Azure portal
Step 2
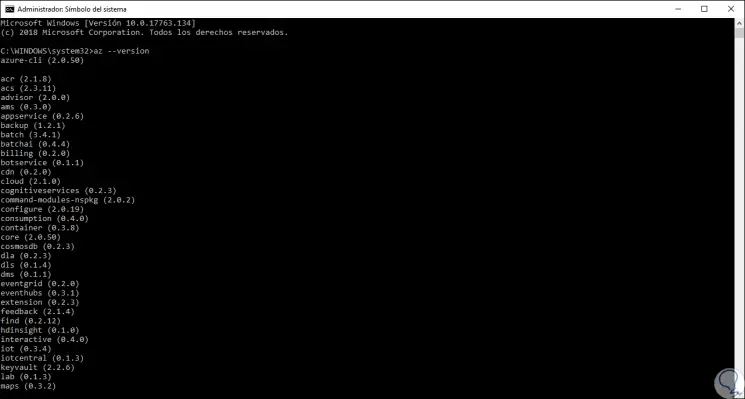
Another option is to use the CLI locally, for this you must run the Azure CLI version 2.0.30 or higher, to know in detail what version we use, we go to the command prompt and execute the following:
az --version
2. Create a resource group in Linux
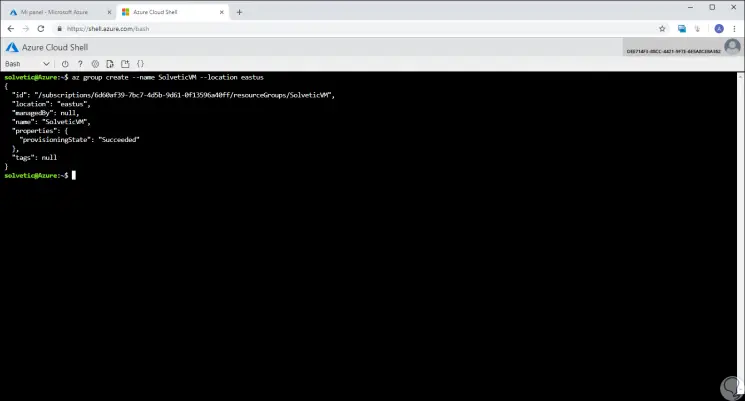
The first step to take is to create a resource group using the "az group create" command. This Azure resource group is a logical container in which the Azure resources that we are creating are gradually implemented and managed.
For this case we will create a group called TechnoWikisVM by executing the following:
az group create --name TechnoWikisVM --location eastus
3. Create a virtual machine in Linux
Once the resource group is created, we are going to create the Linux virtual machine, Azure does not offer Ubuntu from edition 14.40 until 18.04.
Step 1
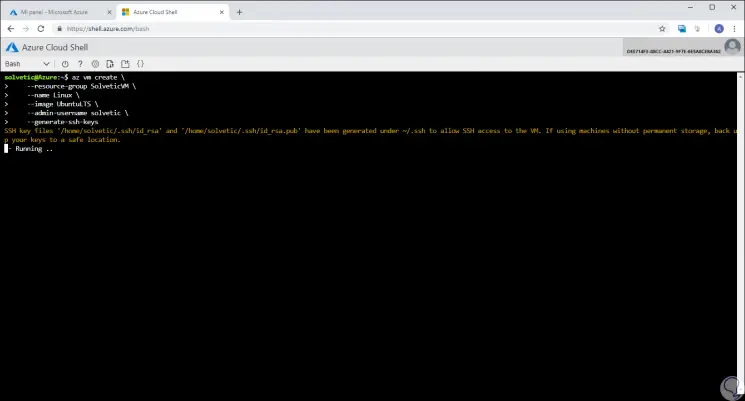
We will create a virtual machine whose name will be "Linux" and the SSH keys will also be registered if they do not already exist in a default key location. If we want to make use of a specific set of keys, we must use the "--ssh-key-value" option, we will create a user with the command "–admin-username", we will execute the following lines:
az vm create \ --resource-group TechnoWikisVM \ --name Linux \ --image UbuntuLTS \ --admin-username solvetic \ --generate-ssh-keys
Step 2
There we see that the virtual machine creation process begins, when this process ends we will see the following. There we see details of the machine created.

4. Open port 80 for web traffic on Linux
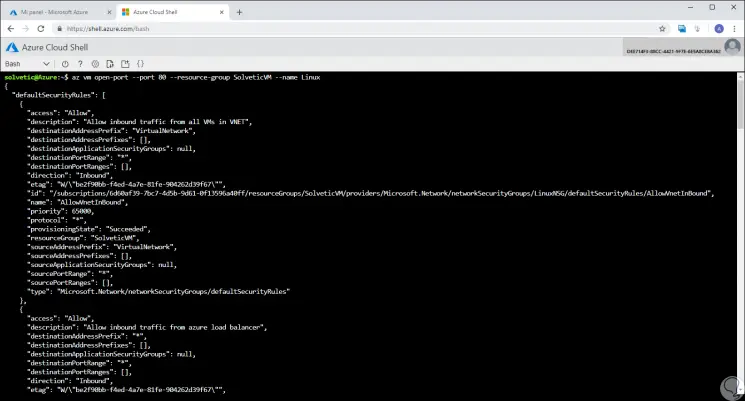
By default in Azure, only connections through SSH are supported in Linux virtual machines implemented in Azure, if the server is going to fulfill the roles of web server, it will be necessary to open port 80 from the Internet, for this we will use the command "az vm open-port "to open this port like this:
az vm open-port --port 80 --resource-group TechnoWikisVM --name Linux
5. Connect SSH with the virtual machine created in Linux
Step 1
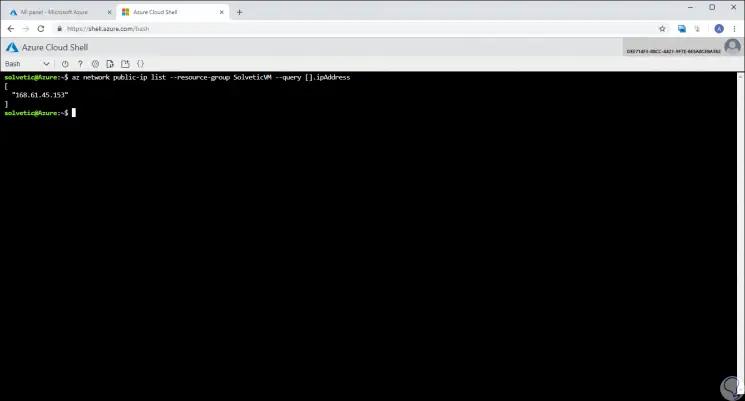
Up to this point we have created the Linux virtual machine and enabled web traffic, now it is time to connect to it, first of all, we must know the public IP address, for this we execute the following line:
az network public-ip list --resource-group TechnoWikisVM --query [] .ipAddress
Step 2
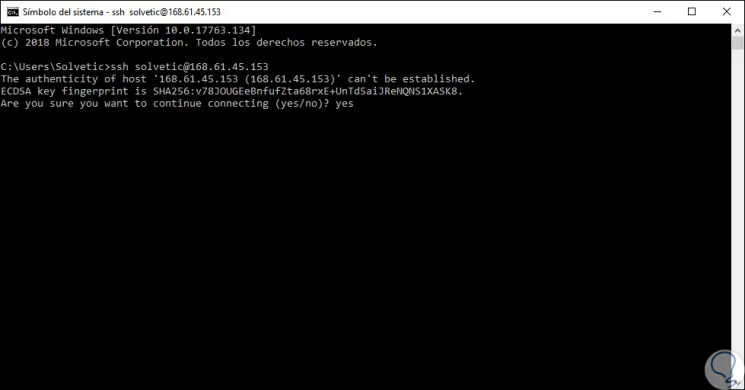
Once the public IP address is identified, we have different ways to connect using the following syntax:
ssh user @ IP_publica
Step 3
Through the Windows command prompt or the macOS Mojave or Linux terminal:
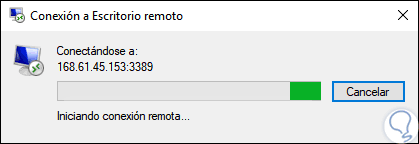
Step 4
Through the RDP connection available in Azure:
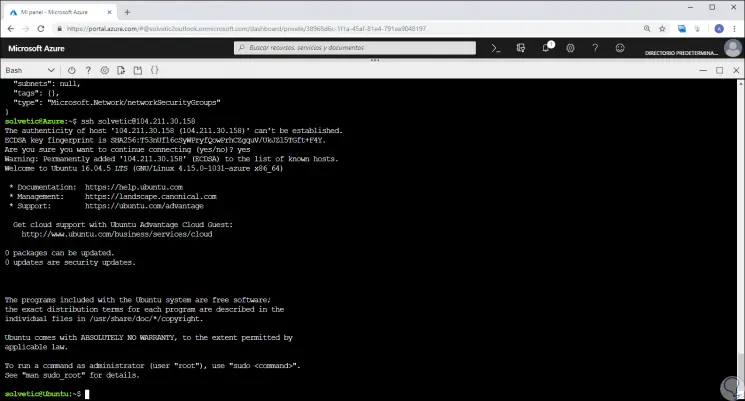
Step 5
Or through Azure's own bash. Once we connect we can see that we are in the Ubuntu home directory.
6. Install Apache, MySQL and PHP on Linux
Step 1
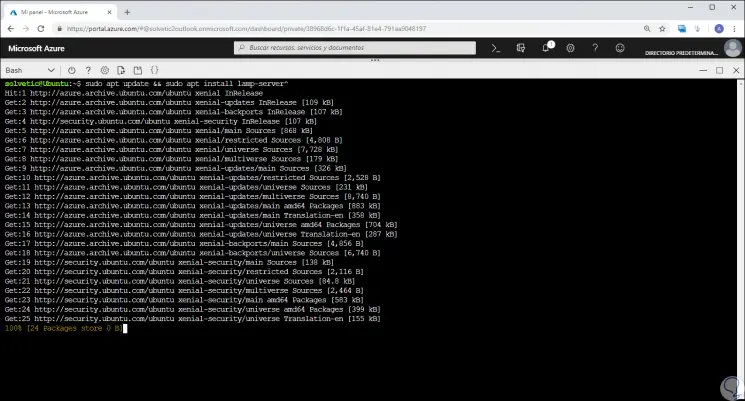
The first step to take is to update the sources of Ubuntu packages and install Apache, MySQL and PHP, for this we must execute the following without losing sight of the fact that we must enter the collation symbol (^) at the end of the command, which forms Part of the lamp-server package name ^:
sudo apt update && sudo apt install lamp-server ^
Step 2
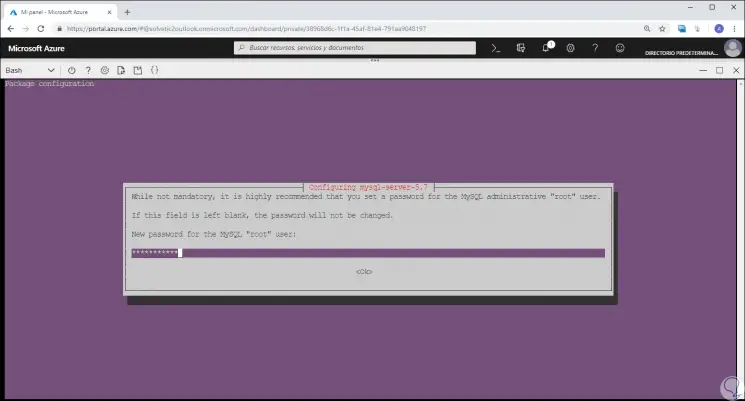
During this process the password of the MySQL root user will be requested:
Step 3
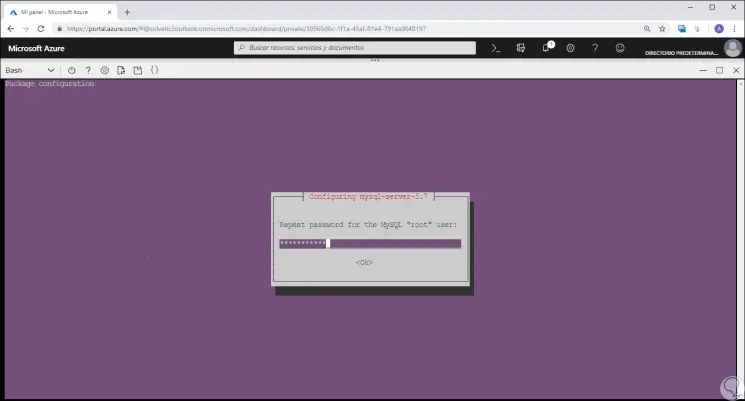
Now we must confirm it:
Step 4
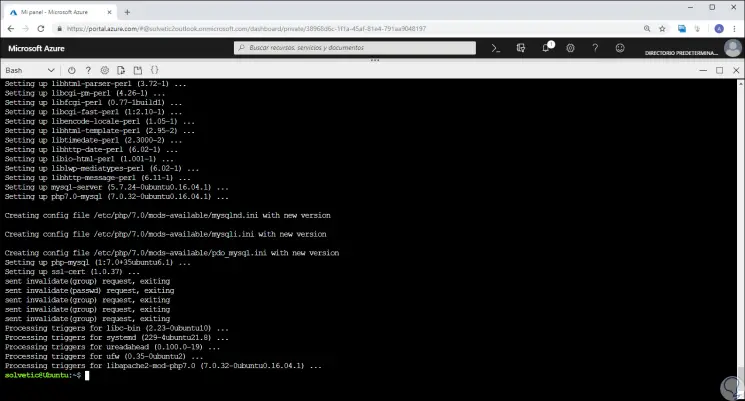
Once this process is finished we will see the following:
7. Check the installation and configuration of Apache on Linux
Step 1
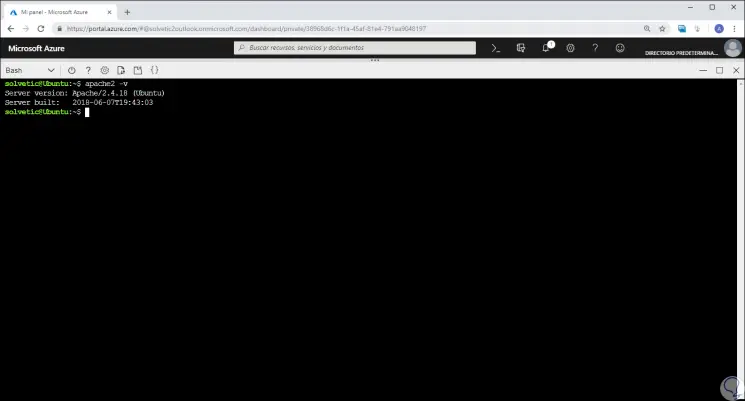
The first step is to validate the Apache version with the following line:
apache2 -v
Step 2
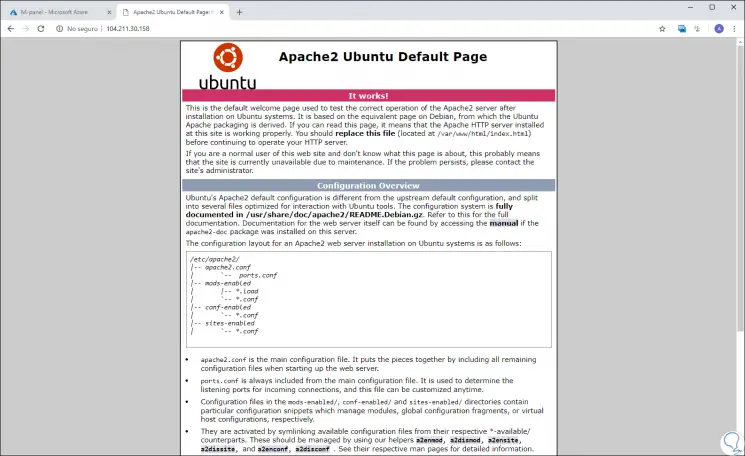
By having Apache installed and port 80 open for the virtual machine. It will be possible to access the web server from the Internet, in order to see the default Ubuntu Apache2 page, we go to a web browser and there we enter the public IP address of the virtual machine and this will be the result obtained:
Step 3
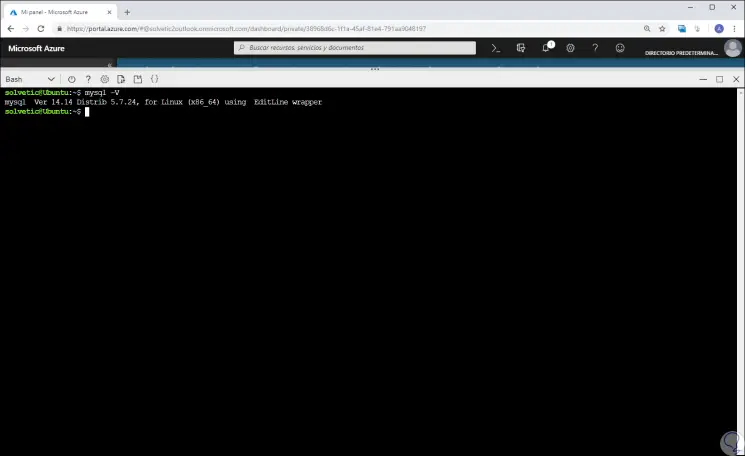
Now let's check the version of MYSQL by running:
mysql -V
Step 4
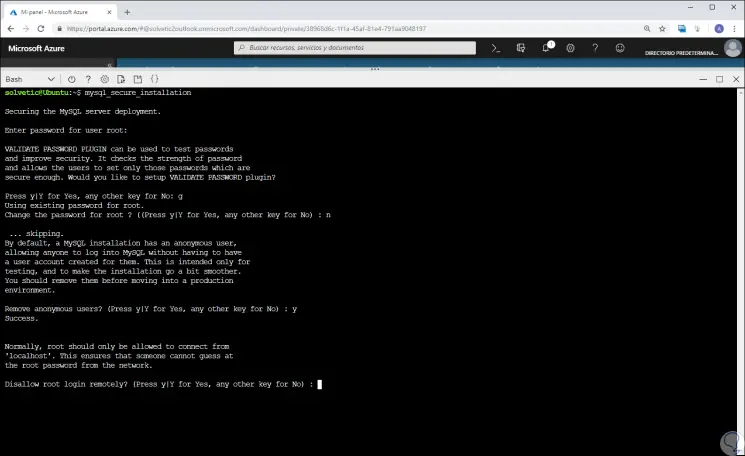
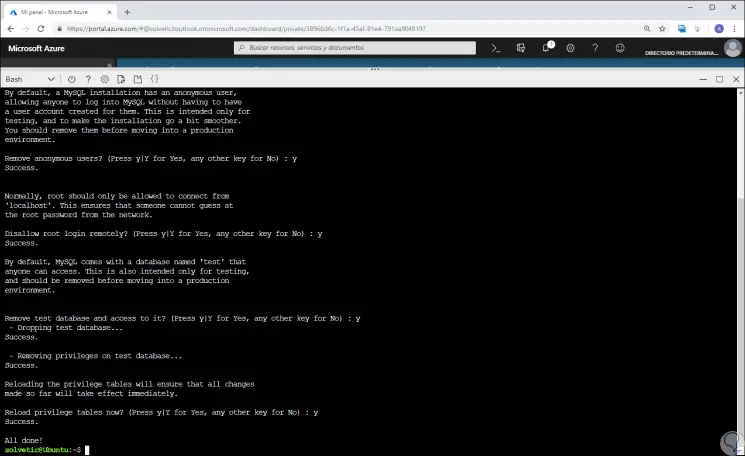
In order to protect the MySQL installation, we are going to execute the “mysql_secure_installation†script and will be asked to enter the password set during the installation:
mysql_secure_installation
Step 5
There a series of security questions will be launched and it is best to enter the letter y (yes) to all of them:
Step 6
At the conclusion of this step we will see this:
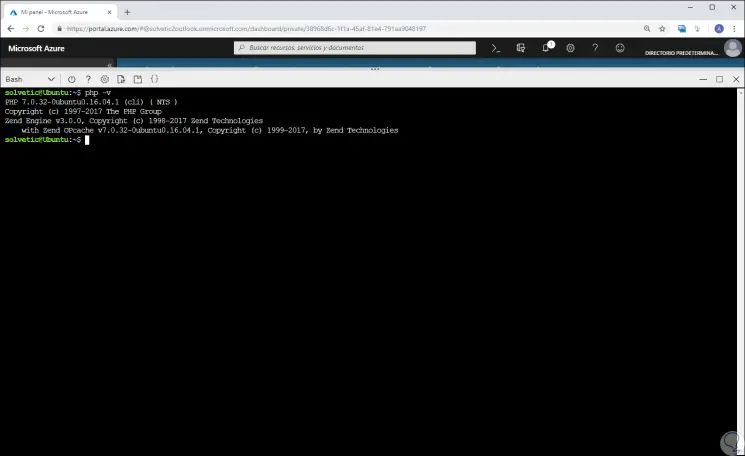
Step 7
Subsequently, we validate the PHP version:
php -v
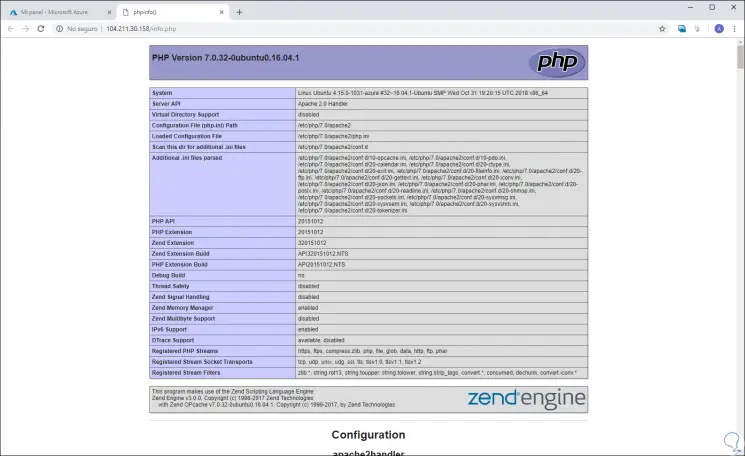
Step 8
To test PHP in a more complete way, we will create a quick information PHP page to be visible from the browser, for this we will enter the following line.
sudo sh -c 'echo "<? php phpinfo ();?>"> /var/www/html/info.php'

Step 9
Now, we go to a new tab and enter the following syntax:
http: //IP_Publica/info.php
Step 10
The result will be as follows:
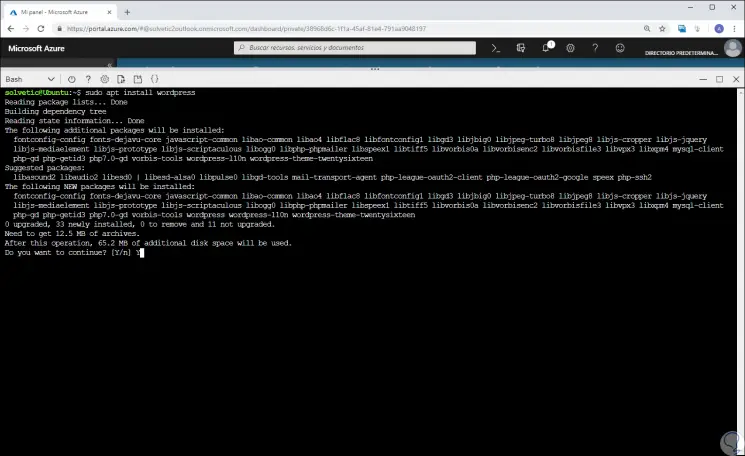
8. Install WordPress on Linux
In order to validate that the entire LAMP stack works in the best way, we will install the WordPress open source platform, with which it is possible to create websites and blogs, but we can use other applications such as Drupal or Moodle.
Step 1
We will install the WordPress package with the following line. There we enter the letter Y to confirm the installation.
sudo apt install wordpress
Step 2
Now we will configure WordPress to use PHP and MySQL, for this in a working directory a wordpress.sql text file will be created in order to configure the MySQL database for WordPress, we will execute the following:
sudo sensible-editor wordpress.sql
Step 3
In the results we leave the default editor option (2 - nano) and in the new window we will paste the following:
CREATE DATABASE wordpress; GRANT SELECT, INSERT, UPDATE, DELETE, CREATE, DROP, ALTER ON wordpress. * TO wordpress @ localhost IDENTIFIED BY 'yourPassword'; FLUSH PRIVILEGES;
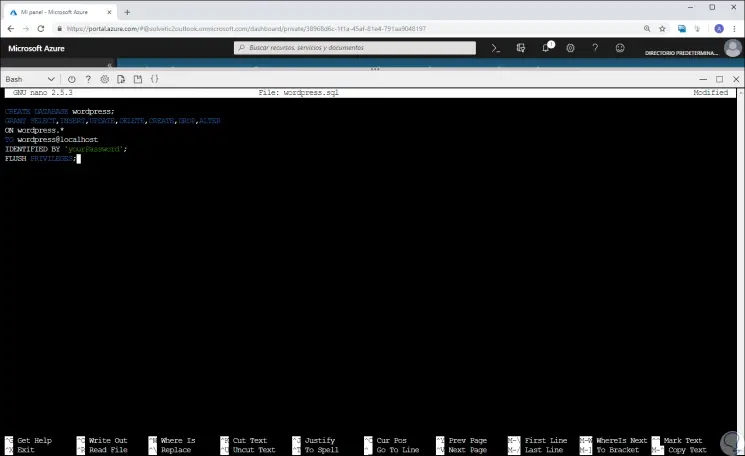
Step 4
We save the changes using the following key combination:
+ O Ctrl + O
We leave the editor using:
+ X Ctrl + X
Step 5
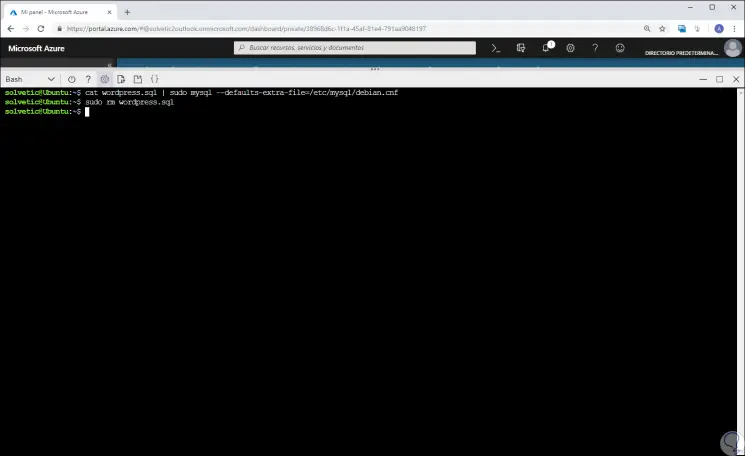
Now we will execute the following command to create the database:
cat wordpress.sql | sudo mysql --defaults-extra-file = / etc / mysql / debian.cnf
Step 6
We are going to delete the wordpress.sql file since it contains database credentials:
sudo rm wordpress.sql
Step 7
In order to configure PHP, we will execute the following command to open a text editor and create the respective file:
sudo sensible-editor /etc/wordpress/config-localhost.php
Step 8
There we will paste the following:
<? php define ('DB_NAME', 'wordpress'); define ('DB_USER', 'wordpress'); define ('DB_PASSWORD', 'yourPassword'); define ('DB_HOST', 'localhost'); define ('WP_CONTENT_DIR', '/ usr / share / wordpress / wp-content'); ?> 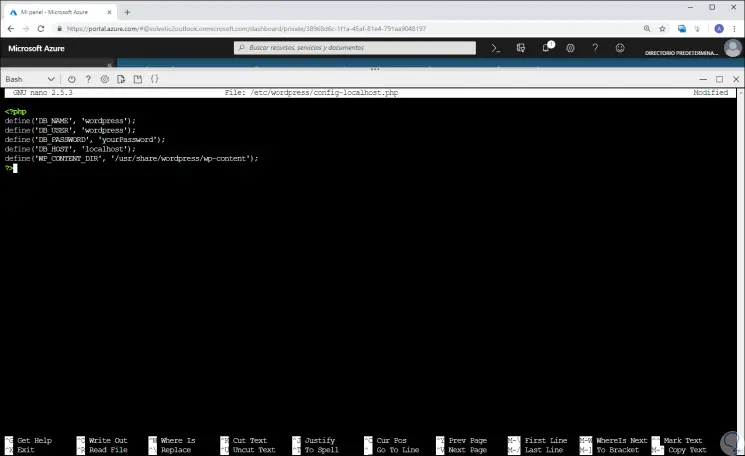
Step 9
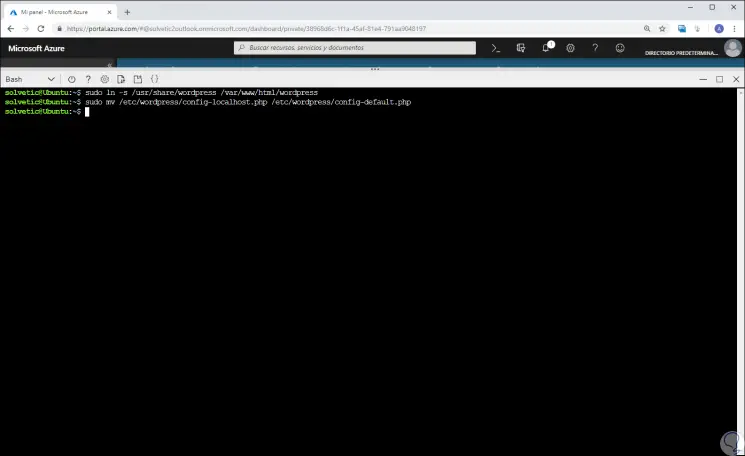
We save the changes and leave the editor. Now we are going to move the WordPress installation to the web server documents root with the following commands:
sudo ln -s / usr / share / wordpress / var / www / html / wordpress sudo mv /etc/wordpress/config-localhost.php /etc/wordpress/config-default.php
Step 10
Finally, we must complete the installation of WordPress directly from a browser with the following syntax:
http: // IP_publica / wordpress
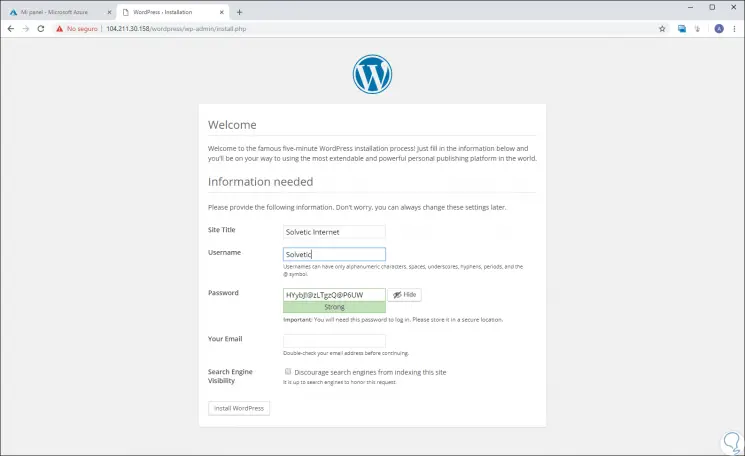
With this we verify that the entire LAMP stack has been installed and works correctly on the Ubuntu server created in Microsoft Azure. As we can see, there are few steps which allow us to expand the offer of our server services and all in a safe and simple environment.