VirtualBox is one of the leading platforms in virtualization tasks, which we know very well that allows us to test applications and systems without affecting a real or productive environment at any time, VirtualBox provides us with features such as:
VirtualBox Features
- Allows you to run multiple systems simultaneously
- Option to create groups from which virtual machines can be managed
- Create multi-generational branched snapshots
- Compatible with numerous hardware such as IDE, SCSI and SATA hard drive controllers, virtual network cards and sound cards, virtual parallel ports, etc.
- Guest Multiprocessing (SMP)
One of the advantages of using VirtualBox is that when we install the VirtualBox Guest Additions we can carry out numerous tasks between the physical and virtual machines. One of these is the possibility of sharing folders between both computers, this makes it easier for us to share items without having to resort to other additional methods such as USB VirtualBox ..
TechnoWikis will explain how to create a shared folder in Windows 10 to be used in VirtualBox.
To stay up to date, remember to subscribe to our YouTube channel! SUBSCRIBE
1. Create virtual folder in Windows 10
Step 1
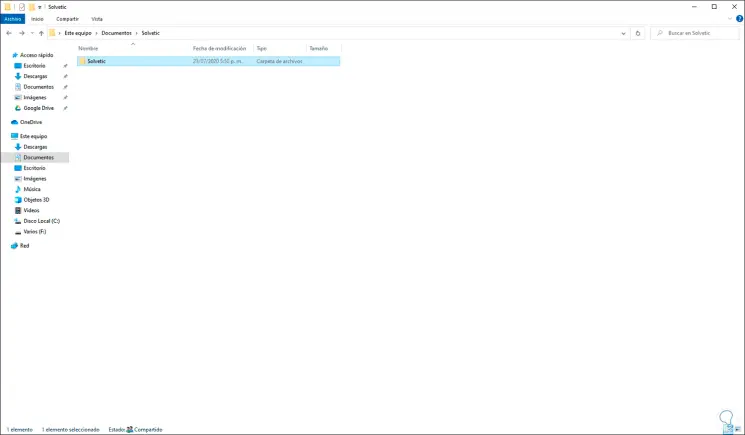
The first thing we will do is create a folder in some location in Windows 10, in this case in Documents:
Step 2
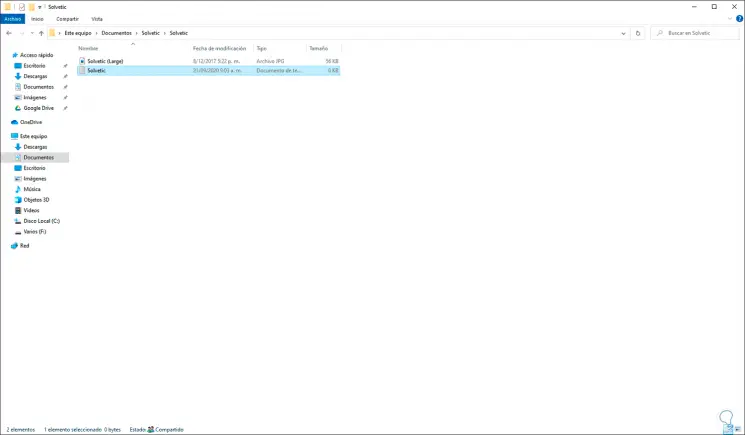
We can access this and create documents or add elements:
2. Configure VirtualBox virtual machine in Windows 10
The next step is to configure VirtualBox to accept the shared folder..
Step 1
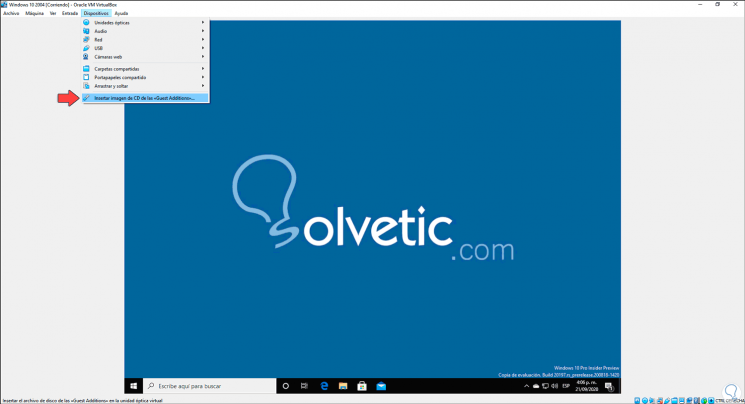
To do this we open the virtual machine and go to the menu "Devices - Insert CD image of the << Guest Additions >>":
Step 2
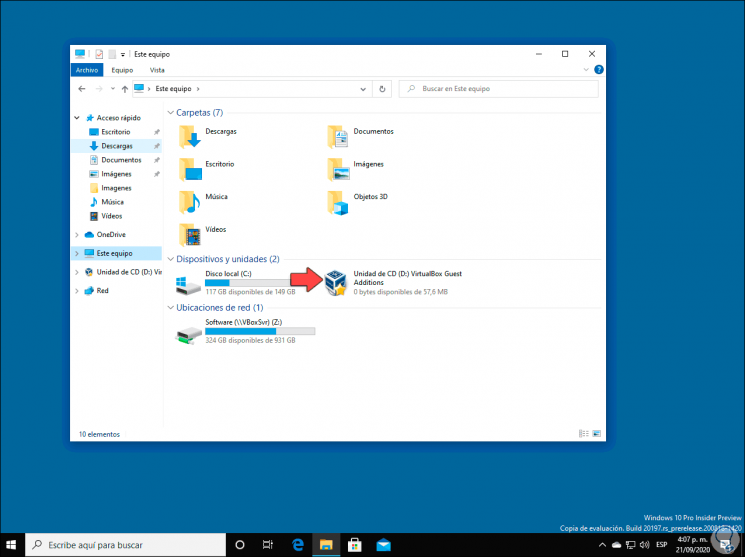
In the virtual machine explorer we locate the VirtualBox unit:
Step 3
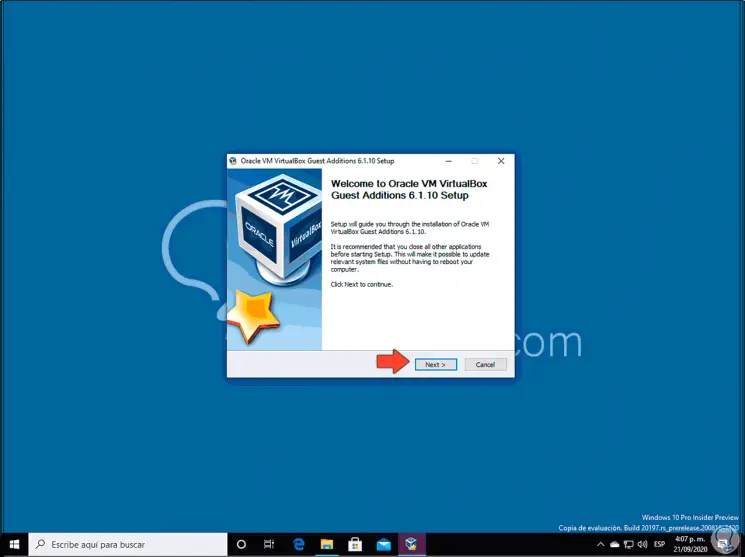
Double-click on it and run the installer, the VirtualBox installation wizard will be displayed:
Step 4
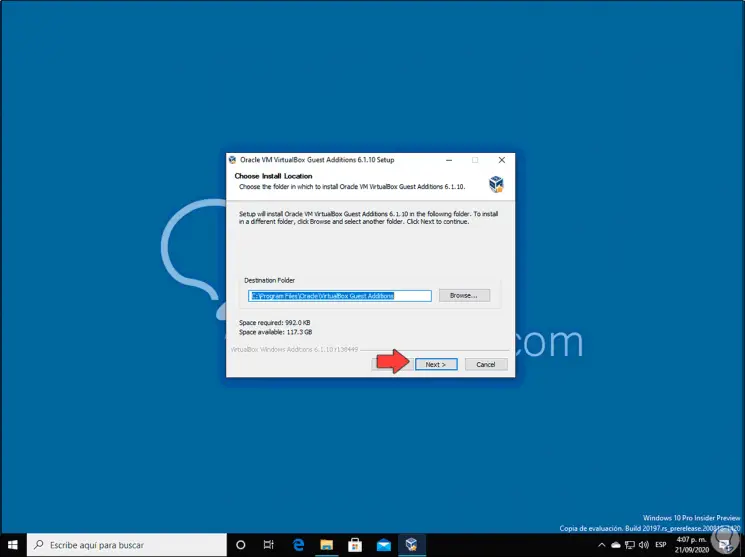
We click Next and now we define the path where it must be installed:
Step 5
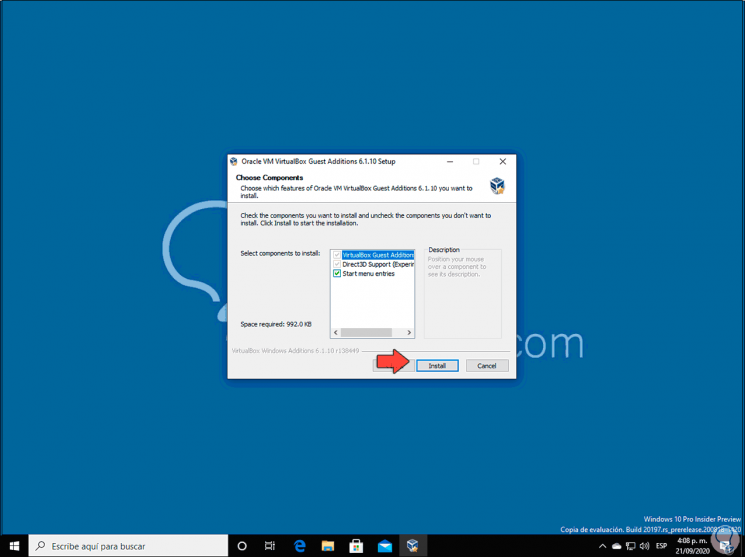
Then we define which components to install:
Step 6
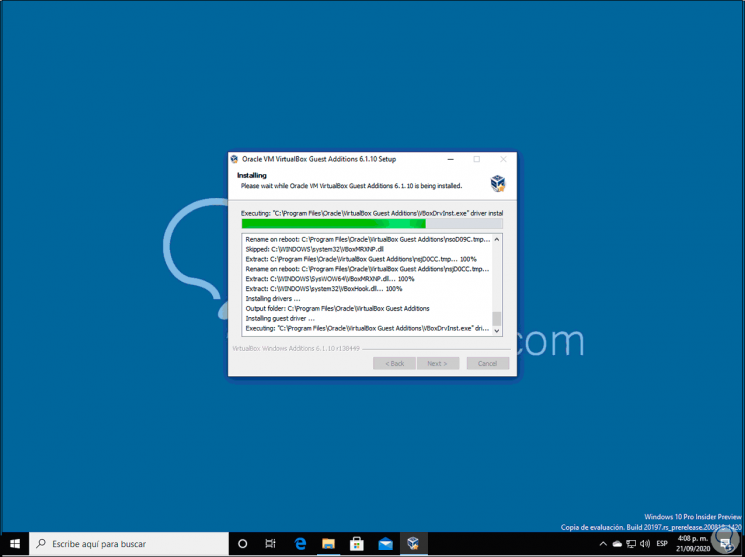
We click on Install and the Guest Additions installation process will start in the VirtualBox virtual machine:
Step 7
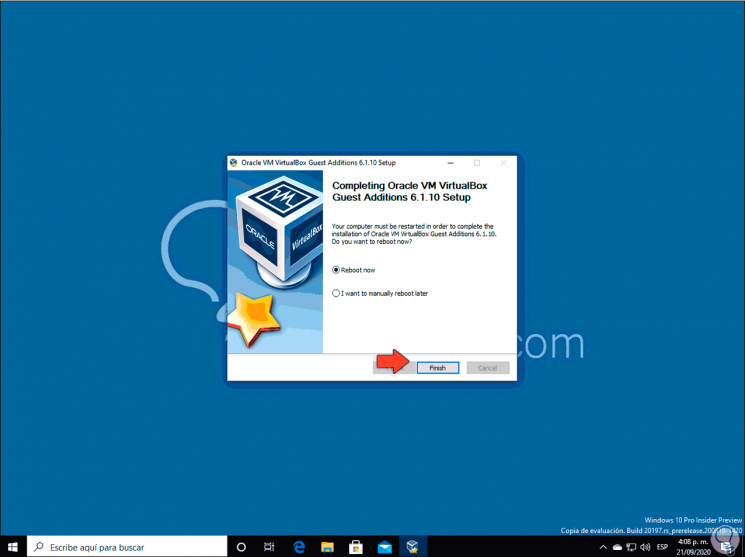
When this process finishes we must restart the virtual machine to apply the changes:
Step 8
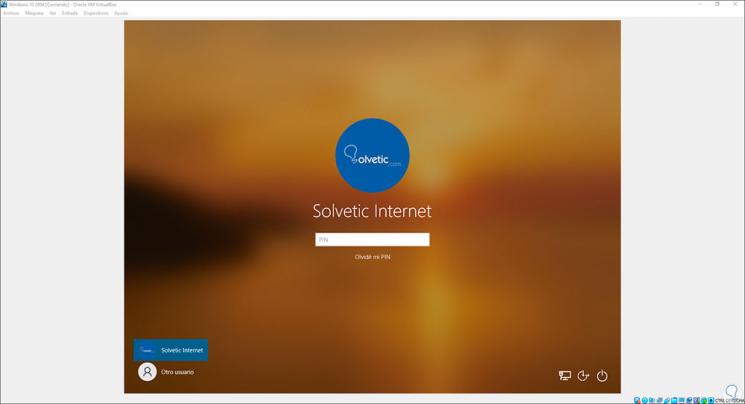
We click on Finish and the machine automatically restarts, then we log in as usual in the virtual machine:
Step 9
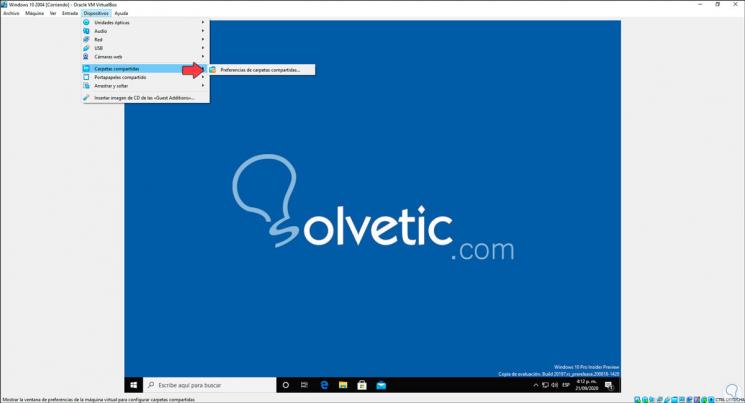
When logging in, we go to the menu "Devices - Shared folders" and there we click on "Shared folder preferences":
Step 10
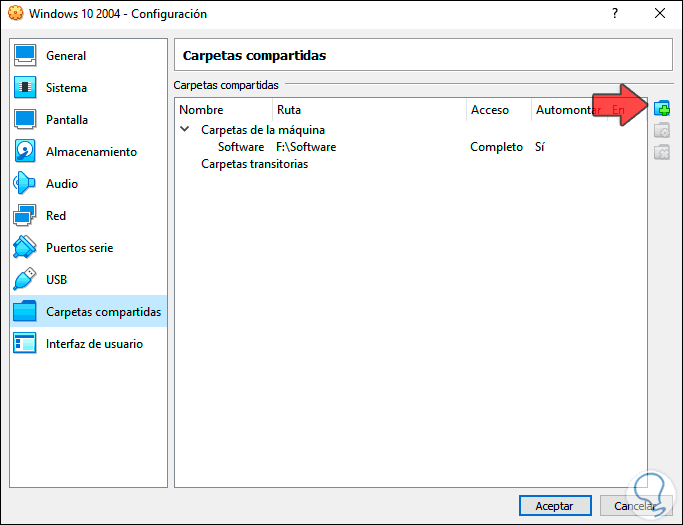
In the displayed window we click on the + sign located in the upper right:
Step 11
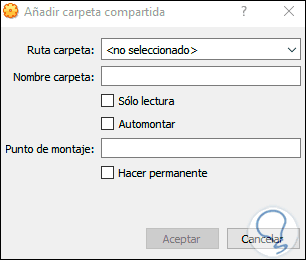
This allows us to select the folder that we have created to share:
Step 12
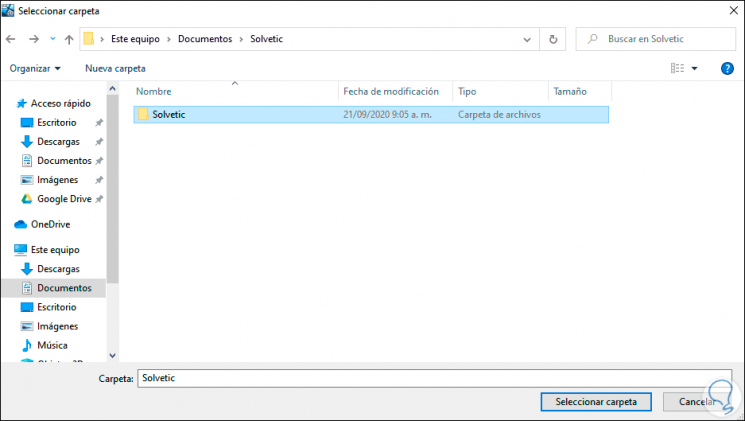
We click on the folder path drop-down field and select the folder that will be shared between both systems:
Step 13
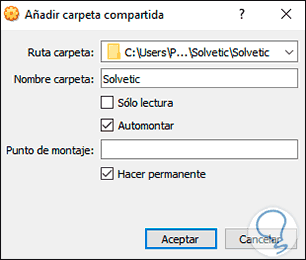
Click on "Select folder" and if we will use this folder frequently, we activate the "Automount" and "Make permanent" boxes:
Step 14
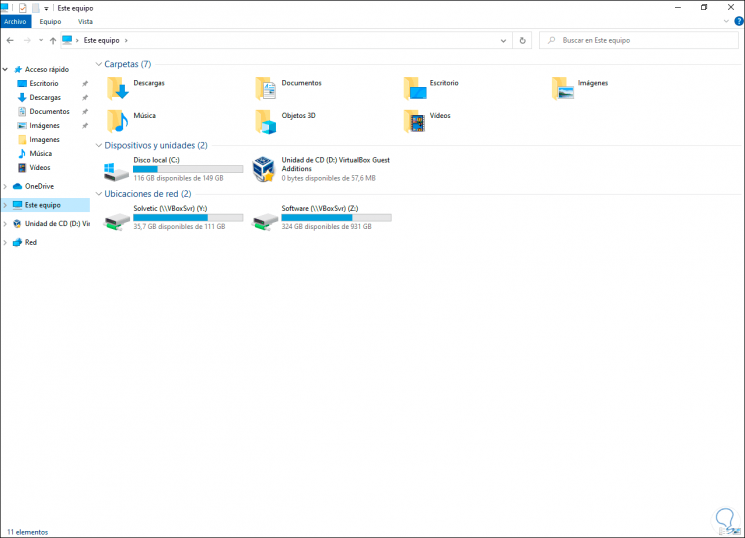
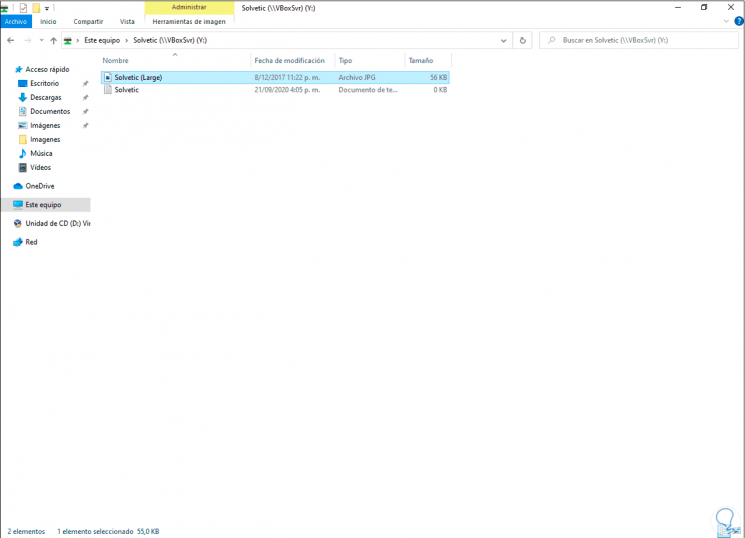
We apply the changes. When accessing the File Explorer in the virtual machine we will go to the "Network Locations" section and there we find the folder that we have shared:
Step 15
By double-clicking on it it is possible to share the content in a bidirectional way:
It is very simple to share a folder in VirtualBox for Windows 10 and thus have a comprehensive method for transferring files.