The shared folders in Windows Server 2022 are created with the aim of making them a central point to access both users and administrators to resources that are made available and each can be defined with the permissions needed for that purpose, all helps to more precise control of the information to use..
Shared folders are one of the classic tasks of Windows Server 2022 and TechnoWikis will explain how to create one there on this new system. In this way you will be able to create directories that you can easily share with other users and in different ways as we explain in the chapters of this tutorial.
To stay up to date, remember to subscribe to our YouTube channel! SUBSCRIBE
1. Create Windows Server 2022 Shared Folder from File Explorer
Step 1
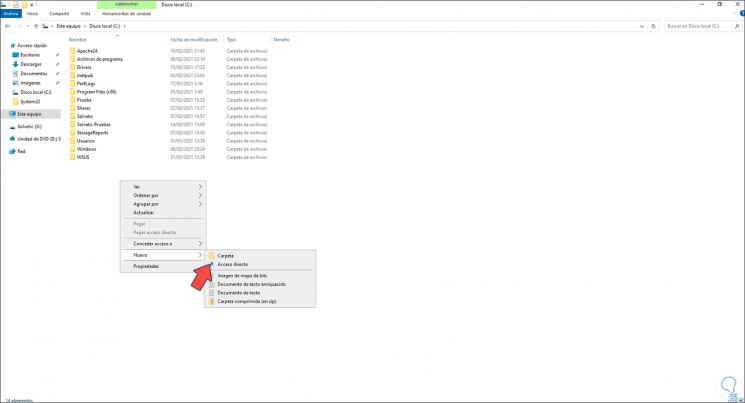
It is one of the traditional methods, for this we access the File Explorer and create the folder:
Step 2
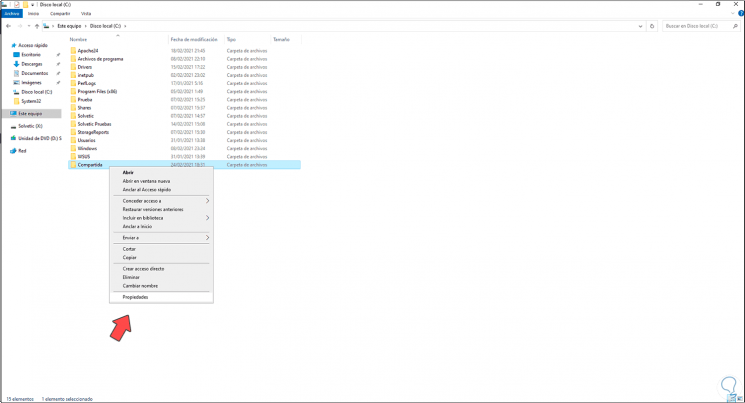
Then we right click on it and select "Properties:
Step 3
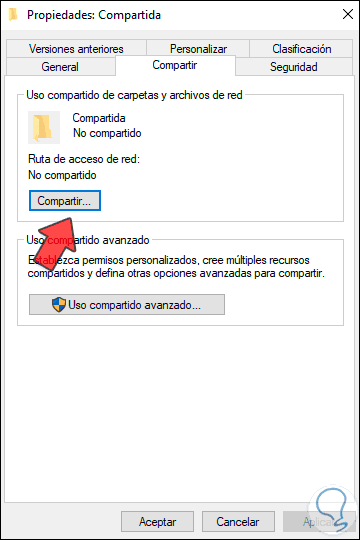
We go to the "Share" tab and there we click on Share:
Step 4
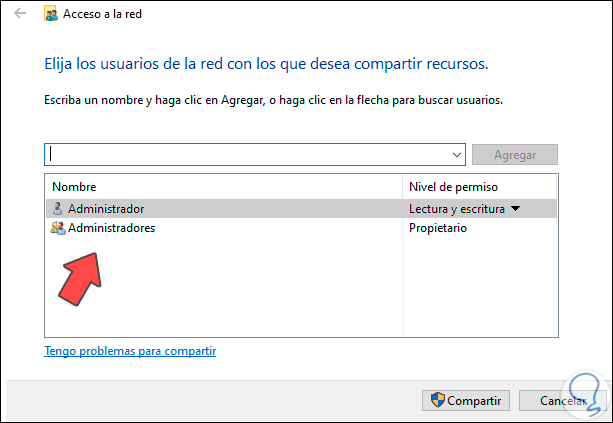
By clicking there it will be possible to assign users:
Step 5
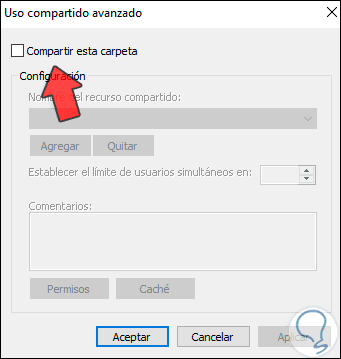
Click Cancel and click on "Advanced Sharing", we will see the following:
Step 6
We click on "Share this folder":
Step 7
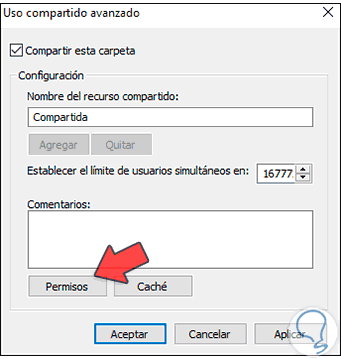
We can assign a new name, we click on "Permissions", we will see this:
Step 8
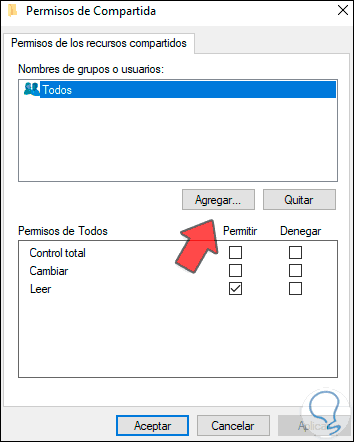
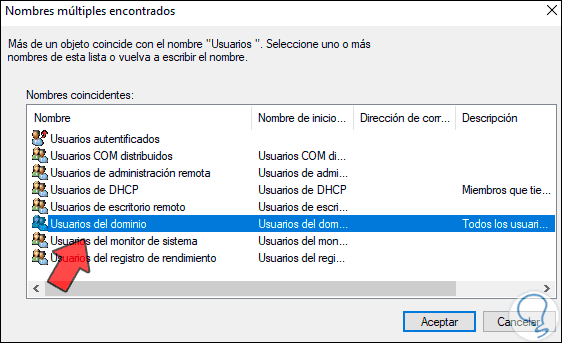
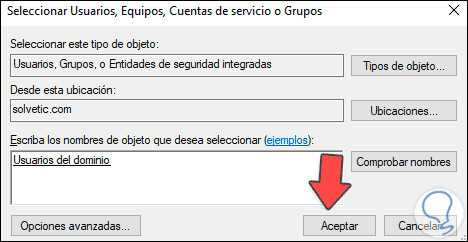
Click on "Add" and select "Domain users":
Step 9
Click OK to integrate the user:
Step 10
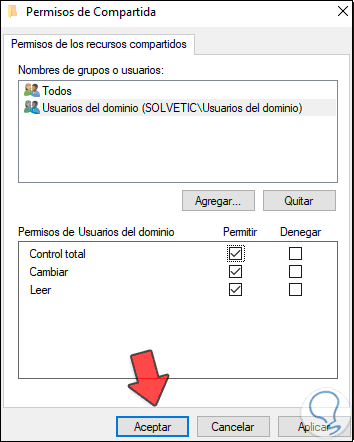
Click OK, now grant the permissions and apply the changes:
Step 11
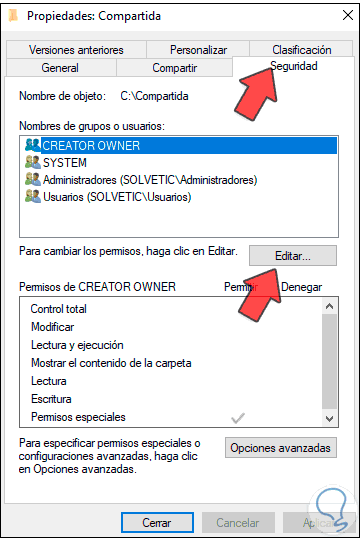
We go to the Security tab:
Step 12
Click on "Edit" to see this:
Step 13
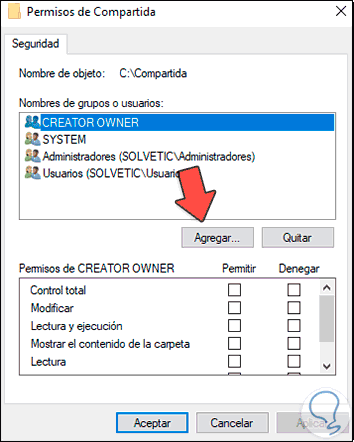
Click on "Add" and select "Domain users":
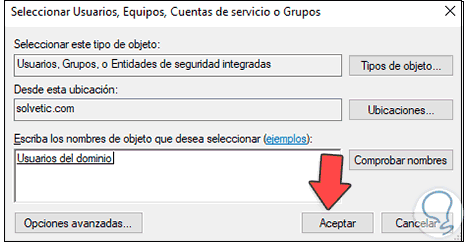
Step 14
We grant the permissions and apply the changes:
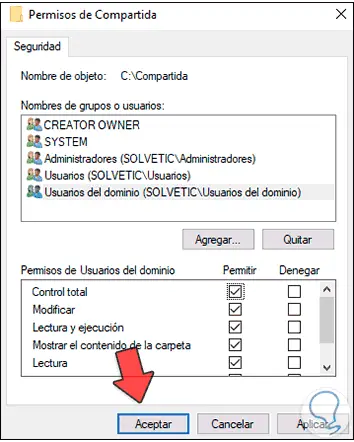
Step 15
In File Explorer we go to the Network section and there we see the shared folder:
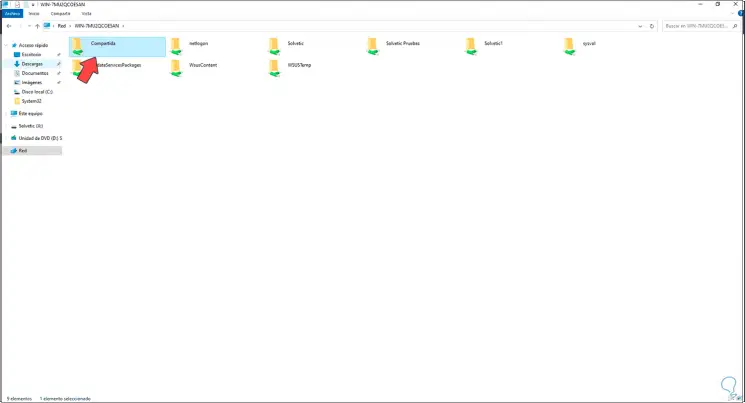
This is the traditional Windows Server 2022 File Explorer method..
2 . Create Windows Server 2022 Shared Folder from Server Manager
Step 1
We open the Server Manager and go to "File and Storage Services", there we go to the "Shared Resources" section and click on "Tasks - New Shared Resource":
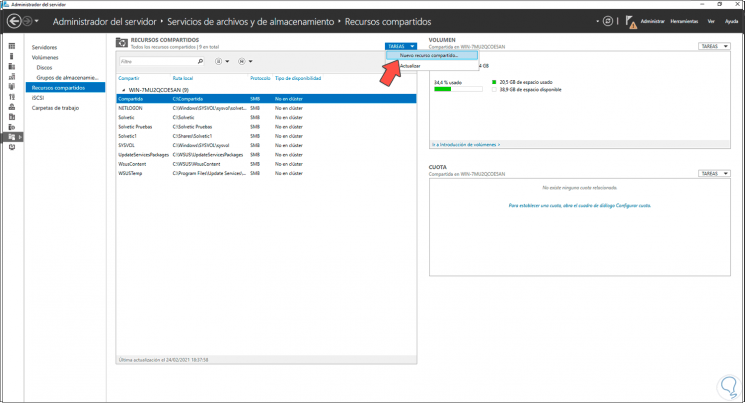
Step 2
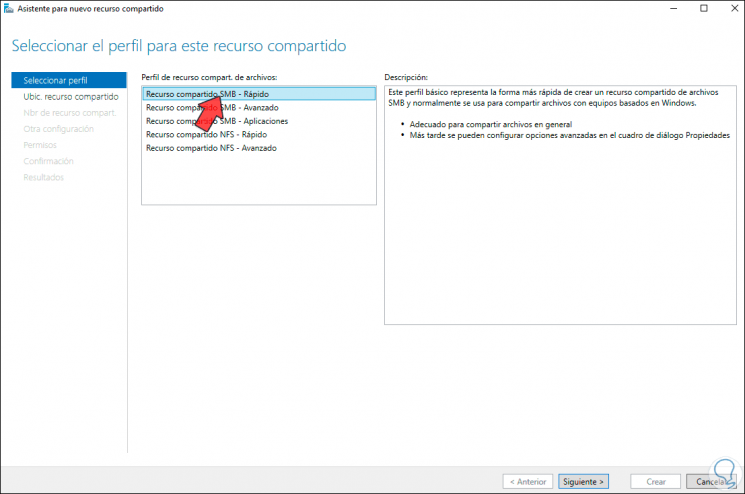
The following wizard will be displayed, we select "SMB Shared Resource - Fast":
Step 3
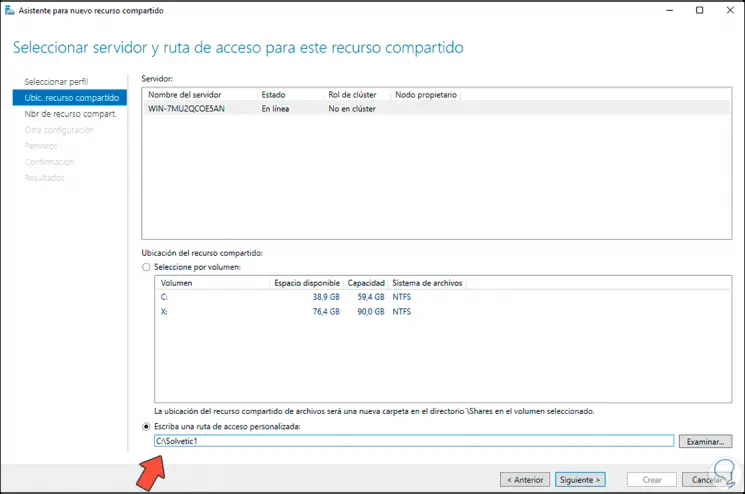
Click on Next and in the next window we activate the box "Write a custom path" to choose the folder to share:
Step 4
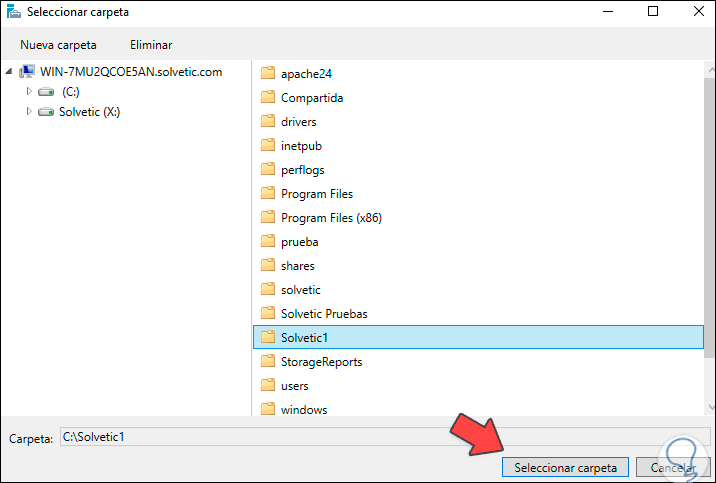
Click Select folder to see it added:
Step 5
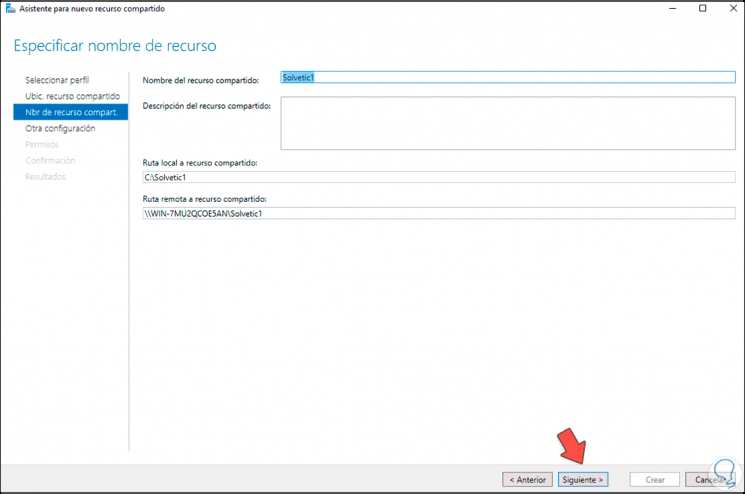
Click Next to see details of the resource to share:
Step 6
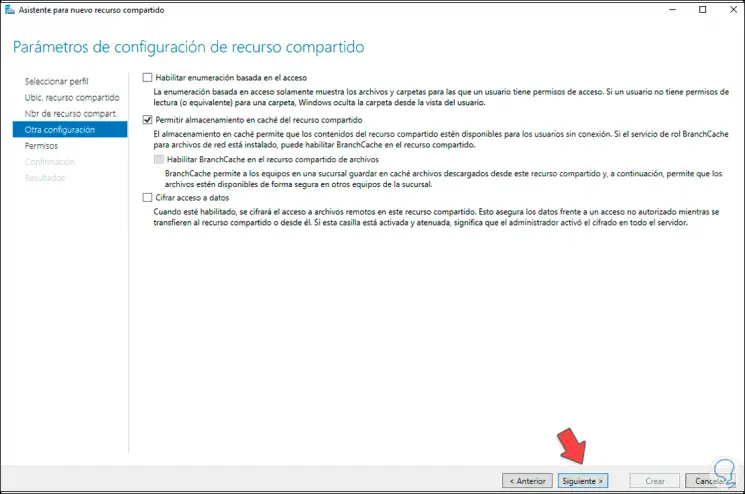
In the following window it is possible to adjust the configuration parameters of the folder:
Step 7
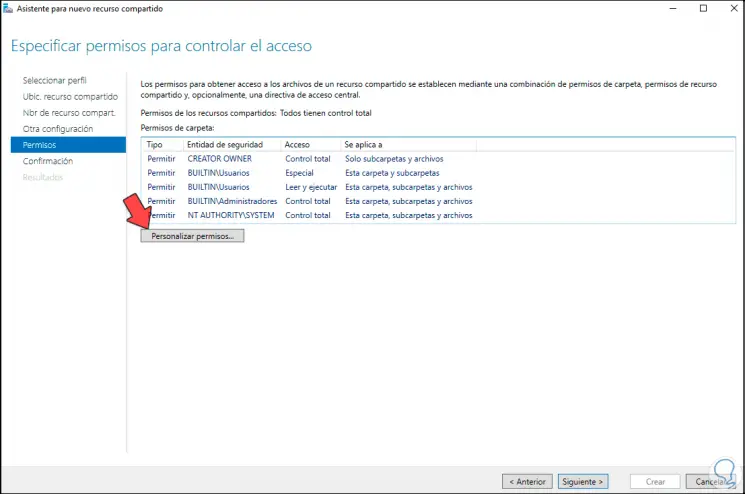
We click Next to see these options:
Step 8
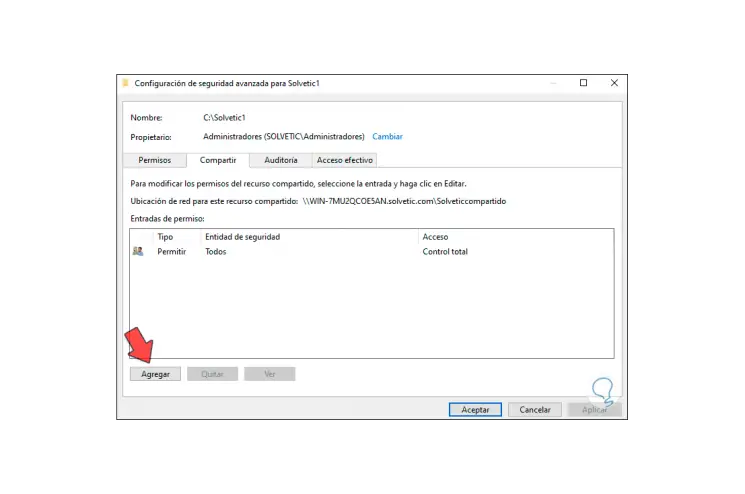
Click on "Customize permissions", in the "Share" tab click on Add:
Step 9
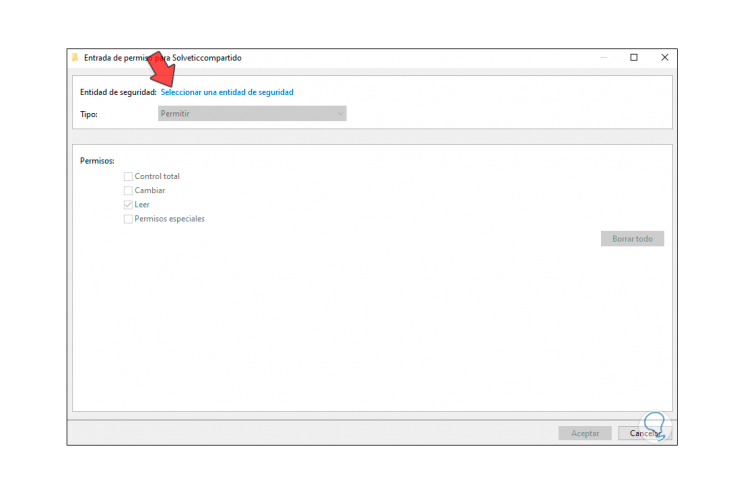
Click on "Select a security principal":
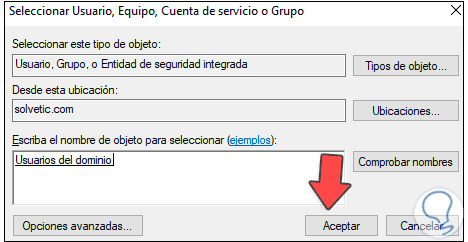
Step 10
We select "Domain users":
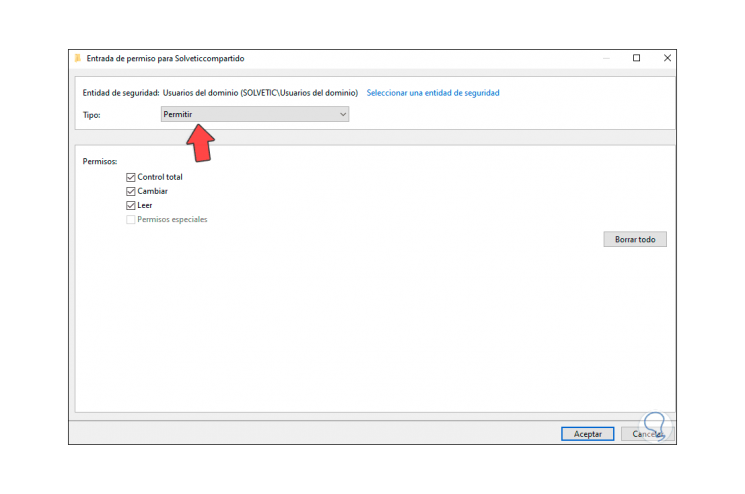
Step 11
We grant the permissions and apply the changes:
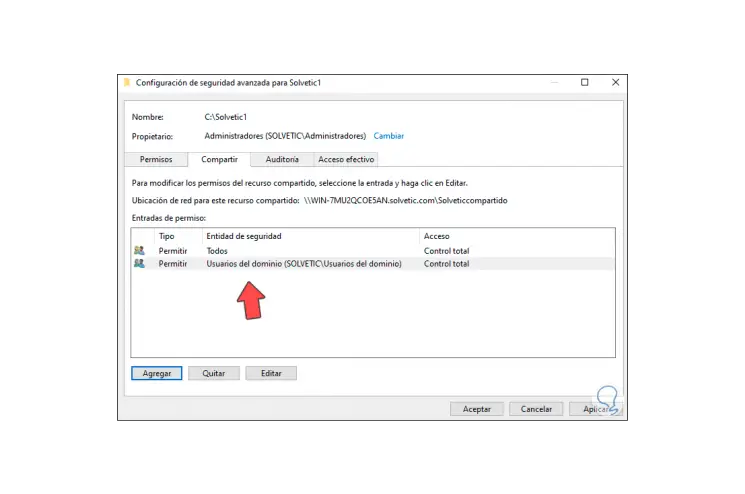
Step 12
Click OK to apply the changes.
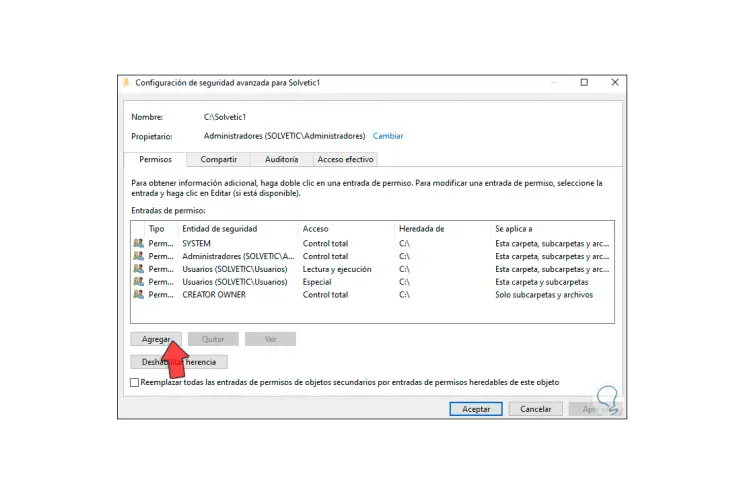
Step 13
In the "Permissions" tab we click on Add:
Step 14
Click on "Select a security principal":
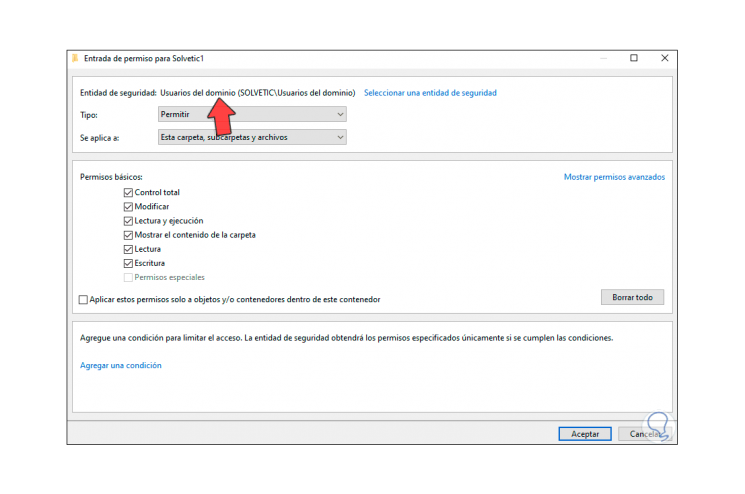
Step 15
Select "Domain users", grant permissions and apply the changes as we saw previously:
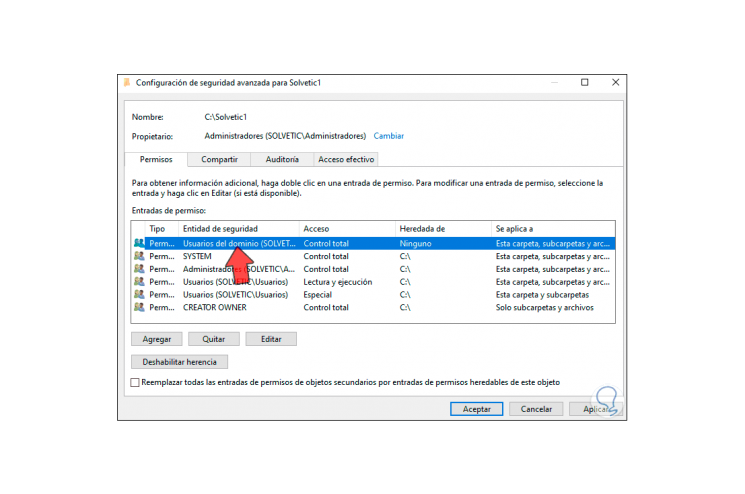
Step 16
Click Apply and OK.
Click Next to see a summary of the action to create:
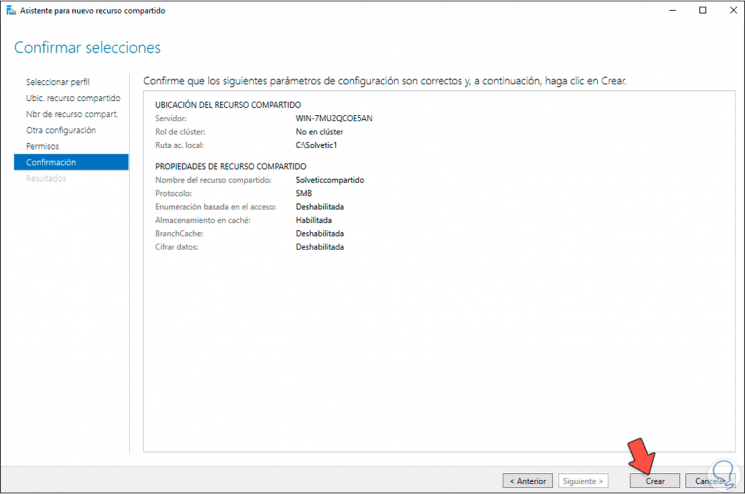
Step 17
Click Create to complete the process:
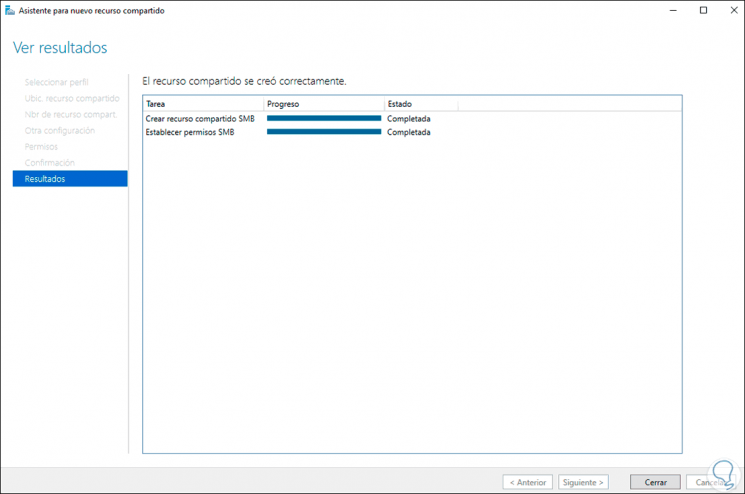
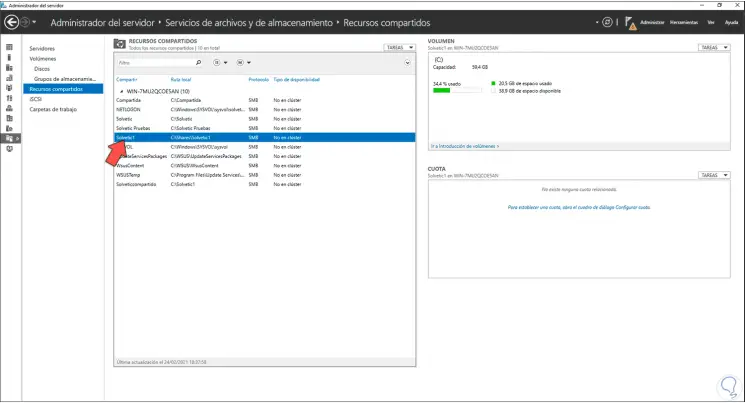
Step 18
We see the shared folder:
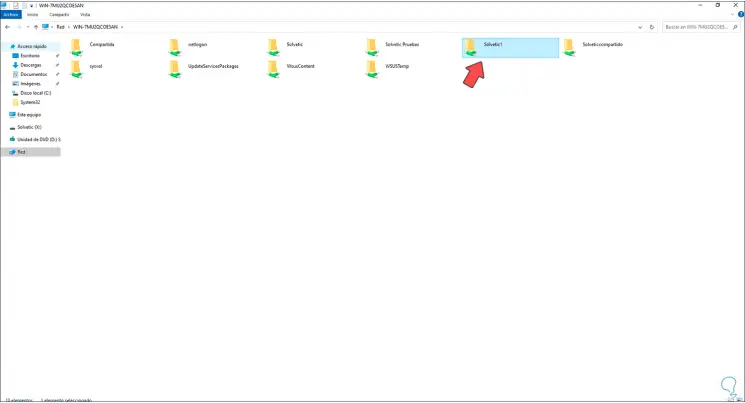
Step 19
In File Explorer go to Network and there you see the shared folder:
With any of these methods we are able to create shared folders in Windows Server 2022.