Many of the applications and programs that we install in Windows 10 are configured by default to be executed automatically with the start of the operating system which in theory helps to maximize access to these applications. But this action brings with it a direct impact on the performance and boot speed of Windows 10 unless we use SSD solid state drives..
One of the most used and dynamic applications of Microsoft is Skype which is used especially in corporate environments to engage in group conversations, make calls both local and international, integrate video conferencing and many other tasks, and as expected, Skype is configured to be run and log in automatically in Windows 10 .
This can be a security failure because if another person accesses the computer, our session will automatically be activated, violating privacy, so that we affect both the performance by executing Skype automatically and our security when logging in automatically..
TechnoWikis will explain how we can prevent Skype from starting our session automatically and is useful in case other people access our team.
To stay up to date, remember to subscribe to our YouTube channel! SUBSCRIBE
1. Deactivate automatic login to Skype Windows 10
Step 1
In case of not having Skype we can visit the following link for download:
Skype
Step 2
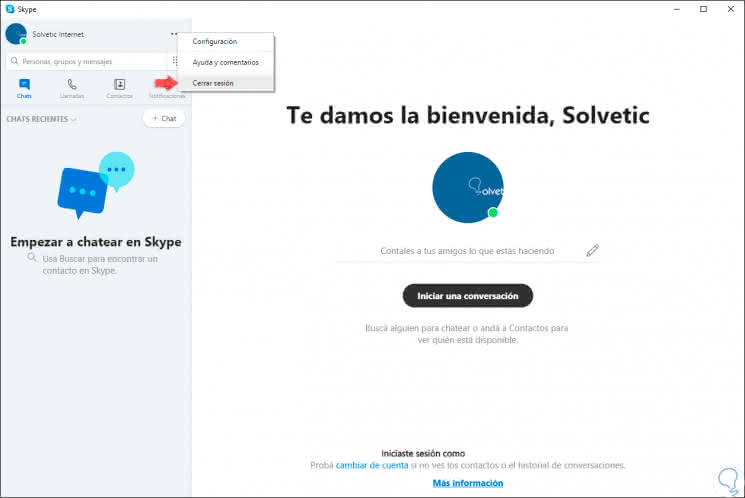
The first step is to close the current session of Skype, to do so, click on the menu icon (...) located in the upper right corner, and in the expanded list select Close session.
Step 3
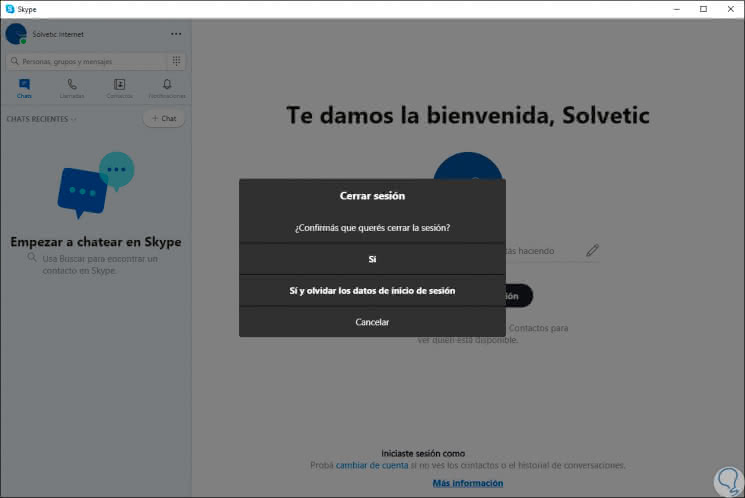
The following window will be displayed. There we can close the session or close the session and forget the login data.
Step 4
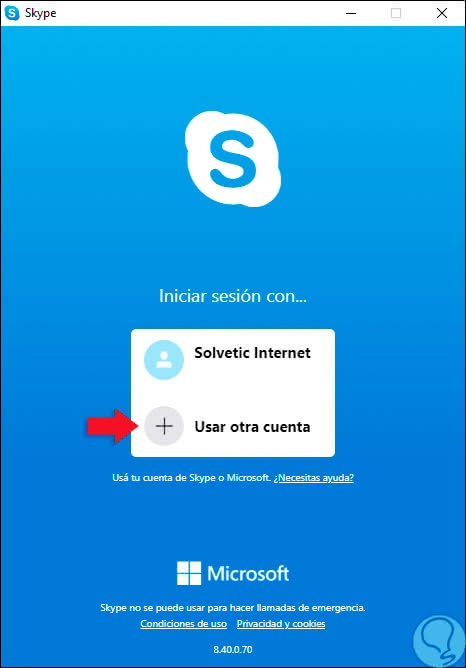
In the displayed window we recommend to click on the option "Use another account" so that our original account is deleted from the beginning:
Step 5
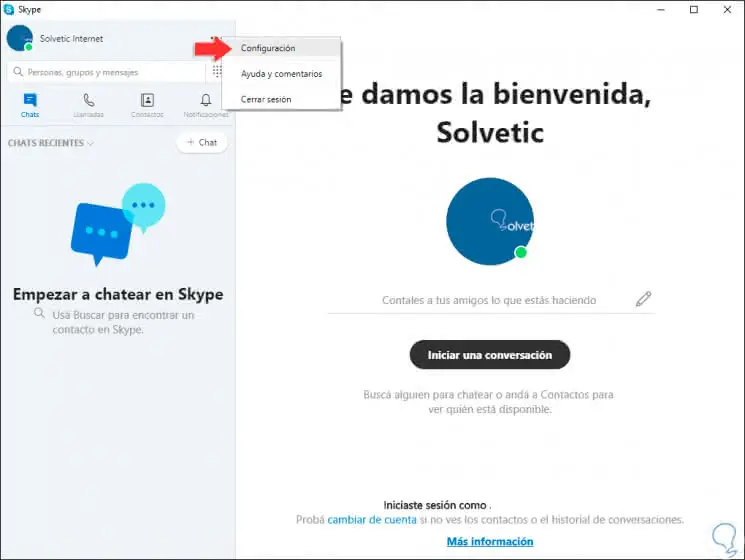
Now, we access Skype again and there we click again on the menu icon and this time we select the option "Configuration":
Step 6
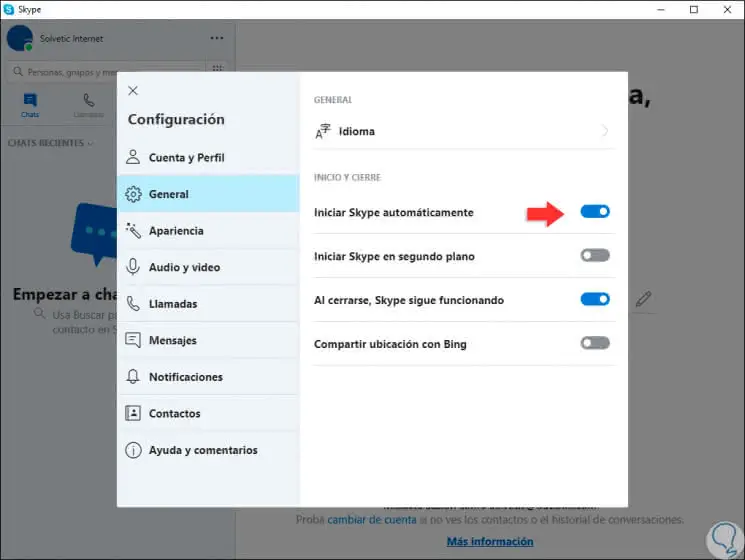
In the new window that will be displayed we will go to the "General" section and there we will see the following:
Step 7
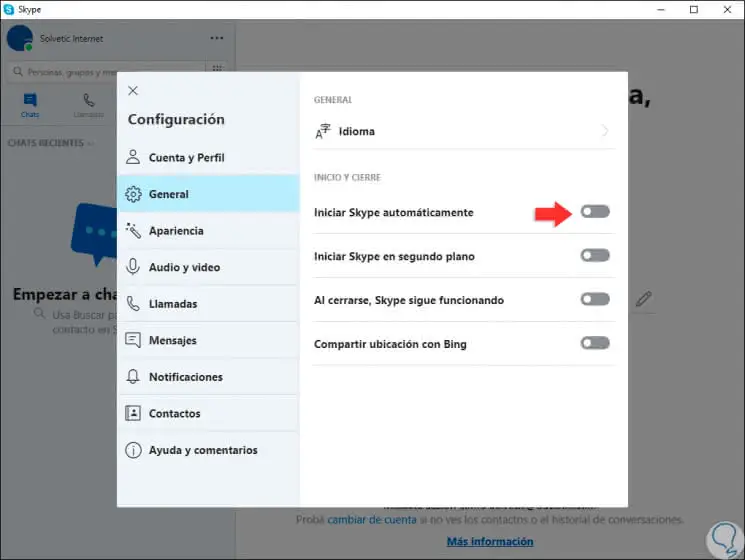
As we can see, the option "Start Skype automatically" is active, we must click on this switch to avoid the automatic start of Skype session. With this simple method it will be possible to avoid this security failure.
2. Uninstall Skype Universal installed by default Windows 10
Windows 10 is made up of a series of applications called Universal Applications (UWP), so Skype can now come as an application integrated in Windows 10 so it is not necessary to download it.
Step 1
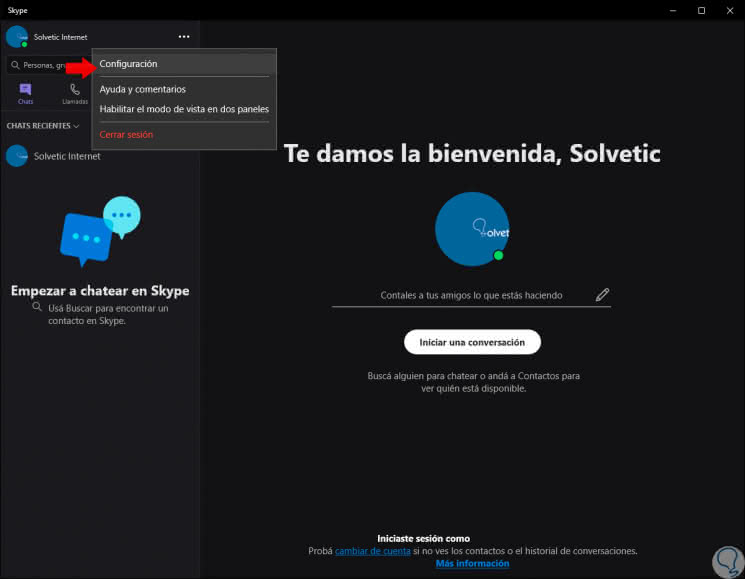
The process is identical in Skype UWP, we open Skype and click on the menu icon to select the option "Configuration":
Step 2
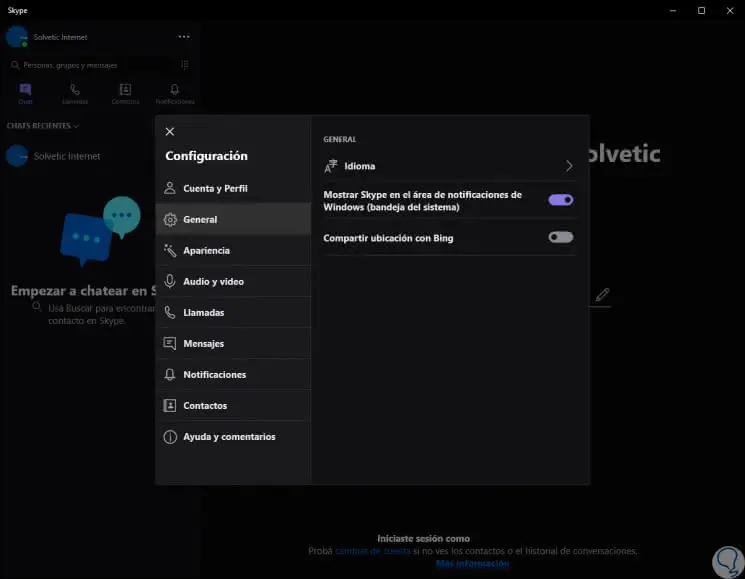
In the window that opens, go to the "General" section and note that there is no option to disable automatic startup:
Step 3
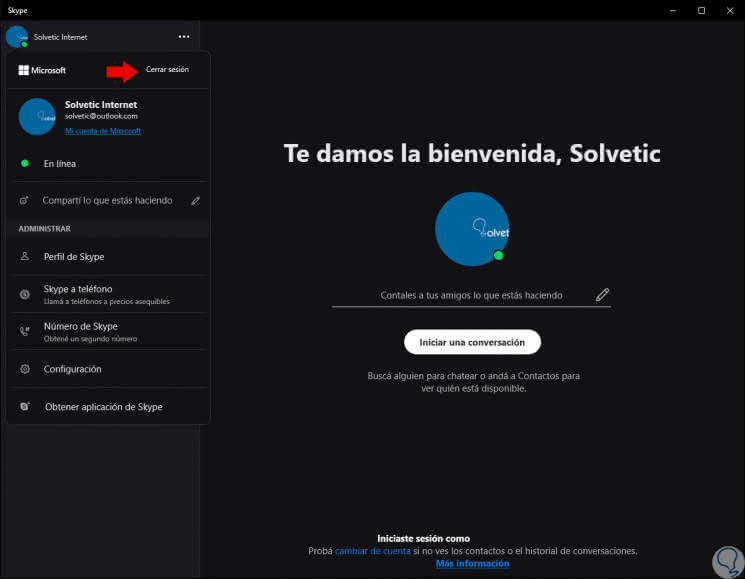
To correct this, we leave the wizard and click on our account and at the top we select the option "Close session":
Step 4
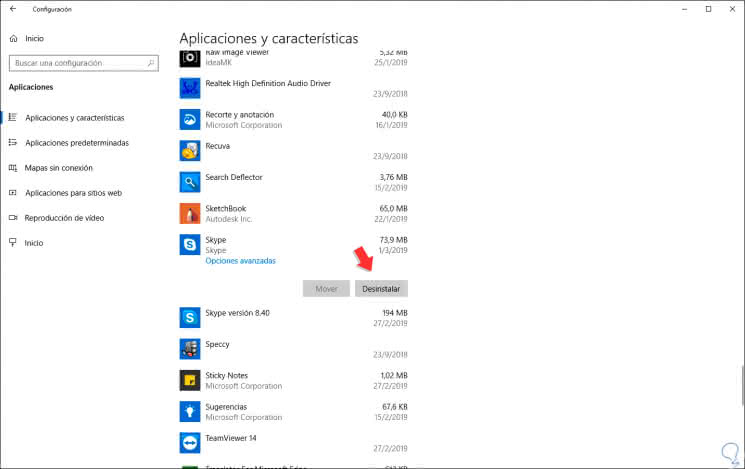
Now, even if we close the Skype session, it will continue to be executed without options to disable it since it is a UWP application. The only method is to uninstall it and make use of the traditional Skype application, for this process we go to the Start menu / Settings / Applications, there we place the Skype app and click on it. We click on the "Uninstall" button to continue with the process and in this way we will only use Skype in its traditional way.
These are the options we have to avoid Skype's automatic login in Windows 10..