Skype has been developed by Microsoft as a comprehensive solution for millions of users to have the best solutions to engage in complete communications thanks to integrated features such as:
- Option to make calls to phones
- Calls and video calls are in high definition
- Built-in screen sharing function
- Option to activate subtitles
- Available for different PC and mobile systems
By default, when Skype is installed it will start automatically with Windows 11 and if we are frequent users this is perfect, but if we use Skype only in some moments, making it start automatically can be annoying since we should close it and if the computer is Limited hardware may be affected booting Windows 11..
TechnoWikis will explain to you the way to avoid the automatic start of Skype in Windows 11.
To stay up to date, remember to subscribe to our YouTube channel! SUBSCRIBE
1. Prevent Skype from automatically starting Windows 11 from the app
Step 1
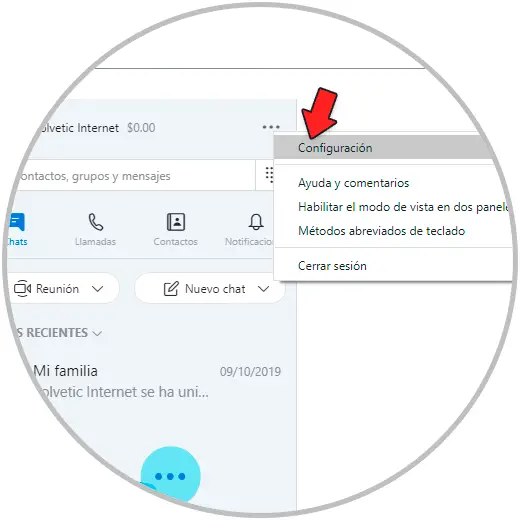
To achieve this method, open Skype and go to "More - Settings":
Step 2
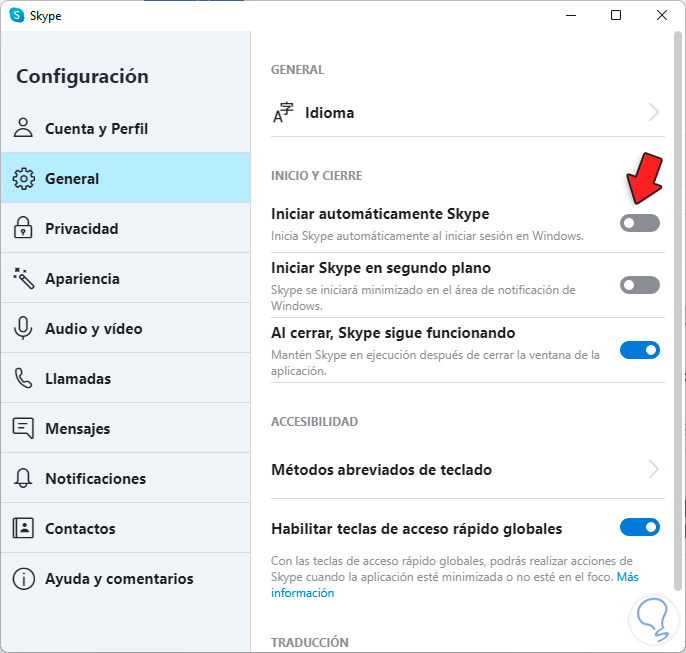
In the pop-up window displayed, in the General section we will see the following. There we are going to deactivate the "Automatically start Skype" switch:
2. Remove Skype from automatically starting Windows 11
Step 1
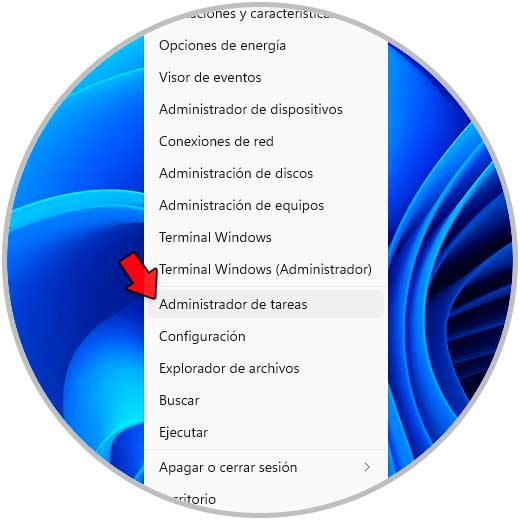
This is one of the traditional ways to prevent an application in Windows 11 from starting next to the system, for this method open the Windows 11 Task Manager from Start:
Step 2
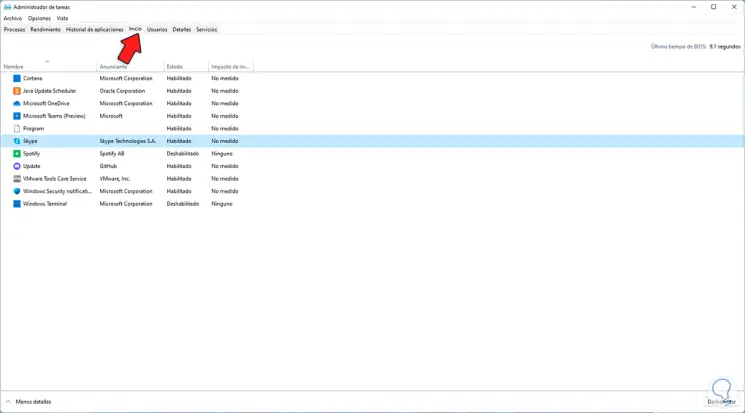
In the administrator window we go to the Home tab:
Step 3
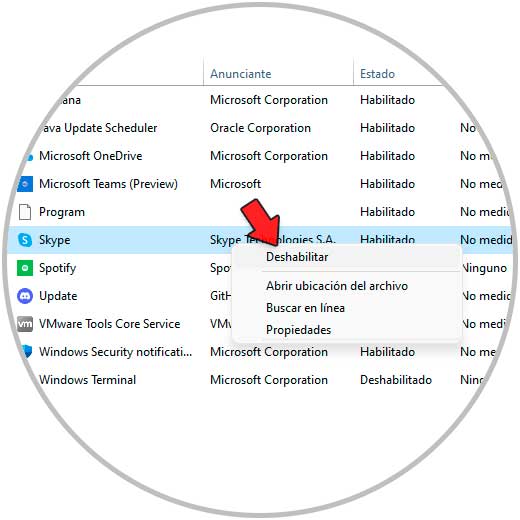
We right click on Skype and select the "Disable" option:
Step 4
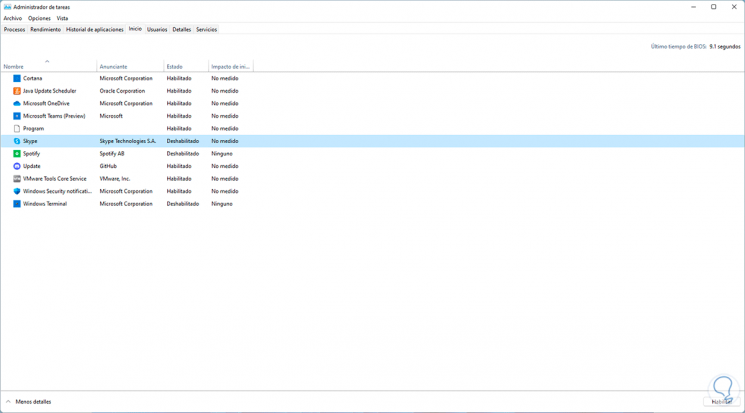
We will see that Skype has been disabled to start with Windows 11:
These are the functional options to prevent Skype from starting alongside Windows 11..