In Windows operating systems there have always been some applications or functions integrated by default and one of the most popular is the recycling bin, which will always integrate its direct access into any Windows installation, basically when we remove some element from the system (either by pressing the Delete key or right click / Delete)..
This object will remain in the recycling bin until it reaches the maximum size preconfigured or manually decide to delete all the contents of this, in the case of Windows 10, an intelligent function is integrated which will remove the oldest files from the trash bin in a certain time with the aim of freeing space in the bin and giving way to new elements are housed there, and therefore we will see space ready for additional use on the hard drive.
Now, in some cases we can see a message when trying to access the recycle bin that tells us that it is corrupt and for this reason it will be impossible to access it to perform tasks on the bin as restore or empty items, other reasons associated with This error are:
- When you access the recycle bin, the deleted files are not displayed.
- It is not possible to delete the files in the Recycle Bin.
Something that we must take into account is that each unit of the operating system has a hidden and protected system folder which is called $ Recycle.bin which has the task of housing the elements that we eliminate, so that a practical option to correct problems associated with the trash is to delete this folder $ Recycle.bin, this will make Windows 10 automatically create a new copy of that folder with all services at zero and thus recover its optimal operation..
This method can not be done directly from the Windows 10 File Explorer and we must bear in mind that when the process of restoring the recycling bin is carried out, all the data hosted there will be deleted .
To stay up to date, remember to subscribe to our YouTube channel! SUBSCRIBE
1. Repair the Recycle Bin using Command Prompt in Windows 10
Repairing the trash using the command prompt is one of the most practical methods because, as we have mentioned, this is not possible directly from the scan, so that the command prompt console is ideal for this type of task in Windows 10 .
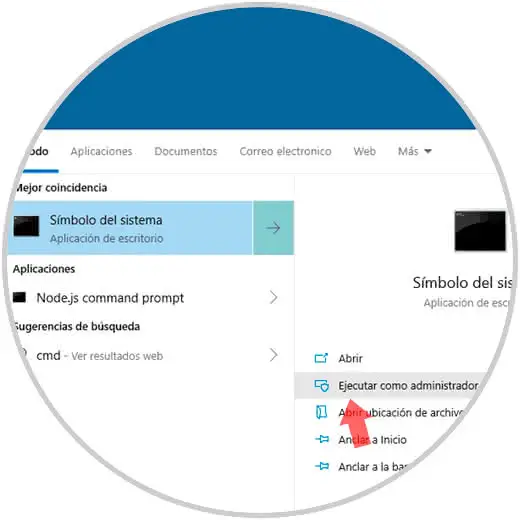
Step 1
We must access as administrators and for that we look for the command prompt in the Windows 10 search box and there we execute it using any of the following alternatives:
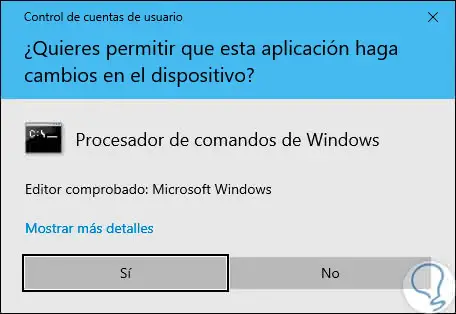
Step 2
The following message of the user account control will be displayed, which we must accept:
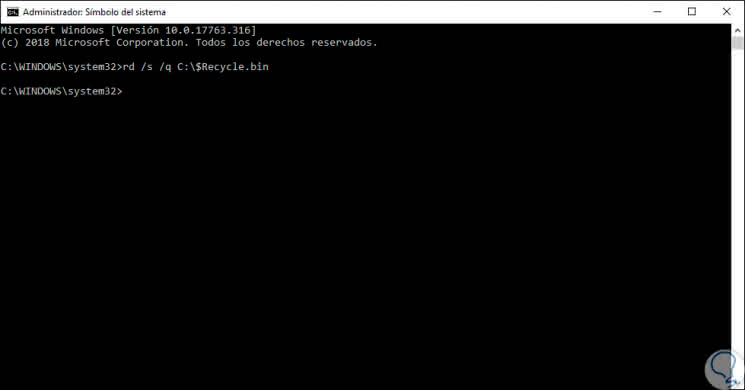
Step 3
Once we enter the terminal, we will execute the following line:
rd / s / q C: \ $ Recycle.bin
Step 4
The command rd (Remove Directory) has been developed to safely delete directories in Windows 10, the parameters we use are:
- / s: Delete all files and subfolders in addition to the folder itself, it is useful to delete a complete folder tree.
- / q: it is the silent mode which does not display the Y / N confirmation
Note
Unit C must be replaced by the desired unit.
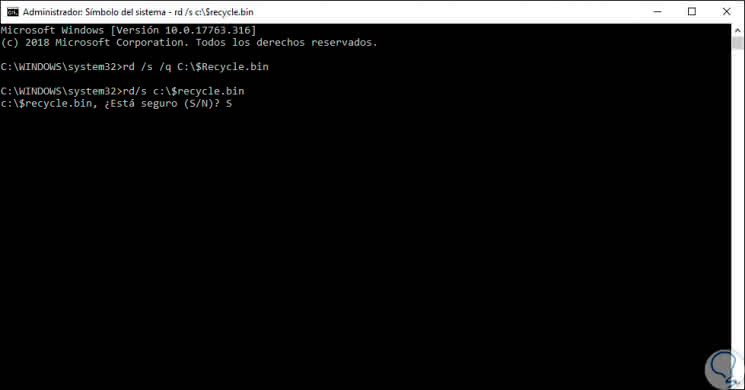
Step 5
In case we do not use the / q parameter it will be necessary to confirm the elimination of the recycle bin. After this we proceed to restart the operating system so that the recycle bin is created again.
2. Repair the Recycle Bin by deleting permissions in Windows 10
This method implies editing the permissions to visualize the protected files of the system which are hidden for security since a bad configuration can bring with it general instability of the operative system.
Step 1
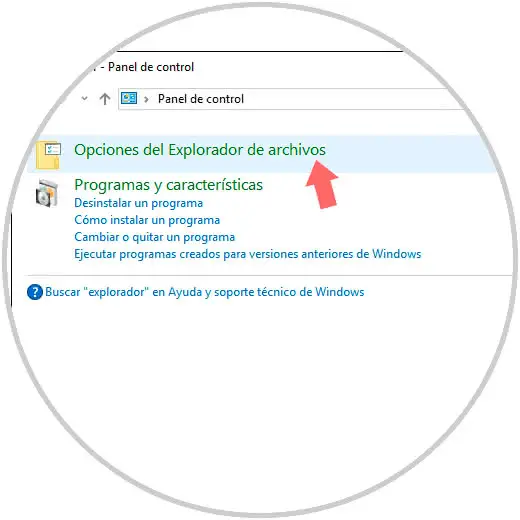
For this we access the Control Panel and in the search field enter "explorer" and we will see the following:
Step 2
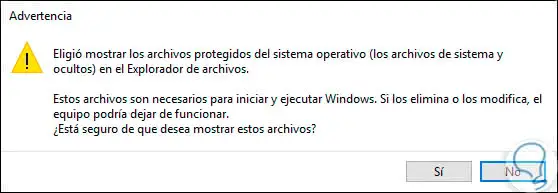
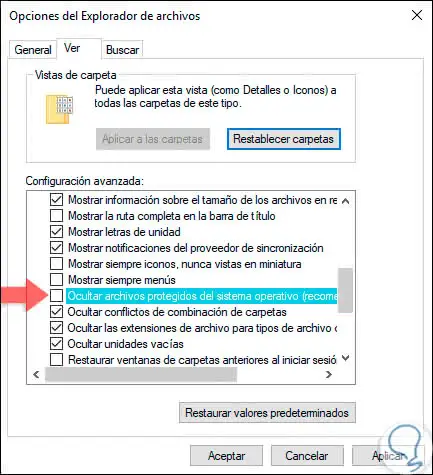
There we click on "File Explorer Options" and in the pop-up window we go to the "View" tab and there we uncheck the box "Hide protected files of the operating system" and the following warning will be displayed:
Step 3
Click on Yes to complete the action. Click on Apply and Accept to save the changes.
Step 4
Now we can go to each unit and there see the Recycle Bin folder:

Step 5
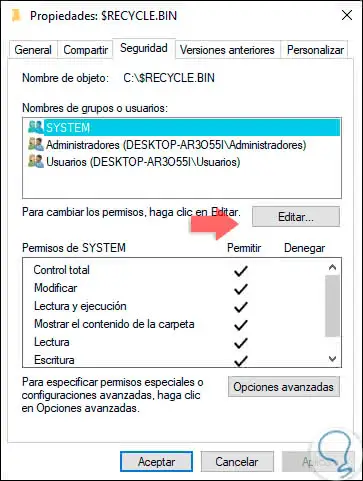
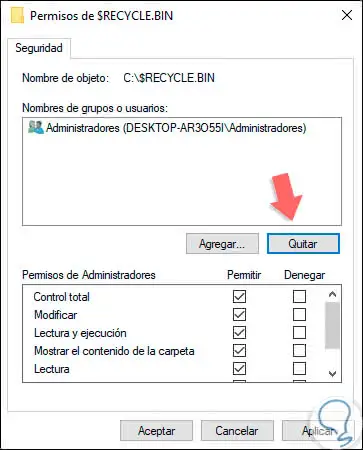
To remove the permissions we right click on the folder and select Properties and in the expanded window we go to the "Security" tab:
Step 6
There we click on Edit and in the next window we will select each of the groups or users and click on "Remove" to eliminate the permissions of each one. Then click on Apply and Accept to save the changes and proceed to restart Windows 10.
3 See the hidden recycle bin in Windows 10
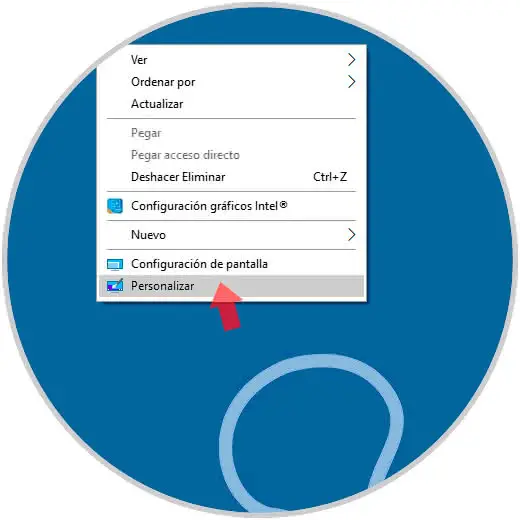
Step 1
Now, if we do not see the Windows 10 recycle bin we should not be alarmed, maybe it's just hidden, to check this we right click on the desktop and select the "Customize" option:
Step 2
In the expanded window we will go to the "Themes" section:
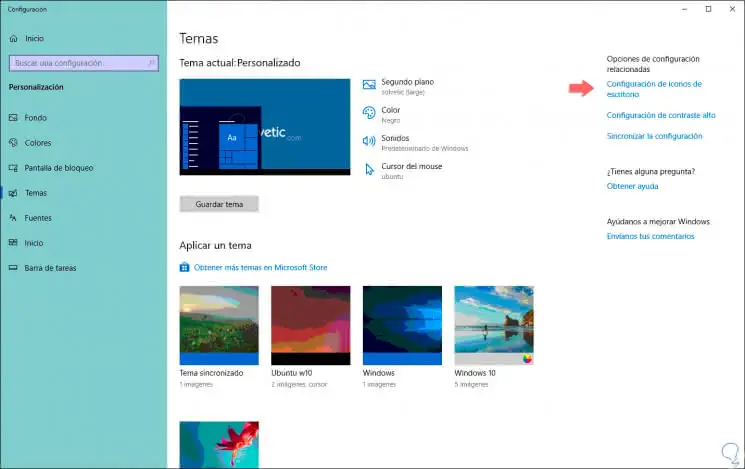
Step 3
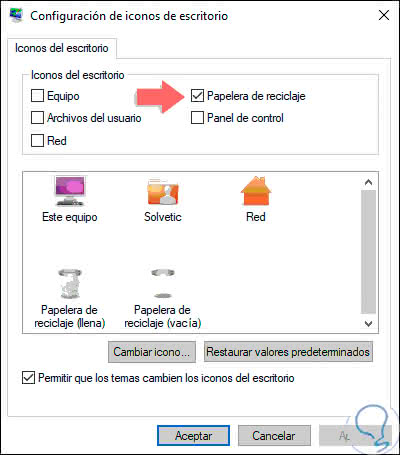
There we click on the line "Configuration of desktop icons" and in the displayed window we activate the box "Recycle bin". Again click on Apply and Accept to save the changes.
Step 4
With one of the described methods it will be possible to recover the optimal functioning of the recycle bin in Windows 10:
In this way we can repair problems in the Recycle Bin or can see it when it is hidden in Windows 10..