Network support is one of the most complex processes that we as administrators or IT support personnel must handle due to the number of situations and scenarios that may arise. In addition to this the cause of the error may be present locally, remotely or in any of the devices through which the information travels which can be really delicate to detect..
One of the basic commands with which we have to determine the state of a device is the ping command and TechnoWikis will explain in detail how to use this command in macOS, in this case macOS Mojave, but being the same procedure for the other versions of macOS .
What is the ping command
Ping is a command that has been developed basically to execute a trazabilidad between a local team and a remote one, it acts sending a series of packages with requests ICMP (Internet Control Message Protocol). The objective is to evaluate how many of these packages return to the equipment that sent them and how long this process takes, this will be useful to determine not only the state of the network but also the integrity of the same.
The basic syntax for using the ping command, which applies to all operating systems, is as follows:
ping [-t] [-a] [-n count] [-l size] [-f] [-i TTL] [-v TOS] [-r count] [-s count] [-w timeout] [- R] [-S srcaddr] [-p] [-4] [-6] target [/?]
Parameters of Ping
Its parameters of use are:
- -t: this option allows us to ping the destination continuously until we stop its result with the Ctrl-C keys.
- -a: with this option we can resolve, if applicable, the host name of a destination of the IP address.
- -n (-c): this option allows to establish the number of ICMP echo requests that must be sent and their range of use is from 1 to 4294967295.
- -l (size): thanks to this option we can set the size, in bytes, of the echo request pack from 32 to 65,527. By default, the ping command will send a 32 byte echo request
- -f: using this option prevents ICMP echo requests from being fragmented by routers between the local computer and the destination.
- -i TTL: with this option we can define the value of the Time of Life (TTL - Time To Life), whose maximum value is 255.
- -v TOS: allows you to set a Service Type (TOS- Type Of Service) value.
- -r count: if we use this option, it will be possible to specify the number of jumps between the source equipment and the destination device or equipment which must be registered and visible.
- -s: this option allows you to display the time, in Internet time stamp format, in which each echo request is received and the echo response is sent with the ping command.
- -w: allows you to specify a time-out value when ping is executed; the amount of time, in milliseconds, with which ping will wait for each response of the target device is adjusted.
- -R: with this option the ping command will trace the round trip of the packets.
- -S: this option allows you to specify the source address.
- -4: this option forces the ping command to use IPv4 addressing only, but will only be useful if the destination is a host name and not an IP address.
- -6: this option forces the ping command to use only IPv6 addresses when the destination is a host name.
- target: is the target device to which we will perform the ping.
Now we will learn different methods to ping in macOS..
To stay up to date, remember to subscribe to our YouTube channel! SUBSCRIBE
1. How to ping through the terminal on Mac
Step 1
To access the terminal we have the following options:
- On the Finder route "Go / Utilities / Terminal"
- Using the following key combination:
+ ⌘ + U ⇧ + ⌘ + U
Step 2
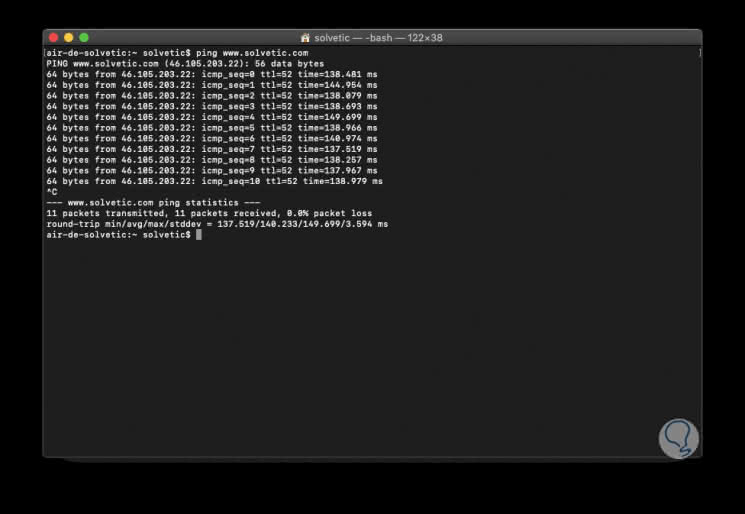
Once in the terminal we will execute the following line. This command is to ping the host solvetic.com
ping www.solvetic.com
Step 3
By default, in macOS the command will continue to be executed until we stop it using the following keys:
+ C Ctrl + C
Step 4
As a result we find:
- Amount of packages received
Step 5
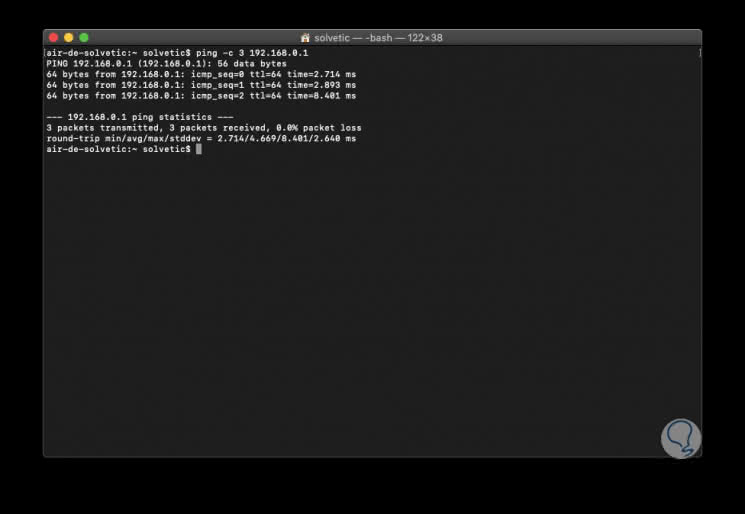
Another way we have in macOS Mojave is to define the number of packets that will be sent, for this we will use the -c parameter indicating the number of packets to be sent, in this case 3. For support issues, the result displayed by ping is vital that each line that is returned represents a transmission of packets. The time specified in milliseconds which is essential to determine if the communication with the device is optimal and thus determine exactly what kind of support to execute.
ping -c 3 192.168.0.1
2. How to ping using the network utility on Mac
Step 1
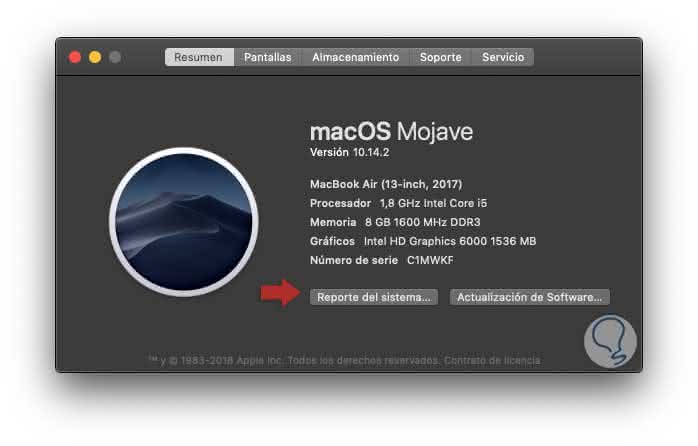
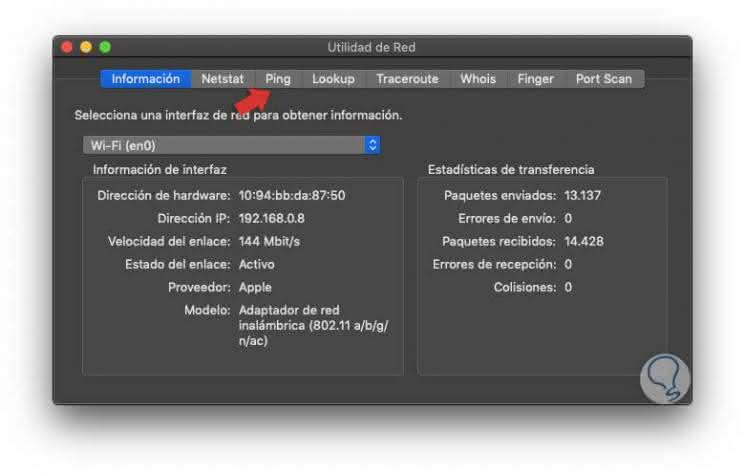
The Network Utility in macOS is another of the integrated options to know the parameters of the network and execute certain actions on it. To access it we can click on the Apple logo and there select the option "About this Mac", then, in the window displayed, we click on the "System Report" button:
Step 2
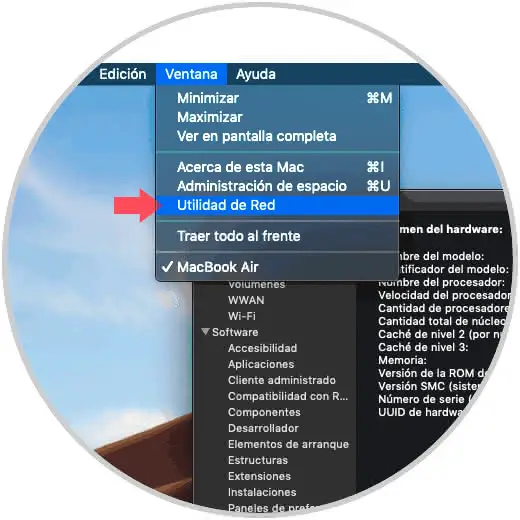
Now, in the expanded window we go to the "Window" menu and there we will select "Network Utility":
Note
we can also access the utility through Spotlight.
Step 3
The following window will be displayed where we will find detailed aspects of the network such as:
- MAC address of the interface
- Packages that have been sent and received
- Amount of errors and more
Step 4
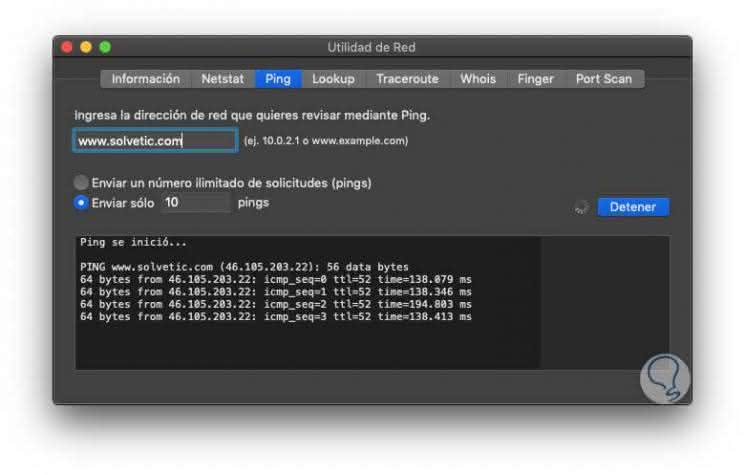
Now, to execute a ping from this utility, we will go to the "Ping" tab and there we will enter the IP address or domain in which we will execute the ping. In the lower part we can define the number of ICMP requests to send (default 10), or activate the checkbox for unlimited requests:
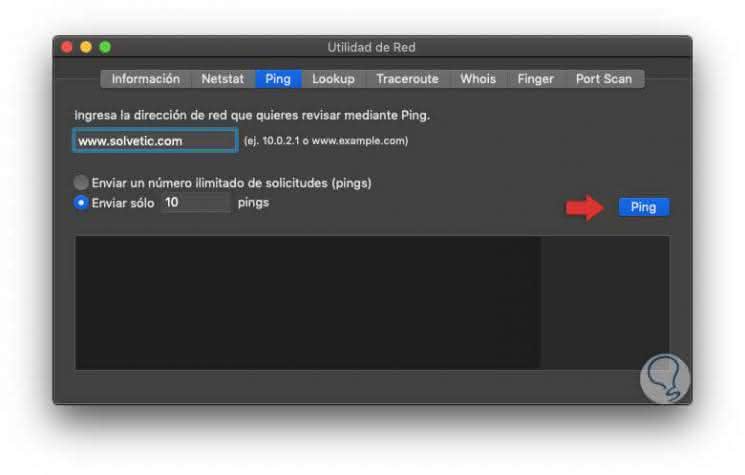
Step 5
Click on the "Ping" button to start the process. Thus, the Network Utility is another practical option to run ping and thus evaluate the state of the network.
3. How to ping using Speedtest on Mac
Step 1
One of the most popular applications to run ping and access details of the state of the network is Speedtest which can be downloaded for free at the following link:
Speedtest
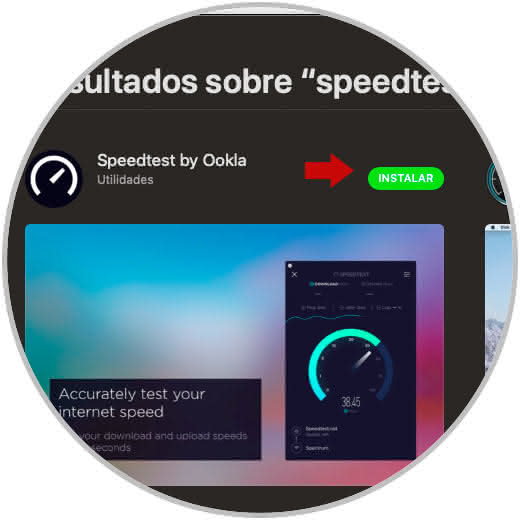
Step 2
There we click on the "Install" button and once it is downloaded and we access the application we will see the following:

Step 3
There we click on "Start" and start the execution process of the ping command to determine the current upload and download speed:
Step 4
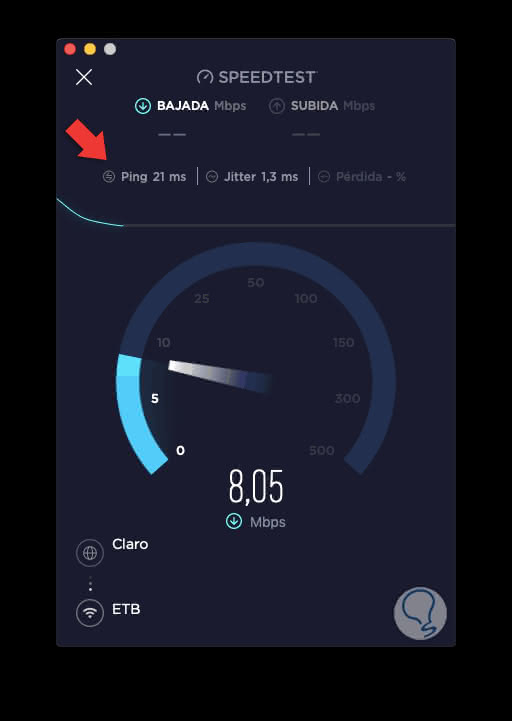
Once finalized we will see the results in the upper part:

Step 5
There we find the following details:
Ping
It is displayed in ms (milliseconds) and based on this result, the smaller it is, it means that the packets will be sent and received in less time.
Jitter
It is a parameter that measures the amount of variation between the different measures of ping thus allowing us to know how stable the amount of ping sent is.
Lost
they are the packages that have been lost during the execution and are measured in percentage.
Thanks to the ping command it will be possible to know the state of the network and on that basis to be able to work in a much more complete and direct way.