The personalization of our equipment is an issue that affects us and of great importance, since, spending a large number of hours in front of these will be important to feel as comfortable as possible in its use.
In the multimedia world there are endless options through which it will be possible to personalize our environment in a much more direct way. Speaking specifically about the desktop and icons, and this is thanks to the possibility of using .ico files for that purpose..
A .ico file is an extension that is used frequently in Windows systems and whose purpose is to represent the icons as images , making them compatible with numerous customization actions; since .ico files are in the ability to be used in the Start menu, such as shortcuts , folders or programs .
In the latest editions of Windows, .ico files have a dimension of 256 x 256 pixels and supports 32 bits, with 8 bits of transparency and 24 bits of color. Now, it is normal that we want some of our own images in JPG or PNG format to be used to be integrated into an element of the desktop or the Start menu and therefore it is ideal to learn how to convert this image to this format. It is for this reason that in this tutorial TechnoWikis will explain some ways to achieve it..
1. How to convert JPG or PNG images to ICO using an online converter
Step 1
In the network we find many sites that help us to easily convert our JPG or PNG images to ICO without difficulty. Some useful links are:
imagen.online-convert
convertio.co
convertimage.es
convertico.com
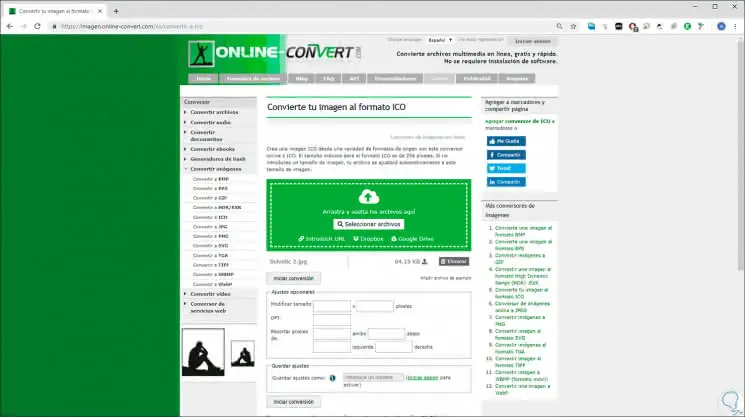
Usually in these sites, the first step is to directly upload or drag the JPG or PNG file there:
Step 2
In that site for example, we have some additional options of adjustments such as:
- Modify the original size.
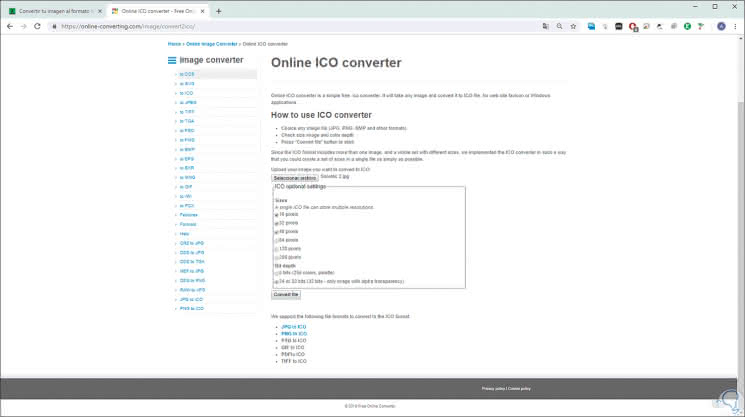
Other sites can change the configuration parameters of the file to be converted:
Step 3
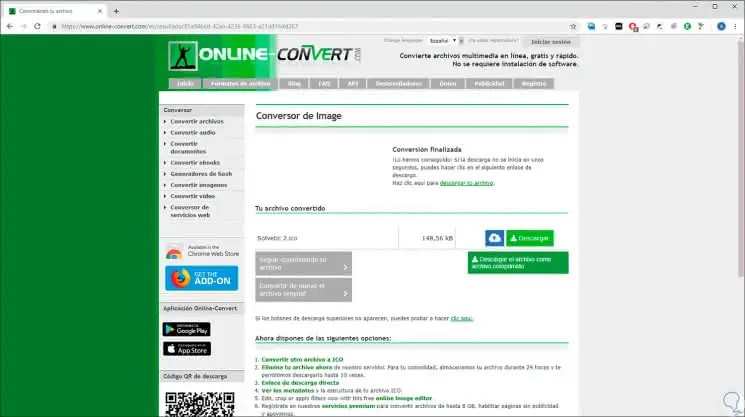
Once these parameters are defined, click on the "Start conversion" button and we will see that the selected file has been converted to .ico:
Step 4
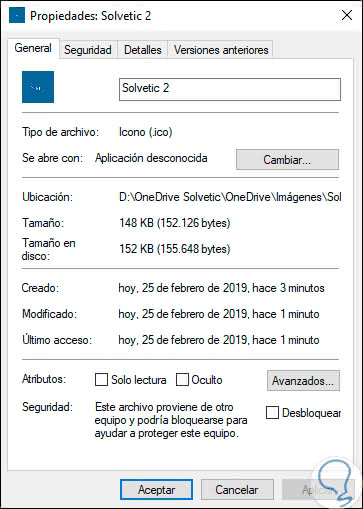
There will automatically be displayed a pop-up window where we select the path where this converted file should be saved, and when accessing its properties we verify that it is really a .ico file:
2. How to convert JPG or PNG files to ICO using an application
The other alternative is to directly download an application that allows us to perform this task even when we are not connected to the network. One of the most used is ConvertIcon Desktop, which can be downloaded at the following link:
ConvertIcon Desktop
It is a simple application thanks to which we can convert different types of image files into .ico files with following dimensions:
It is a portable utility, which we can run directly once it is downloaded.
Step 1
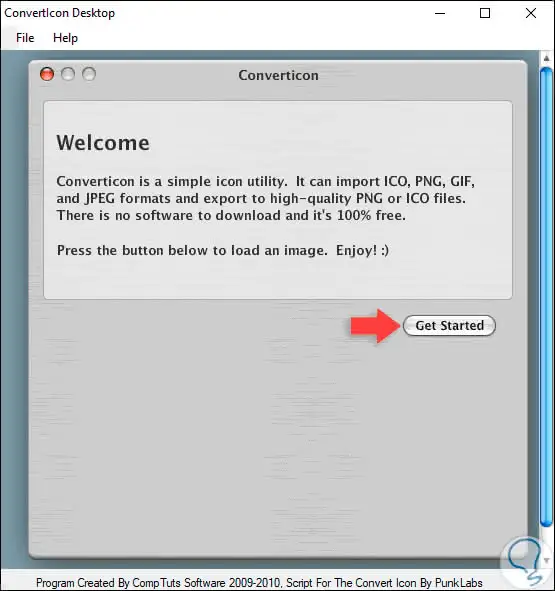
Once we have done it, the following will be displayed. There we click on the "Get Started" button.
Step 2
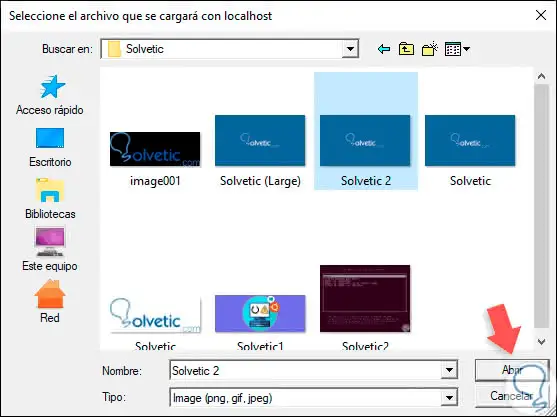
In the next window we will select the image JPG or PNG to convert. We select the image and click on "Open".
Step 3
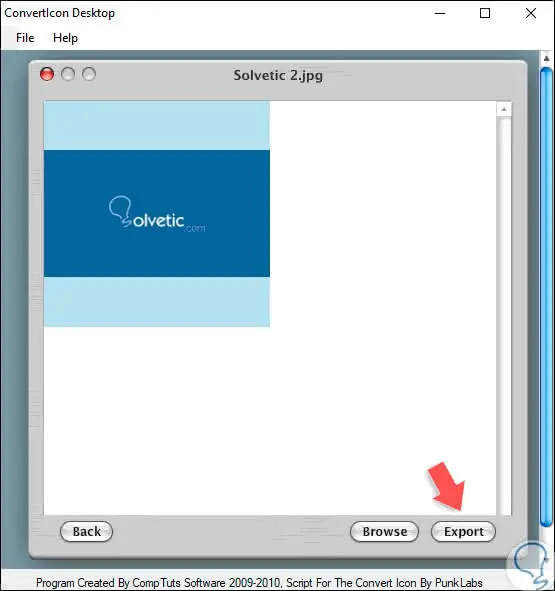
We will see the following. There we click on the "Export" button.
Step 4
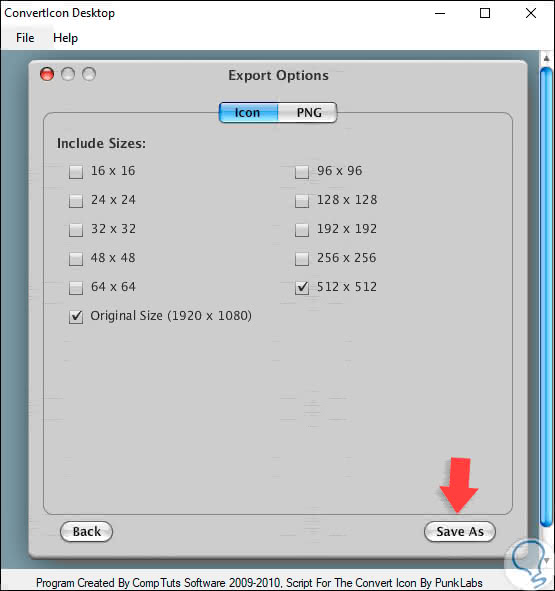
In the next window we activate the corresponding ICO tab and define the size in which we want the conversion:
Step 5
In the next window we will define the path and name for the ico file:
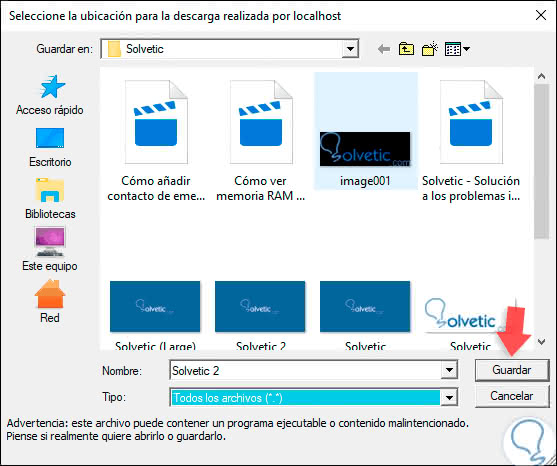
Step 6
After this, it will be possible to make use of this .ico image to establish it in folders or other elements of the operating system:

Thus, it will be possible to use these .ico files to define new ways to customize the Windows 10 system following the simple steps that we have explained.