Databases are a central axis in thousands of companies today, since they allow automated and centralized control of millions of data ranging from user IDs to daily sales, these databases can become exponentially increasing as the company rises. That is why it is key to have software that is available for this comprehensive growth and the key pillars of a database system are:
If any of these pillars is not fulfilled, our data housed in the database may be facing major failures. phpMyAdmin has been developed to help us have a comprehensive solution for all these types of situations, with TechnoWikis you will learn how to install phpMyAdmin Ubuntu 20.04 and have a robust platform to manage databases..
What is phpMyAdmin
phpMyAdmin is written in PHP and its main mission is to manage MySQL on the Web, MySQL is one of the most popular languages, but phpMyAdmin supports hundreds of operations that are executed in both MySQL and MariaDB.
PhpmyAdmin tasks
phpmyAdmin seeks to simplify to the maximum the traditional tasks of administrators since it allows them to be carried out directly from a simplified but dynamic interface, it will be possible to carry out tasks such as:
- Create, edit or delete tables and columns.
- Make use of relationships, indexes and more.
- Manage users and permissions.
Features phpmyAdmin
Currently phpMyAdmin is available in 72 languages and supports LTR and RTL languages, some of its main features are:
- MySQL user accounts and privileges can be managed
- It allows to export the information to different formats such as CSV, SQL, XML, PDF, ISO / IEC 26300 - OpenDocument Text and Spreadsheet, Word, LATEX
- Lets you import CSV and SQL data
- It allows us to manage multiple servers simultaneously
- Allows you to perform a global search in a database or in a subset of this database
We are going to see how to install phpMyAdmin in Ubuntu 20.04 and from there manage the databases ensuring the best solution for our organization. We will see different sections to know how to install Apache PHP MysQl and phpMyAdmin in Ubuntu 20.04.
1. Install Apache and MySQL on Ubuntu 20.04
Step 1
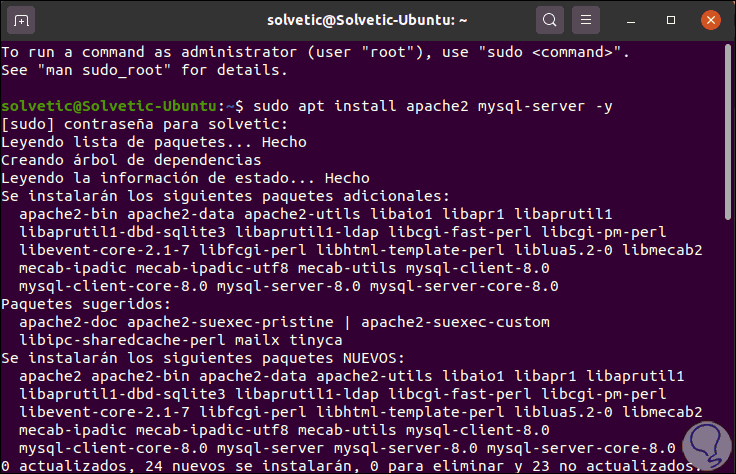
We must install Apache and MySQL in Ubuntu 20.04 in order to manage both the database and the website, to perform this installation we are going to run the following command:
sudo apt install apache2 mysql- server -y
Step 2
Once this process comes to an end we will see the following:
Step 3
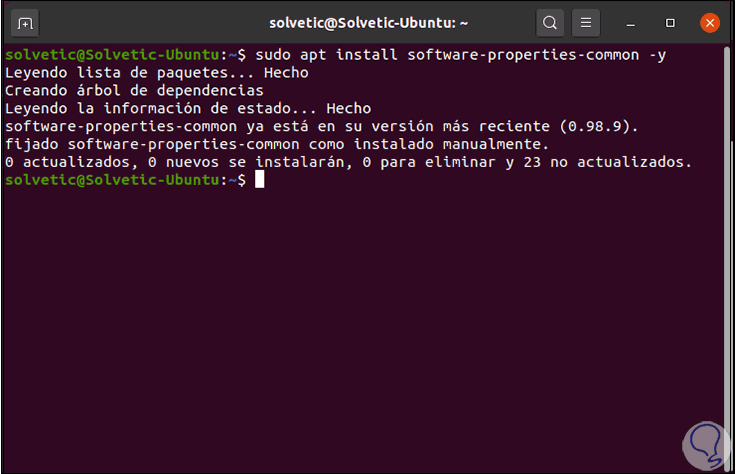
To install phpMyAdmin, we must resort to third-party repositories since by default phpMyAdmin is not available in the default Ubuntu repository, this repository must be added by executing the following:
sudo apt install software-properties-common -y
Step 4
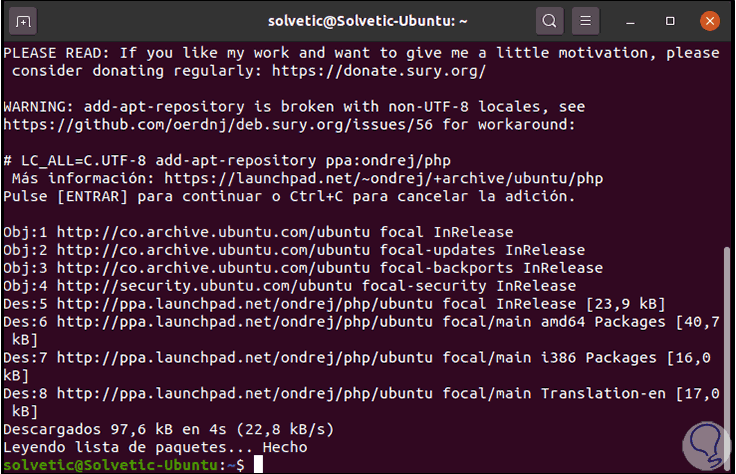
Now we add the repository with the following command:
sudo add -apt-repository ppa: ondrej / php
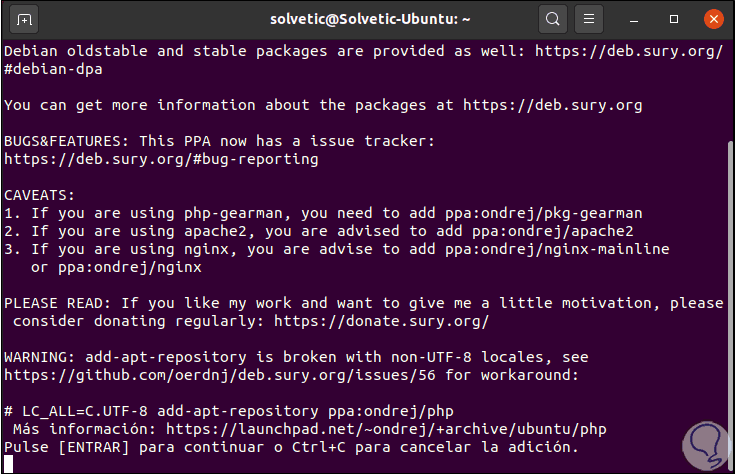
Step 5
Press the Enter key to add it:
Step 6
Once added, we can install phpMyAdmin with the following command:
sudo apt install phpmyadmin php-mbstring php-gettext -y
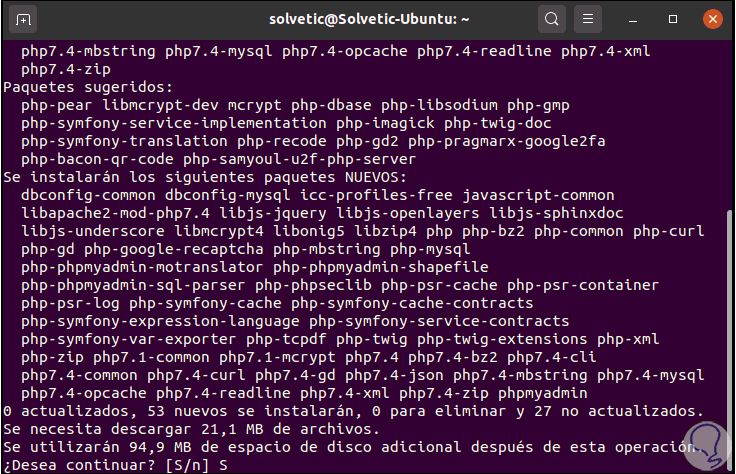
Step 7
We enter the letter "S" to confirm the download and installation of phpMyAdmin in Ubuntu 20.04 and during this process we will see the following message:
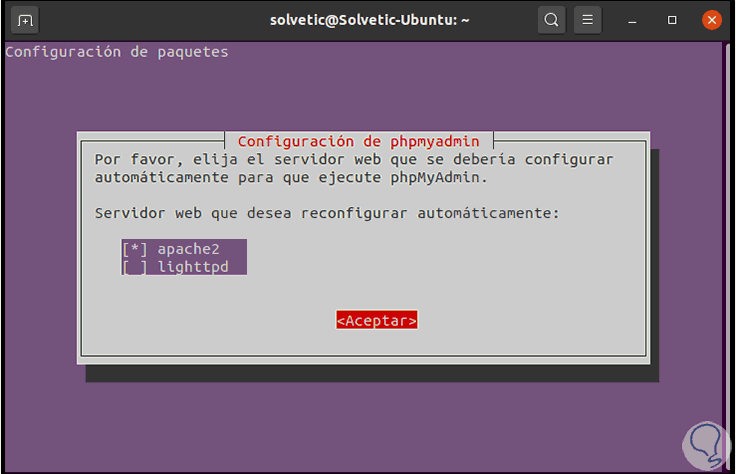
Step 8
Select Apache with the space bar and choose OK to continue the process, now we will see the following message related to the phpMyAdmin database:
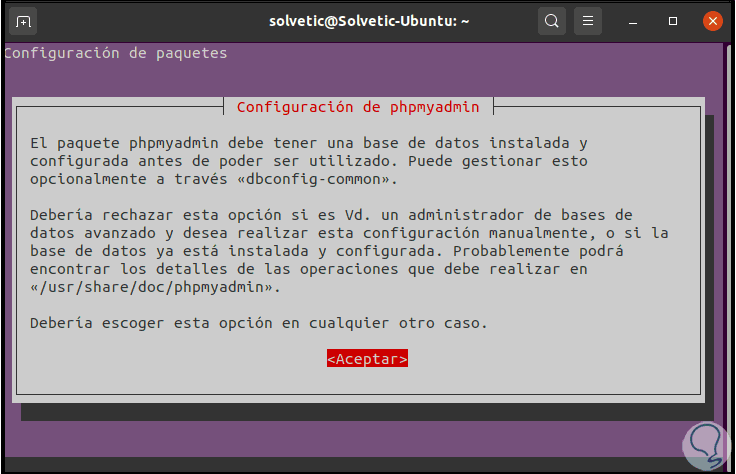
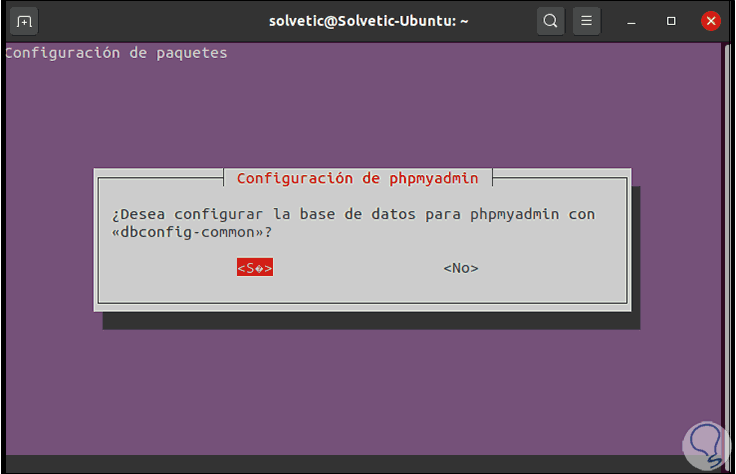
Step 9
We click OK and now we must confirm the selection:
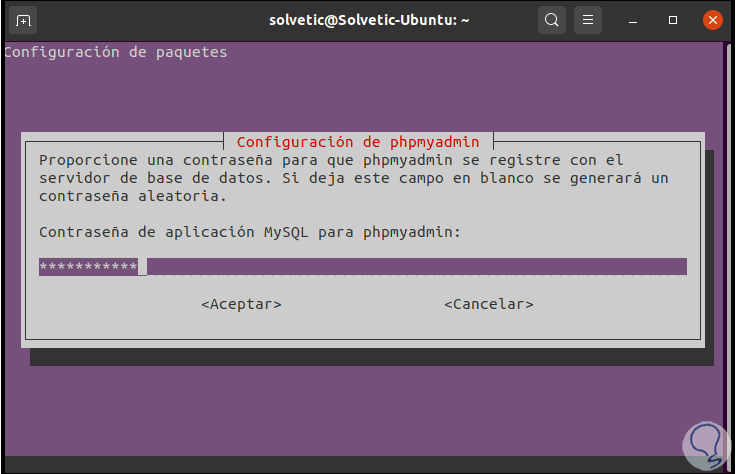
Step 10
Select "Yes" and define the password for phpMyAdmin:
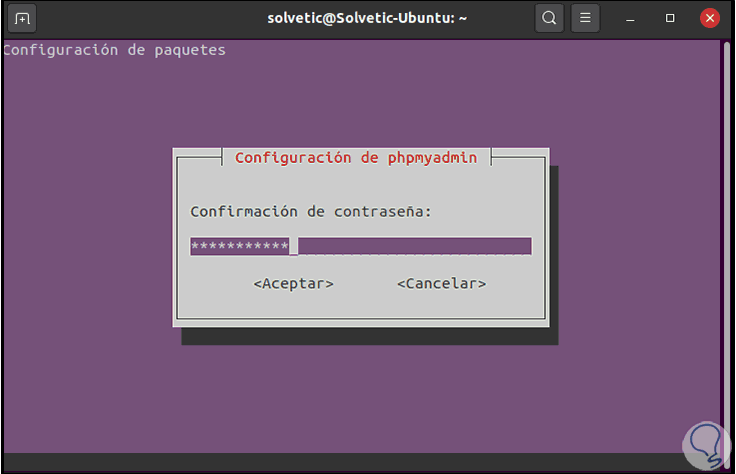
Step 11
We click Accept and we will confirm the password:
Step 12
After this the phpMyAdmin installation process will finish:

Step 13
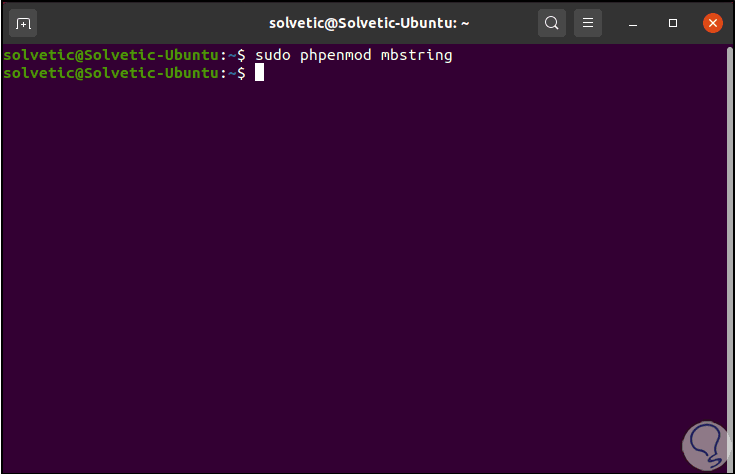
After this we are going to enable the PHP mbstring extension with the following command:
sudo phpenmod mbstring
Step 14
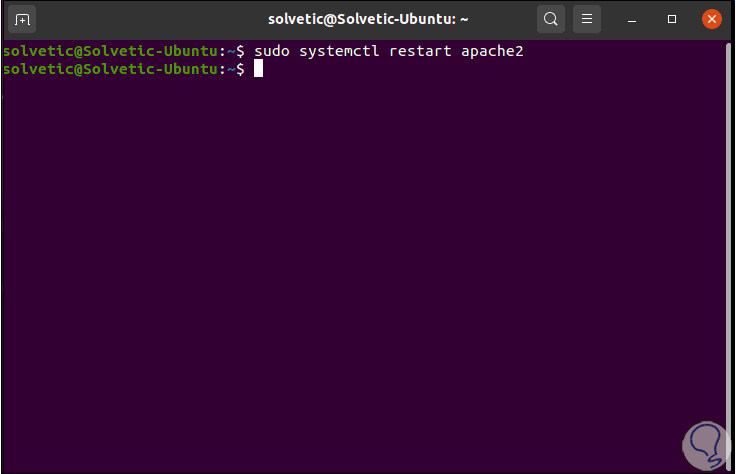
We proceed to restart Apache with the following command:
sudo systemctl restart apache2
2. Authenticate user phpMyAdmin in Ubuntu 20.04
By default, phpMyAdmin automatically creates a user who manages the database which is called phpmyadmin which has the administrative password entered in the installation process, for security reasons it is ideal to create a different user who is responsible for managing the databases through the phpMyAdmin web interface, as we have installed the MySQL platform, there the MySQL root user is configured to authenticate through the auth_socket plugin, the objective is to change the authentication method from auth_socket to mysql_native_password..
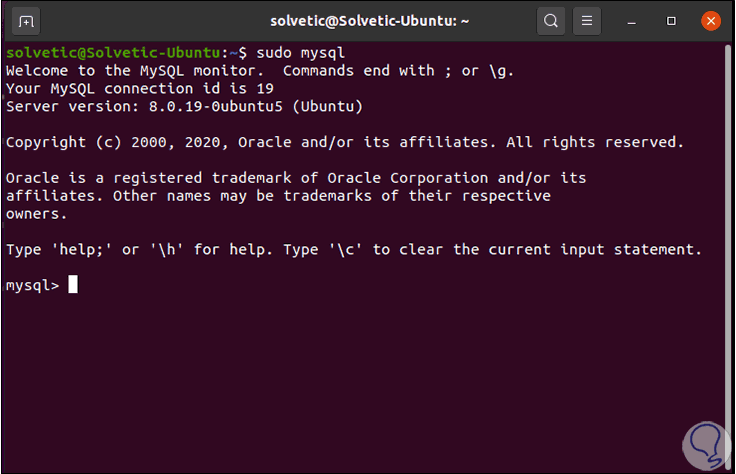
Step 1
To do this we log into the MySQL Shell with the following command:
sudo mysql
Step 2
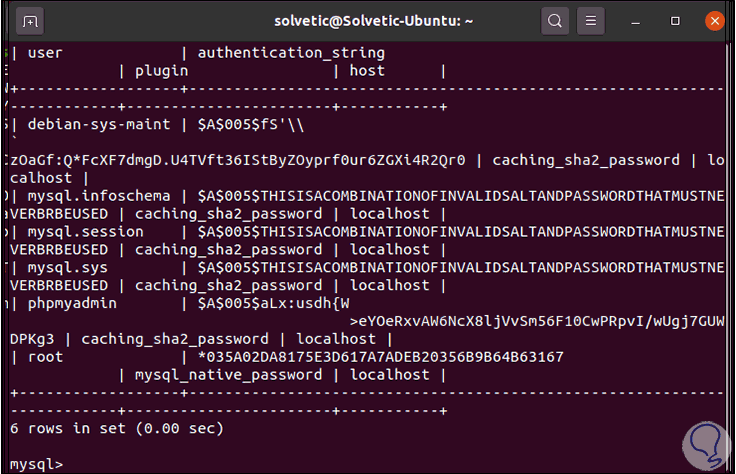
We verify the current MySQL user authentication method with the following command there in the Shell:
SELECT user , authentication_string, plugin , host FROM mysql.user;
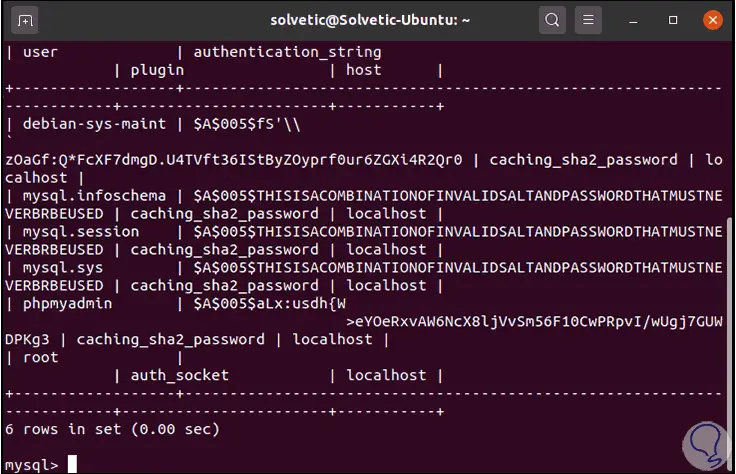
Step 3
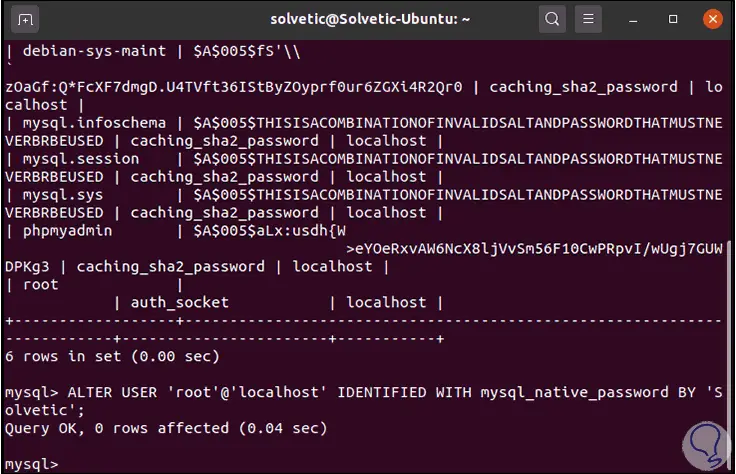
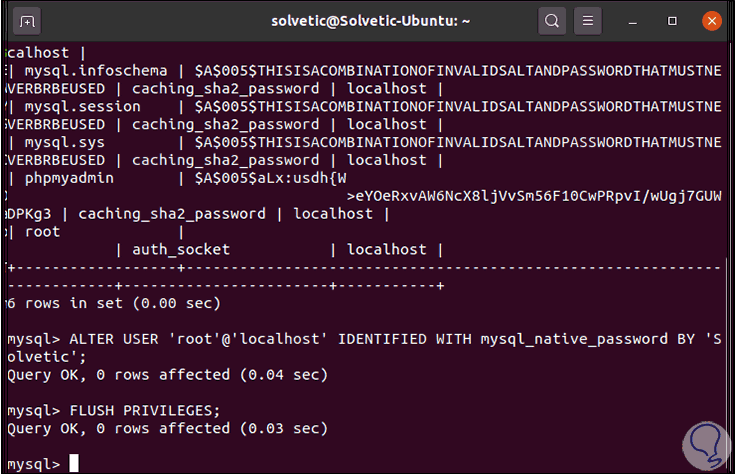
This result indicates that root uses the auth_socket plug-in for authentication, in order to authenticate with a password it will be necessary to enter the following line:
ALTER USER 'root' @ 'localhost' IDENTIFIED WITH mysql_native_password BY 'password' ;
Step 4
We apply the changes with the command:
FLUSH PRIVILEGES ;
Step 5
Now we check the change with the following command:
SELECT user , authentication_string, plugin , host FROM mysql.user;
Step 6
We can see that the authentication method is now "mysql_native_password".
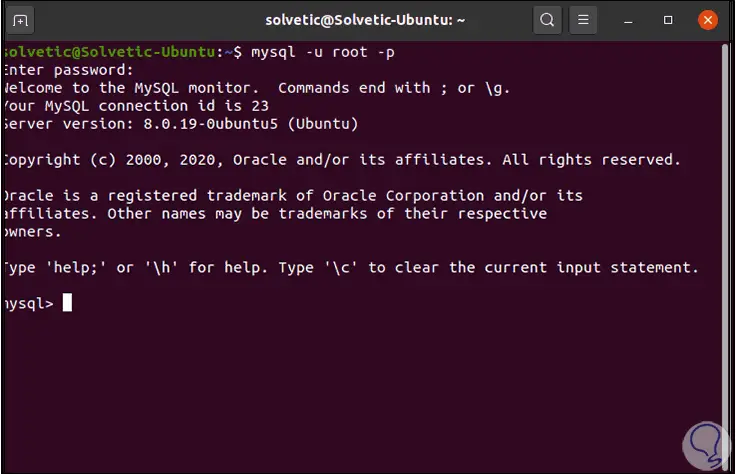
The next step to take will be to create a user "phpmyadminuser" for the connectivity process with phpMyAdmin, from the MySQL Shell we execute the following: to log in with the root user and the password that we have established:
mysql -u root -p
Step 7
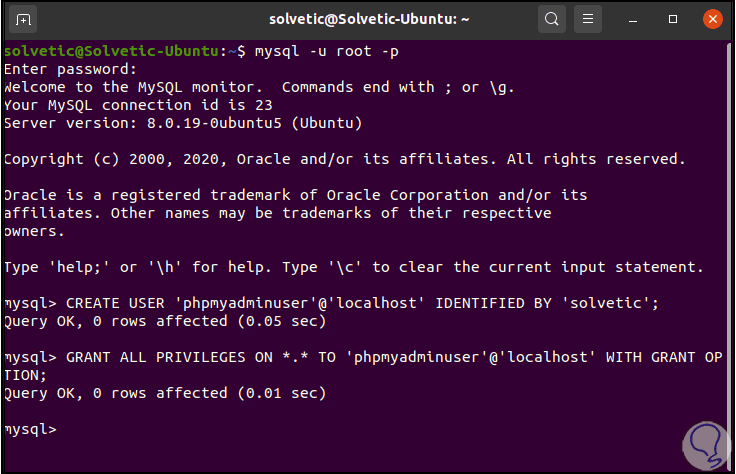
There we enter the following lines where the user is created with the password and the respective permissions are granted. We leave the Shell with the exit command;
CREATE USER 'phpmyadminuser' @ 'localhost' IDENTIFIED BY 'password' ; GRANT ALL PRIVILEGES ON *. * TO 'phpmyadminuser' @ 'localhost' WITH GRANT OPTION ;
3. Open phpMyAdmin in Ubuntu 20.04
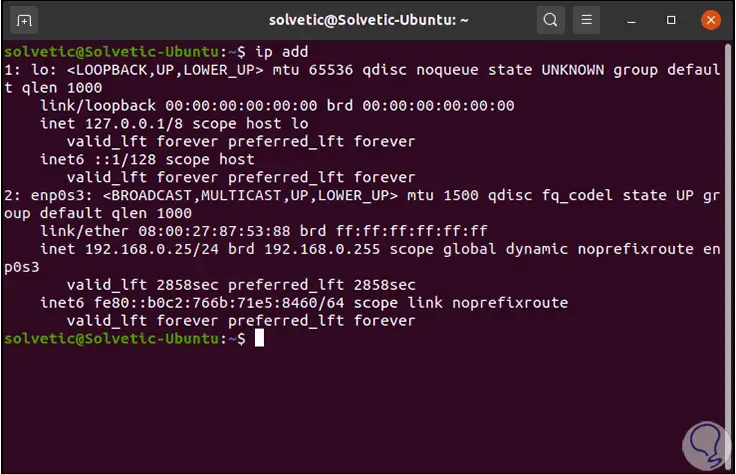
Step 1
For this we must know the IP address of Ubuntu 20.04, for this we execute the command "ip add":
Step 2
Now we go to a browser and enter the following:
http: // IP_address / phpmyadmin
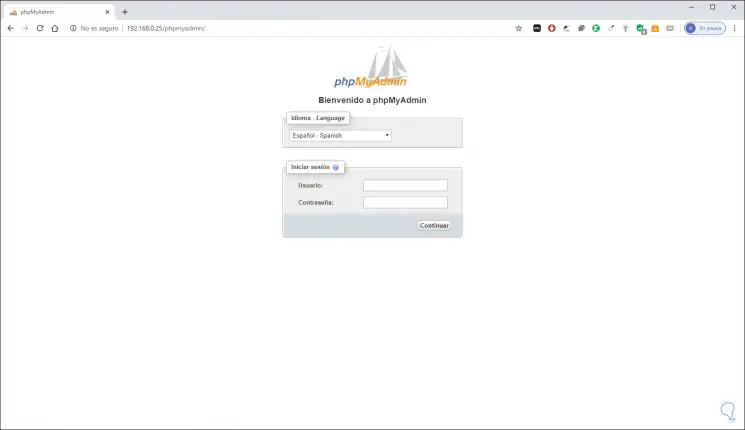
Step 3
We enter the username and password that we have created in the MySQL Shell:
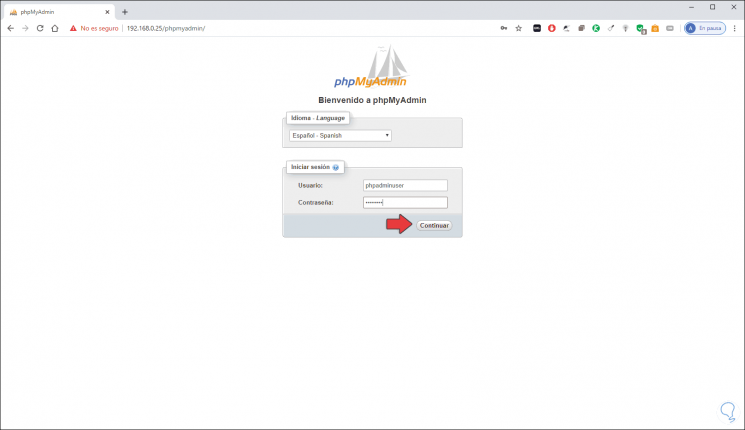
Step 4
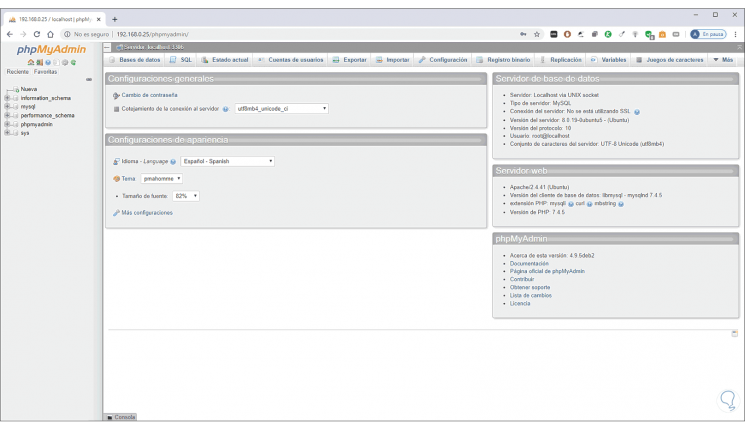
Or if we want we can enter with the root user and this will be the initial console of phpMyAdmin in Ubuntu 20.04:
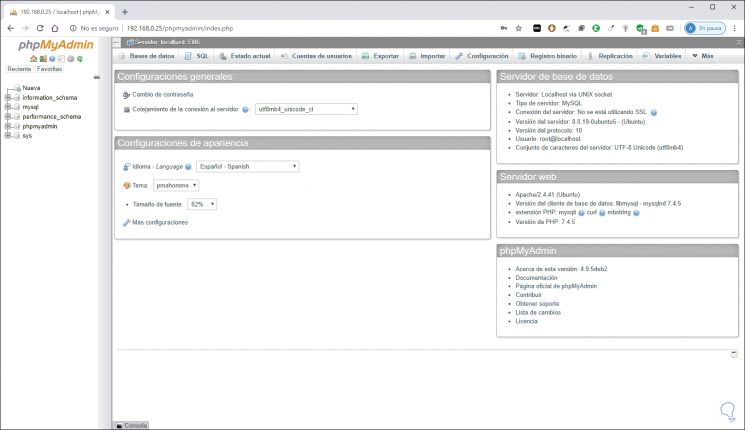
On the lateral side we find all the packages and languages installed with their respective version, on the central panel we configure general aspects and on the left lateral side we find the tools to work in the databases.
4. Configure phpMyAdmin security in Ubuntu 20.04
A key security step is to protect the instance of phpMyAdmin with the din that no unauthorized access is made, this is possible thanks to the authentication and authorization functions .htaccess integrated in Apache.
Step 1
We access the file with the following order:
sudo nano /etc/apache2/conf-available/phpmyadmin.conf
Step 2
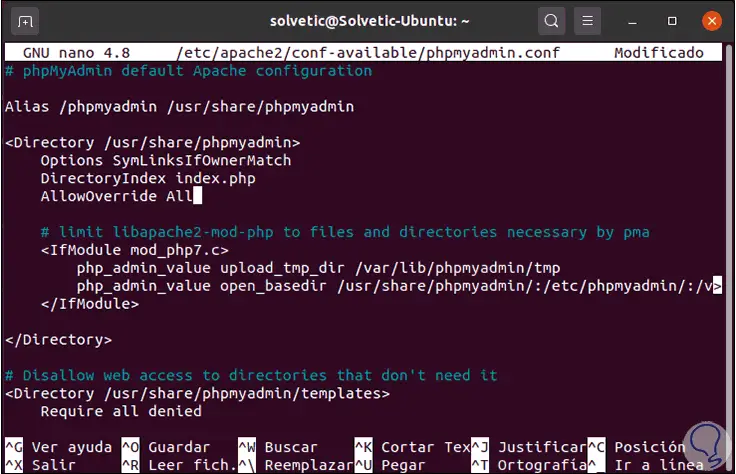
We will see the following:
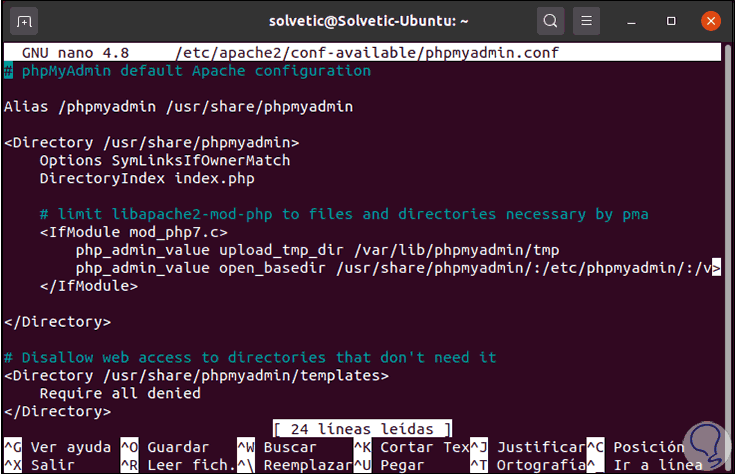
Step 3
There we are going to enable the use of .htaccess file overrides by adding the line “AllowOverride All” as follows:
< Directory / usr / share / phpmyadmin > Options SymLinksIfOwnerMatch DirectoryIndex index.php AllowOverride All
Step 4
We save the changes using the following key combination:
Ctrl + O
We exit the editor using:
Ctrl + X
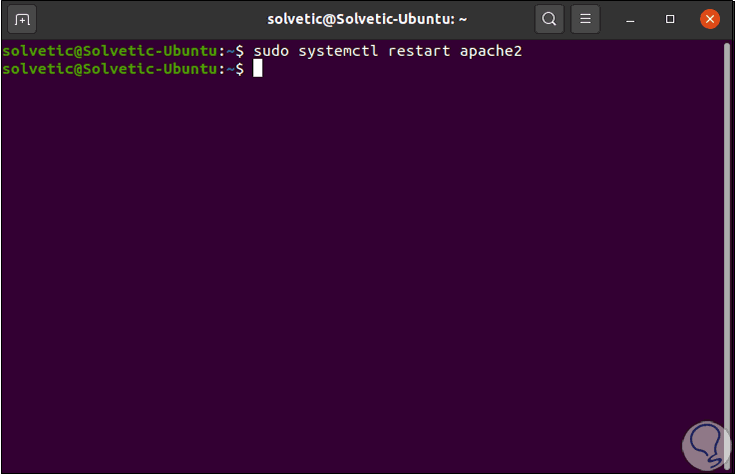
Step 5
We restart Apache:
sudo systemctl restart apache2
Step 6
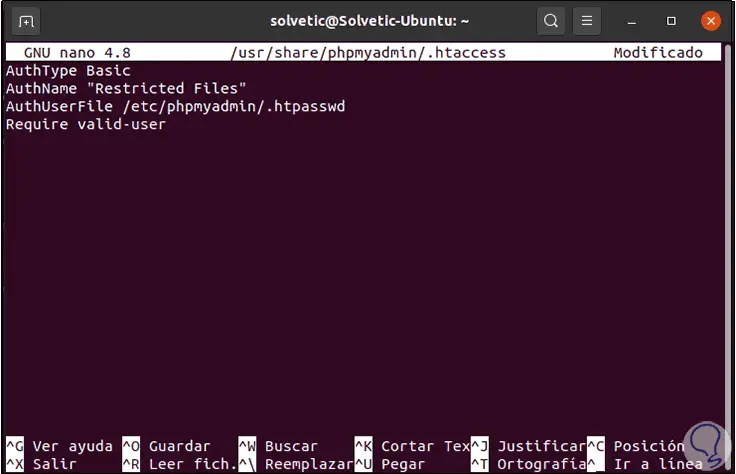
Now we are going to create a .htaccess file inside the phpmyadmin directory in the following way:
sudo nano /usr/share/phpmyadmin/ .htaccess
Step 7
There we will enter the following:
AuthType Basic AuthName "Restricted Files" AuthUserFile /etc/phpmyadmin/ .htpasswd Require valid-user
Step 8
We save the changes made, it is time to create an admin user with the htpasswd utility as follows:
sudo htpasswd -c /etc/phpmyadmin/ .htpasswd admin
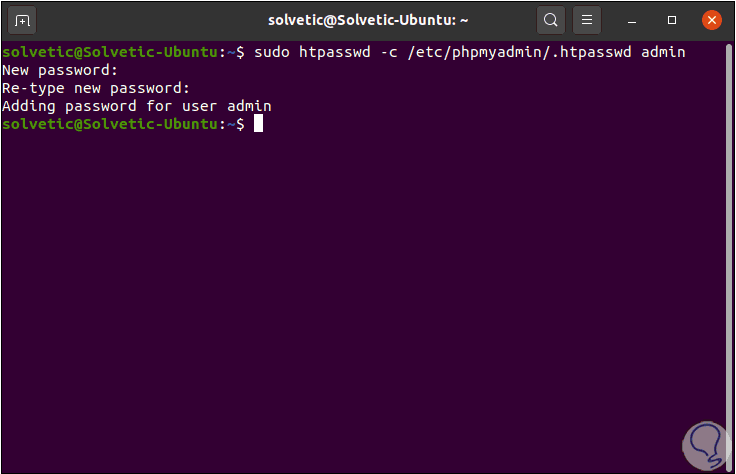
Step 9
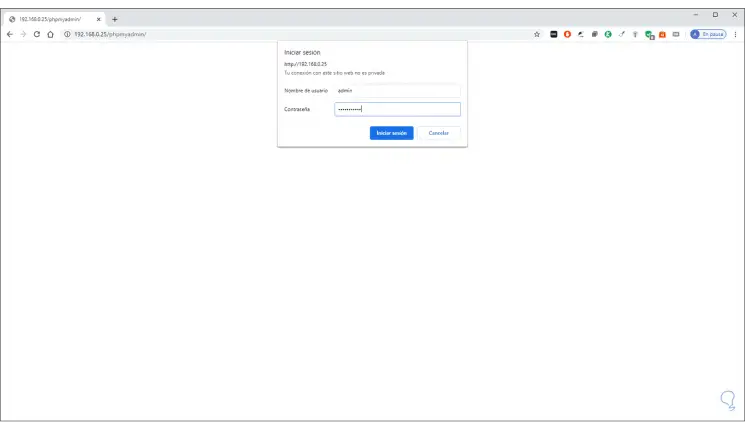
The objective is that when accessing phpMyAdmin from the browser, the following pop-up window is launched to enter the credentials:
Step 10
We click on "Login" to access phpMyAdmin:
Step 11
We will see the phpMyAdmin console like this:
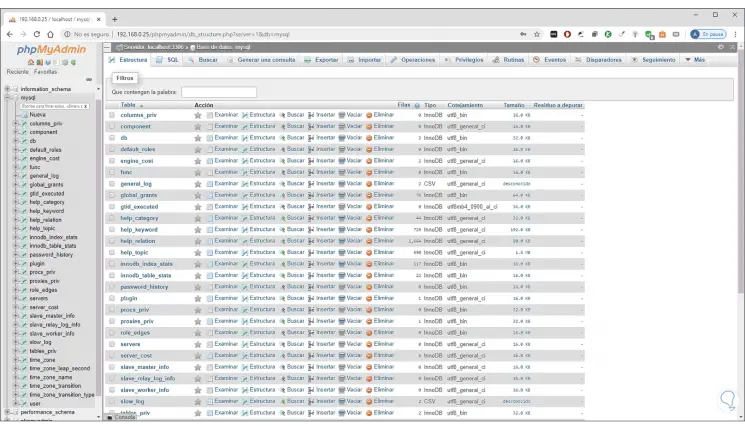
From this point we will be able to use all the phpMyAdmin options to manage MySQL in a much more interactive way and thus know how to install Apache PHP MysQl and phpMyAdmin in Ubuntu 20.04..