The versatility of Linux operating systems gives us the possibility of expanding the organization's capabilities to the fullest, with the possibility of installing thousands of free applications and services for the management and administration of all processes, users and system parameters. Within this world of possibilities, we have the LAMP compilation which gives us the opportunity to centrally manage databases, web services and many more services..
Through this tutorial we will learn how to install LAMP and phpMyAdmin in Ubuntu 18.04. In case of not having Ubuntu 18.04, we can install it from the following link:
What is LAMP?
LAMP (Linux, Apache, MySQL and PHP), is a set of free code software, which can be installed together in order to enable a server for hosting dynamic web sites and applications. Actually, LAMP is an acronym that represents a Linux operating system with an Apache server. Site data is stored in MySQL database and dynamic content is processed with PHP.
These descriptions are basically:
Linux
It is the operating system which constitutes the first layer of this structure. Linux lays the groundwork for the LAMP model.
Apache
Refers to a web server software, usually Apache Web Server. And its function is to translate from web browsers to the correct website.
MySQL
MySQL is responsible for storing details that can be consulted through scripts to carry out the construction of a website.
PHP
PHP is the programming language that will allow websites and web applications to run within Linux.
What is phpMyAdmin
phpMyAdmin has been developed as a free software tool, which has been written in PHP, and which aims to help manage the administration and management of MySQL through the Web. phpMyAdmin enjoys compatibility with a diverse set of operations in MySQL and MariaDB.
The most used operations such as administration of databases, tables, columns, and more can be carried out through the phpMyAdmin user interface, while it will still be possible to directly execute any SQL statement.
PhpMyAdmin features
- Support for most MySQL features
- You can export data to various formats such as CSV, SQL, XML, PDF, ISO / IEC 26300 - OpenDocument text and spreadsheet, Word, LATEX and others
- It is capable of managing multiple servers
- Creating graphics of a database design in various formats
- Create complex queries using Query-by-example (QBE)
- Global search in a database or a subset of it
Now we will see how to install these practical tools in Ubuntu 18.04..
1. Install Apache on Ubuntu 18.04
Step 1
The first step to take is to update all system packages and for this we execute the following command:
sudo apt update
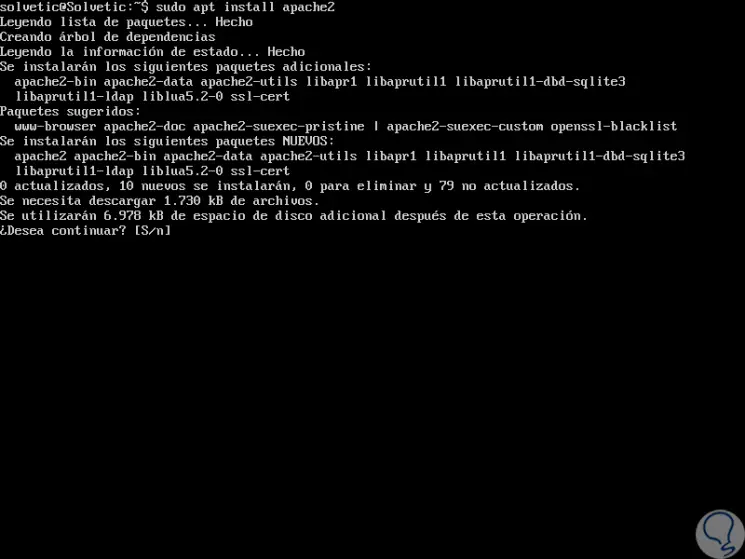
Step 2
Once updated, we proceed to install Apache by running the following line. Enter the letter S to confirm the download and installation of Apache.
sudo apt install apache2
Step 3
Once the Apache installation process is finished in Ubuntu 18.04, the Apache service should start automatically and will be enabled to be started at the time of the operating system startup. This can be verified, if it is active and working, using the following command:
sudo systemctl status apache2
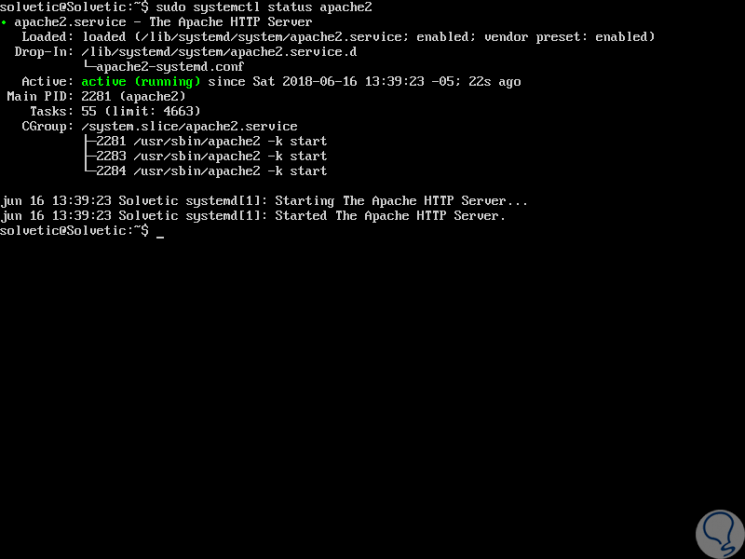
Step 4
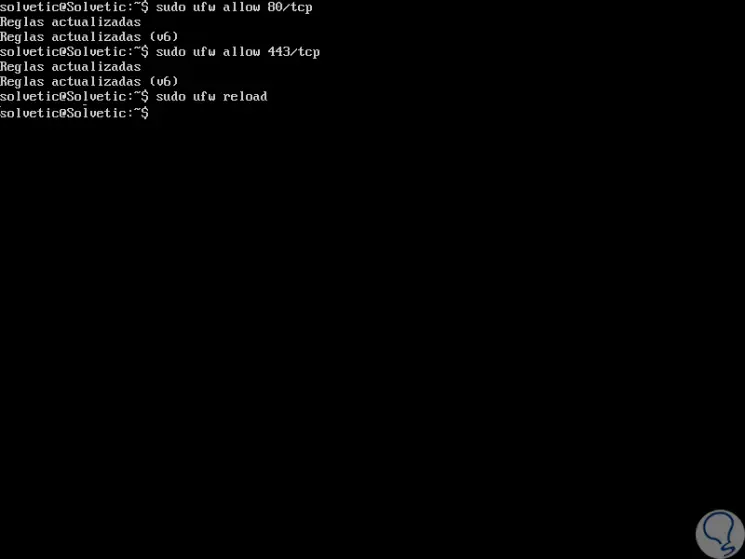
We can check that your status is active and running. Now, it will be necessary to configure the firewall to enable and open ports 80 and 443 in order to allow client connection requests to the Apache web server through HTTP and HTTPS respectively, for this we execute the following:
sudo ufw allow 80 / tcp sudo ufw allow 443 / tcp
Step 5
After this, we recharge the Apache service by running the following:
sudo ufw reload
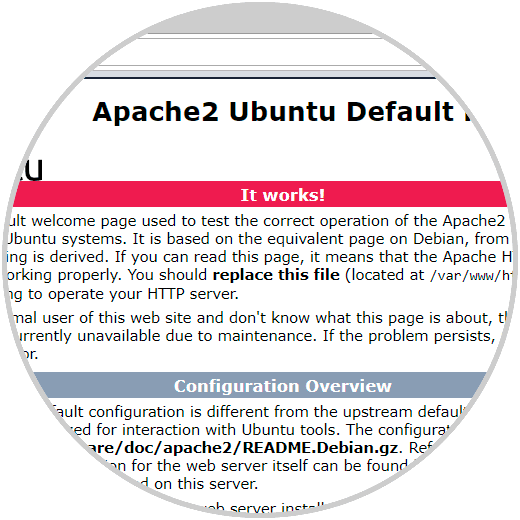
Step 6
After this, we must validate the IP address of our server using the "ifconfig" command and to verify that Apache works and has been installed correctly we will go to some browser and there we execute the following:
http: // domain_name / OR http: // server_IP /
2. Install MariaDB on Ubuntu 18.04
The next step is to install MariaDB which is a free open source database administration system with high performance.
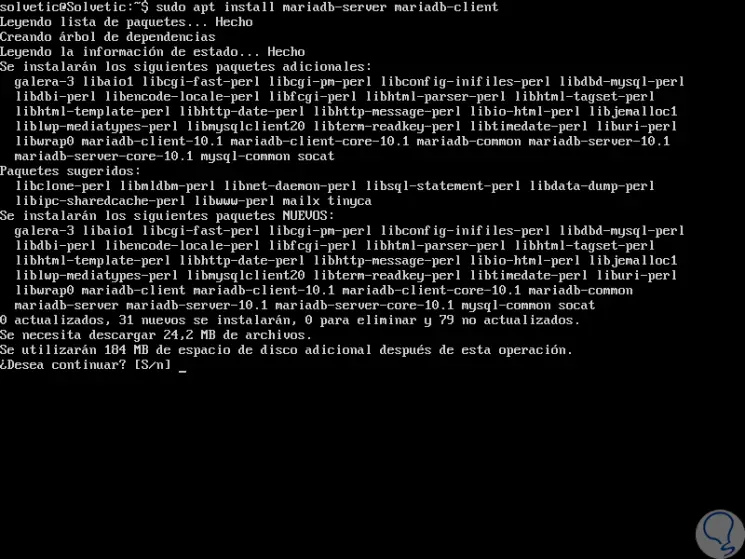
Step 1
For its installation we will execute the following. Enter the letter S to confirm the download and installation of MariaDB in Ubuntu 18.04.
sudo apt install mariadb-server mariadb-client
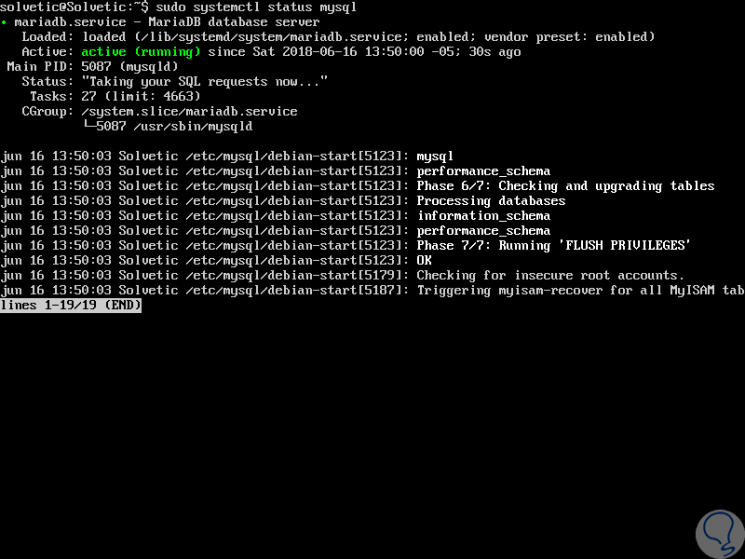
Step 2
MariaDB services must be started automatically after installation, to verify this status we will execute the following:
sudo systemctl status mysql
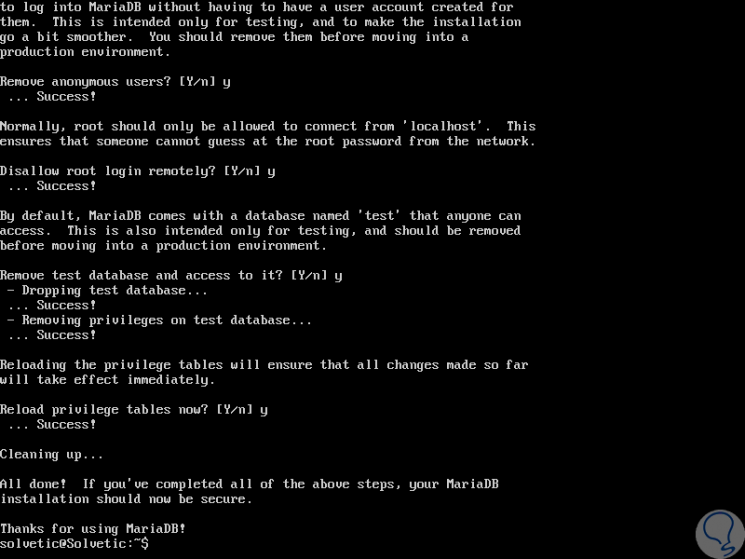
Step 3
By default the installation of MariaDB is not secure, to ensure it is necessary to run a security script that is included with the package. You will be asked to configure a root password so that no one else can log in to MariaDB. To ensure MariaDB we will execute the following:
sudo mysql_secure_installation
Step 4
The questions you answer, along with your answers, are:
Set root password? [Y / n]: and Remove anonymous users? (Press y | Y for Yes, any other key for No): y Disallow root login remotely? (Press y | Y for Yes, any other key for No): y Remove test database and access to it? (Press y | Y for Yes, any other key for No): y Reload privilege tables now? (Press y | Y for Yes, any other key for No): y
3. Install PHP on Ubuntu 18.04
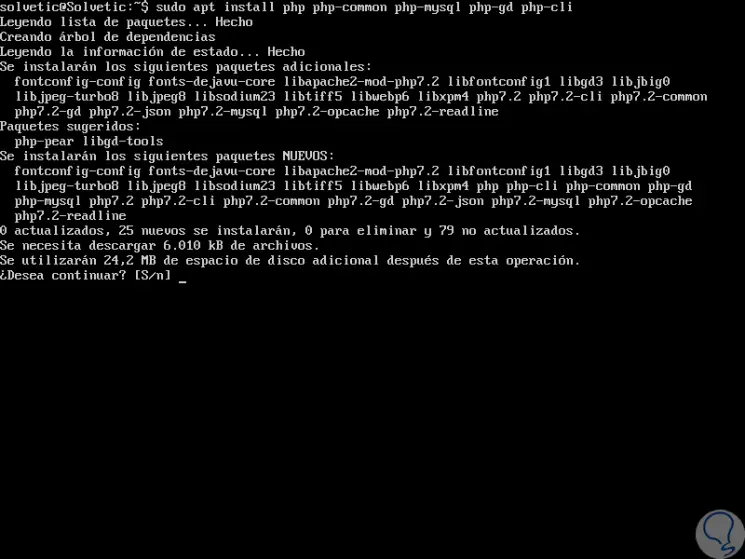
Step 1
Now, we are going to install PHP, whose default version is PHP 7, and other modules for web implementations using the following command. Enter the letter S to confirm the download and installation of PHP and its add-ons.
sudo apt install php php-common php-mysql php-gd php-cli
Step 2
Once PHP has been installed, it will be possible to test the PHP configuration by creating a simple info.php page in the web server document root, by executing the following command:
echo "<? php phpinfo ();?>" | sudo tee /var/www/html/info.php
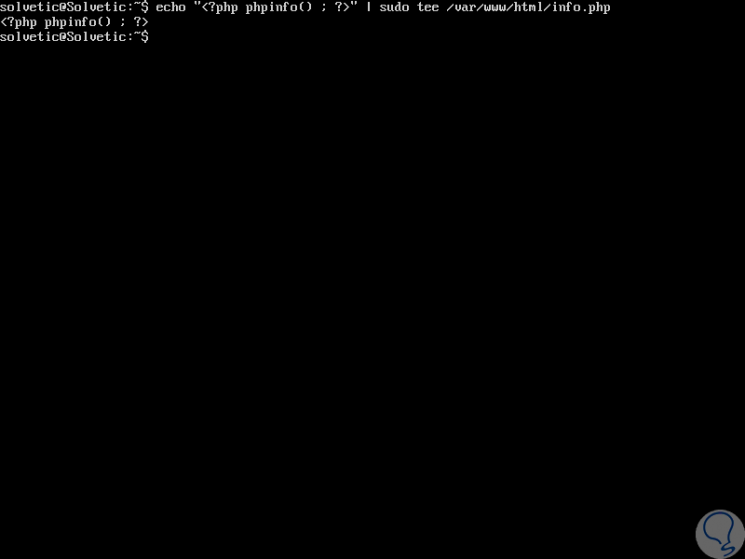
Step 3
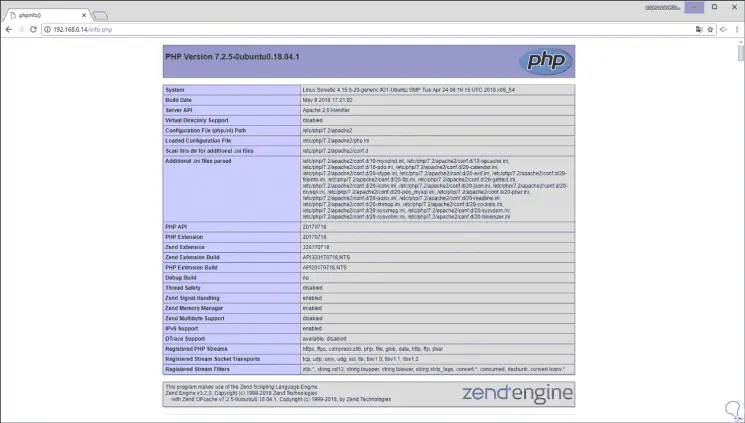
Now, we go back to some browser and execute one of the following lines:
http: //domain_name/info.php OR http: // server_IP / info.php
4. Install phpMyAdmin on Ubuntu 18.04
Step 1
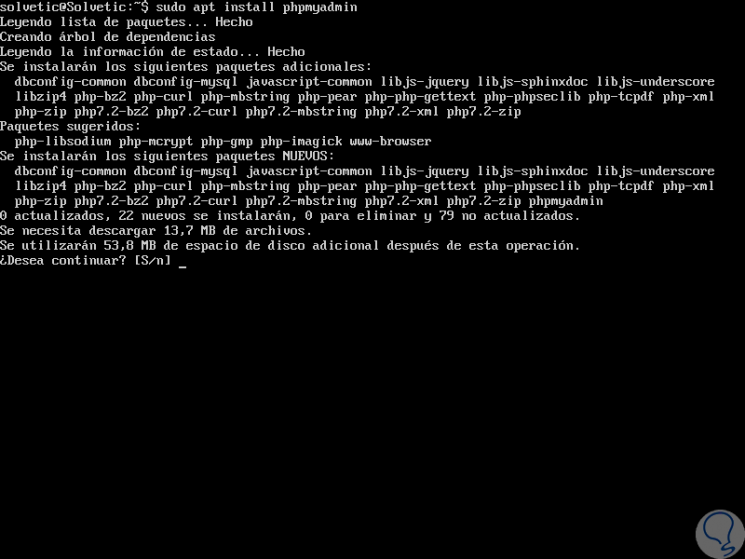
Now, we are going to install phpMyAdmin in order to manage MySQL / MariaDB databases from a web browser, for this we will execute the following command:
sudo apt install phpmyadmin
Step 2
Enter the letter S to confirm the download and during the installation process we will see a series of questions such as:
Choose the web server that should be automatically configured to run phpMyAdmin:
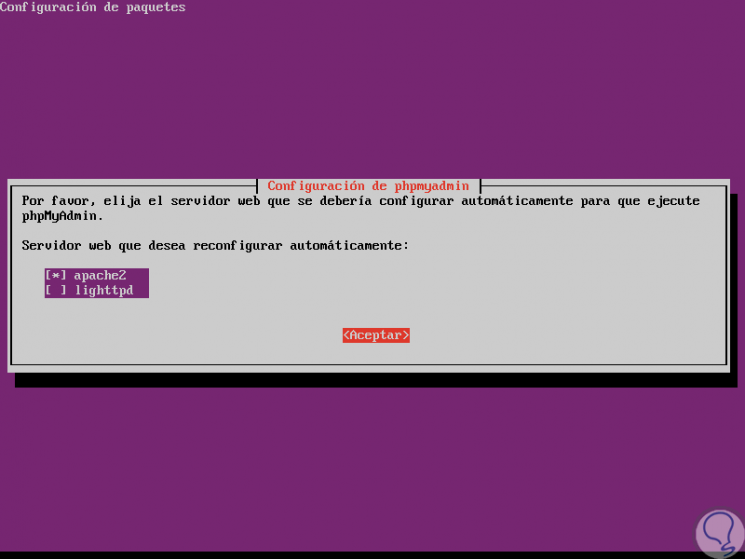
Step 3
Click Accept and then we will see the following:
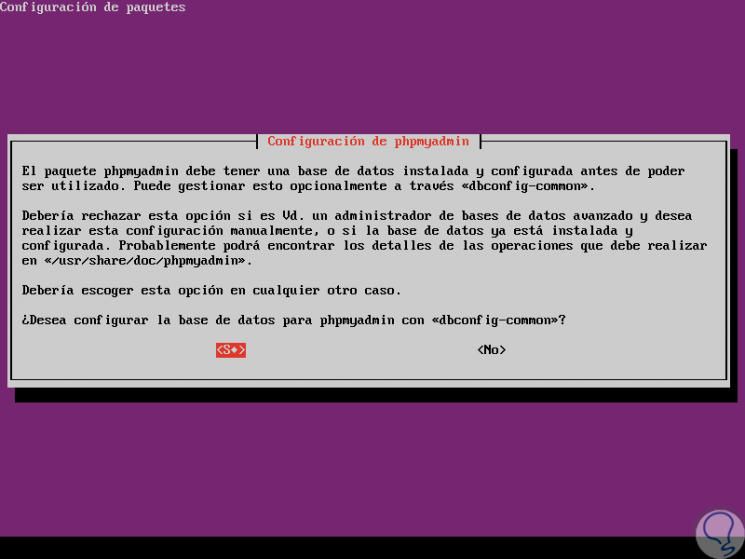
Step 4
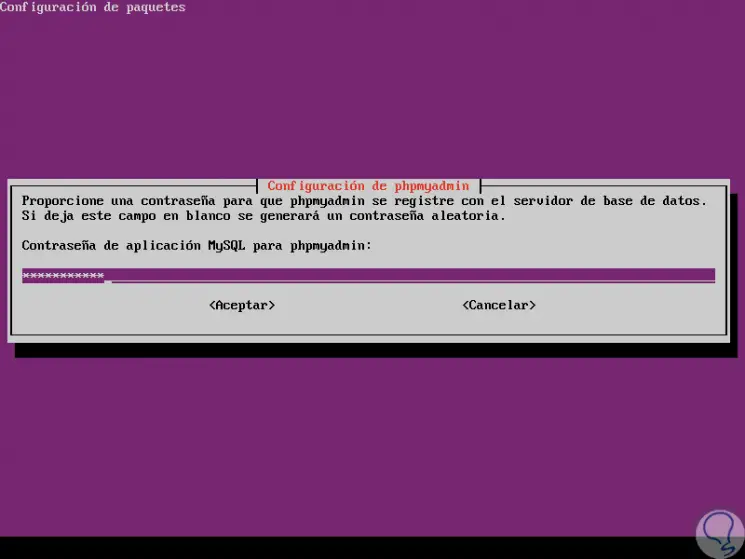
Select the option Yes and press Enter. Now we set the password for MySQL of phpMyAdmin:
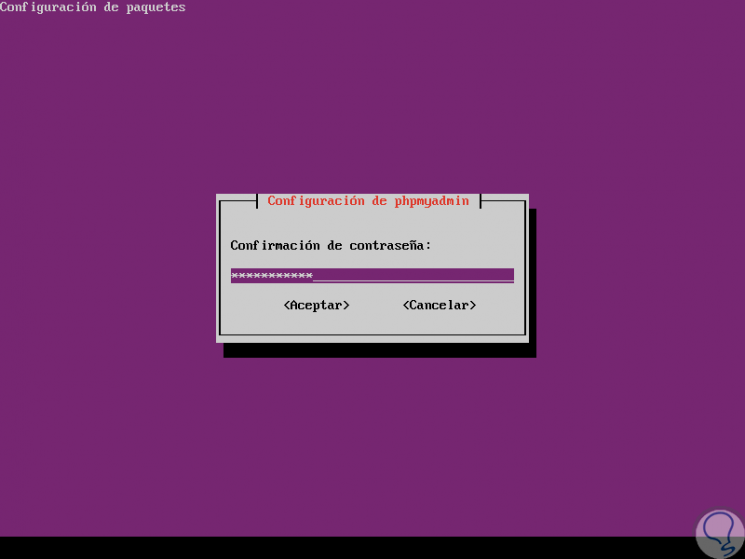
Step 5
We confirm the same:
Step 6
In this way we have installed phpMyAdmin in Ubuntu 18.04. Now we must restart the service by executing the following:
sudo systemctl restart apache2
Note
If the PhpMyAdmin package has not been enabled to work with the Apache web server automatically, it will be necessary to execute the following commands to copy the phpmyadmin apache configuration file located in / etc / phpmyadmin / to the available configurations directory of apache webserver / etc / apache2 / conf-available / and then activate it using the "a2enconf" utility, and restart the Apache service like this:
sudo cp /etc/phpmyadmin/apache.conf /etc/apache2/conf-available/phpmyadmin.conf sudo a2enconf phpmyadmin sudo systemctl restart apache2
Step 7
Once this is defined, we can access phpMyAdmin using one of the following options.
http: // domain_name / phpmyadmin OR http: // server_IP / phpmyadmin
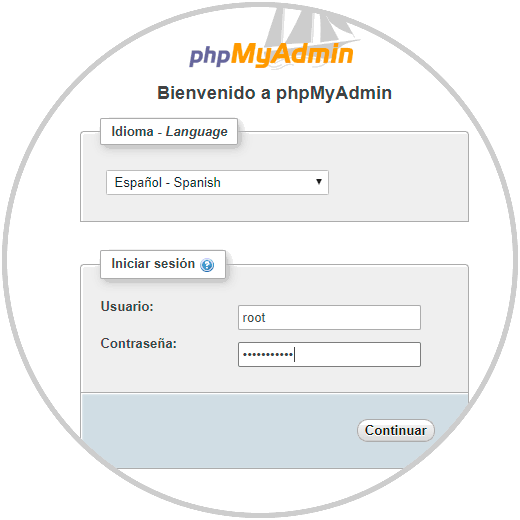
Step 8
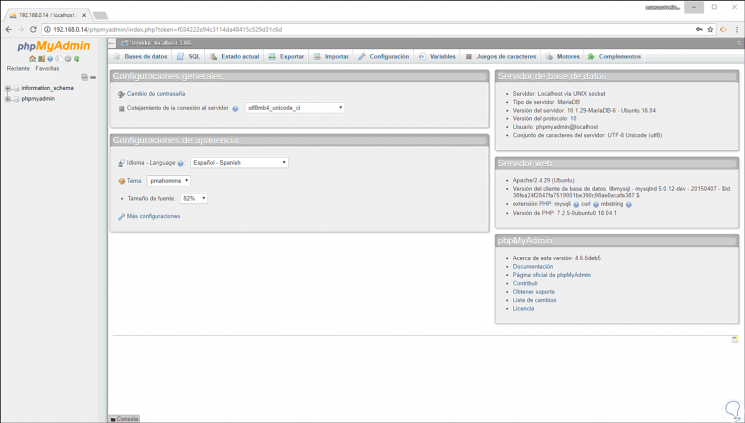
There we define the language to use and we will enter the root credentials for access. Click on Continue and in this way we will access the phpMyAdmin console to perform all the necessary steps:
Step 9
If we want to create a new user to access phpMyAdmin we will execute the following line:
sudo mysql -u root -p
Step 10
We enter our password and now we must execute each line in its order as well. Thus we have created a user called "admin".
CREATE USER 'admin' @ 'localhost' IDENTIFIED BY 'Password'; GRANT ALL PRIVILEGES ON *. * TO 'admin' @ 'localhost' WITH GRANT OPTION; FLUSH PRIVILEGES; Exit;
As we see, LAMP and phpMyAdmin is a useful and simple alternative, worse powerful, to manage both databases and web servers in a totally dynamic way, with great features and with simplicity.