Installing the WServer Backup tool
To be able to make backups we need a tool, in this tutorial you are taught to do it with the one that comes with the included Windows Server system.
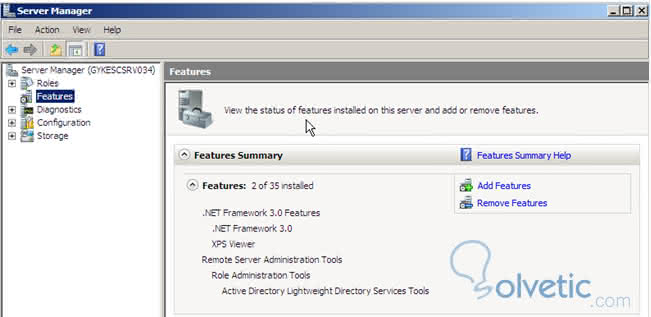
Previously we will have to install the "WINDOWS SERVER BACKUP" tool . For this we turn to our large usable "SERVER MANAGER". Here we will give "FEATURES"; in the central screen we can see "ADD FEATURES" . We give to this action.
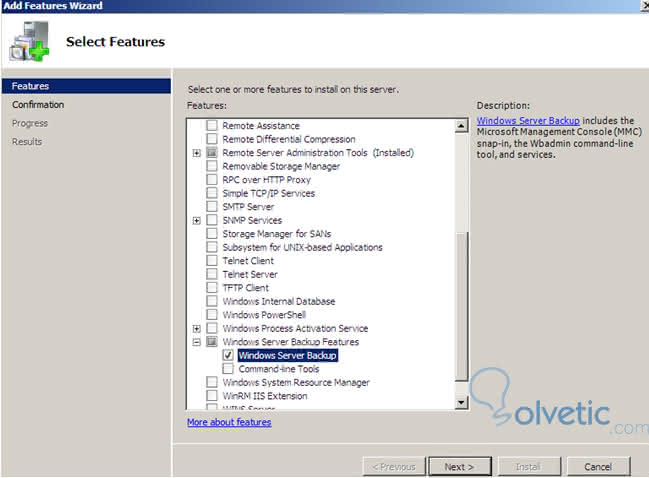
In this screen we will see all the possible options; in this case we select "Windows Server Backup" and we will give it "NEXT". The installation of our tool will begin.
Once we have finished our installation of the "Windows Server Backup" Tool , we will continue with the "Backup" configuration process .
Perform Windows Server 2008 backup
Let's write "BACKUP" in the search box of the Start menu to open the backup function of Windows Server (which of course must be installed on the server before you can use it) : Next, the Windows Server Backup Manager will open:
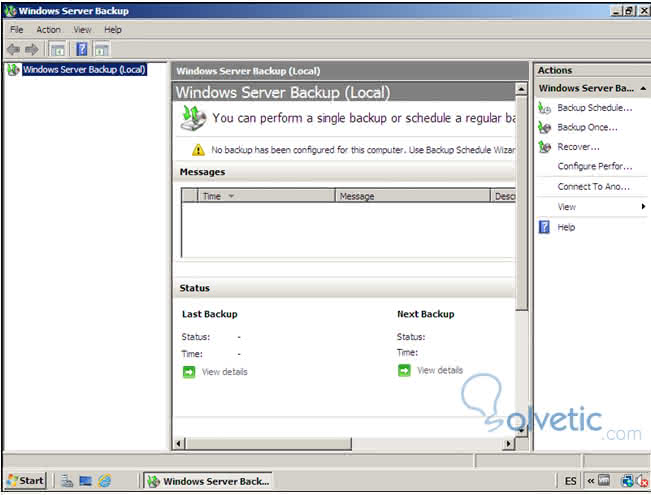
When the Windows Server backup window opens, click "BACKUP ONCE ...".
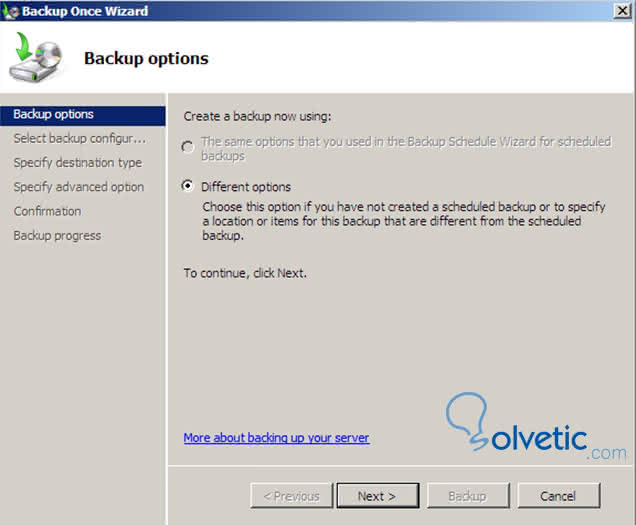
On the Backup Options page of the wizard, make sure that "DIFFERENT OPTIONS" is selected , and we will give "NEXT".
- On the next page select backup settings, select "CUSTOM". We will give you "NEXT" .
- On the page select items for backup of the page, click on the "ADD ART" button, we will give you "NEXT".
- In the select elements dialog box, select the "ENABLE SYSTEMS RECOVERY" check box . By doing this, all other check boxes will be automatically selected. We will give you "NEXT".
- On the destination type page we must specify, select "REMOTE SHARED FOLDER".
- On the Specify Remote Folder page, type the UNC path to the shared folder on the "network" where you will store the data from your backups (backup copies). The path that we specify in this case is "solveticBackups" and leave the rest of the options of the page in their default values.
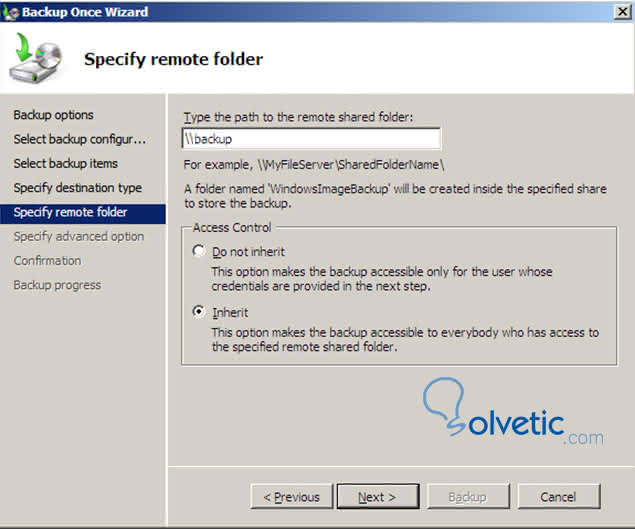
- We will request credentials, we specify the credentials to access the shared folder on the host computer that we had previously selected.
- After reviewing the confirmation page below, we will click "START" the server backup. The Operating System will begin to roll back.
- After your Backup is finished, we go to the unit assigned in the Explorer to verify the backup file is there. Once the file is verified, our backup copy is ready for possible restoration in the event of catastrophes.
- In this case we explain how to make the backup in a network folder, and not local, I always recommend using another backup server . This tool I have used in a critical opportunity, before a rupture of the Rigid disk boot, where the Windows 2008 Server was housed.
We recommend you also see the Tutorial: Restoring the Backup in Windows Server 2008