Introduction
The role of the DHCP service in Windows 2008 Server is to dynamically assign IP addresses to client computers that request addresses. The DHCP function is easily added with the Server Administrator application.
Installation
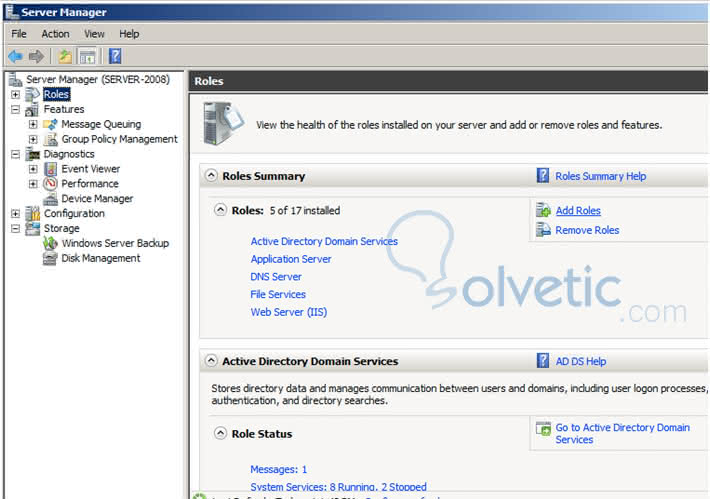
We will go to our Server Administration tool. Once opened, click on the button to add functions. 
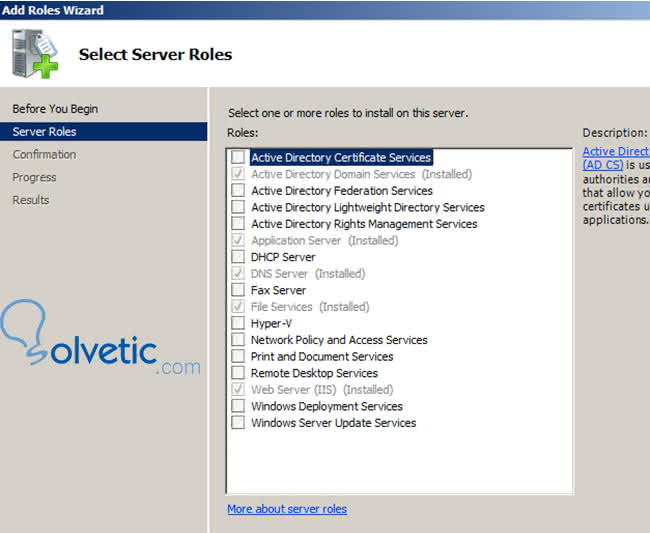
On the Select Server Features screen, search for DHCP server and then check the box for it, which will allow you to click on the "NEXT" button . On the DHCP Server screen, click "NEXT".

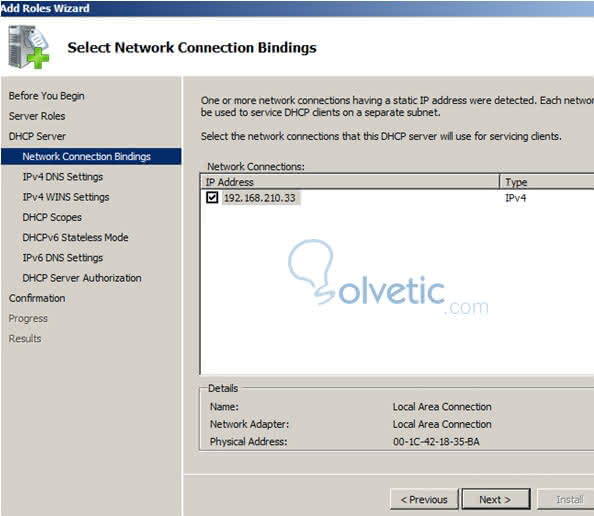
On the network connection links screen, check the box for each network interface that will be available to DHCP to host DHCP scopes. Click on "NEXT".

On the next Specify IPv4 screen of the " DNS Settings" server, specify the name of the search domain that will be assigned in the "Parent domain" field.
Next, provide the IP address of the first DNS server that is provided to the clients in the " Preferred DNS" field of the IPv4 address server, click on "NEXT" , once you have provided the appropriate DNS information.
If you are using WINS servers, click " WINS" is needed for the applications of this network and click on the "NEXT" button .
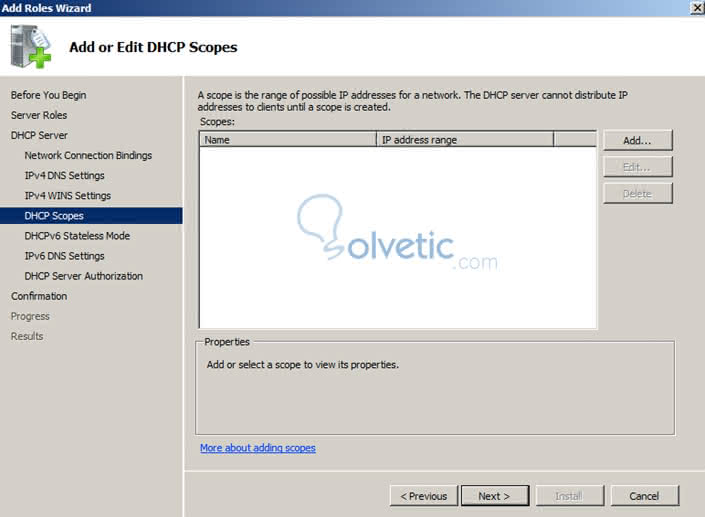
On the Add Scopes screen, click on the "ADD" button. To provide the first DHCP scope for the environment.

On the Add Scope screen, enter the following information:
- Scope Name : A descriptive name for the DHCP scope (for example RQUAGLIANO)
- Starting IP Address : The first IP address in the scope of the addresses provided
- Ending IP Address : The last IP address in the scope of the addresses provided.
- Subnet Type : Select a type of scope that is being created.
- Activate this Scope: Check this box so that the scope of application available immediately
- Subnet Mask: The subnet mask used by clients in the scope
- Default Gateway : The router for the scope that is being created
Once it is configured as we wish, click on "ACCEPT". Next, select if DHCP will be provided for IPv6 and click "NEXT".
If IPv6 is supported, enter the address of a DNS service based on IPv6. Click on "NEXT".
Next, integrate DHCP with Active Directory (to disable, use the "Skip authorization from this DHCP server in AD DS"), either allowing the service to use the credentials of the current user or with the Specify button to provide a different user account. Then give it "NEXT".
In the detail screen of the summary, it will show us the configuration which we were choosing and then click on the "NEXT" function . Then the installation corresponding to the service will begin.
In a few minutes we will have started our DHCP service. Then we can add several scopes. In another tutorial we will learn how to administer this service.