Ubuntu releases with some frequency new editions of its operating systems (Desktop and Server) seeking to update many of the integrated applications or to renew some of them. This is the case of the new Ubuntu 20.10 edition "Groovy Gorilla" which will officially be released in October 2020 but we can already enjoy its different novelties..
Ubuntu 20.10 will have support until July 2021 initially, but it will undoubtedly be extended before it is officially released.
characteristics
Among its characteristics we find:
- Updates in Python, Ruby, Perl and PHP packages
- New security enhancements
- Updates in Firefox, LibreOffice and Thunderbird
- PulseAudio, BlueZ, NetworkManager and more subsystems have been updated
- Support for Cloud Images, Raspberry Pi and s390x
- Option to download dedicated ISO images shared through Canonical as well as Microsoft Store for WSL installation when it is officially released
Other features will be implemented by the development team as the days go by before its official release..
Ubuntu 20.10 can be downloaded at the following official link:
Ubuntu 20.10
Important note
Ubuntu 20.10 is in the testing phase, so TechnoWikis does not recommend implementing it in a productive environment, as it will be sensitive to failures. This is done with the aim of getting to know the system a little before its official launch.
How to install Ubuntu 20.10
Step 1
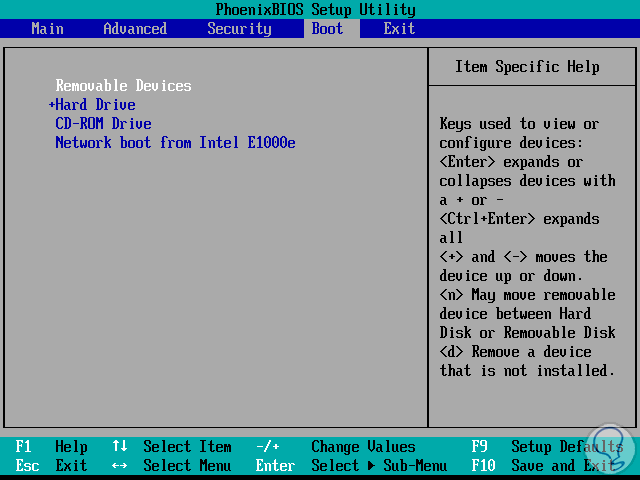
Once the ISO image is downloaded, we must burn it to a bootable DVD or USB, after which configure the boot of the computer in the BIOS from any of these options (USB or DVD):
Step 2
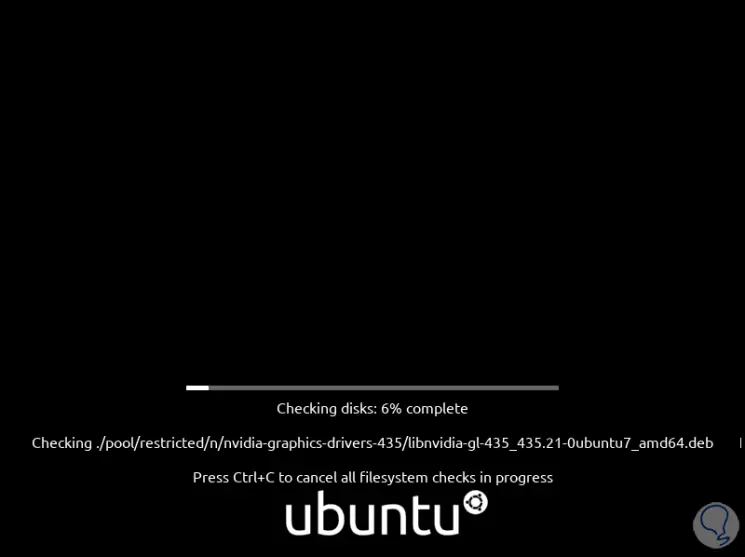
Once the system starts with the selected boot medium, we find the first novelty which is the automatic analysis of the disk in search of errors:
Step 3
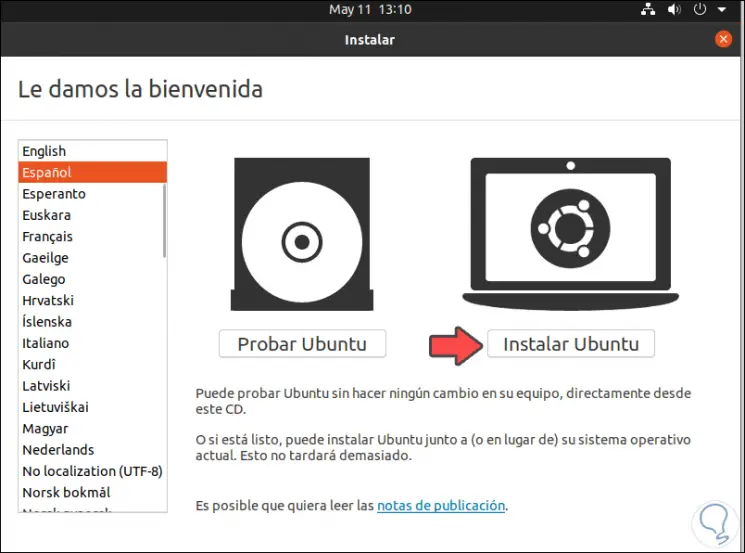
If everything is normal, we access the following window where we define whether to try Ubuntu 20.10 or install locally on the disk. The difference is that the option to test allows us to access all the functions, but when you log off or turn off the computer, everything will be lost.
Step 4
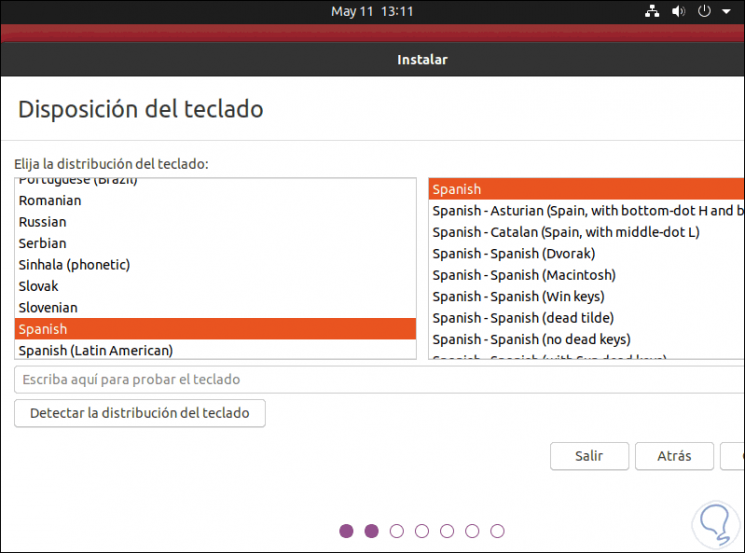
In this case we click on “Install Ubuntu” and then define the keyboard language to use:
Step 5
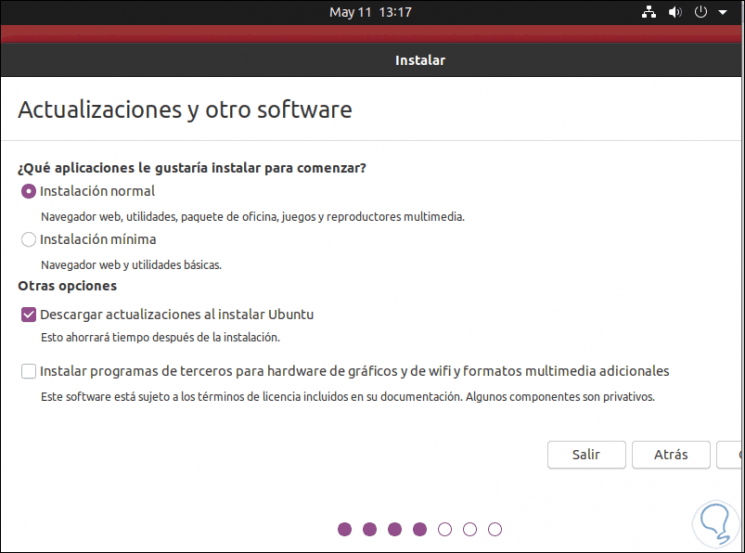
In the following window we define the type of installation to use, it can be normal or minimal, as well as the possibility of downloading the available updates during this process:
Step 6
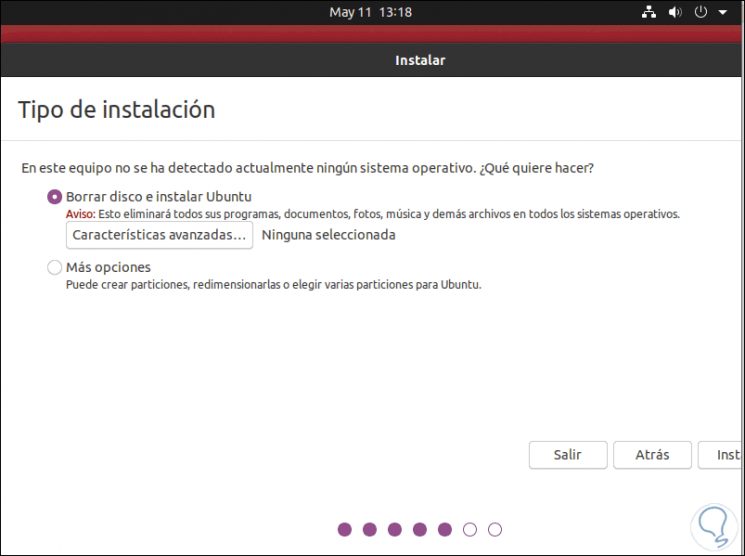
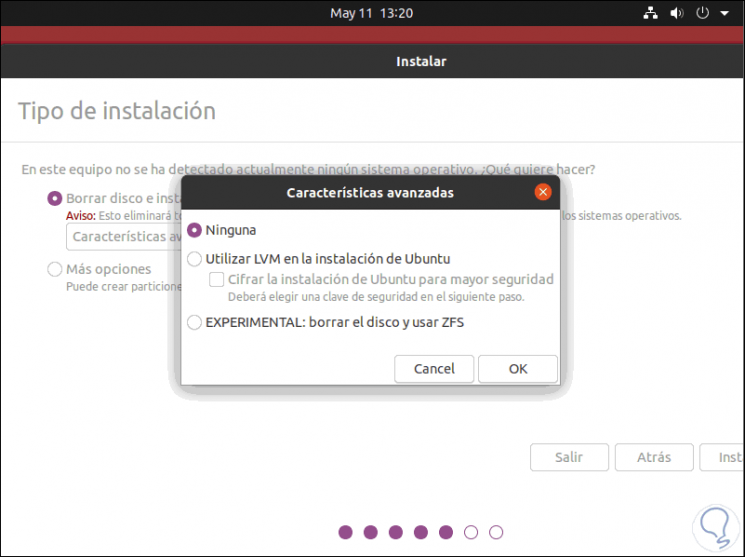
Next, we will come to the section of the hard disk where we will see the following. There we can leave the default option for Ubuntu 20.10 to manage the structure of the disk or we can activate the "More options" box to do this process manually. We also have the "Advanced Features" button which gives us the opportunity to use ZFS for this process:
Step 7
ZFS is a file system developed by Sun Microsystems and is an open source file system with advanced features and integrates data protection measures using integrity systems focused on data loss and corruption.
Step 8
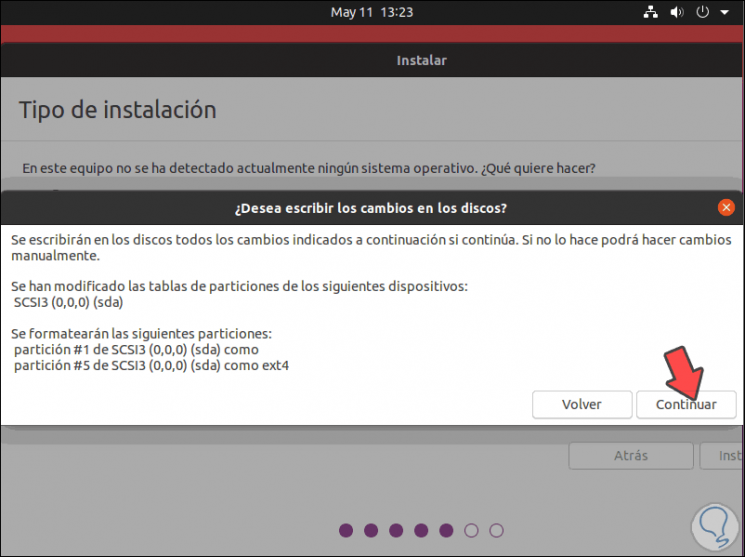
In this case we leave the default option and click "Install" to continue and we must accept this action:
Step 9
We click "Continue" and now we select our graphic location:
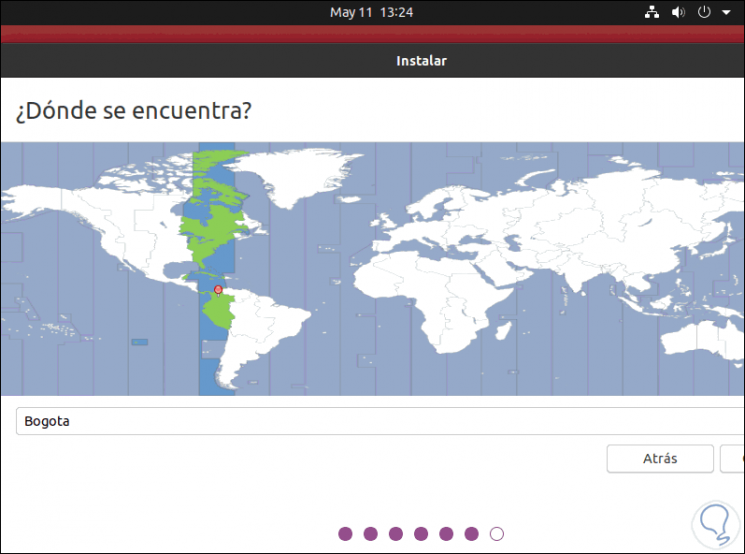
Step 10
In the following window we will enter the administrator user data and password:
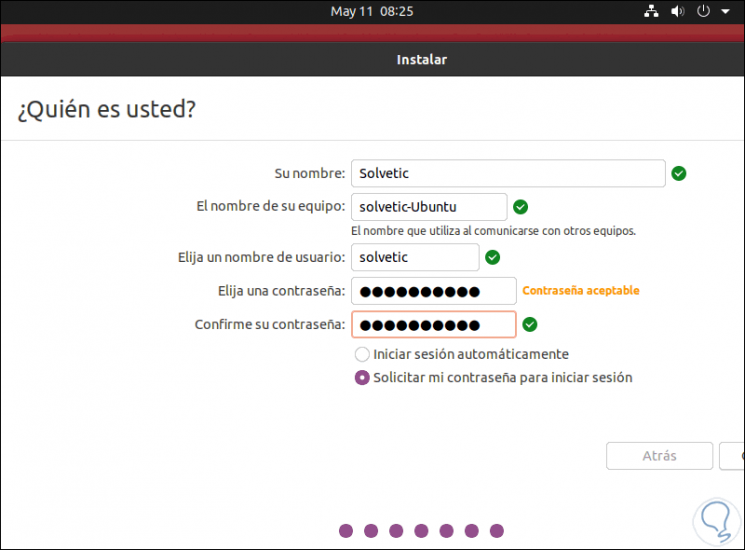
Step 11
We start the Ubuntu 20.10 installation process by clicking Install:
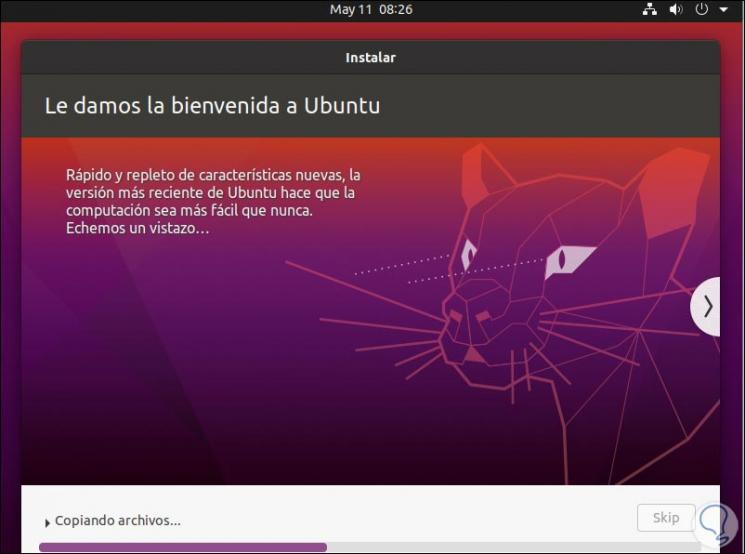
Step 12
When this process reaches its end we will see the following:
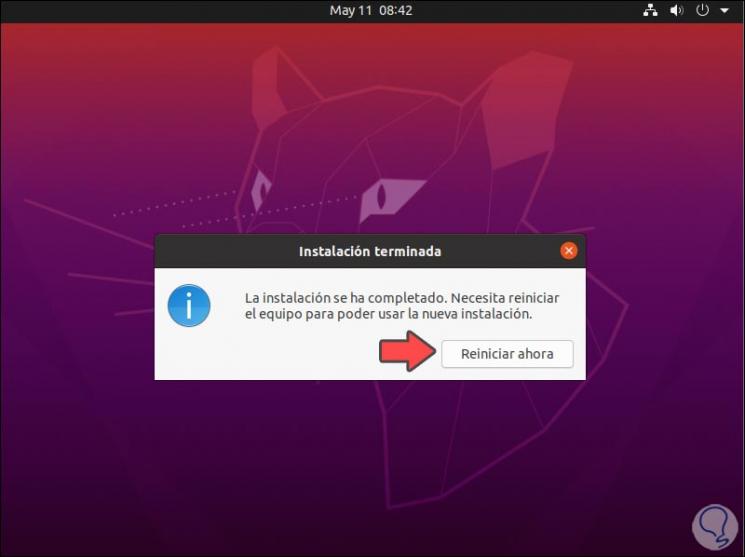
Step 13
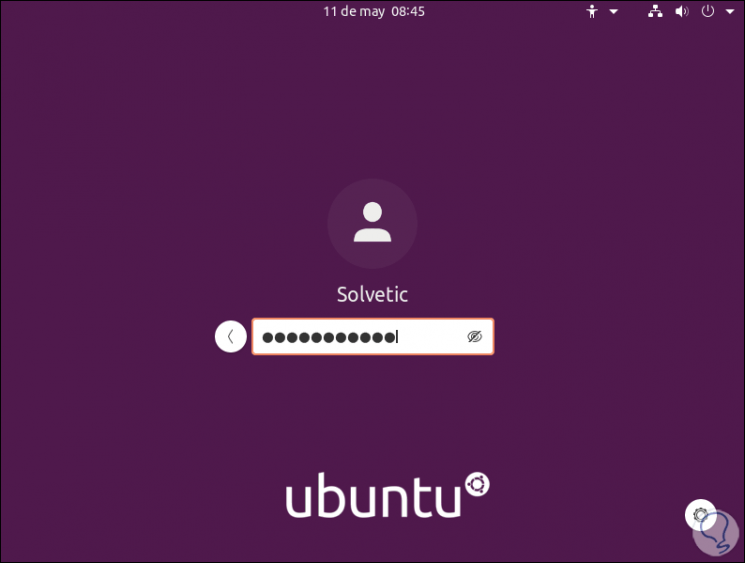
We click the "Restart now" button, remove the bootable DVD or USB with the ISO image and after this we will access the Ubuntu 20.10 login window:
Step 14
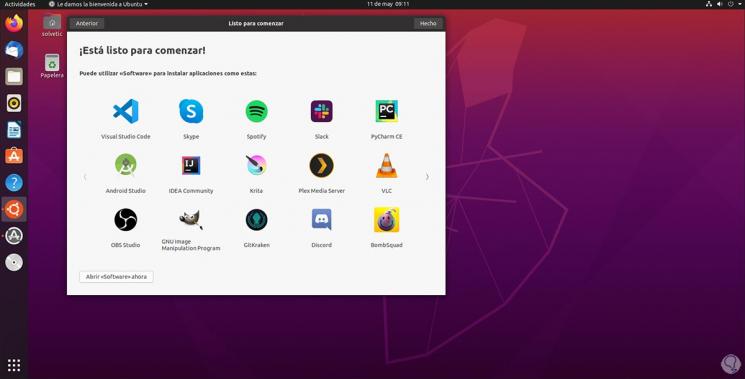
We enter our credentials and log in, we must complete the steps of the wizard:
Step 15
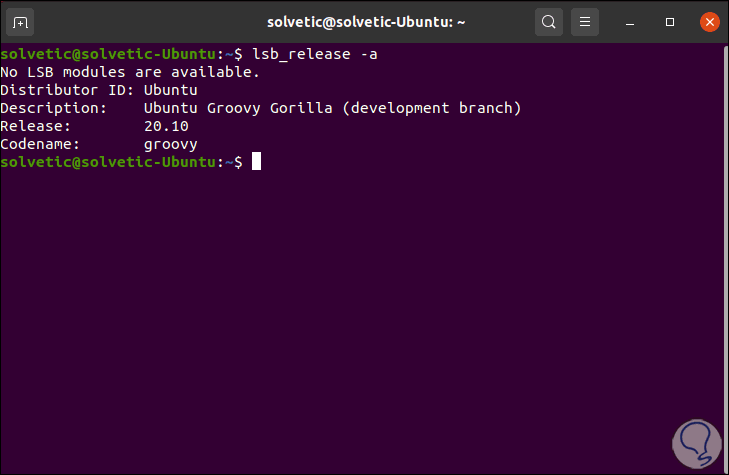
We can access the terminal and execute "lsb_release -a" to verify that Ubuntu 20.10 has been installed correctly:
TechnoWikis has explained the way to install Ubuntu 20.10 on your computer and thus be with the latest available version of this popular Linux distribution.