Our teams are the main elements of data management and storage since we store our data in them so that we can process them later. Sometimes we find an excess of consumed space and we need to free up Windows 10 space to be able to continue working, otherwise a series of errors will appear..
Windows 10 space errors
Storage is one of the most delicate issues in any operating system since if the disk were to arrive it can simply present errors such as:
- Reading and writing failures.
- Unexpected closings of applications and files.
- Restarts or system crashes.
For this reason, it is key to detect the way in which the space on the hard disk is distributed and that is why Microsoft has integrated in Windows 10 the functionality of "Storage Sensor" to help us maintain precise control over the space on the hard disk in Windows 10.
What is Windows 10 Storage Sensor
This is a utility integrated in Windows 10 which is in charge of automatically analyzing the computer and based on this analysis it removes temporary files, trash files and other types of files which together can cause loss of space due to their large size. size.
It is clear that some large files that the storage sensor does not delete due to their functionality (system, records) are:
- Windows updates (Windows.old)
The storage sensor only works in the unit where the operating system is installed, which is traditionally the C drive, this because it is a function of the system.
Next, let's see how to activate Windows 10 storage sensor and thus free up Windows 10 space with it..
1. Activate Windows 10 storage sensor
Step 1
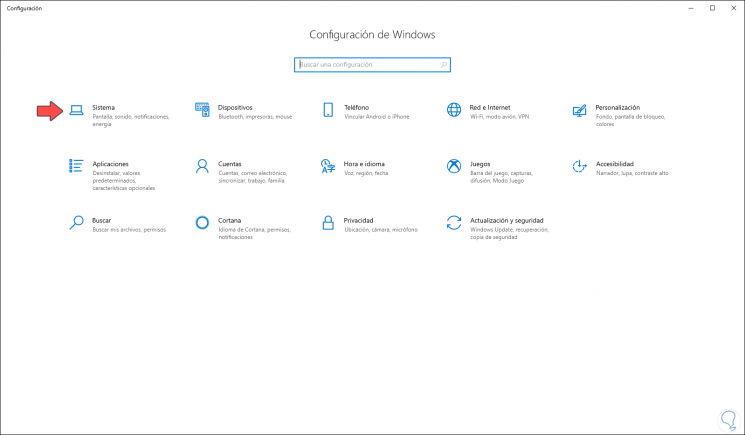
To use this functionality we go to the Start - Configuration menu:
Step 2
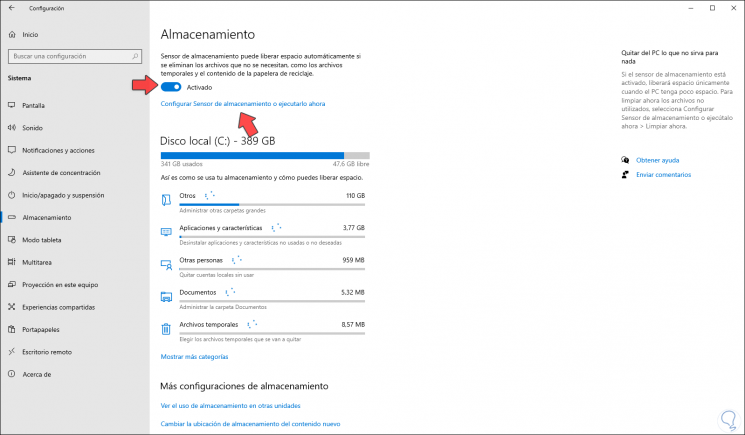
We go to the "System" category and then we find the "Storage" section there. To activate it we must press the "Activated" switch at the top.
2. Configure Windows 10 Storage Sensor
The sensor offers us different ways to configure it.
Step 1
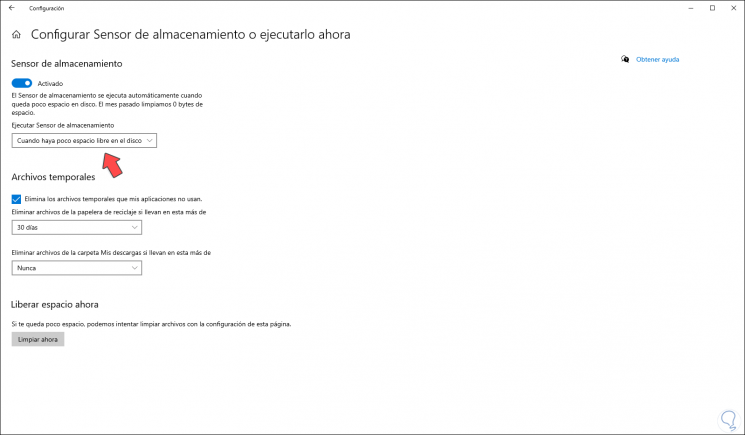
To do this we click on the line "Configure Storage Sensor or run it now" and we will be redirected to the next window. First, we activate the upper switch to activate the sensor, in its legend we can see that it explains how much space has been freed, this logically if we let the sensor work and we do not manually delete the files.
Step 2
There are other additional settings such as:
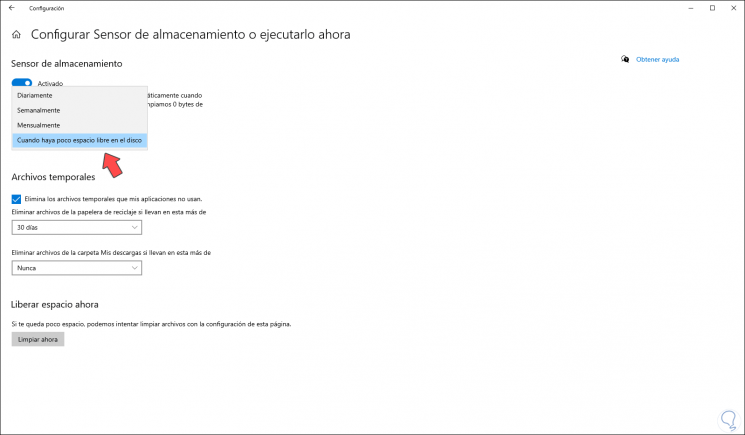
Run storage sensor: Here you will specify when the sensor should come into play, the options are:
- When there is little free space on the disk
Step 3
In the section "Temporary files" we can activate the box "Delete temporary files that my applications do not use" so that these types of files are automatically deleted.
At the bottom we can define how often the files must be deleted in the Windows 10 trash, the options are:
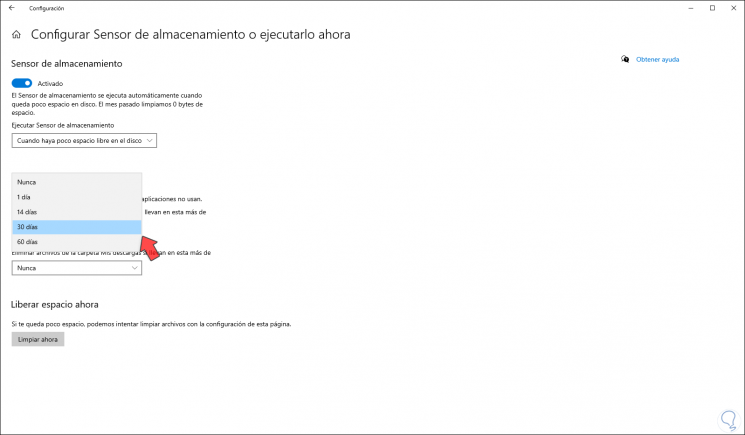
Step 4
Below we find the option "Delete files from the My Downloads folder if they have been in it for more than" and we can define the amount of time as follows:
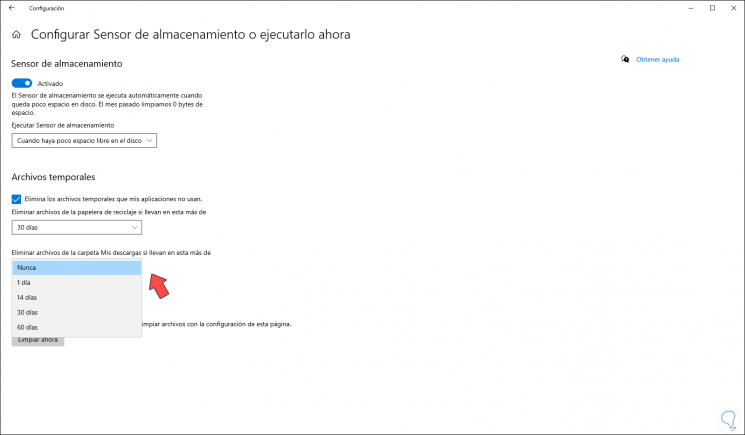
Step 5
In addition to this, if OneDrive is installed on the C drive, we can access the configuration of the files that we save in OneDrive so that they can be deleted. To run the sensor at any time, just click on the “Clean now” button for it to run:
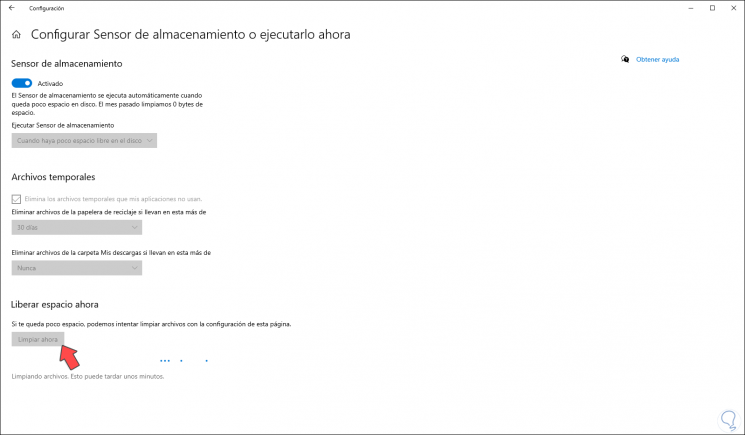
Step 6
After this we can see how much space has been removed from these locations:
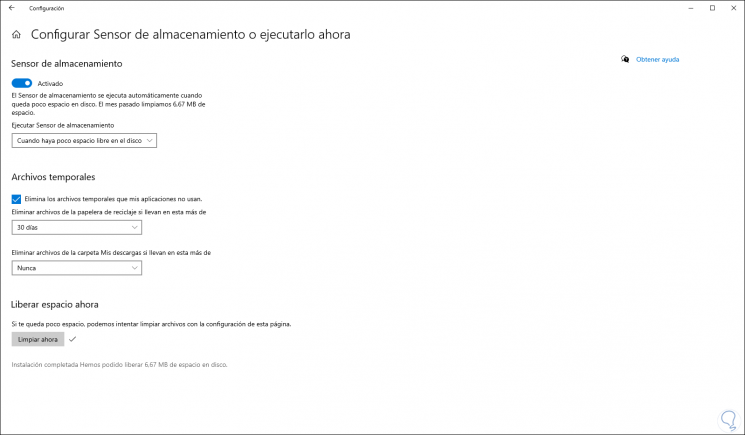
With this practical functionality we can manage the space on our hard drive in a much more complete way by activating the Windows 10 storage sensor.