We are frequently adding more and more information to our hard drive and this implies that its storage capacity is constantly being limited. And although this is something natural, many times we can count on numerous elements that are large and occupy an unnecessary space on the hard disk thus affecting its capacity..
And even if we have 2TB discs this is no guarantee that space will at some time be limited. Although we can use various methods to free up space on the hard disk , Windows 10 includes a function called Storage Sensor, which will allow you to analyze in detail what applications or files take up space on the disk and proceed with cleaning or maintenance. .
The storage sensor in Windows 10 gives us two alternatives to recover hard disk space and these are:
- It is possible to select and delete files located in Disk Cleanup manually
- We have the possibility to configure the function to free up space automatically when you are running out of hard disk space.
TechnoWikis will make a complete analysis on how to enable and use this important function in Windows 10.
1. How to see what space certain applications occupy on the Windows 10 hard drive
The first point to review is to know in detail the way in which the files and applications use the space of our hard disk in order to determine the impact that these have on the system and thus take the administrative measures that are required.
Step 1
To do this, we go to the Start menu and there we click on the Configuration utility, we will see the following:

Step 2
There we select the System option and in the window we will go to the Storage section and we will see the following:
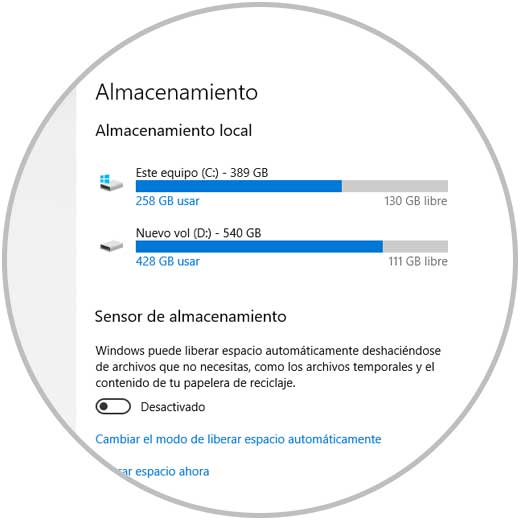
As we can see, this option is structured according to the hard drives that we have active in the equipment where we can see their total storage capacity, as well as their free space. At the bottom we have some storage sensor configuration options which we will see later..
Step 3
To see in detail the way in which the applications or files that are occupying space in the selected unit, just click on it and the following will be displayed:
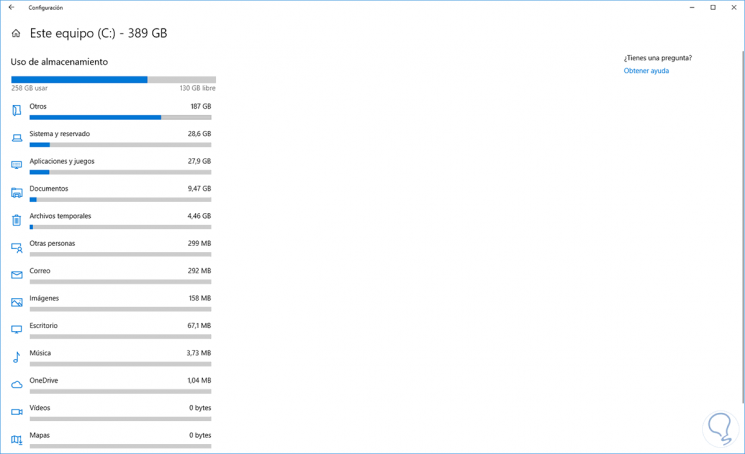
As we can see, each section of the hard disk with its respective space is explained in detail as follows:
Others
There we found a series of folders that occupy a considerable space in the system but that Windows 10 cannot categorize, there we find elements such as C: \ Users \ Public \ Documents, C: \ root.
System and reserved
This is one of the most delicate sections at the storage level since within this section we find parameters such as System Files, virtual memory or Hibernation Files.
Applications and games
In this section we can find the space occupied by the various applications both integrated and installed in Windows 10.
Documents
In this section we will find the space occupied by the files and elements stored in the Documents library
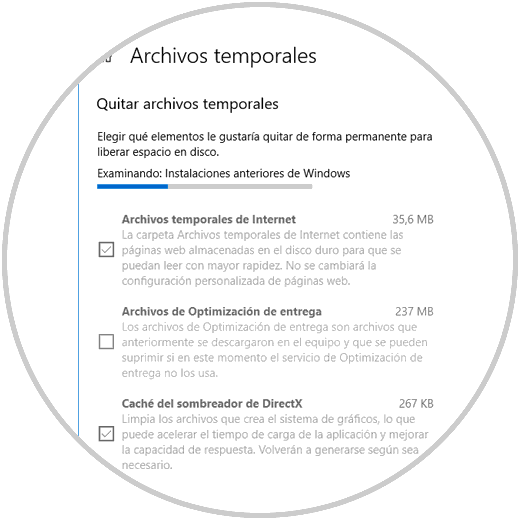
Temporary files
Here we will have access to temporary files that include previous system installations, Delivery Optimization files, etc.
Others
Through this option, we will see the space occupied by the applications and files of other users active in the operating system.
Mail
As the name implies, through this line we will be able to manage all emails that arrive in the Mail application in Windows 10.
Images
There we will have access to the space used by the Images library in Windows 10.
Desk
Through this section we find the space that occupies each of the elements that are on the Windows 10 desktop with their respective size.
Music
Refers to the size of the items in the Music library
Onedrive
There we can manage the items that have been uploaded through the OneDrive application.
Video
Refers to the size of the items in the Videos library
Maps
Here we find the amount of space occupied by the maps that we have downloaded to Windows 10 through this application.
Step 4
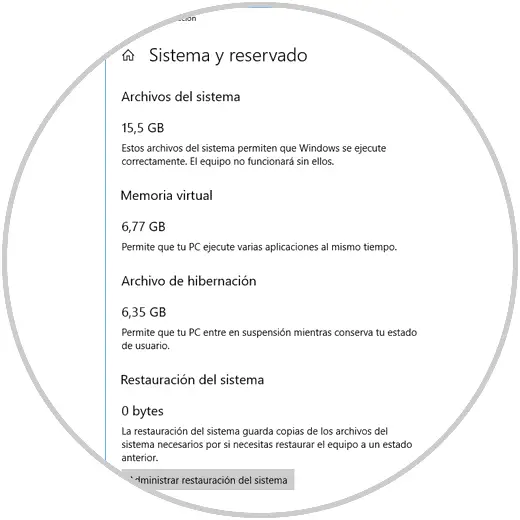
To see more detailed information on each of these elements, just click on it and this will be the result:
System and reserved:
Step 5
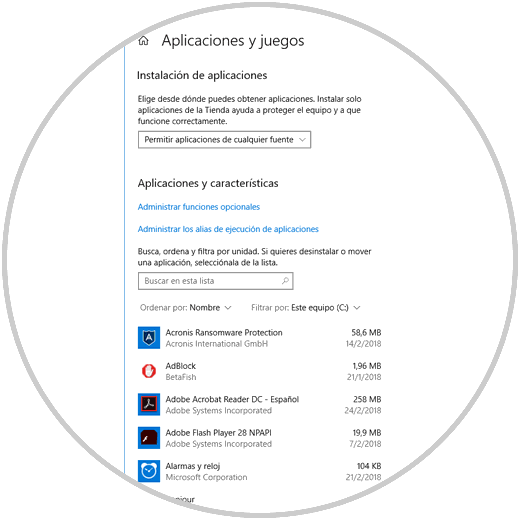
Applications and games:
Temporary files:
And so with each of the options available.
2. How to use the storage sensor in Windows 10
We have seen the way in which the storage sensor allows us to obtain detailed information on each aspect of the system, but now we will see the options that it offers us for the correct management of the space.
First, to enable the Windows 10 storage sensor, we will click on the switch located in the Storage sensor section so that its status becomes Activated:
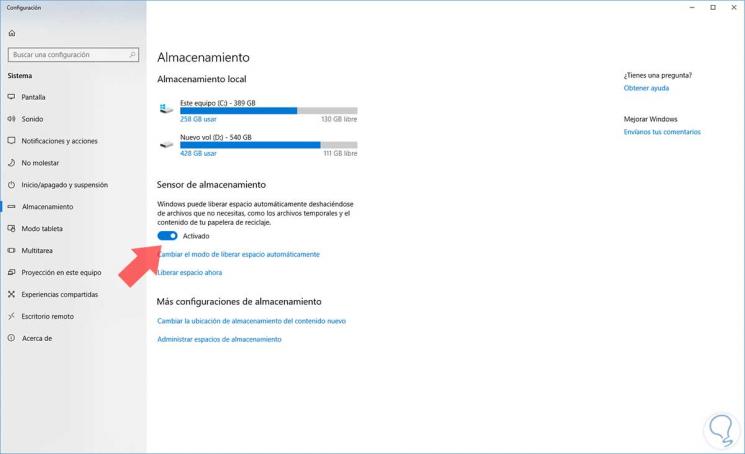
Thus, the storage sensor has been enabled, which will automatically delete the temporary files and the items in the Downloads folder from time to time, thus optimizing the hard disk space..
3. How to free up space at any time Windows 10
If the goal is to free space before the utility does it automatically, we can click on the Free space line now and we will see the following:

Possibility to activate the section boxes
- Windows Defender antivirus files
- Previous Windows Installations
- Delivery optimization files and more.
At the top we will see the space that has to be released and to execute the task click on the button Remove files.

4. How to free up space automatically with the Windows 10 storage sensor
The storage sensor in Windows 10 allows us to automate this task and to configure this we must click on the line Change the way to free up space automatically and there the following will be displayed:
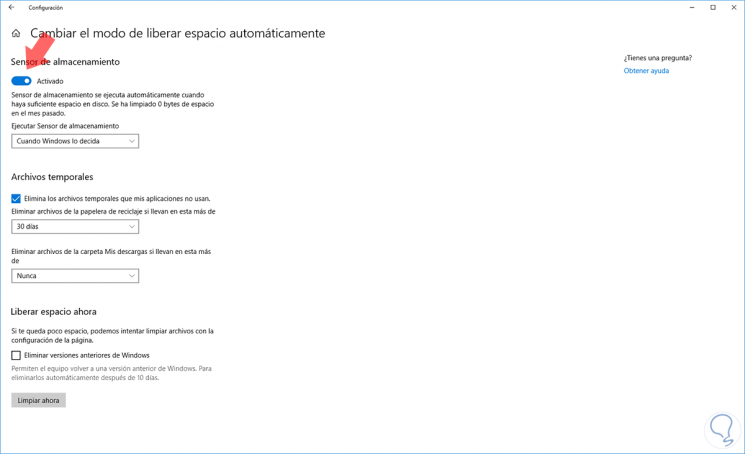
First, we must validate that the sensor is active and we have the following options available:
Run storage sensor
There we have the opportunity to configure the way in which the sensor will be executed, the options to be used are Daily, Weekly, Monthly or When Windows decides
Time frequency
We can select the frequency of time at which temporary files will be deleted as long as we check the box Delete temporary files that my applications do not use and the options are Never, 1 day, 14 days, 30 days or 60 days.
Time Frequency Deleted Files
In the same way we can define the frequency of time in which the files in the Downloads folder will be deleted.
Clean now option
At the bottom we can select the Clean now option and from there decide whether or not to remove the previous versions of Windows which occupy between 2 and 4 GB of space
.
Thus, the Windows storage sensor is the ideal solution for the whole space management issue in Windows 10 in a simple, useful and totally dynamic way for any user.