Fedora Server is one of the solutions that have been developed so that both users and administrators have the best security features, compatibility and overall system performance. For this reason, with each edition that will be launched, the aim is to improve the performance of the system in general, and that is why Fedora 33 Server RawHide will be available at the end of 2020, and this is why we will explain some of what this new edition of Fedora Server and how is its installation process..
What is Fedora Server 33 RawHide
The first thing you should know is that Fedora gives us the opportunity to test fedora 33 Server thanks to its test images, these are available at the following link:
Download Fedora 33 Server
As expected, being a test image, it is susceptible to errors and changes, so it is not advisable to mount it in a real environment and features will often be added or removed.
Fedora 33 Features
Some of the things we will find in Fedora 33 Server will be:
- Rpm-ostree will be used to update the host.
- DNF execution improvements.
- Security and performance enhancements to services to start, stop, or restart Fedora Server global services.
- What's new in Apache HTTP Server.
- OpenLDAP has been defined as the open source implementation of the LDAPv2 and LDAPv3 protocols.
- Postfix, Sendmail, Fetchmail and Procmail updates.
- File and print servers offer greater integration with Samba configuration.
- Improvements in the Network Time Protocol (NTP).
- Compatibility with network drivers that support Precision Network Time Protocol (PTP).
- News and improvements in system monitoring tools such as ps or top.
- Better options for managing log files with the Rsyslog daemon.
- New options to automate tasks.
- OProfile integration which is a system performance monitoring tool.
- Comprehensive work with GRUB 2 Boot Loader.
Let's see how to download Fedora 33 Server and install Fedora 33 Server..
Install Fedora 33 Server
Step 1
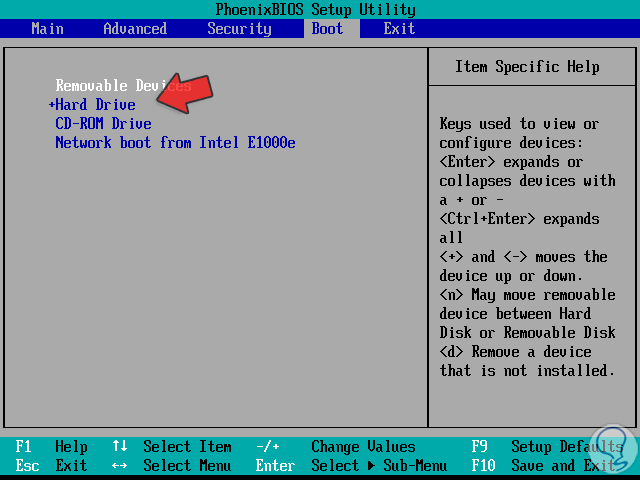
The first thing will be to download the ISO image of Fedora 33 Server and burn it to a bootable DVD or USB, after this we must configure the system to boot from said medium (DVD or USB):
Step 2
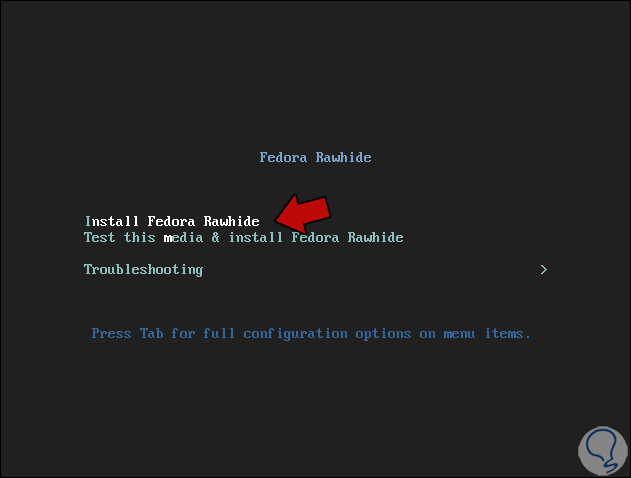
Once the Fedora 33 Server installation starts we will see the following:
Step 3
There it is possible:
- Install Fedora RawHide - Run Fedora Server installation on local hard drive
- Test this media & install Fedora RawHide: Run a computer and component scan before installing the operating system
- Troubleshooting: fix computer problem
Step 4
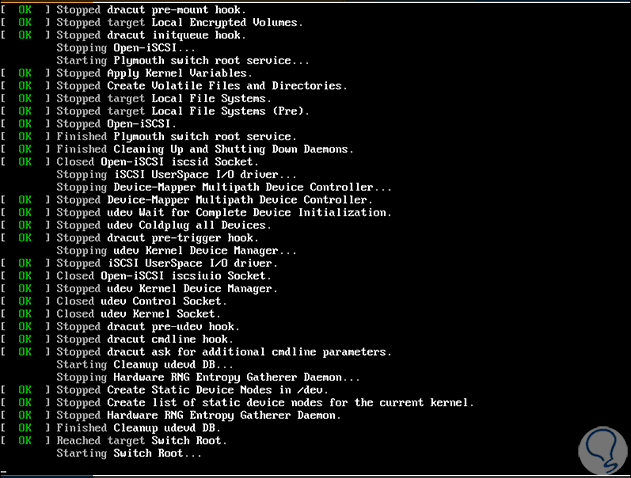
We select the first option and start loading the services:
Step 5
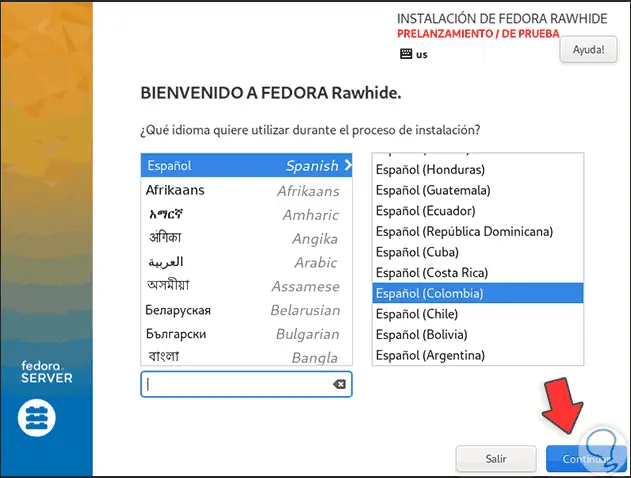
After this we define the installation language, note that at the top it is indicated that it is a test image:
Step 6
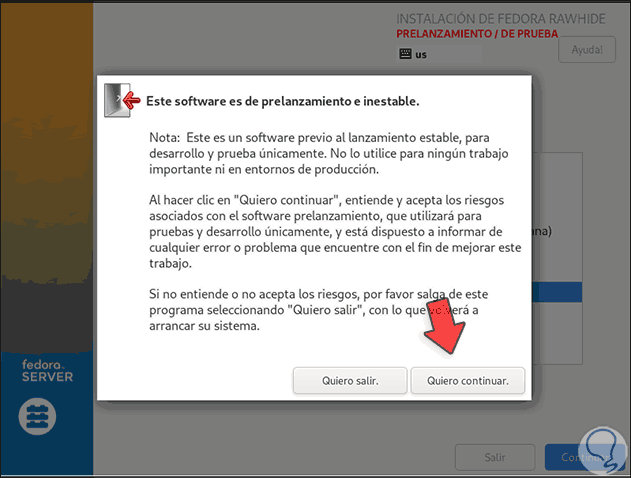
We click Continue and we will receive this warning:
Step 7
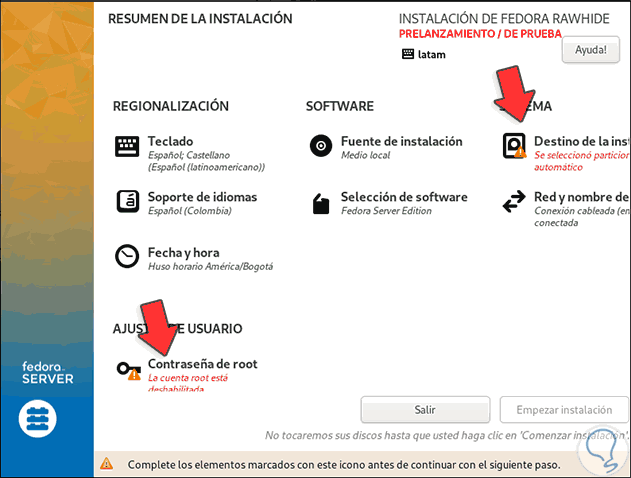
We click on "I want to continue" and we will see the following:
Step 8
There we have the following options:
- Keyboard: allows us to modify the keyboard language in the system
- Installation source: allows defining where Fedora 33 Server will be installed
- Language Support - Allows you to assign the global language of Fedora Server
- Installation destination: indicates where Fedora 33 Server will be installed
- Date and time: adjust local date and time parameters
- Software selection: gives us the opportunity to choose different options to be installed together with the operating system
- Network and computer name: allows you to activate the network card and assign a name to the computer
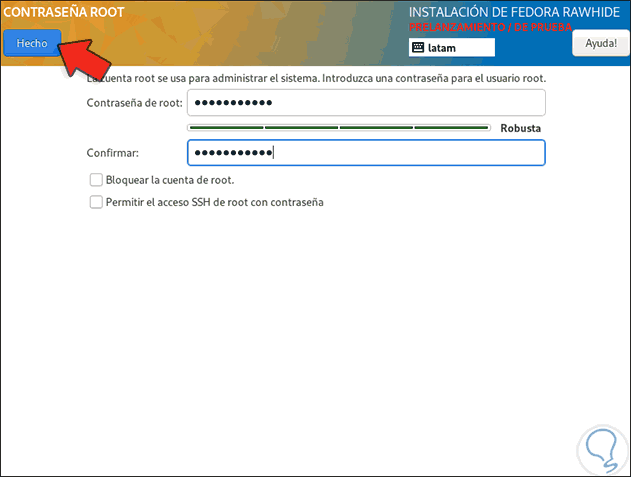
- Root password: for security this user is disabled, but we can activate it if we want
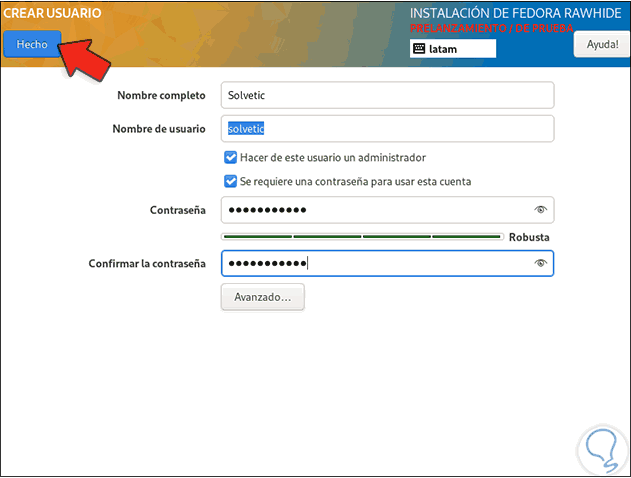
- User account: from here we can create the administrator user of Fedora 33 Server
Step 9
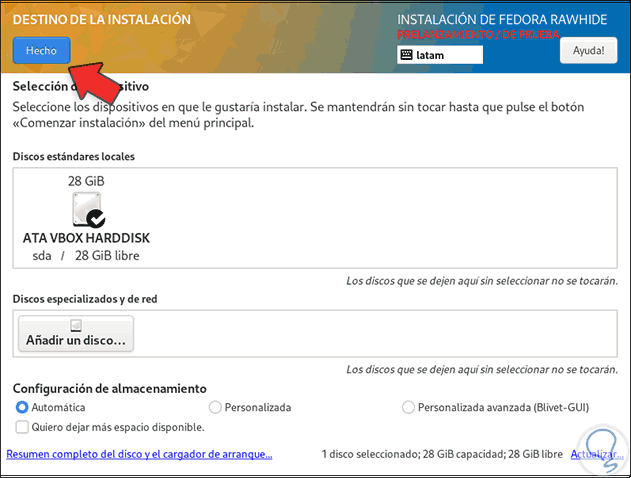
The fields with a warning sign must be modified, in this we click on Installation destination and we will see the following:
Step 10
There we select the current hard disk and we can let the structure of the partitions be done automatically by Fedora, or we can select the “Custom” option and create these partitions ourselves.
Select the disk and click on "Done" to validate the selection.
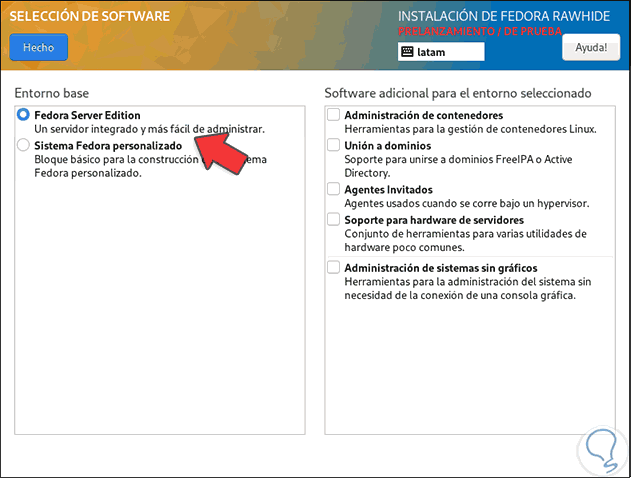
As we mentioned, from Software Selection we can define that it will be installed on Fedora 33 Server:
Step 11
If we want to activate the root user we simply must assign a password to this:
Step 12
After this we go to User account and create the user to administer Fedora 33 Server:
Step 13
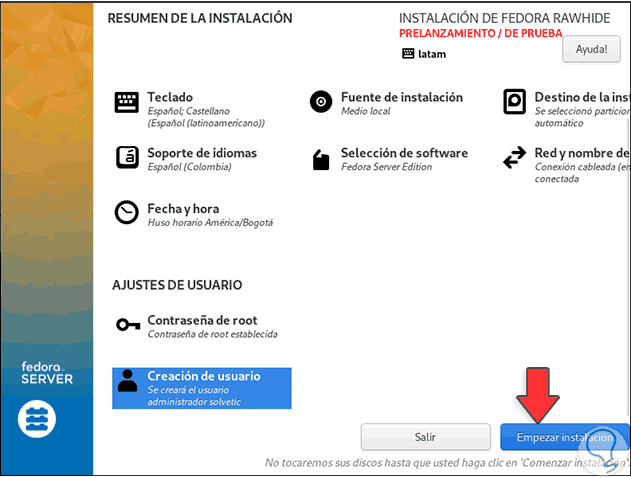
We click Done and we are ready to install Fedora 33 Server:
Step 14
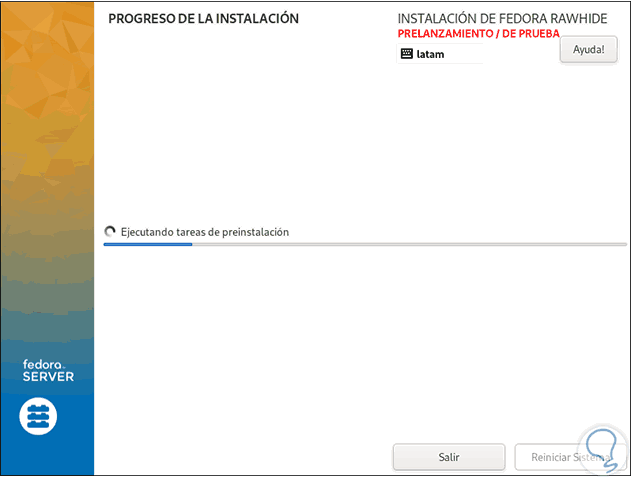
For this we click on the "Start installation" button:
Step 15
When this process comes to an end we will see the following:
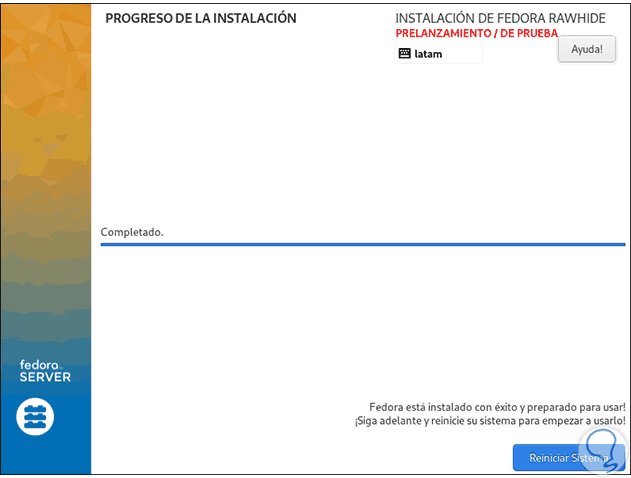

Step 16
We click "Restart system" to access Fedora 33 Server:
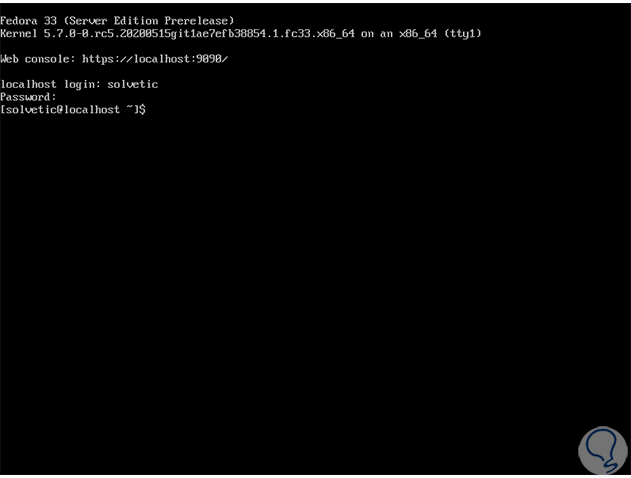
Thus we have learned to install Fedora 33 Server and know its news.