Fedora 34 Server is the bet that fedora has launched to manage services and processes at the enterprise level, providing security, scalability and updated functions that allow to take control of tasks and users to more advanced levels..
Fedora 34 has an automatic update mechanism with which it is possible to run workloads in containers safely and with a scaling perspective, Fedora 34 Server adds various update flows to receive automatic updates every two weeks with which we will have the certainty that the system will always be up-to-date, which is key in a business environment.
Fedora 34 Server continues the trend seen in Fedora 33 of using BTRFS as the default file system, transparent compression has now been introduced on this type of BTRFS file system.
By using Fedora 34 Server it will be possible to run applications on dedicated hardware or in the cloud using Fedora since it has the latest open source technology..
Fedora 34 Server
Fedora 34 Server has introduced and updated the following components in this new edition:
- Btrfs transparent zstd compression has been enabled by default
- Systemd-oomd has been enabled by default
- Changes and / or updates to the MinGW environment and tool chain
- GNU Toolchain update (gcc 11, glibc 2.33)
- Ibus-m17n will now be used as the default IME for Sinhala
- In Fedora 34 Server, Anaconda kernel boot parameters without 'inst' are ignored.
- Changes to NSS CK_GCM_PARAMS
- OpenLDAP without libraries without threads
- Support for disabling the SELinux runtime has been removed
- In Fedora 34 Server services are now restarted at the end of the rpm transaction
- The location of GRUB configuration files is unified across all supported architectures
- Python-mock has been deprecated
- Python bottom-up architecture names are accepted
The Fedora 34 Server ISO image is available at the following link:
Fedora 34 Server
Let's see how to install this new system and thus better manage business processes.
To stay up to date, remember to subscribe to our YouTube channel! SUBSCRIBE
How to install Fedora 34 Server
Step 1
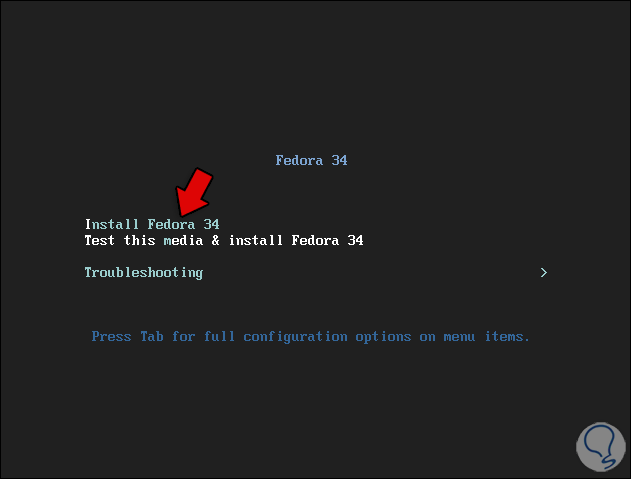
We start the team with the described Fedora 34 Server ISO image and we will see the following. We select the option "Install Fedora 34"
Step 2
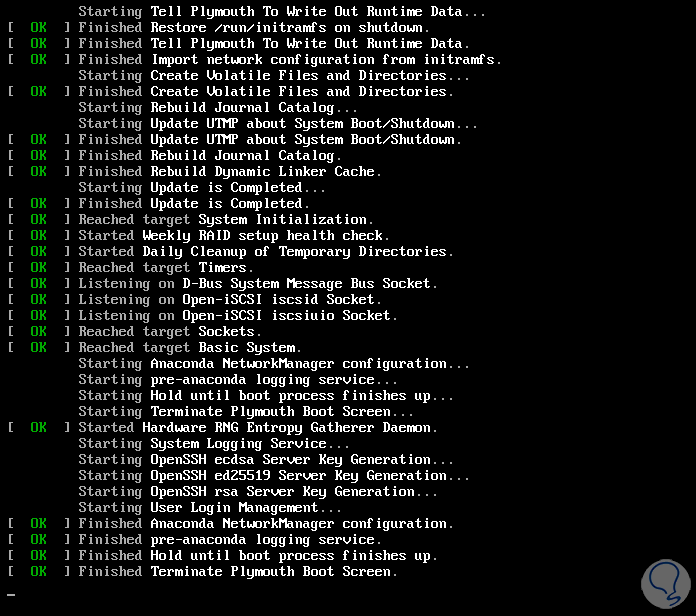
We wait for the process to start:
Step 3
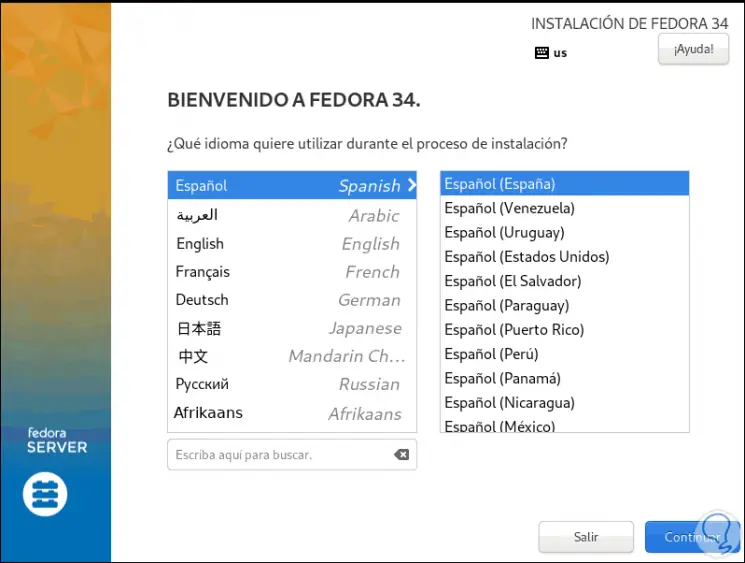
After this we select the installation language of Fedora 34 Server:
Step 4
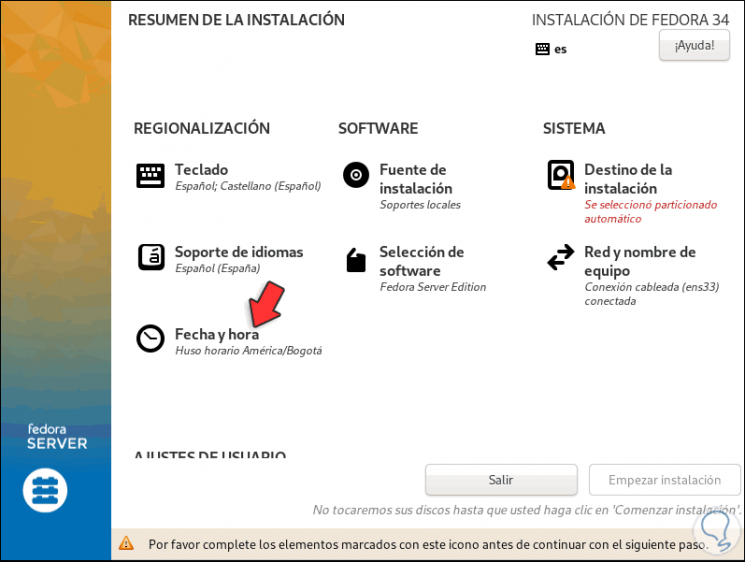
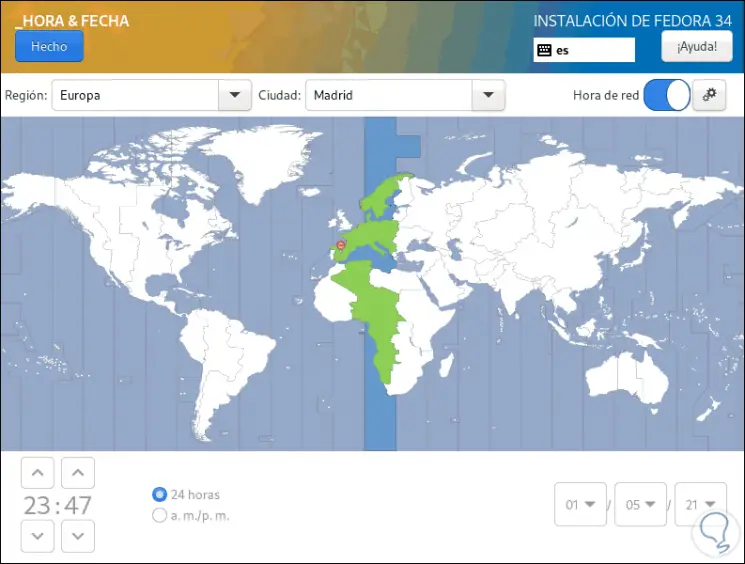
Click Continue and we will see the following. The fields with a warning sign must be complete, first we click on "Date and time" to establish the physical location:
Step 5
Click Done to complete the process
Step 6
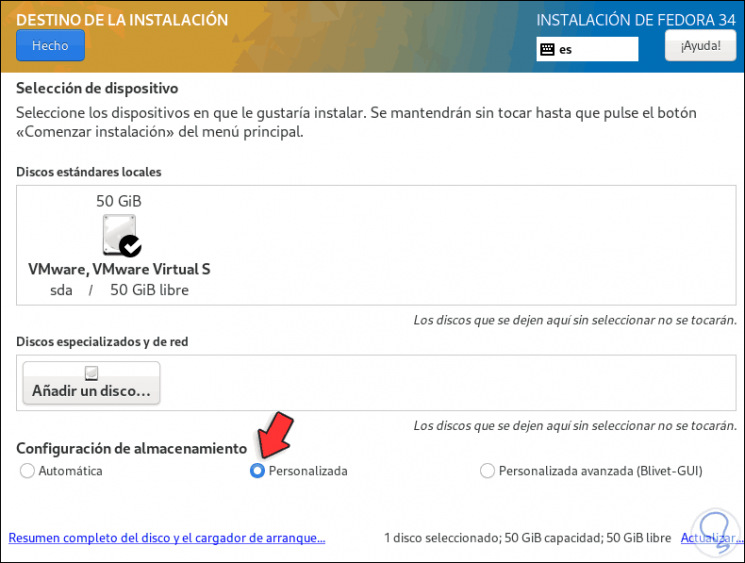
Now we click on "Installation destination" and we will see this related to the Disks section. There we activate the "Custom" box
Step 7
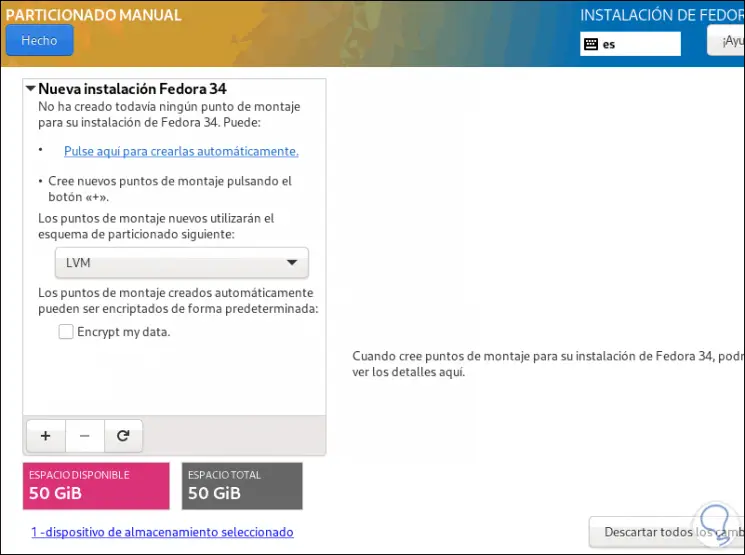
We click on "Done" to complete the process, we will see this:
Step 8
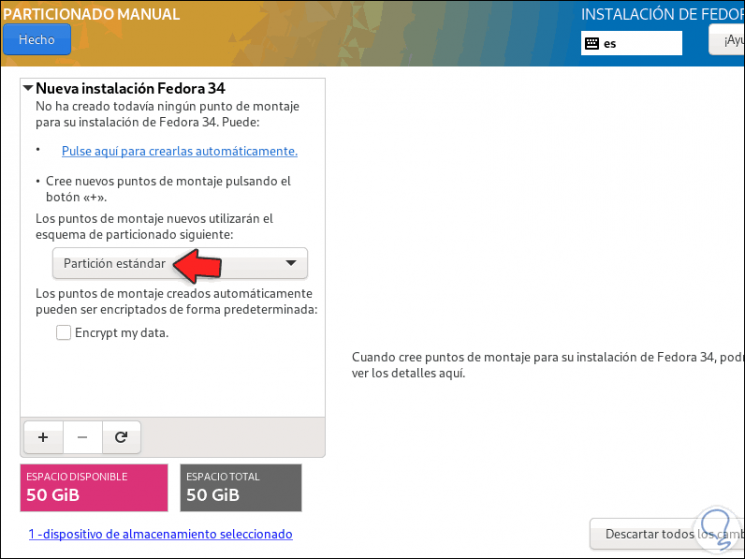
We select "Standard partition":
Step 9
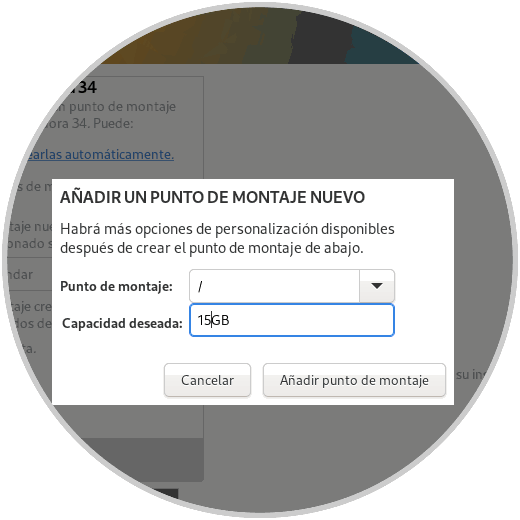
Now we click on the + sign and select the root folder (/) and assign the desired size:
Step 10
The root directory (root) (/) is where the Linux operating system is hosted, this directory manages everything under the folder model.
Click on "Add mount point" to see the following:
Step 11
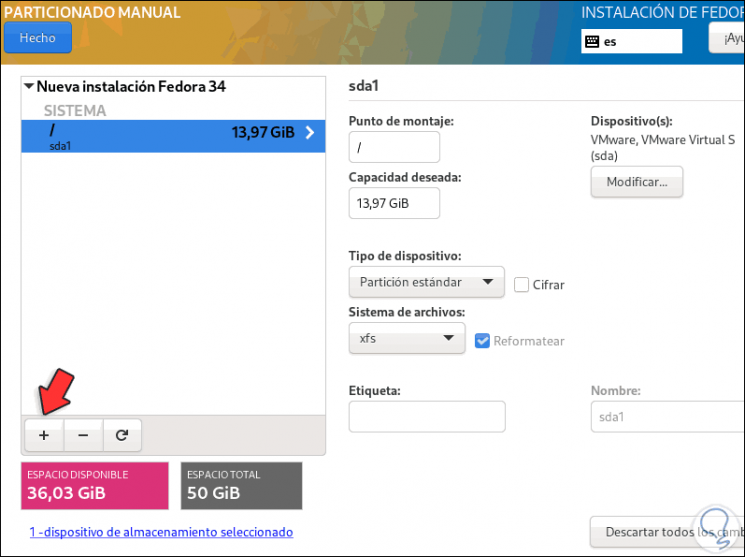
We see that the mount point is created and it is possible, if necessary, to adjust certain settings.
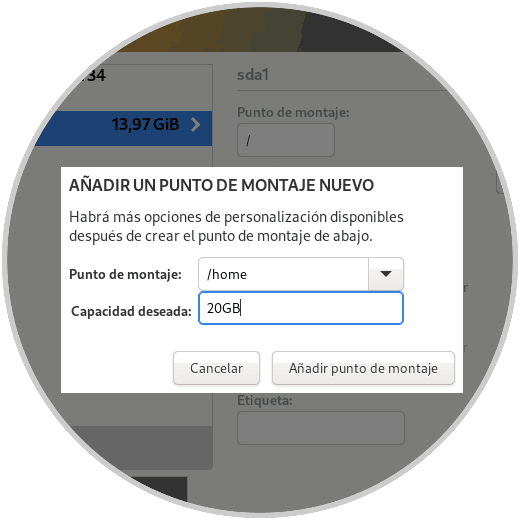
Again we click on the + sign and select the home directory, assign the desired size:
Step 12
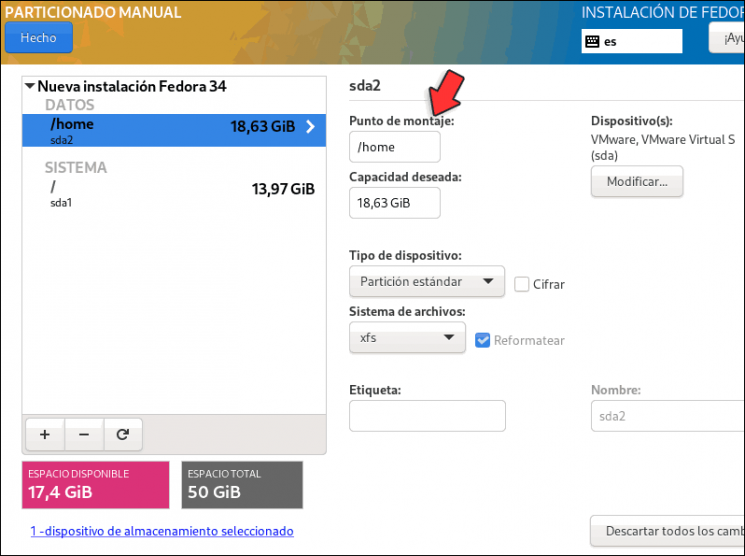
The / home directory contains a home folder for each user created on the system, where the user data files and the specific configuration files of the user in question are housed.
We click on "Add mount point" to complete the process:
Step 13
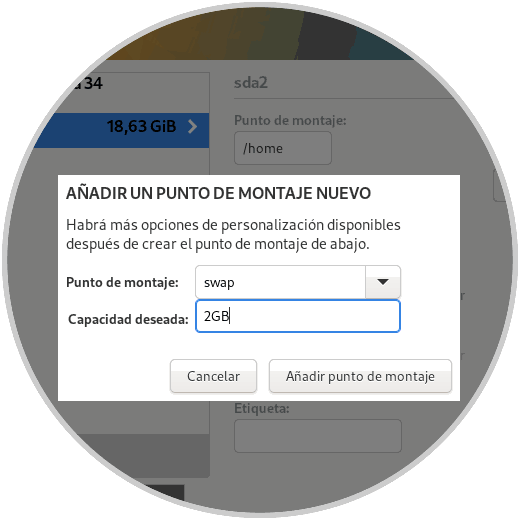
Finally, we click on the + sign and select swap, assign the size for swap:
Step 14
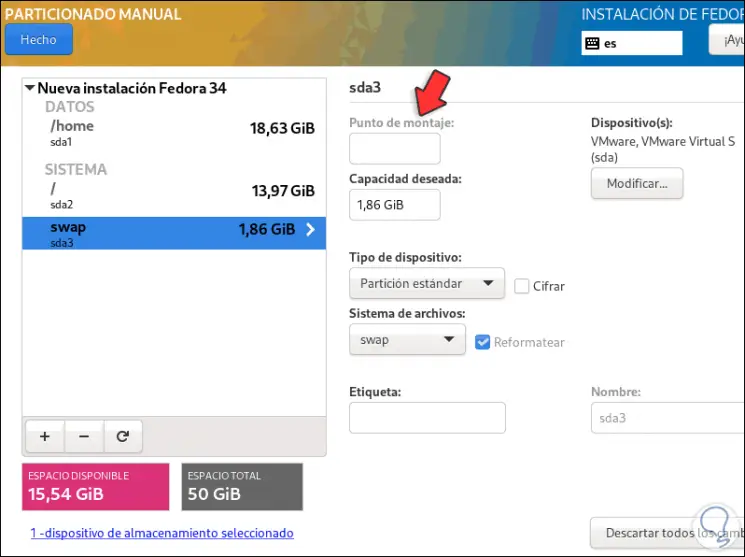
Swap or swap memory, acts as virtual memory and is key when the physical memory of the computer runs out, so it is a support for the RAM to prevent the computer from being blocked.
Click on "Add mount point" to complete the process:
Step 15
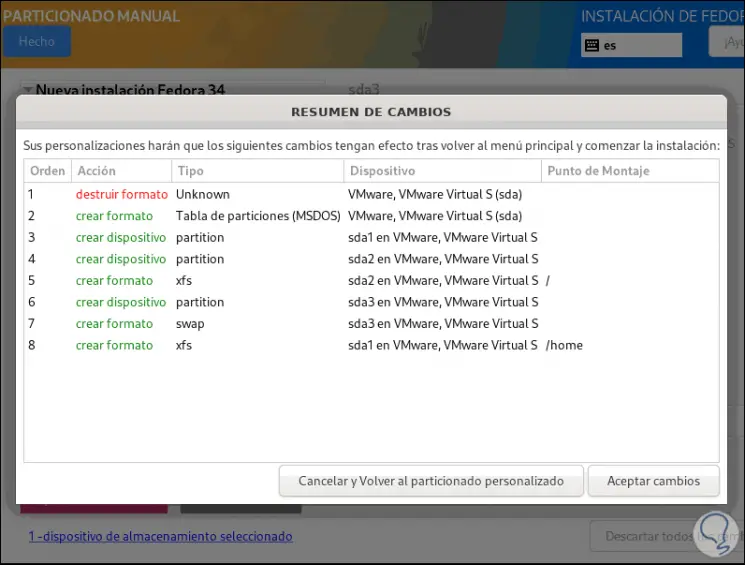
We click on "Done" and the following will be displayed:
Step 16
There we see the structure as Fedora 34 Server will be, apply the changes.
Step 17
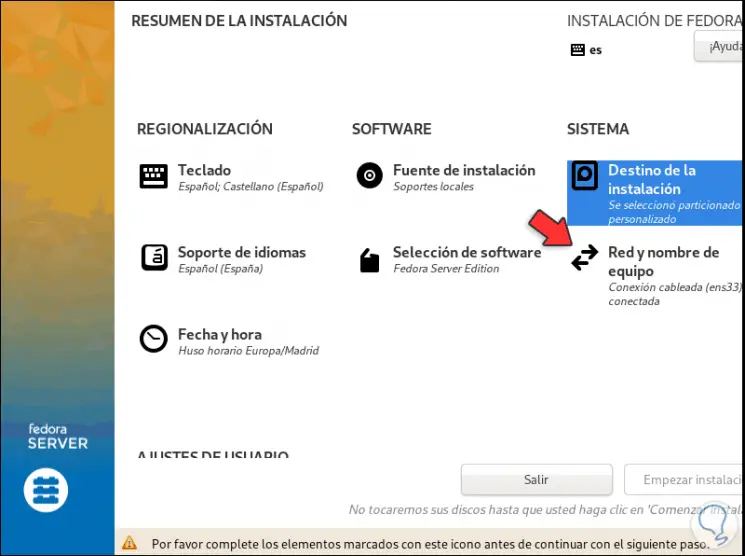
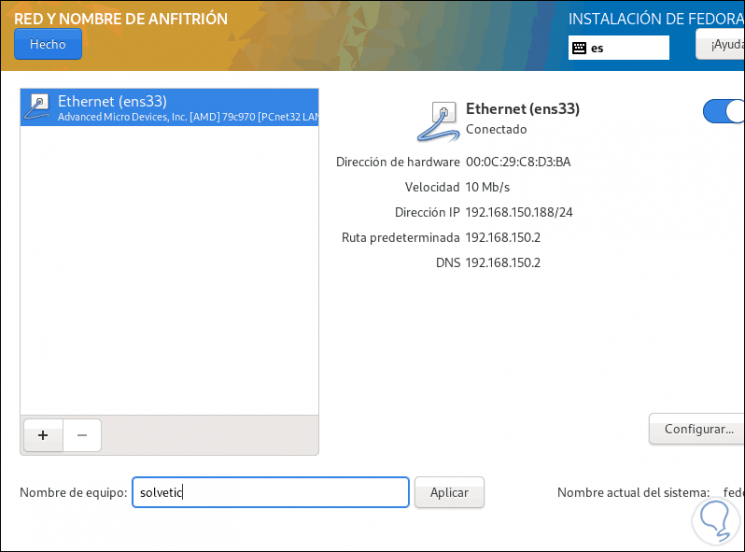
Now we go to the section "Network and team name" and there we assign the name to the team:
Step 18
Apply the changes.
Step 19
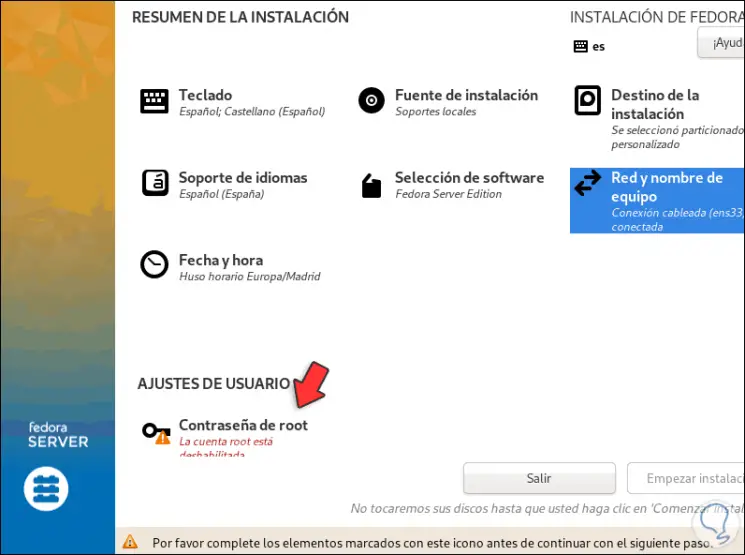
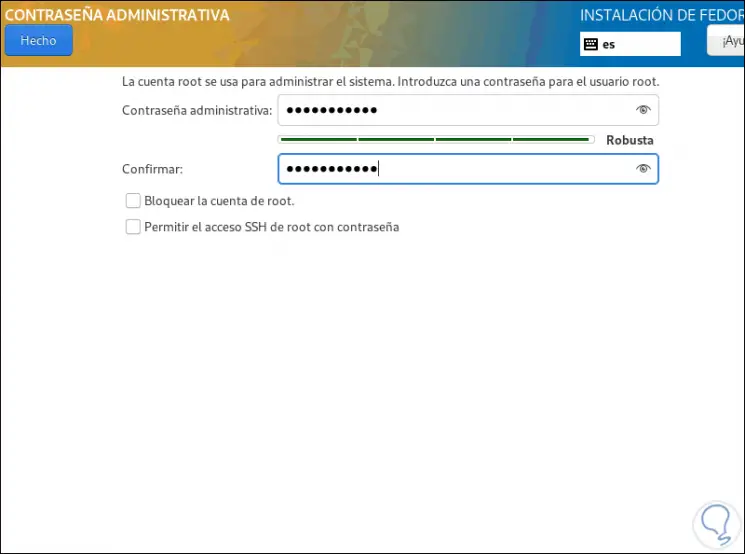
We click on "Root password" to assign the root user password:
Step 20
Click Done to complete the process.
Step 21
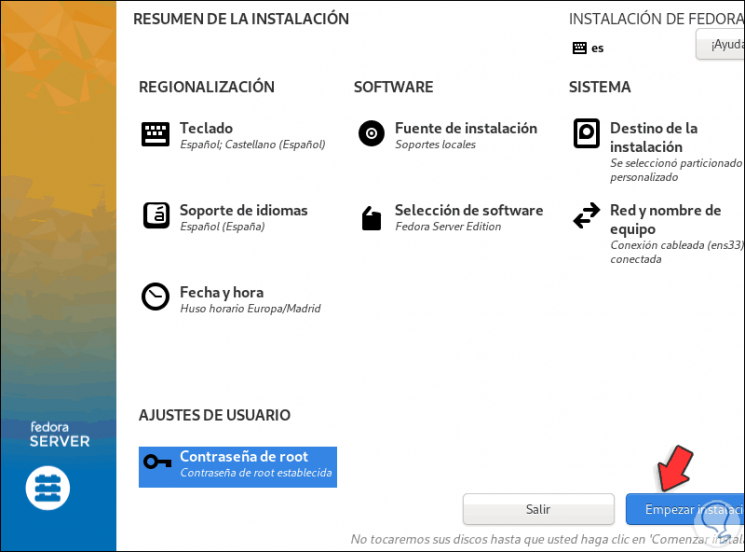
We click on "Start installation" to start the process:
Step 22
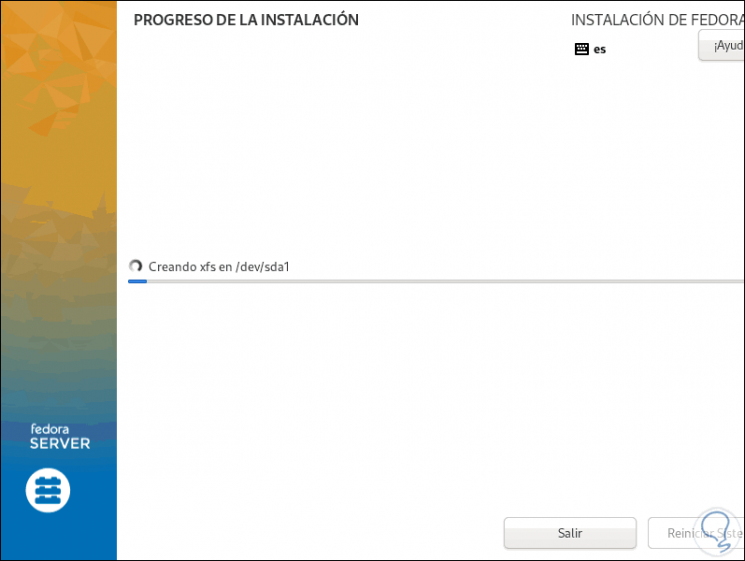
We can see that the bootloader is created:
Step 23
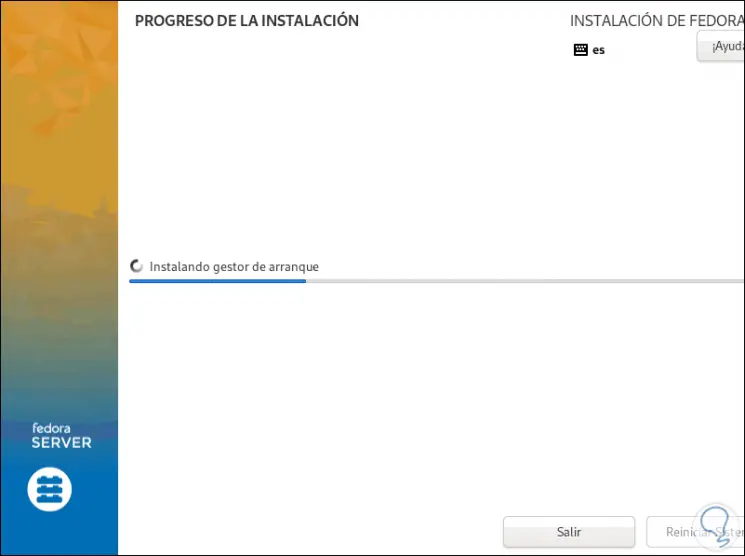
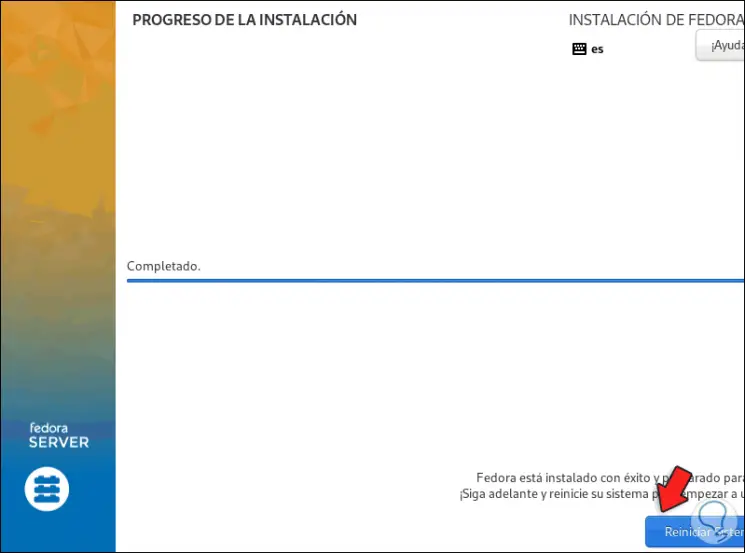
We hope that the Fedora 34 Server installation process is completed and in the end we will see the following:
Step 24
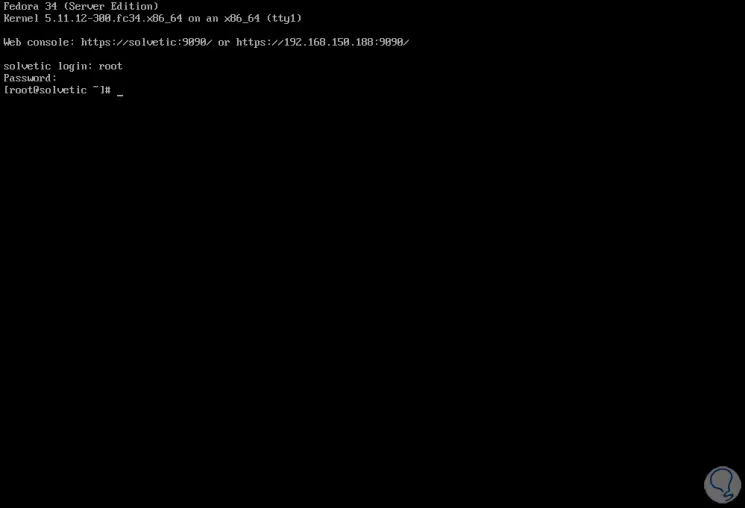
We reboot the system and after this we log into Fedora 34 Server:
This has been the process of installing this new system and we are ready to explore its functions.