Fedora is one of the most versatile Linux distributions of Linux which is available both in desktop version (Workstation) and for enterprise level (server). Fedora is currently available in version 33 but has released version 34 of its system in beta (trial)..
Fedora 34 will be available for aarch64 version with Plasma, we will also find a KDE version for devices with 64-bit ARM architecture. Wayland's support for Plasma and KDE components will have notable changes in Fedora 34 as one of the changes will be the change from the default Fedora KDE Spin X.Org-based session to the modern Wayland session.
Fedora 34 will feature Plasma 5.20 and it will be possible to select the X11 session as a desktop environment option if we wish..
At the moment we do not have any more first-hand news that will be available in Fedora 34.
In view of the fact that it is a system in beta or testing phase, what better way than to try it in VirtualBox which can be downloaded for free In the following link:
VirtualBox
With VirtualBox we can create a virtual machine and know everything that we can see in Fedora 34, with TechnoWikis you will see how to create it and thus know in advance that Fedora 34 will have.
To stay up to date, remember to subscribe to our YouTube channel! SUBSCRIBE
How to install Fedora 34 in VirtualBox
Step 1
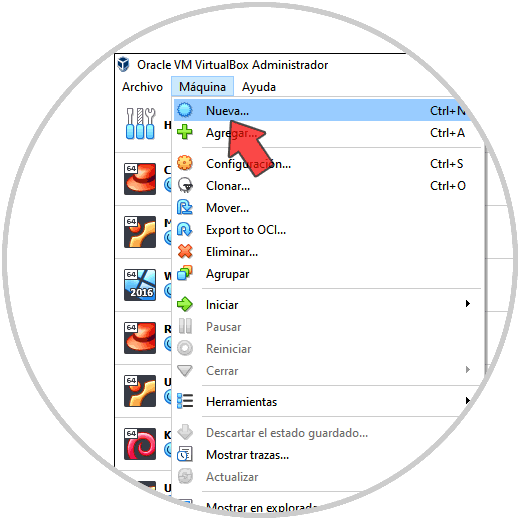
The first step will be to open VirtualBox and create the virtual machine, for this we have the following options:
- From the "Machine - New" menu
Step 2
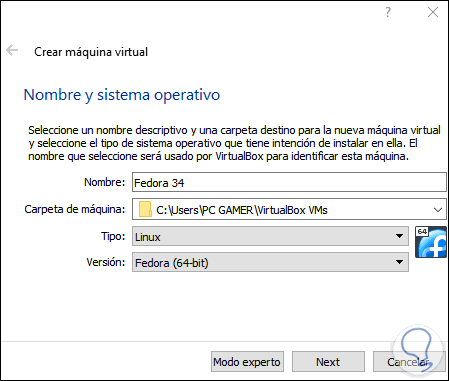
In the displayed wizard we enter the name of the virtual machine and the location where it will be, by default VirtualBox assumes the operating system and version to use:
Step 3
We click Next and now we assign the RAM to the virtual machine:

Step 4
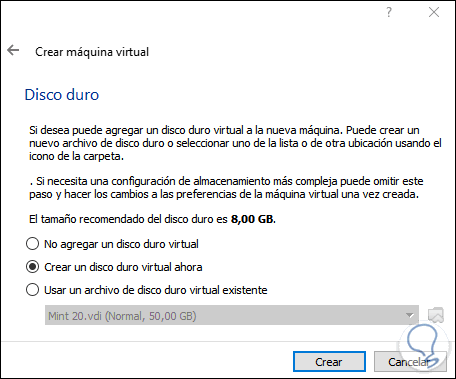
After this we are going to create the virtual hard disk for Fedora 34:
Step 5
Click Create to select the type of hard drive to use:
Step 6
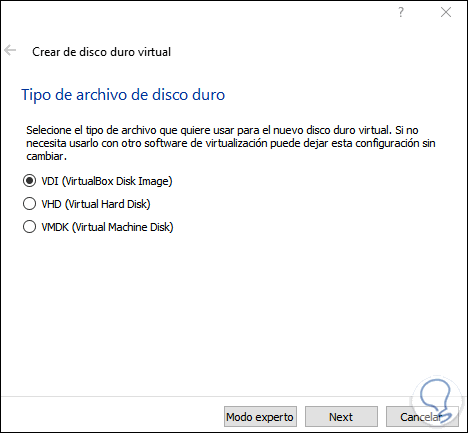
We click Next to assign the type of storage to use:

Step 7
After this we assign the size of the hard disk and we will see where it will be hosted:
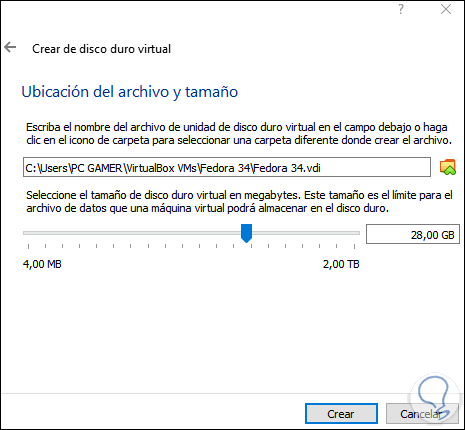
Step 8
We click on Create and we will see the virtual machine created:
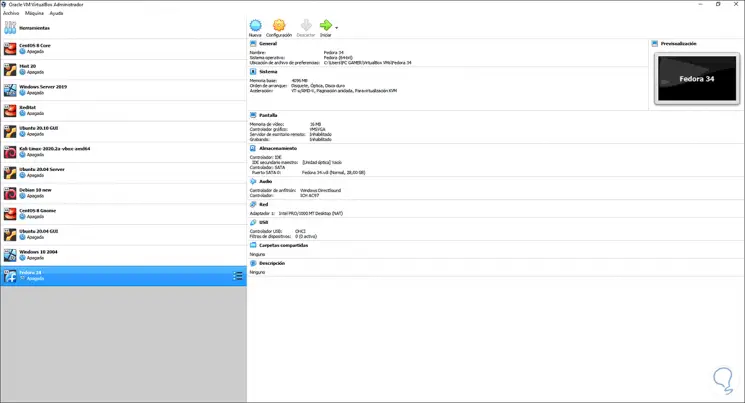
Step 9
We click on the "Configuration" button and in the Network section we must activate the bridge adapter with the physical network card for network connectivity:
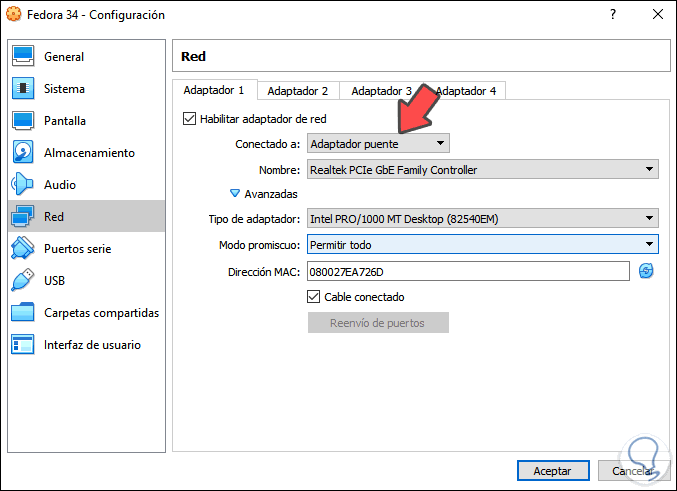
We save the changes..
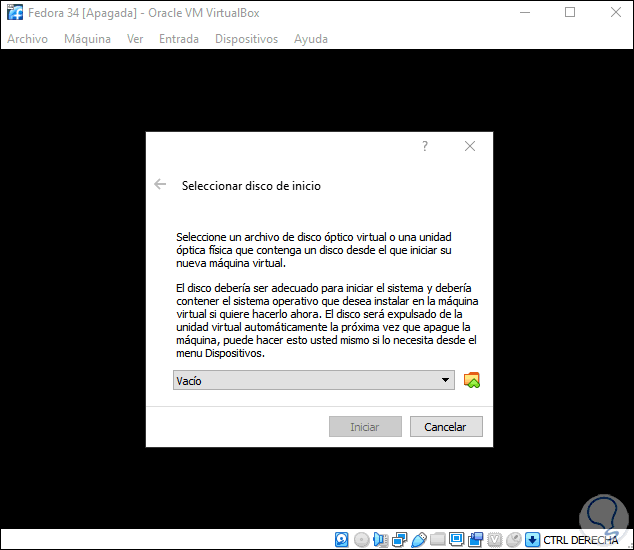
Step 10
We start the virtual machine and we will see the following:
Step 11
We click on the browse button and we will use the Fedora 34 ISO image available at the following link:
Fedora 34
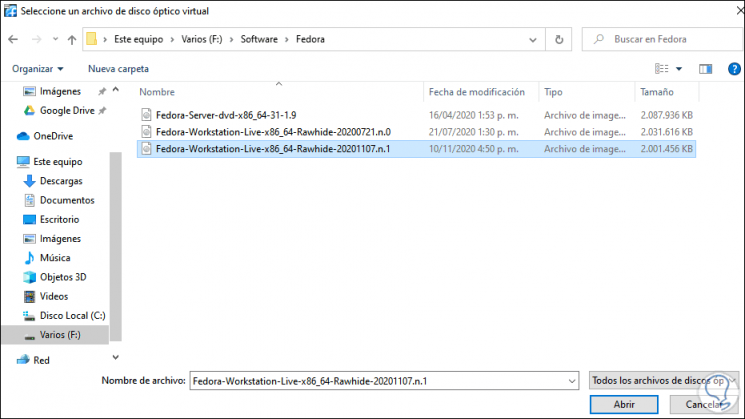
Step 12
We click Open and we will see the added image:
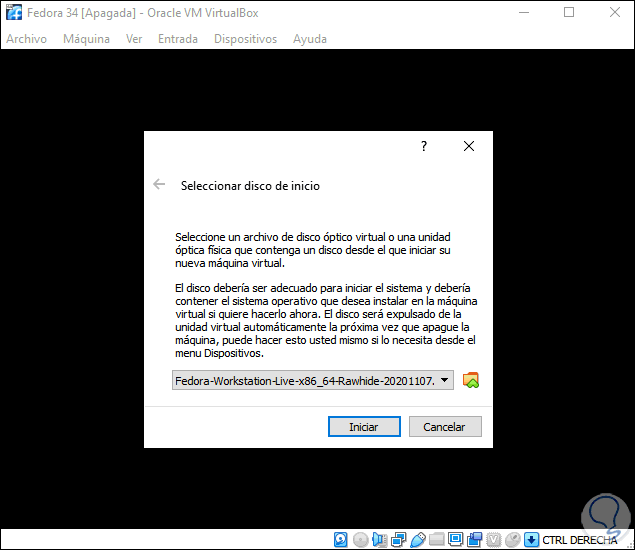
Step 13
We click on "Start" and in the next window we click on "Start Fedora-Workstation-Live Rawhide":
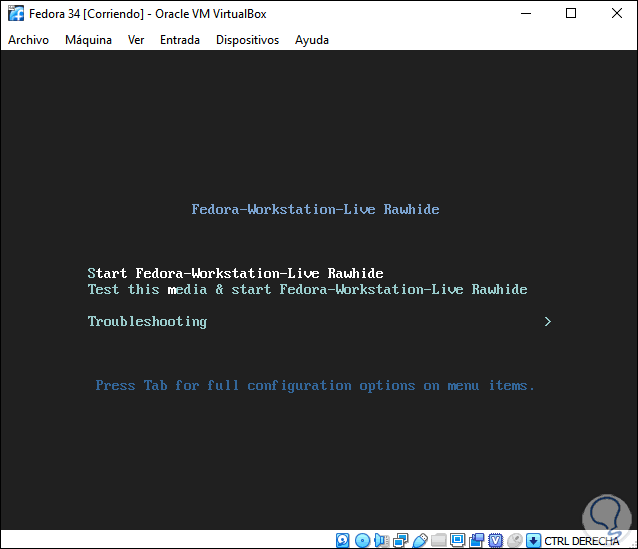
Step 14
After a moment we will see the following:
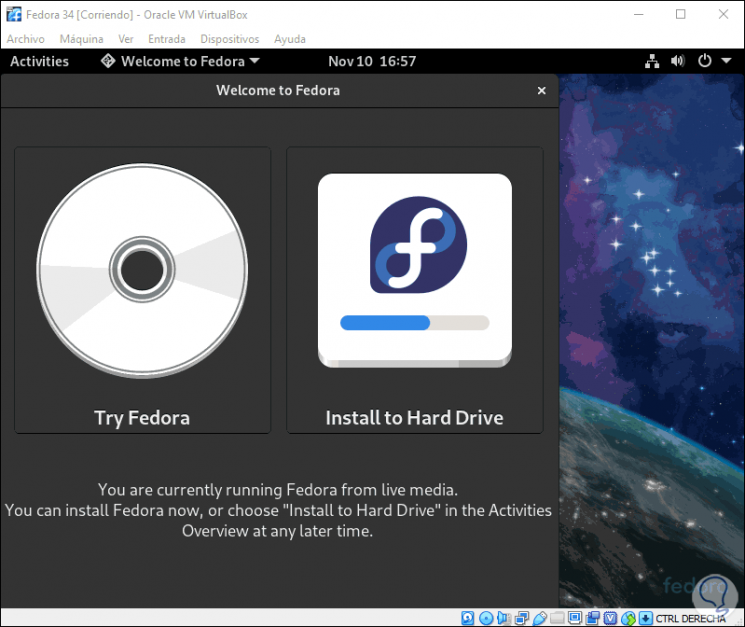
Step 15
There we can test Fedora (this does not store the changes) or click on "Install to Hard Drive" to directly install Fedora on the hard drive, then we select the language to use for the installation:
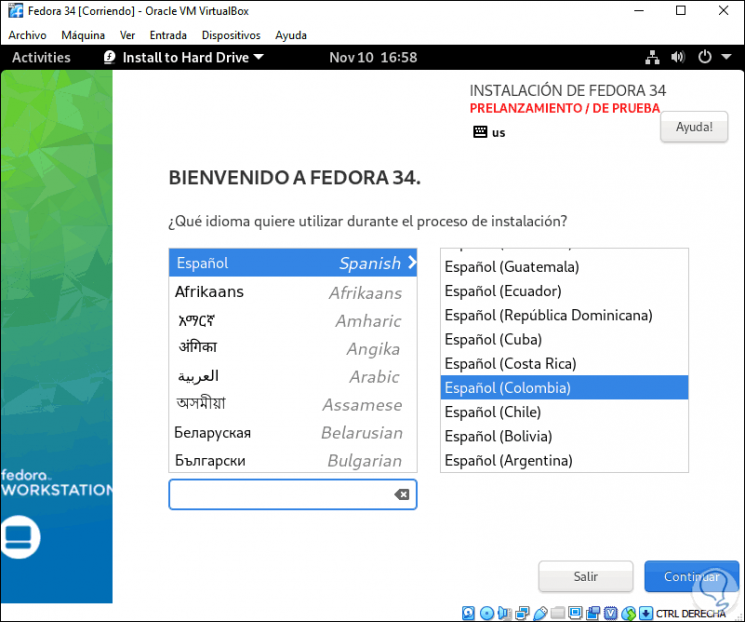
Step 16
After selecting the language we will see the following message where it is noted that it is a test system which can be unstable:
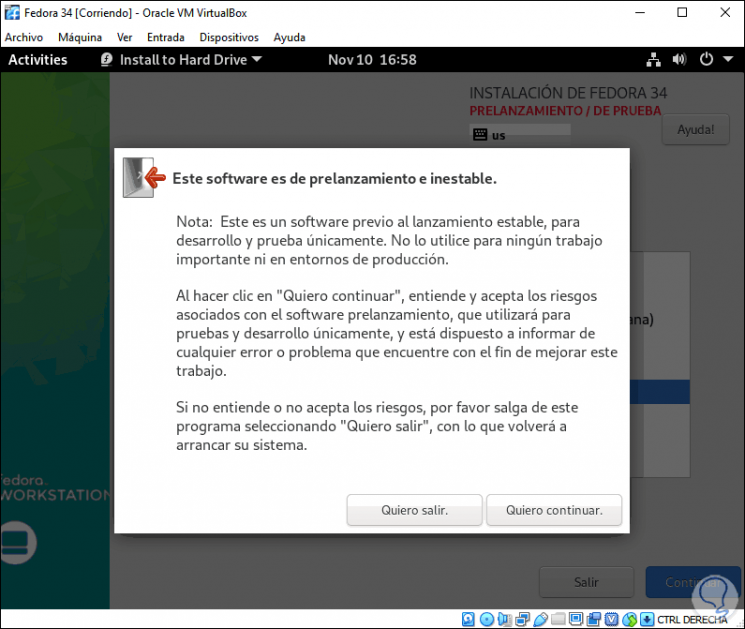
Step 17
Click on "I want to continue" and we will see the following:
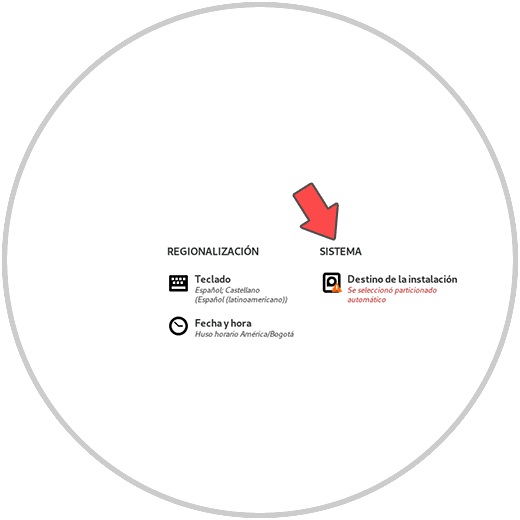
Step 18
There we must complete the fields with a warning, we click on "Installation destination" and in the next window we can configure the way to partition the disk, it can be automatic or personalized:
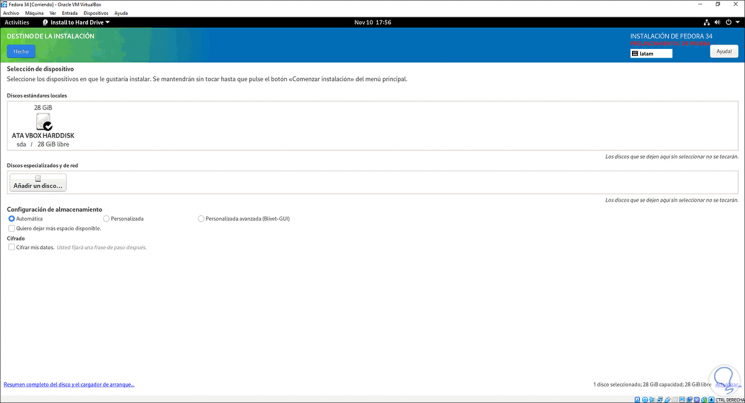
Step 19
Once this is complete, we click on "Done":
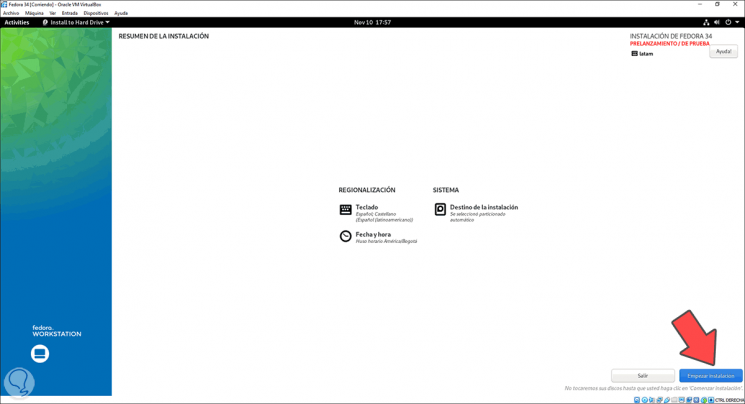
Step 20
We click on "Start installation" to proceed with the installation of Fedora 34:
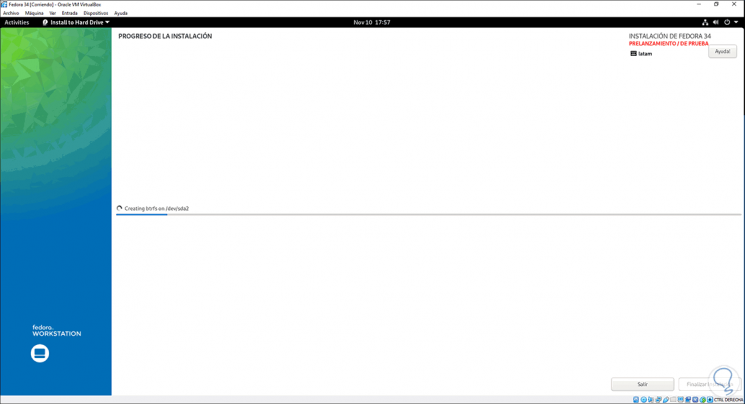
Step 21
At the end of this process we will see the following:
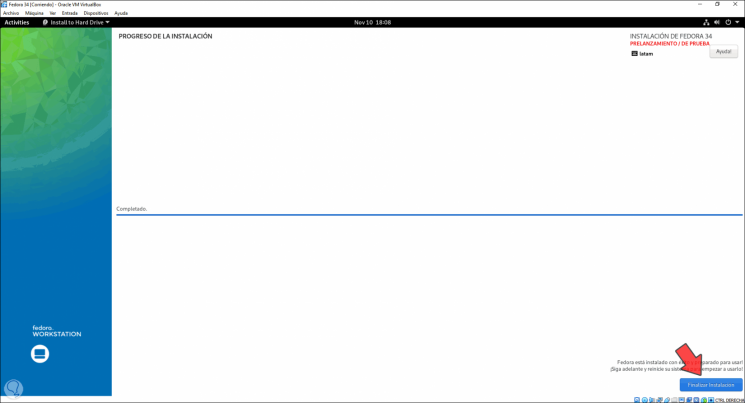
Step 22
We click on "Finish installation" to restart the system.
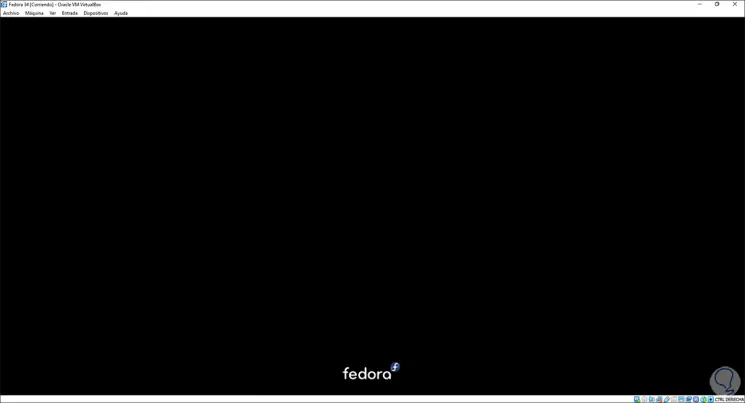
We advise you to delete the virtual hard disk from "Devices" and then go to "Machine - Restart".
Step 23
Once the system loads we will see the welcome screen:
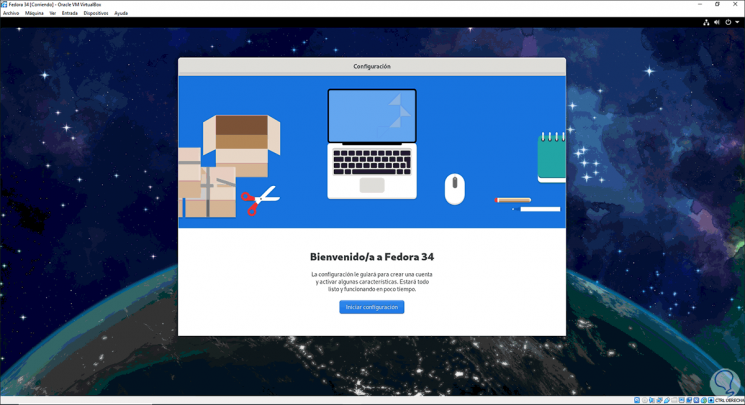
Step 24
We click on "Start configuration" to complete some additional steps such as creating the user:
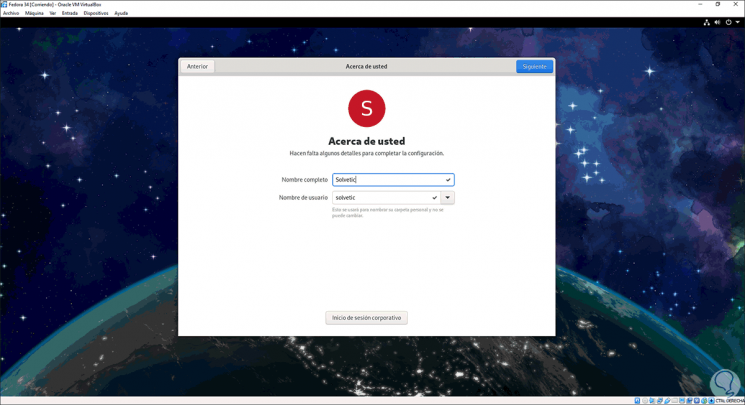
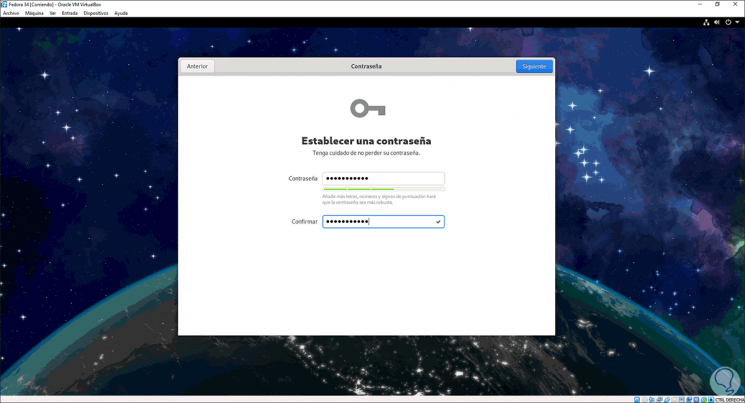
Step 25
We assign password:
Step 26
Once we finish we will see this:
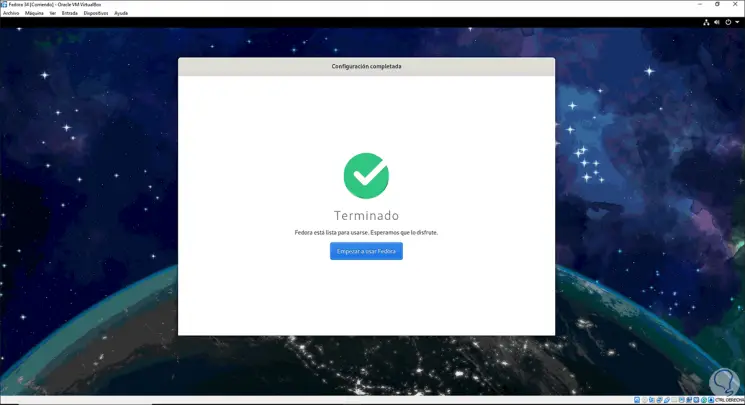
Step 27
After that we can receive a tour of everything that Fedora 34 has:

This is how simple it is to install Fedora 34 in VirtualBox thanks to TechnoWikis.