The new updates of the operating systems are always well received, since they offer news and improvements for the usability of the user in most cases, as well as correction of different errors..
Fedora has made available to its users the Fedora 33 Rawhide beta which will be officially released in October 2020 as the new update of this popular system. In this latest version we will be able to see different novelties among which are the following.
Fedora 33 Rawhide
- Security enhancements in services like Apache HTTP Server, Postfix, Sendmail and more
- New updates for package management
- Greater interaction with kernel modules and constant kernel updates
- java-11-openjdk added as system JDK
- System-resolved improvements
As it is a beta version, it is advisable for TechnoWikis to try it in a virtual environment , but if you trust Fedora and use Windows 10 at the same time, TechnoWikis has interesting news for you and it will be possible to use it on the same Windows computer 10 and Fedora 33 using the same hardware resources..
TechnoWikis will explain through this tutorial how to create this dual boot on the computer and then simply define with which system you will log in.
Fedora 33 Rawhide is available for download at the following link:
Fedora 33
Please note, if the Windows 10 operating system installation was in UEFI mode (but not in Legacy or CSM mode), the Fedora installation should also be processed in this same UEFI mode..
1. How to configure Windows 10 disk to install Fedora 33
The first step will be to configure the hard disk in Windows 10 where Fedora 33 has to be installed.
Step 1
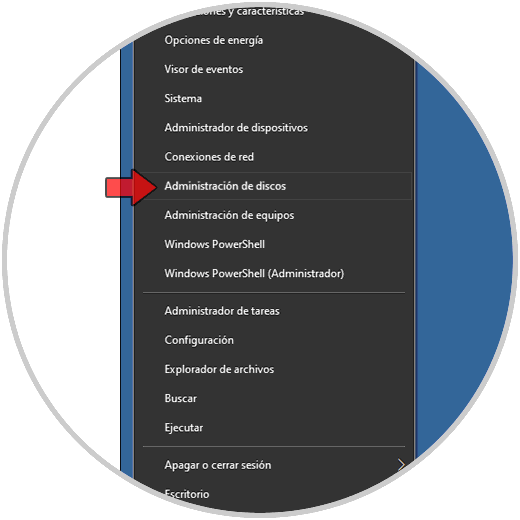
To do this we right-click on the Start menu (or use the Windows + X keys) and select "Disk Management":
Step 2
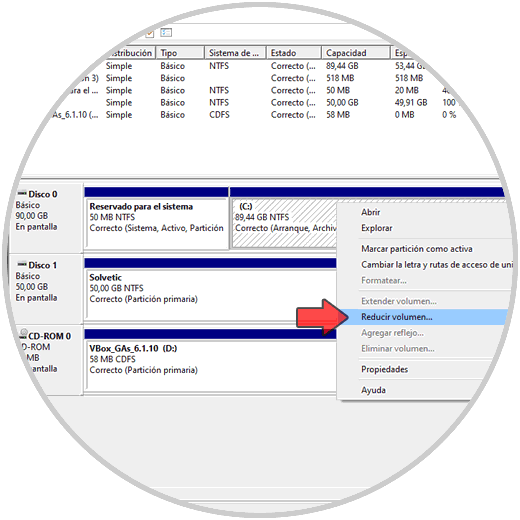
In the administrator we will right-click on the C drive (where Windows 10 is installed) and select "Reduce volume":
Step 3
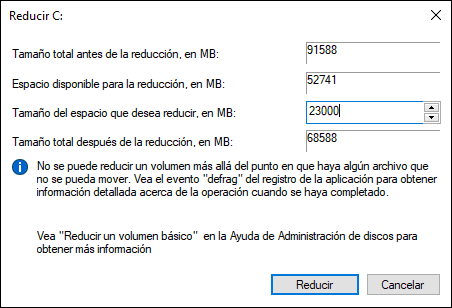
After this we will enter the size to be set for fedora 33, in this case 23 GB:
Step 4
We click on “Reduce” and we will see the following as a result:
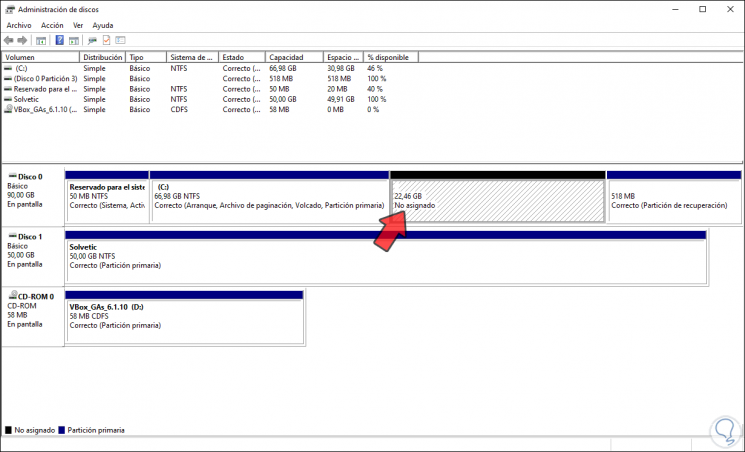
The space on the hard disk for Fedora 33 we leave it as it is with the legend "Not assigned", that is, we will not apply any type of format on it.
2. How to prepare ISO image of Fedora 33
After this, the ISO image that we have downloaded must be configured as a bootable medium, be it
DVD or USB.
Step 1
In this case we recommend using Fedora Media Writer which is available at the following link:
Fedora Media Writer
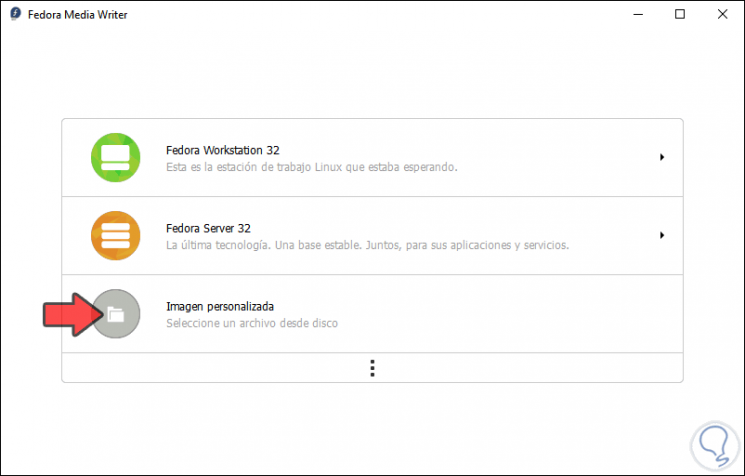
After installing it we will see the following. There we select the option "Custom image" and select the Fedora 33 image that we have previously downloaded:
Step 2
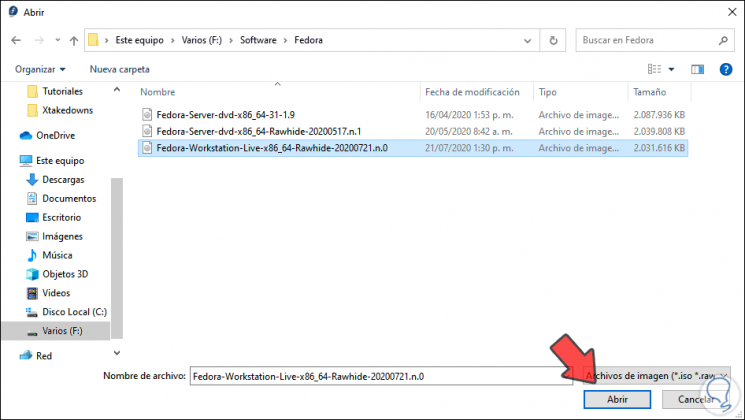
We click "Open"
Step 3
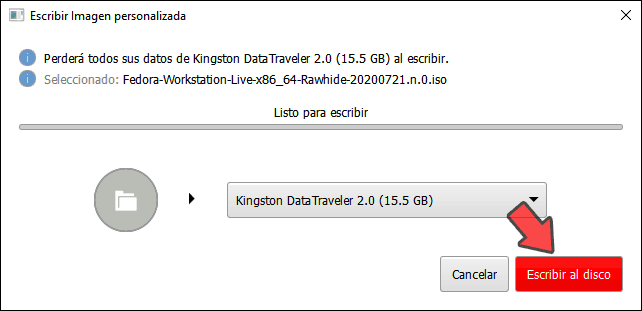
After this we select the medium where Fedora 33 will be installed. To complete the process we click on "Write to disk".
3. Set up dual boot between Windows 10 and Fedora 33
Step 1
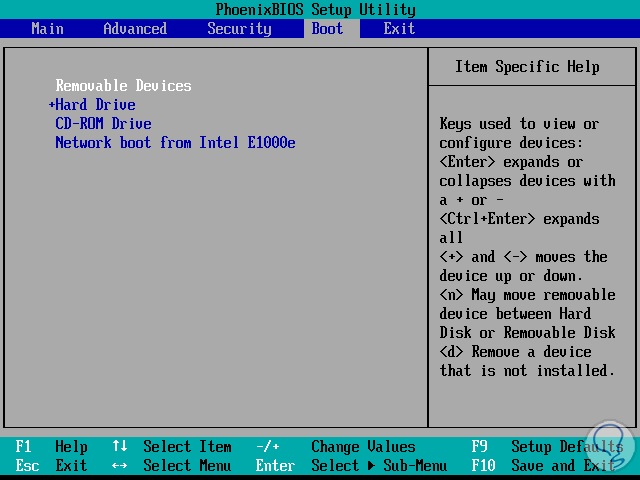
Once the boot media is created, we go to the BIOS or UEFI configuration of the computer to select the type of media from which we will boot:
Press the F10 key and we will see that the system will start from Fedora 33 Rawhide:
Step 2
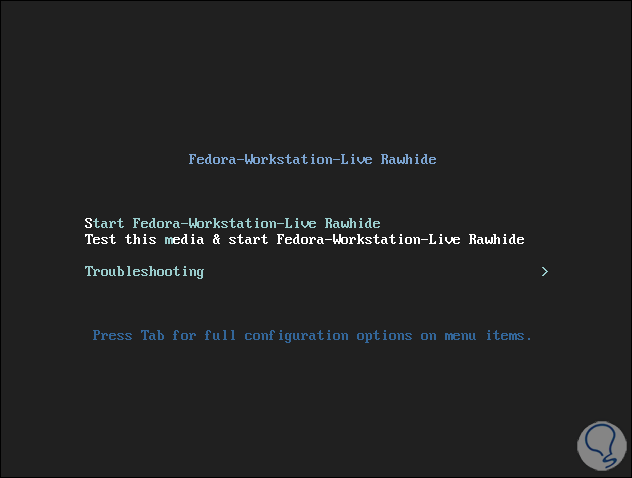
We select the option “Start Fedora-Workstation-Live Rawhide” in order to access the Fedora 33 live use medium:
Step 3
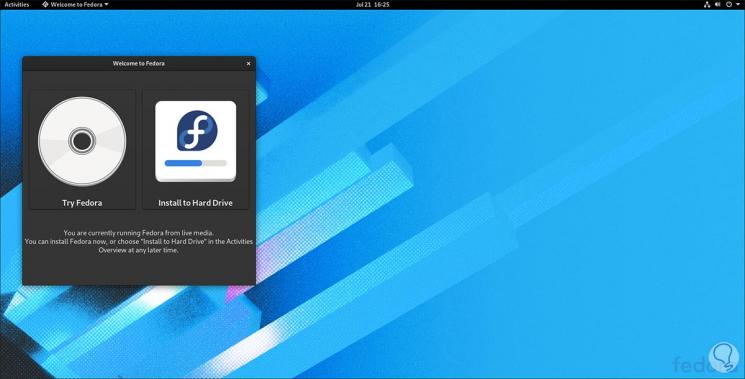
There we can navigate and get to know the system, but nothing will be stored, we click on “Install to Hard Drive”
Step 4
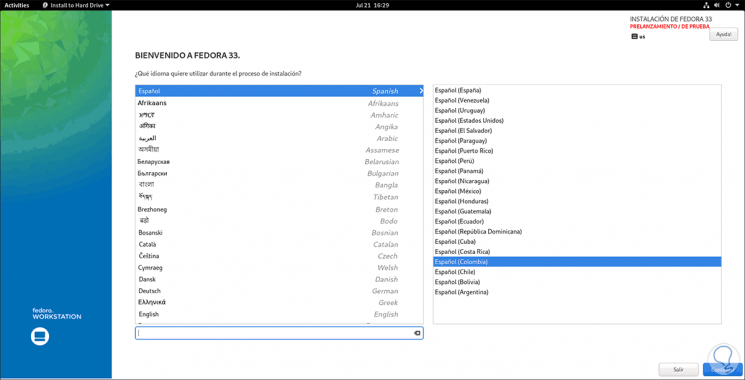
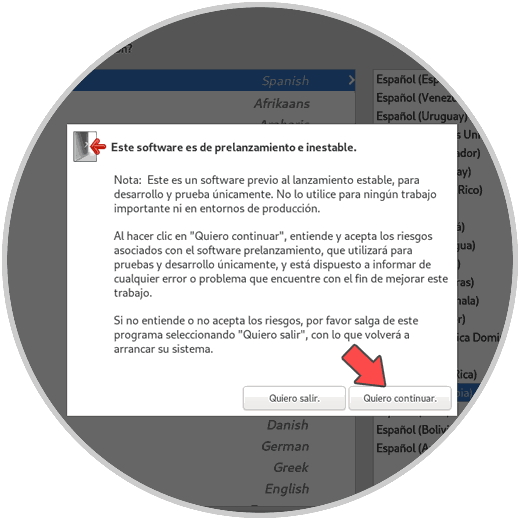
then the following will be displayed where we select the installation language of Fedora 33. We click "Continue" and we will see the following warning:
Step 5
We click on "I want to continue" and we will see the following:
Step 6
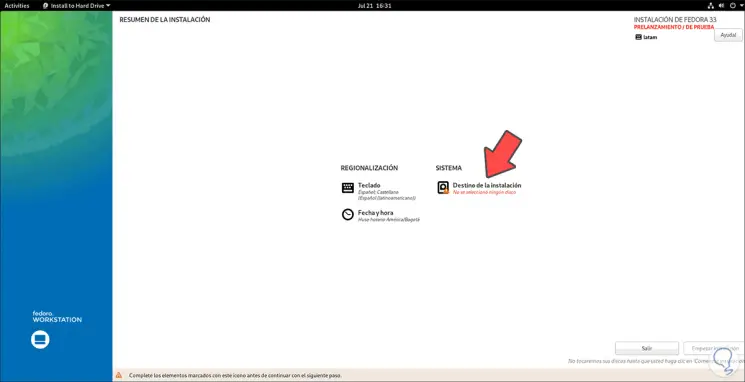
In this case we must click on “Installation destination” in order to select where to install Fedora 33,
Step 7
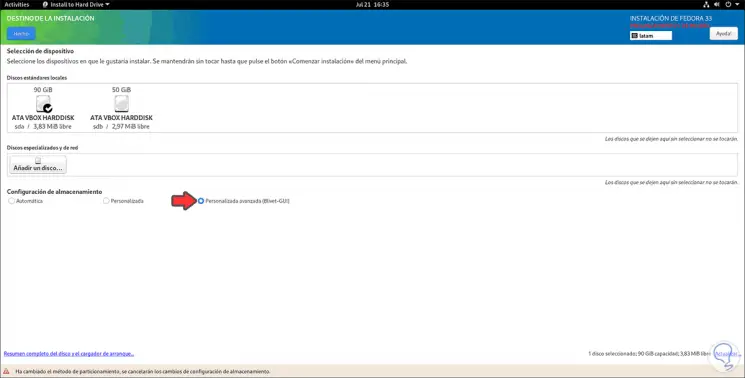
In this case we select the disk where Windows 10 is installed and activate the “Advanced Custom (Blivet GUI) box:
Step 8
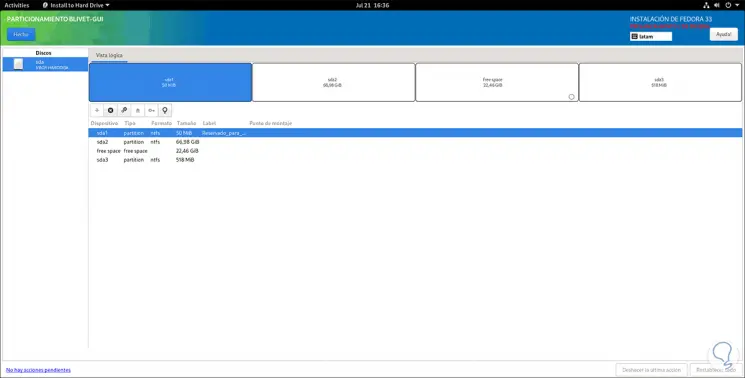
We click on the "Done" button and we will see the structure of the selected disk:
Step 9
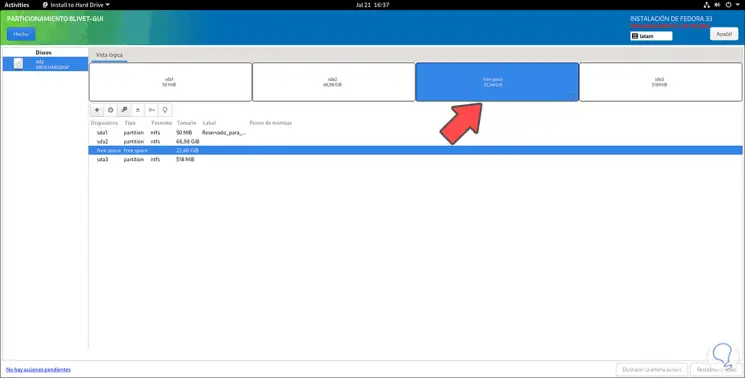
There we select the box with the free space:
Step 10
We click on the + sign and now define the following:
- In the "File system" field we select "ext4"
- In "Label" we can enter some name to the unit
- In "Mount point" we enter / to set the root
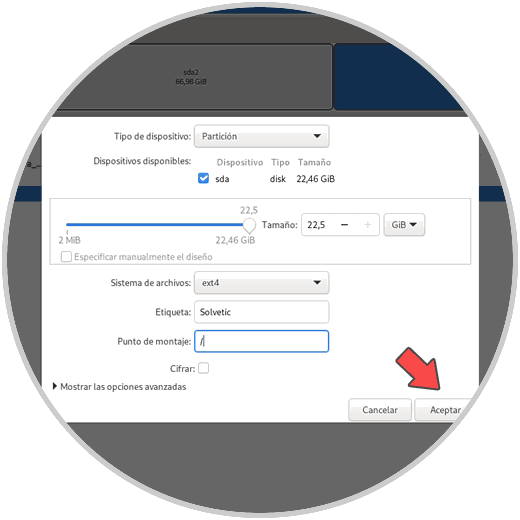
Step 11
We click "OK" and we will see the changes in the selected disk or partition:
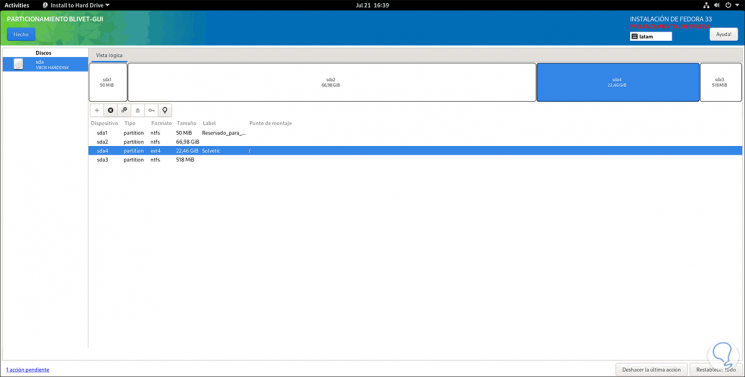
Step 12
We click on the "Done" button and the following window will be launched with the new partition structure:
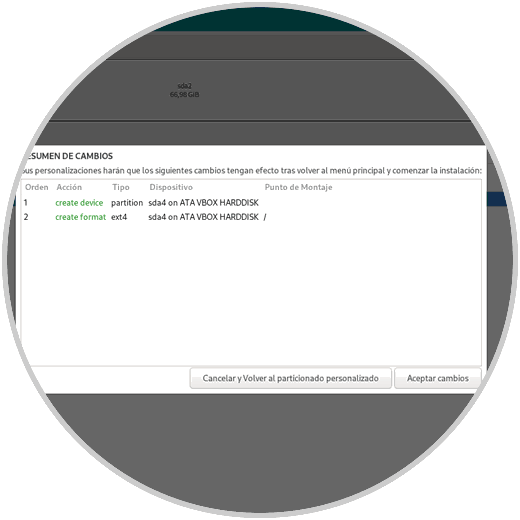
Step 13
If we agree, we click on the "Accept changes" button and we will be redirected to the main window:
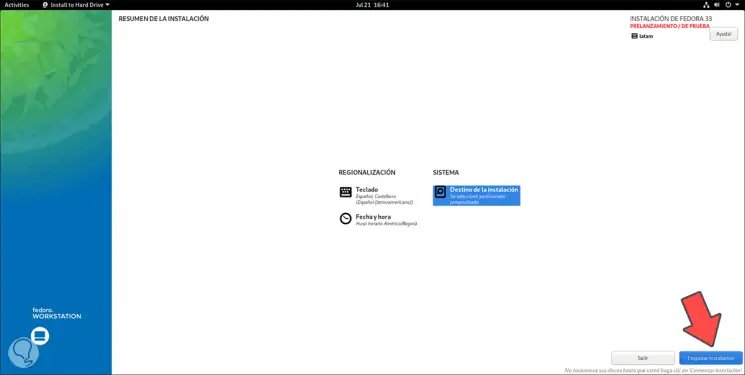
Step 14
We click on “Start installation” to start the Fedora 33 installation process with Windows 10:
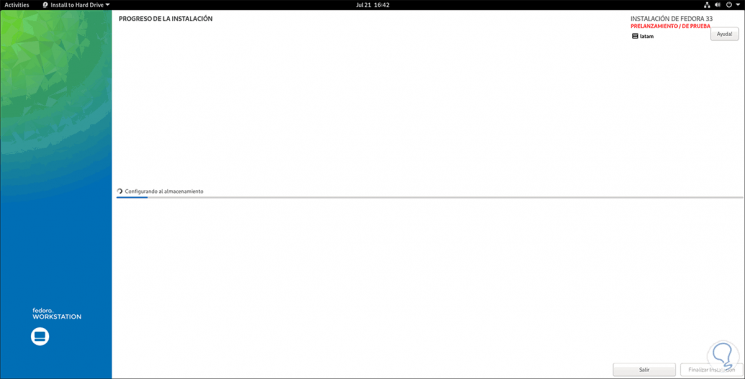
Step 15
When the process reaches its end we will see the following:
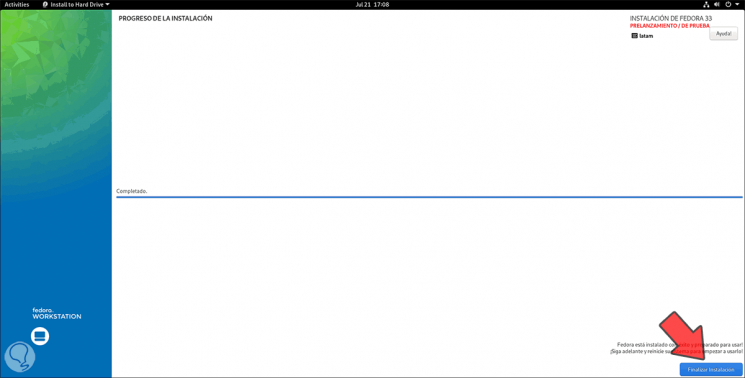
Step 16
We click "Finish installation" and we must reboot the system and when you log in, the initial configuration of Fedora 33 will open:
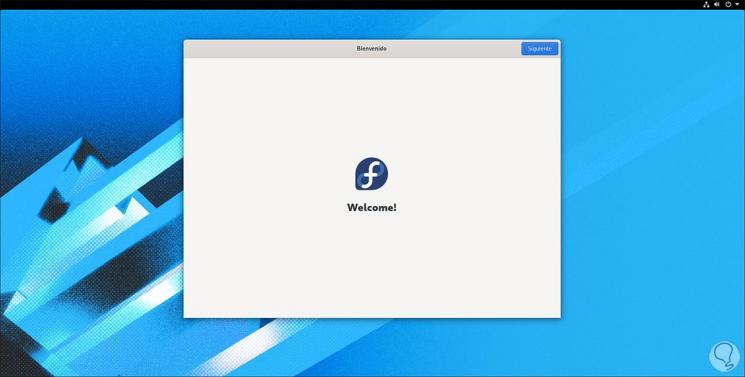
Step 17
We click Next and configure some system services:
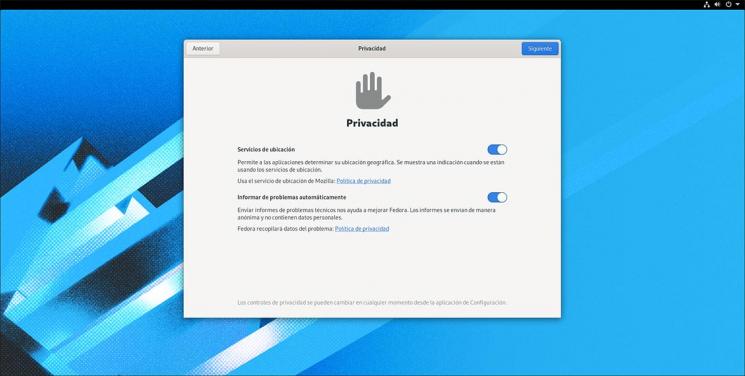
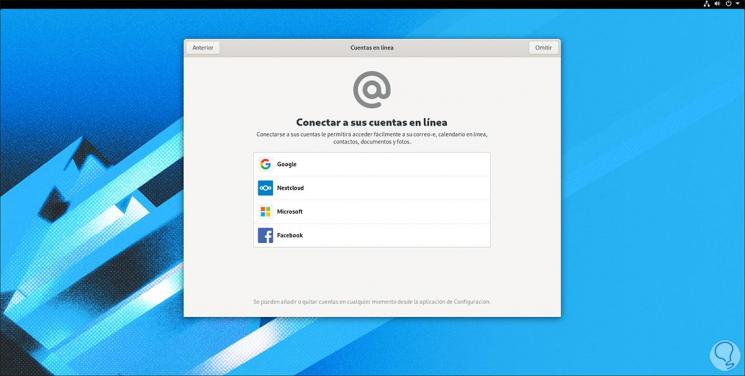
Step 18
After this it will be possible to link accounts online if we wish:
Step 19
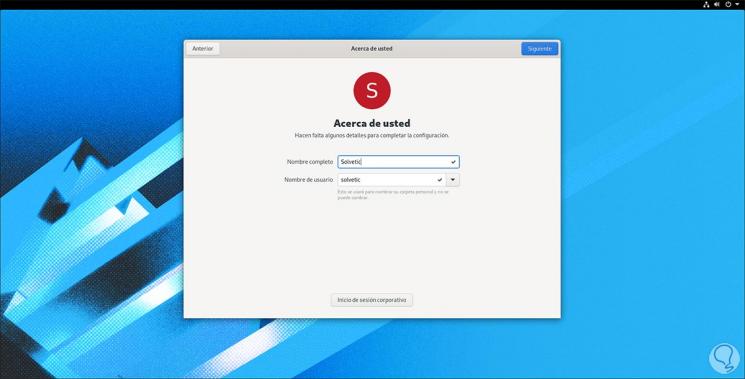
Next, we enter the username for Fedora 33:
Step 20
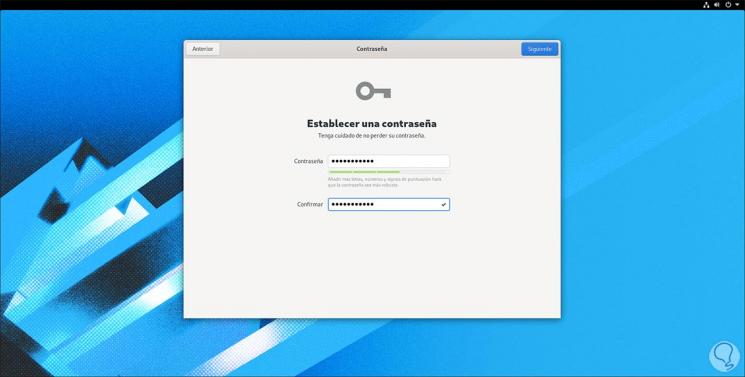
We enter the desired password:
Step 21
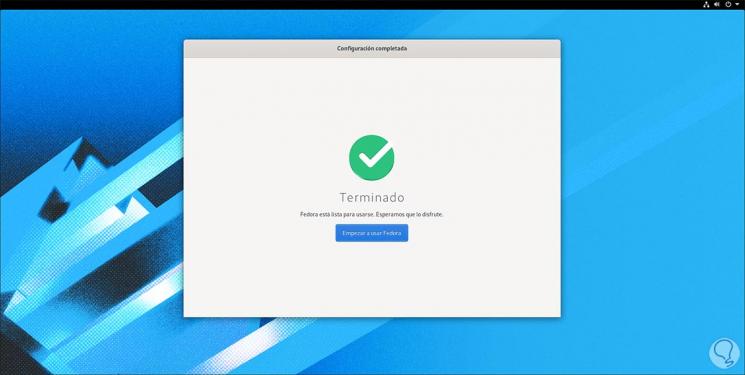
We click Next and with this we have configured Fedora 33 with Windows 10:
Step 22
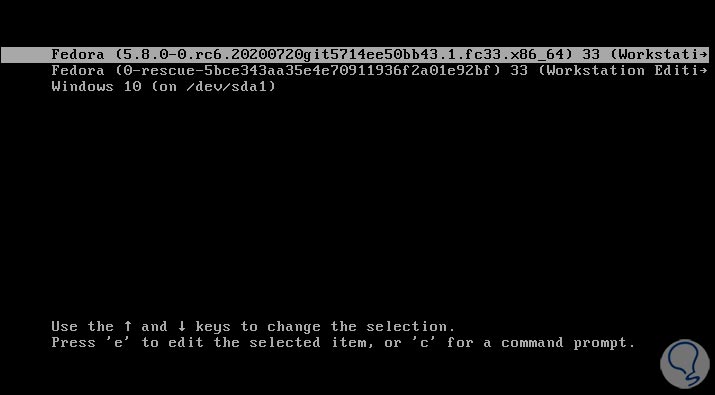
When the computer is restarted or turned on, we can select which operating system we want to start with:
Step 23
On some computers with Linux and Windows dual boot and with UEFI firmware, the GRUB menu will be displayed after the restart, in which case we must access the Windows 10 computer and at the command prompt console (as administrators) execute:
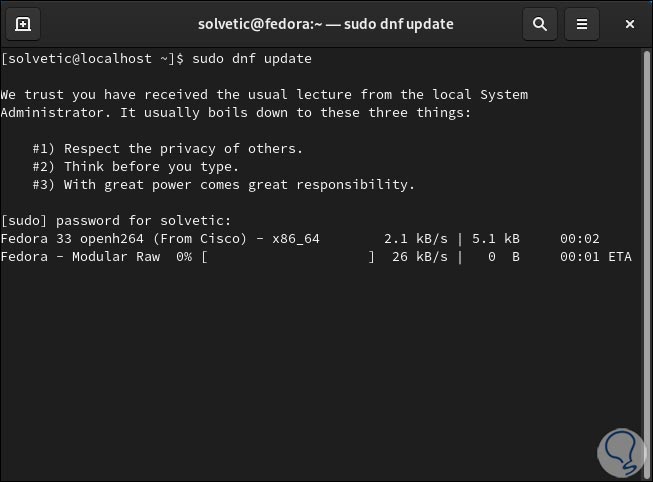
bcdedit / set {bootmgr} path \ EFI \ fedora \ shim.efi We can access Fedora 33 and update it with the following command:
sudo dnf Update
Step 24
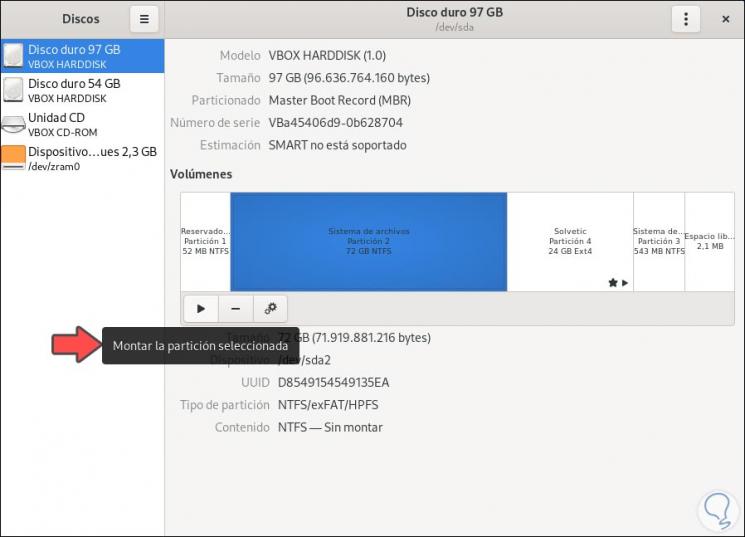
If we want to access the Windows 10 partition from Linux, we must access Disks and there select the Windows 10 drive and click on the button "Mount the selected partition":
Step 25
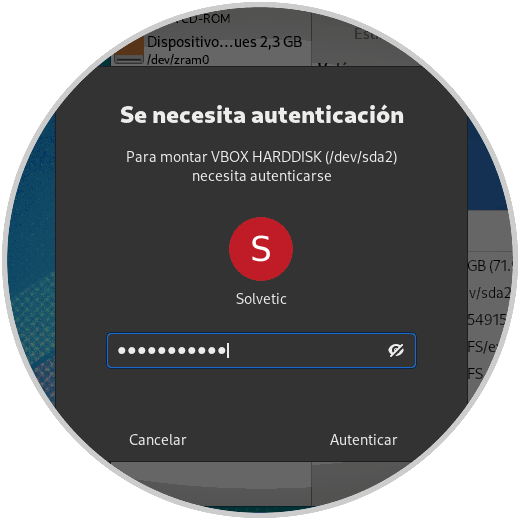
We must enter the administrator password:
Step 26
We click Authenticate and the unit will be mounted:
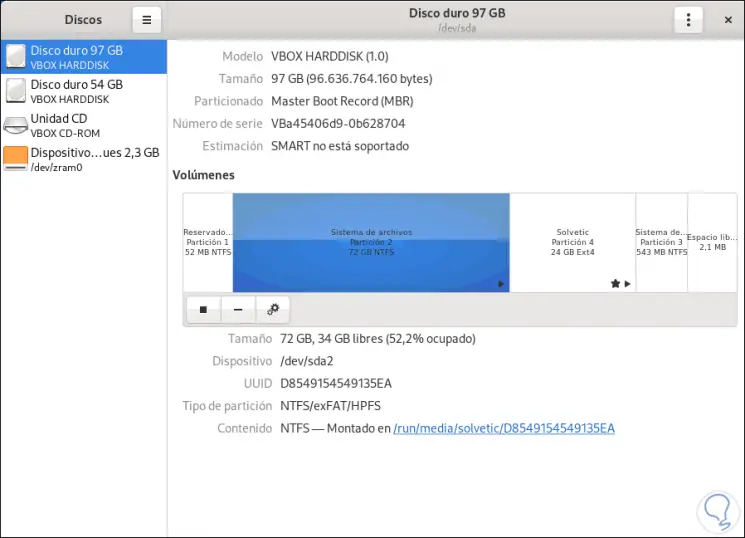
Step 27
To access this unit we will go to Files - Other locations and select the Windows 10 partition to see its contents:
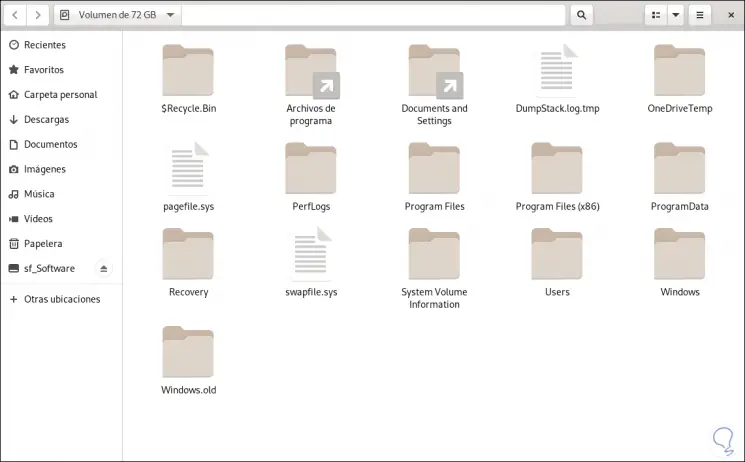
With this method, Fedora 33 has been installed together with Windows 10.