We currently have different options when it comes to managing and using operating systems regardless of their final objective, one of the most relevant features in this medium is the ability and possibility of using two operating systems on a single computer, normally called dual boot , since That in this way and whenever we have enough hardware resources, it will be possible to fully explore a new system (not virtualized) are to spend more on new hardware or other resources..
One of the most special distributions of Linux is Kali Linux which has a purely security approach which, if we are in this medium, will be a more than valuable tool to detect failures, security holes and in an integral way improve security in a organization. Through this tutorial, TechnoWikis will explain how to install the latest version of Kali Linux, 2108.2, along with Windows 10 and thus have these two powerful and dynamic systems on hand.
Before seeing how Kali Linux is installed dually with Windows 10, it is important that we know a little more about this Linux distribution..
What is Kali Linux?
Kali Linux is a Linux distribution that is based on the popular Debian distribution and whose purpose is to carry out advanced security penetration and audit tests. This is achieved because Kali integrates various tools for different information security tasks, including penetration tests, security research, computer forensics and reverse engineering.
The Kali Linux distribution has been developed, funded and supported by Offensive Security, which is a leading information security training company worldwide.
Kali Linux features
Within the various functions and characteristics of Kali we have:
- It has more than 600 penetration test tools to make use of the best and thus add high level security parameters.
- All the source code included in Kali Linux is available through Git for public access.
- Kali Linux is completely free.
- Kali Linux complies with FHS standards which allows Linux users to easily locate binaries, support files, libraries and other elements of the distribution.
- Kali has a custom kernel or kernel with special patches for injection in order to optimize the tests to be carried out.
- Support of wireless devices with a wide range which allows Kali Linux to function properly on a wide variety of hardware and thus allow it to be compatible with numerous USB devices and other wireless devices.
- Developed in a secure environment using secure protocols.
- All Kali Linux packages and repositories have been signed by GPG.
- Fully customizable in all areas of the distribution to adjust as necessary.
- Multi-language support to always be available for more users.
- Kali Linux is compatible with ARMEL and ARMHF and is available in a large group of ARM devices and has ARM repositories integrated with the main distribution.
Knowing these advantages of Kali Linux we will know how to create a dual boot between both systems..
1. How to install Kali Linux
We will start by installing Kali Linux as follows.
Requirements
To carry out this task it will be necessary to download the Kali Linux ISO image for free at the following link:
Kali Linux
This will also require the following:
- USB device of at least 4 GB if the boot is to be through this medium.
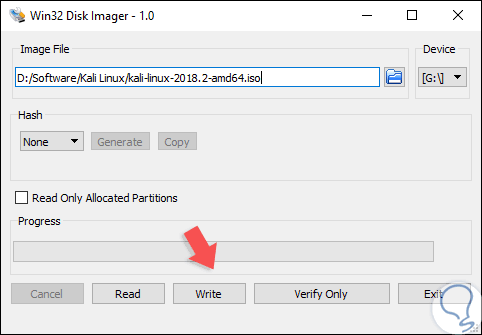
- Utility to record the ISO image on USB media such as win32diskimager or Rufus
Step 1
In the case of selecting this method, we execute some of these utilities and it is enough to select the downloaded ISO image and select the USB medium where this image is to be recorded:
Step 2
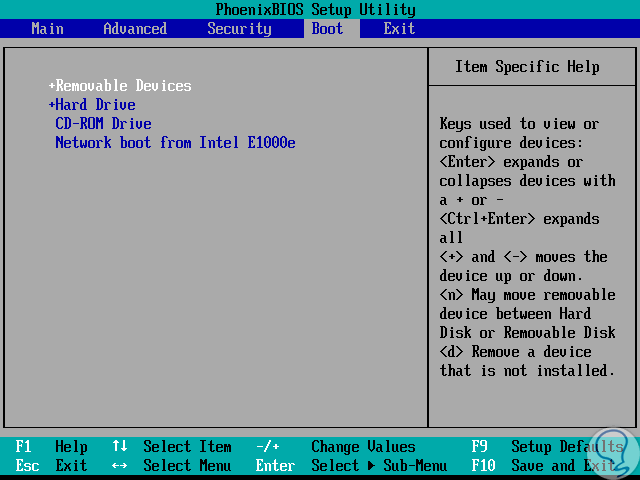
Once this is done we proceed to execute the recording process. The next alternative is to burn the ISO image to a DVD and run the process from there. After configuring this step, we access the BIOS or UEFI of the device and in the “Boot†section we choose “CD ROM Drive†(If we have burned the ISO on a DVD) or “Removable Devices†(If the ISO has been recorded on a USB medium):
2. Windows 10 settings
Step 1
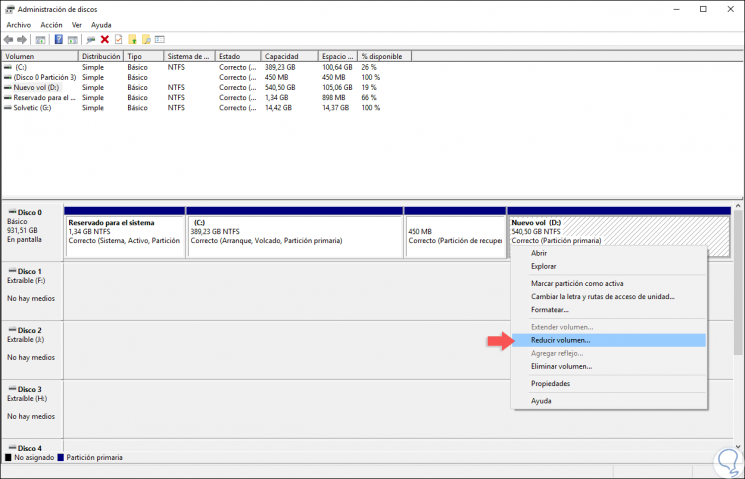
Now it will be necessary to configure the space to be allocated for Kali Linux in Windows 10, for this we must go to the disk manager using one of the following ways:
- Using the following keys, or right click on the Start menu, and there select the option "Disk Management".
+ X Ctrl + X
- Use the following keys and execute the “diskmgmt.msc†command and press Enter.
+ R Ctrl + R
Step 2
In the deployed administrator we will right click on the unit where it is to be installed and select the “Reduce volume†option:
Step 3
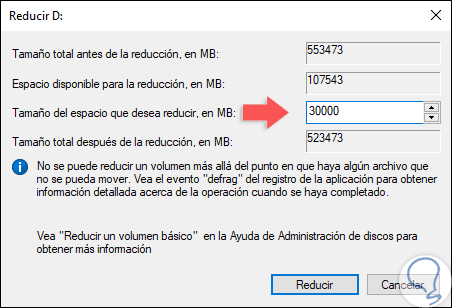
In the displayed window we define the desired space which is recommended to be greater than 30 GB:
Step 4
Click on "Reduce" and we can see that the action is completed with this free space. Defined this we are ready to install Kali Linux next to Windows 10.
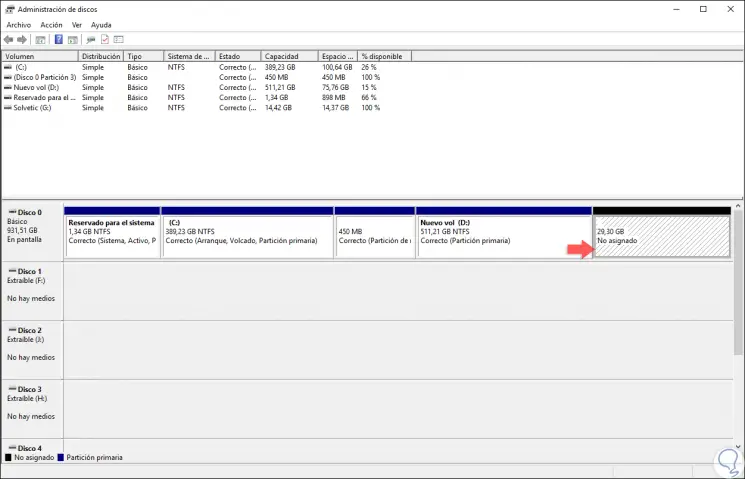
3. Install Kali Linux with Windows 10
Step 1
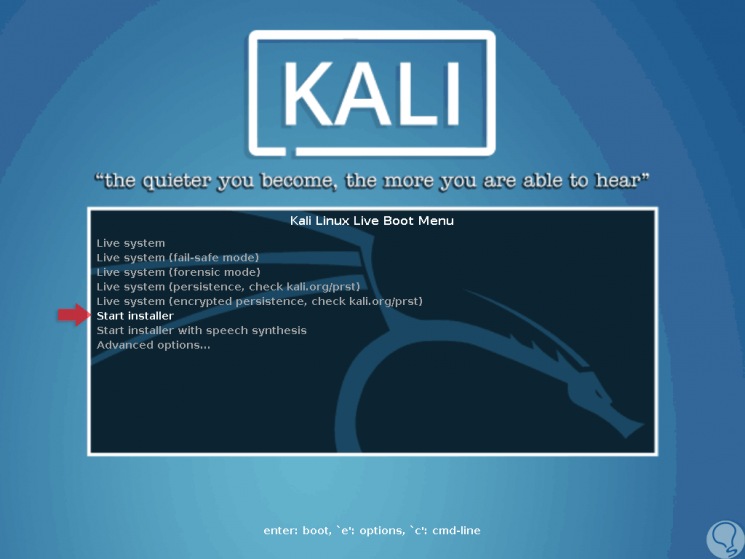
We proceed to start the computer from the USB or DVD with Kali Linux and the following window will be displayed:
Step 2
There we select the “Start installer†option and in the next window we will define the language for Kali Linux:

Step 3
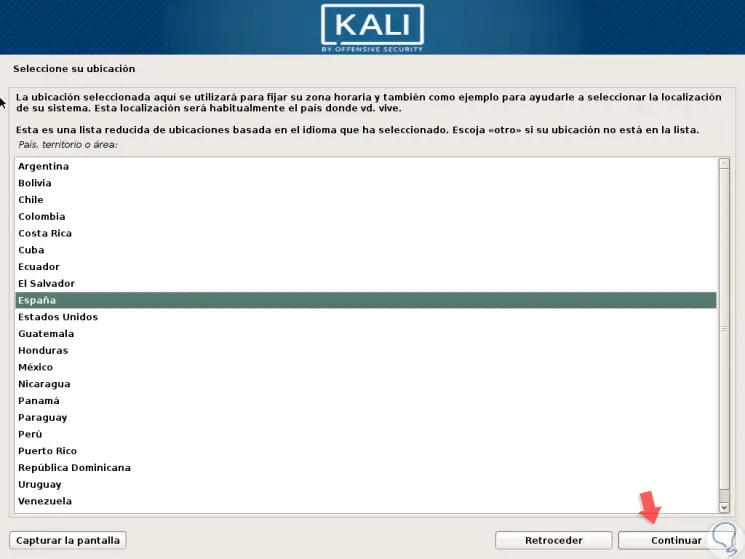
Click on Continue and then select the physical location:
Step 4
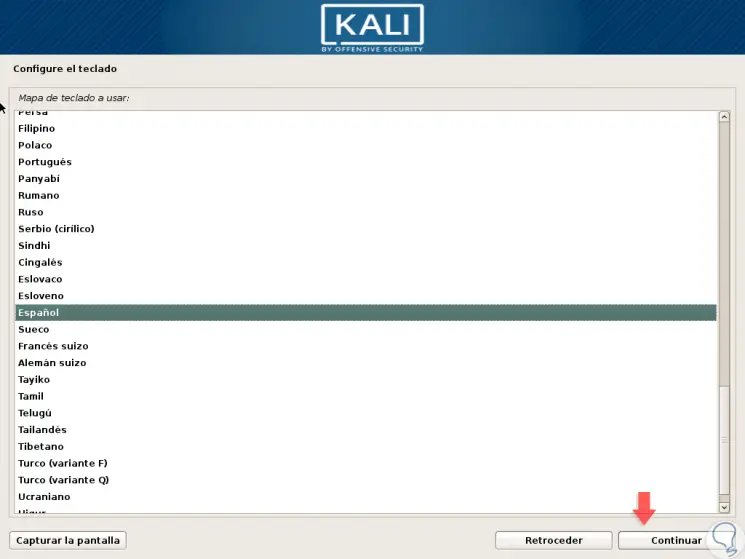
Once this is defined, click on Continue and now select the keyboard language:
Step 5
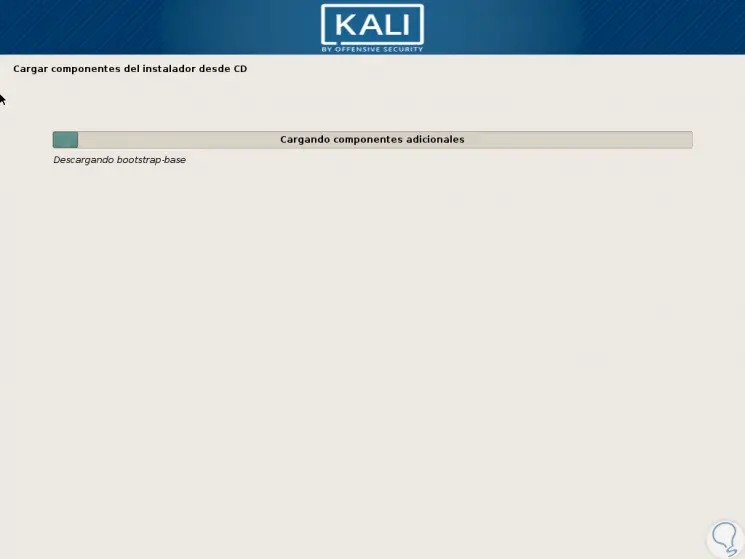
The process of loading necessary components will begin:
Step 6
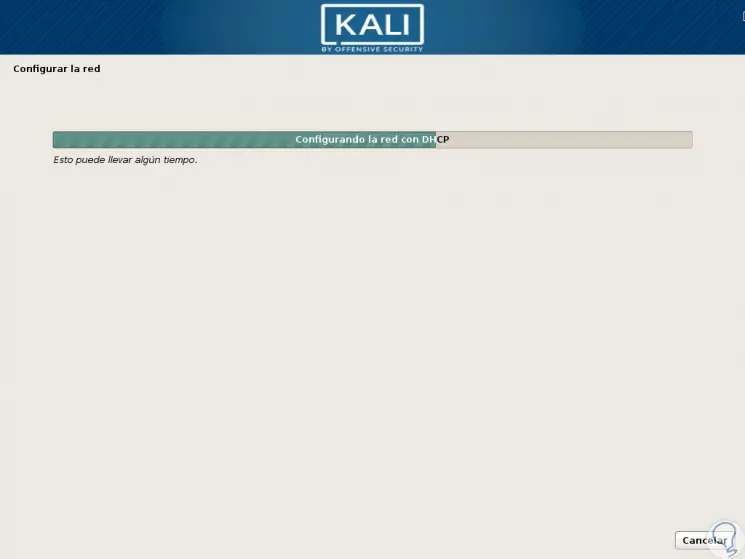
Once this is completed, the network configuration process will be automatically carried out:
Step 7
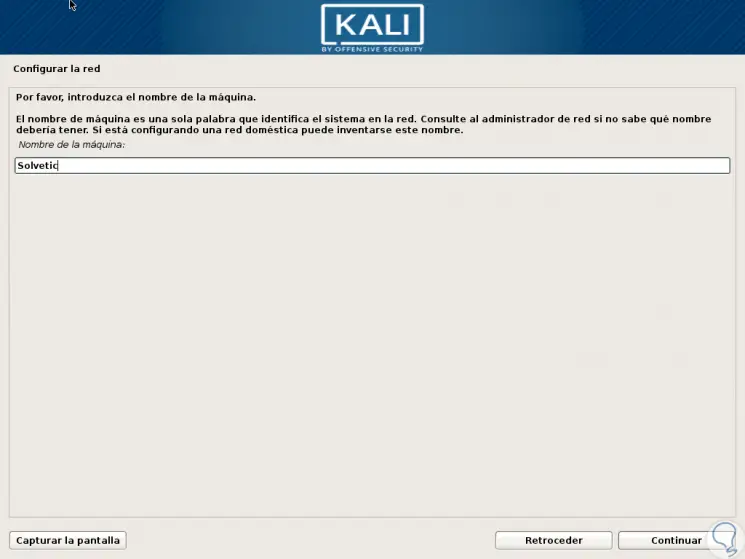
Once the network is configured, we proceed to assign a name to the Kali machine:
Step 8
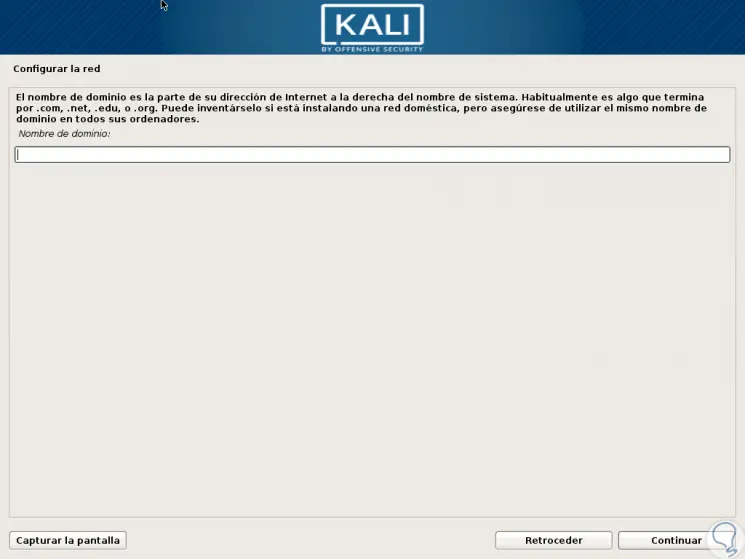
Later we define, if it exists, the respective domain:
Step 9
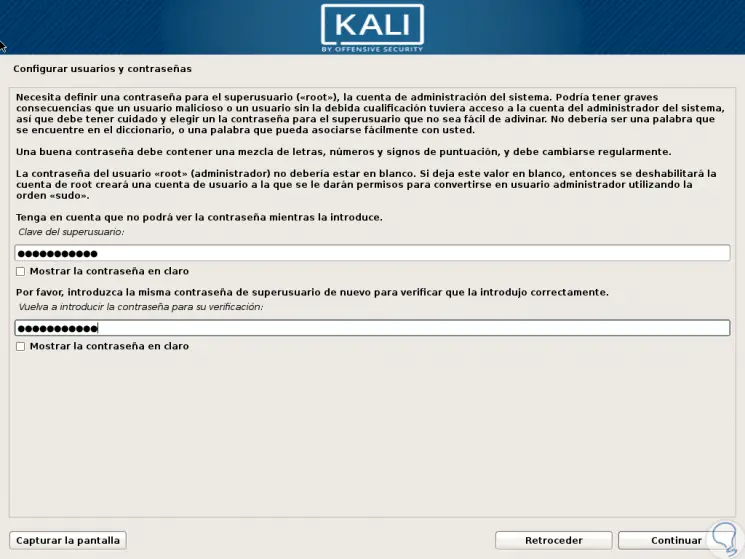
This space can be blank, click on Continue and now we will assign the password, with your confirmation, to the root user:
Step 10
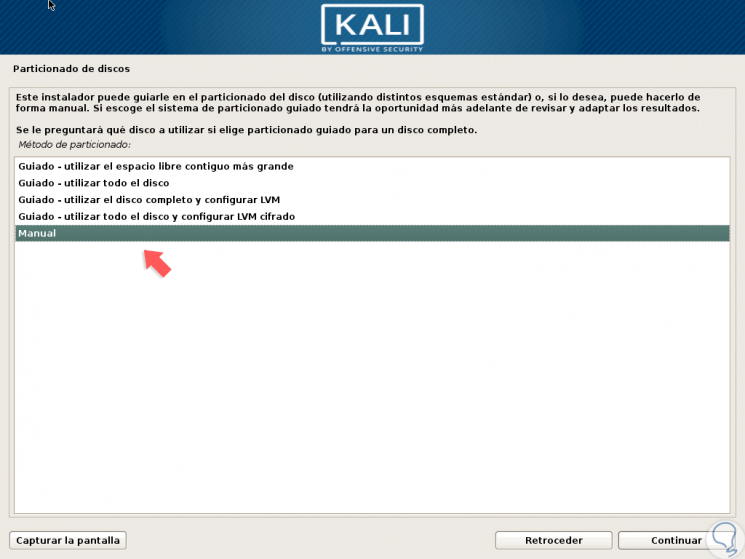
After this, it will be time to configure the hard disk partition, for this we select the “Manual†option:
Step 11
The following will be displayed:
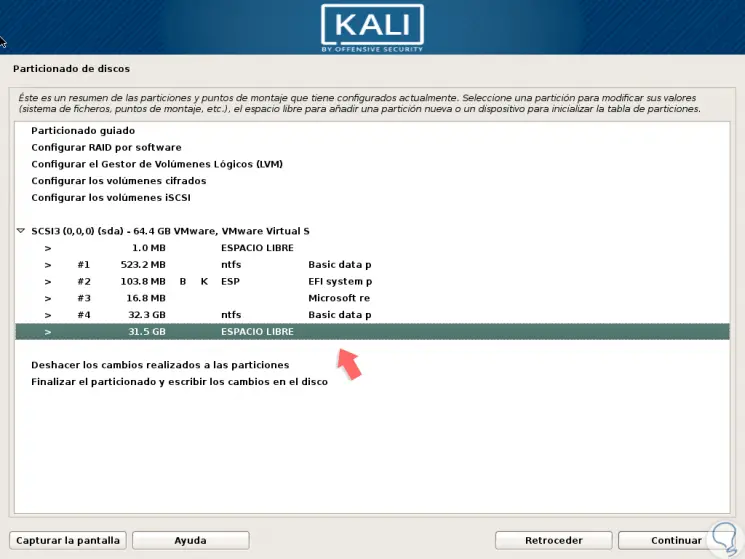
Step 12
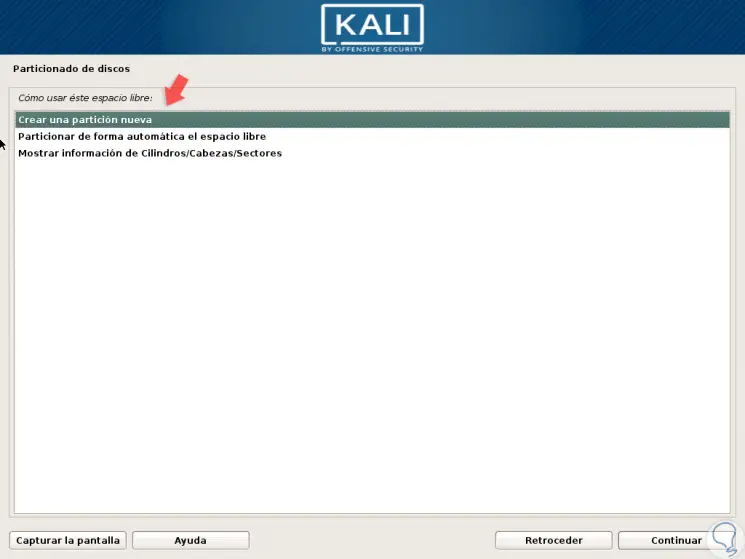
There we go to the “Free space†line and enter Enter on it and in the new window we select “Create a new partitionâ€:
Step 13
Press Enter and we will define the size of said partition, it is important to leave a minimum of 2 Gb for swap memory:
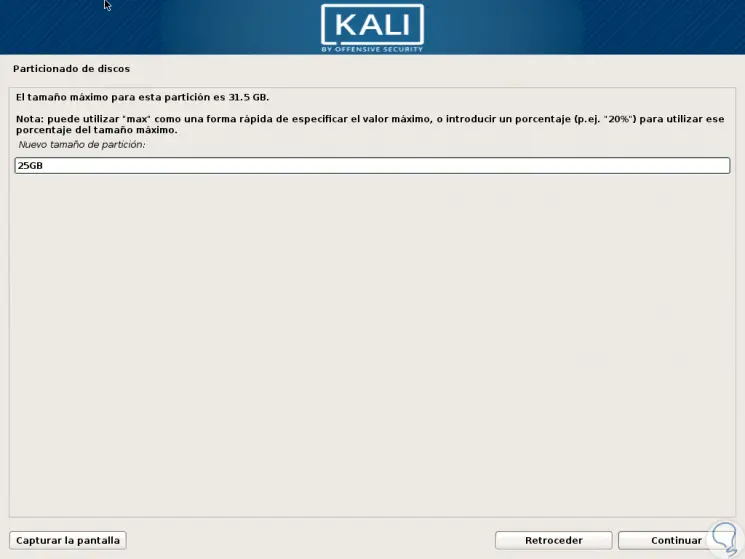
Step 14
Click on Continue and in the next window select "Principle":
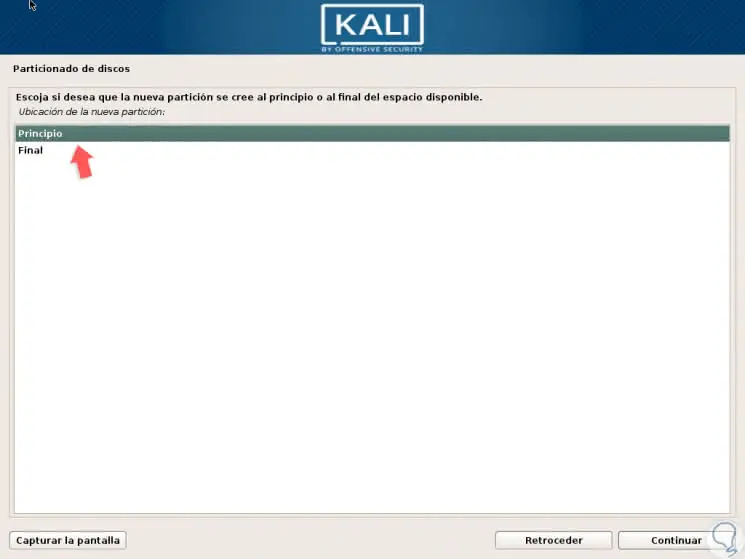
Step 15
Press Enter again and we will see a summary with the configuration made:
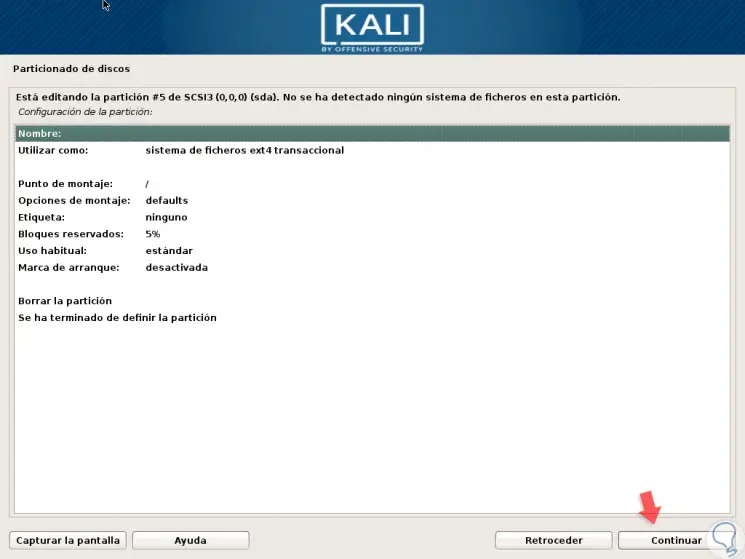
Step 16
Click on the line "The definition of the partition is finished" and now we go back to the free space that has been available:
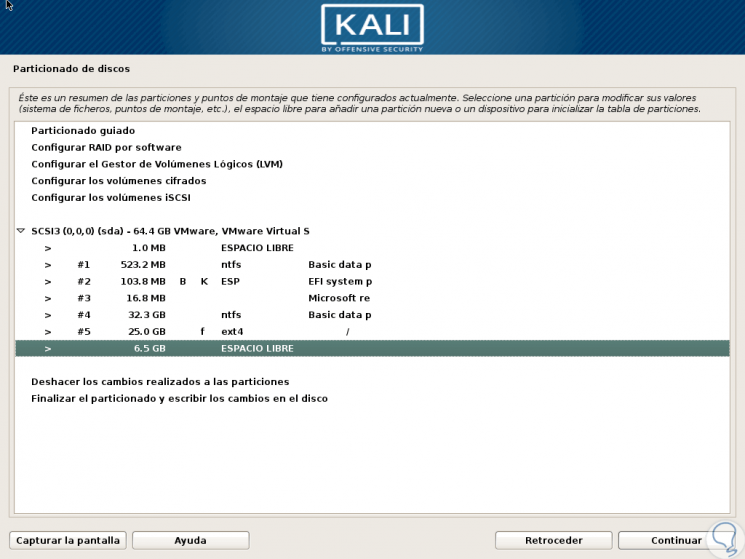
Step 17
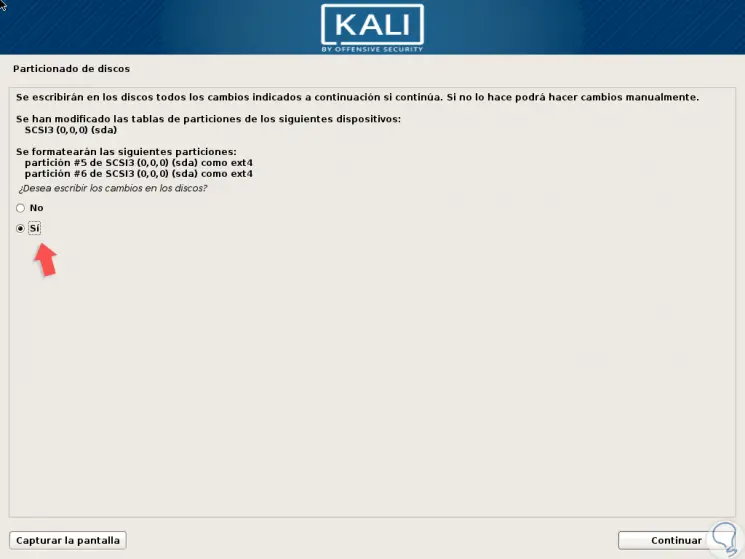
There we repeat the previous process and in the “Use as†section we select “Swap space†to allocate the swap memory. Once this is defined, click on the option “Finalize partitioning and write the changes to disk†and the following will be displayed:
Step 18
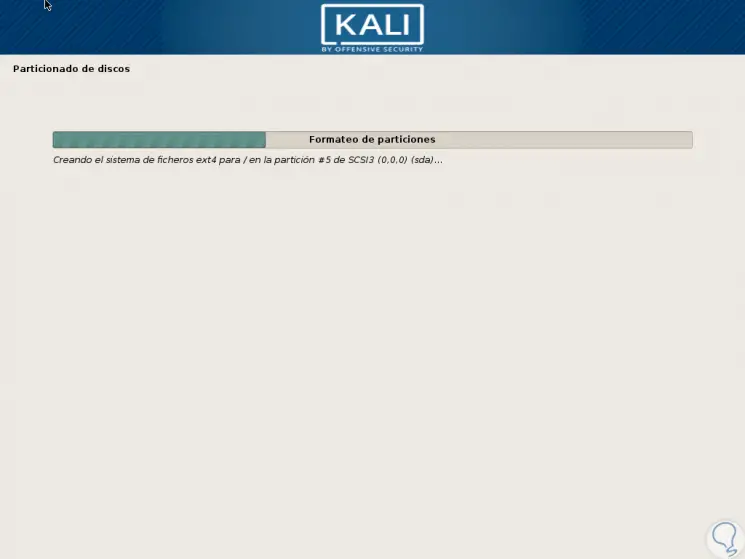
Select the Yes box and press Enter to start the configuration process:
Step 19
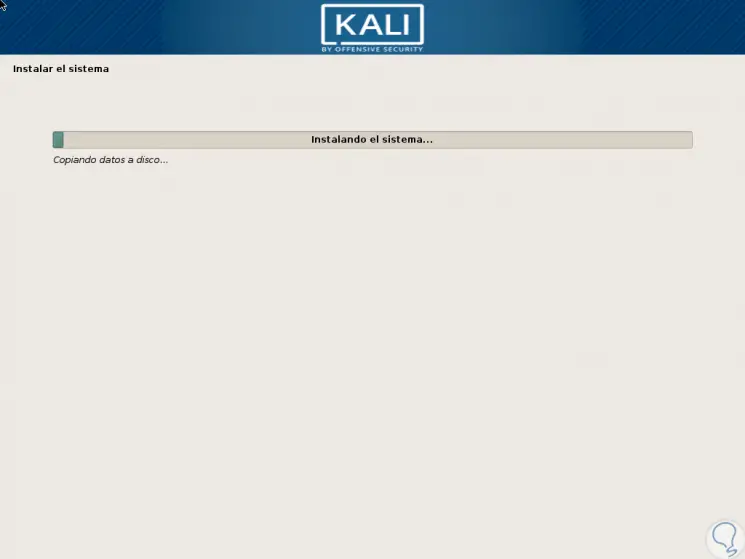
After the disk configuration, Kali Linux installation will begin:
Step 20
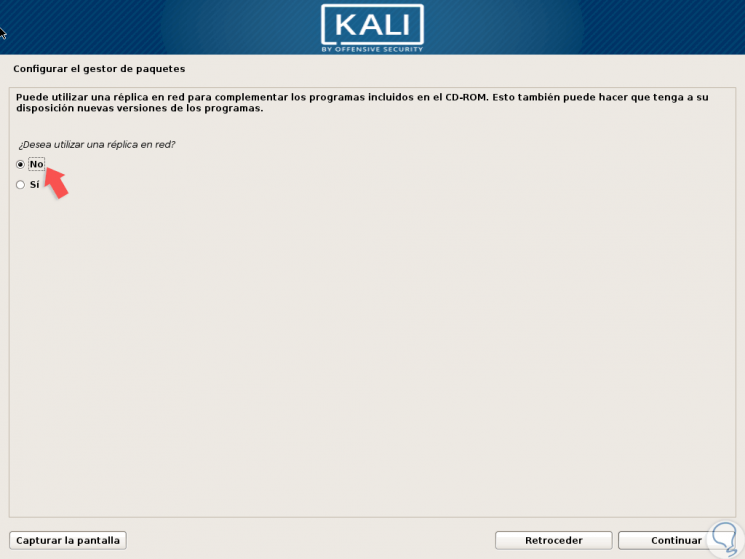
During this process the following message will be displayed to which we will say No:
Step 21
Then the GRUB bootloader will be installed automatically and once the process is finished we will see the following:
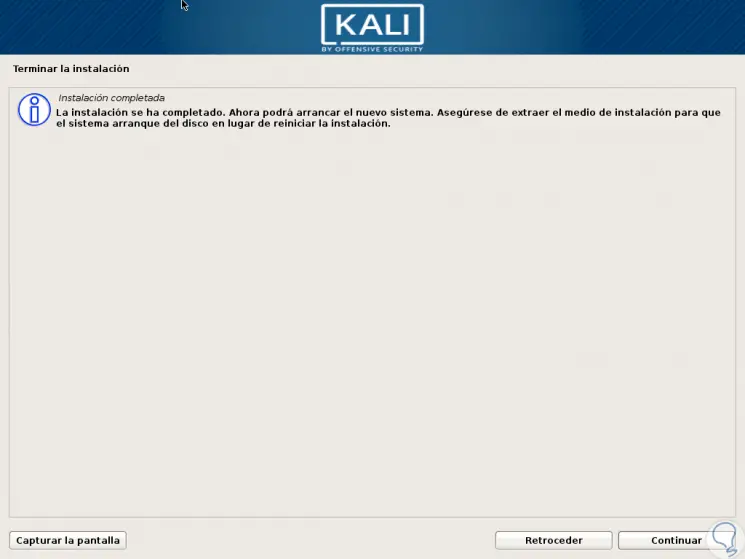
Step 22
Click on Continue and so, when the system is restarted we will see the following:
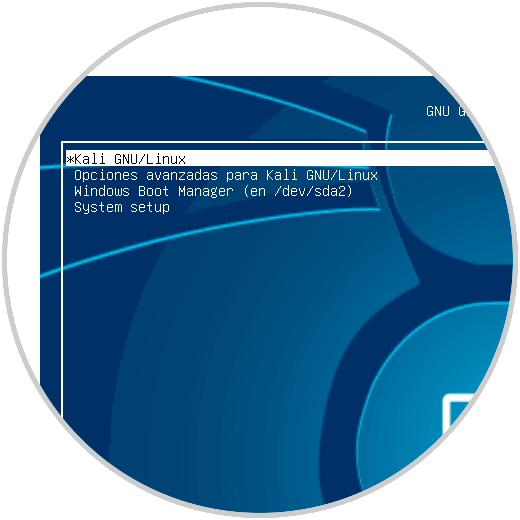
Step 23
We will have these options:
- To start Kali Linux we select the line “Kali GNU / Linuxâ€.
- To start Windows 10 we select the "Windows Boot manager" line.
In this way we have learned to run a dual boot with Windows 10 and Kali Linux and thus take full advantage and functionality of each of these operating systems which have different approaches but each one special.