If the objective is to add security improvements or check the current level of protection in our organization's system or infrastructure, the best option to use is Kali Linux. Kali Linux is developed by the Offensive Security company which has a focus on security issues and when using Kali Linux we will be using one of the best utilities to carry out hundreds of advanced security penetration and audit tests and thus determine in detail any security breach that may jeopardize the integrity and privacy of the company..
Kali Linux gives us more than 600 penetration testing tools, meets FHS standards, has more than 30 installation languages, has wireless device support and many more options.
Now, one of the great advantages we have today is the portability and ease to carry out installation and maintenance tasks of operating systems and this is possible thanks to the option of creating bootable , or bootable, USB media with the which saves us the need to burn the ISO images to DVDs and transport them from one place to another..
USB advantages
Some of the advantages of using a bootable USB media are:
- It does not make changes to the hard disk of the host system or the installed system which adds security.
- It does not require complex hardware uses.
- Extensive customization and configuration options.
For these reasons, TechnoWikis will explain through this tutorial how to create a bootable USB with Kali Linux and thus take this practical and secure Linux system everywhere.
Previous requirements
To fully carry out this process is required:
- A USB device with at least 4 GB of free space
- Kali Linux ISO image which is available in the following link. Kali Linux
- Have the Win32 Disk Imager utility for Windows 10 which can be downloaded at the following link:
Win32 Disk Imager
Now we will see how to create Kali Linux USB Boot in Windows 10 , macOS Mojave and Ubuntu 18.04 ..
1. Create bootable USB boot of Kali Linux in Windows 10
Step 1
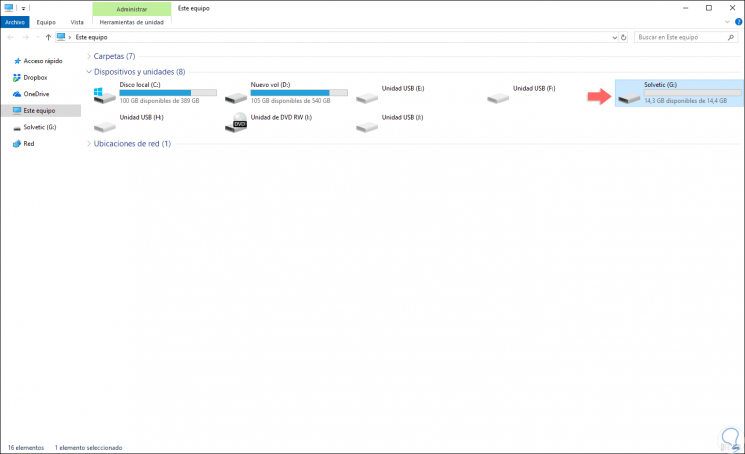
In the case of Windows 10 we will use the Win32 Disk Imager utility and before its execution, we will connect the USB medium to the computer and observe through the file explorer what letter has been assigned to it by the system, in this case the letter G :
Step 2
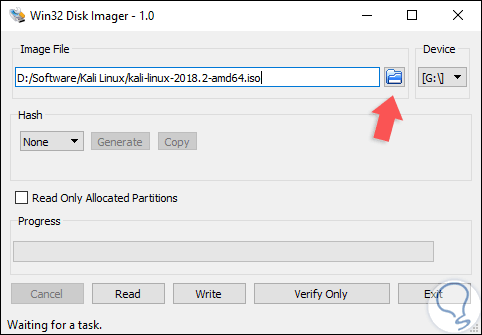
Now we run the utility and define the following fields:
- In the “Image File†field we select the Kali Linux ISO image that we have downloaded.
- In the "Device" field we select the letter assigned to the connected USB medium.
Step 3
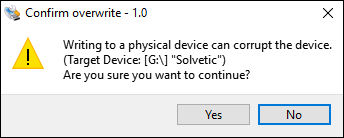
Once this is defined, click on the “Write†button to start the process of creating the USB media and the following message will be displayed:
Step 4
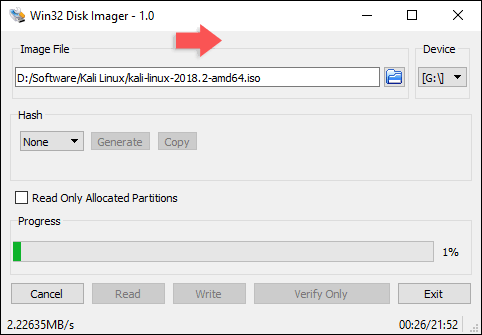
Click Yes to confirm the action and the creation process will begin. Once the process is finished we will see the following:
2. Create bootable USB boot of Kali Linux on Ubuntu 18.04
In the case of Linux, and macOS, we are going to make use of the dd command, this dd command (Dataset Definition - Data Duplicator), is a utility that allows us to carry out various actions on disks, partitions, files, devices and more with optimal results.
Step 1
Once we connect the USB media to the computer with Ubuntu 18, we go to the terminal and run the following:
sudo fdisk -l
Step 2
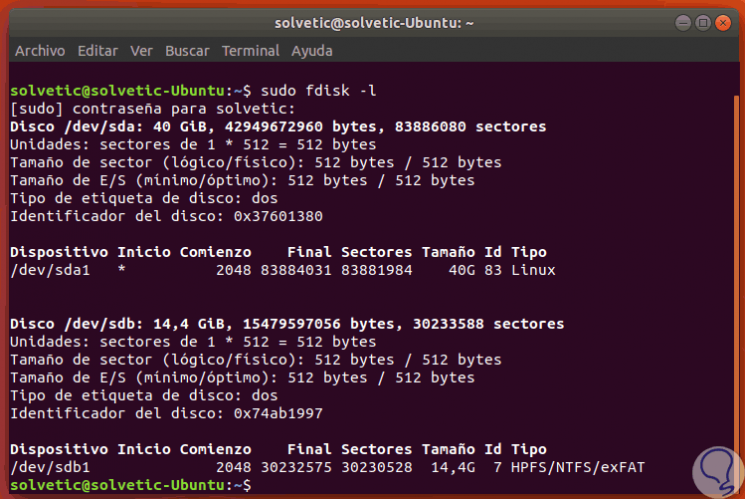
The purpose of this command is to deploy all active storage devices in the system with their respective information such as path, free space, etc:
Step 3
In this example we notice that our USB media is selected as “/ dev / sdb†with a size of 14.04 GB.
Now, we will execute the following command in order to create our bootable USB medium with Kali Linux in Ubuntu, the syntax is:
dd if = Kali_iso.iso of = / dev / sdb bs = 512k
Step 4
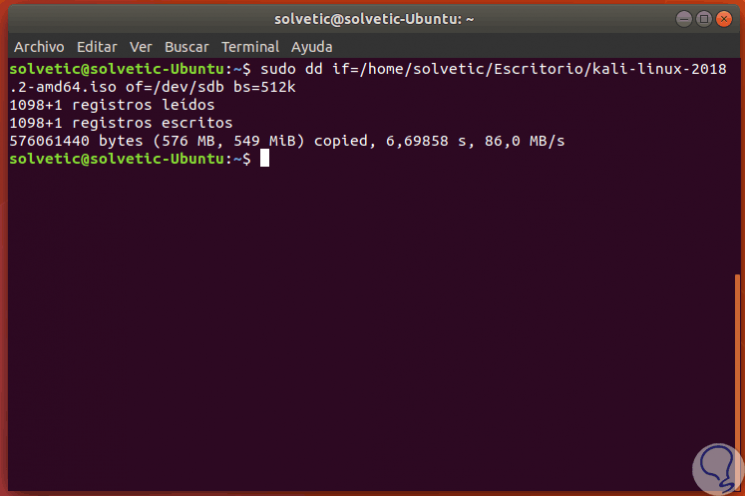
The block size parameter, bs, can be increased to speed up the creation process, but it can cause the USB drive to not start as expected, the default and recommended value is "bs = 512k", additionally we must indicate the Exact route where the ISO image of Kali Linux is hosted and specify in the “of†field the route assigned to the USB device, once this is executed, the result will be as follows. Thus, our USB media is now ready to be run as a bootable media.
3. Create bootable USB boot of Kali Linux on macOS Mojave
Because macOS Mojave is based on UNIX, the process will be similar to Ubuntu 18.
Step 1
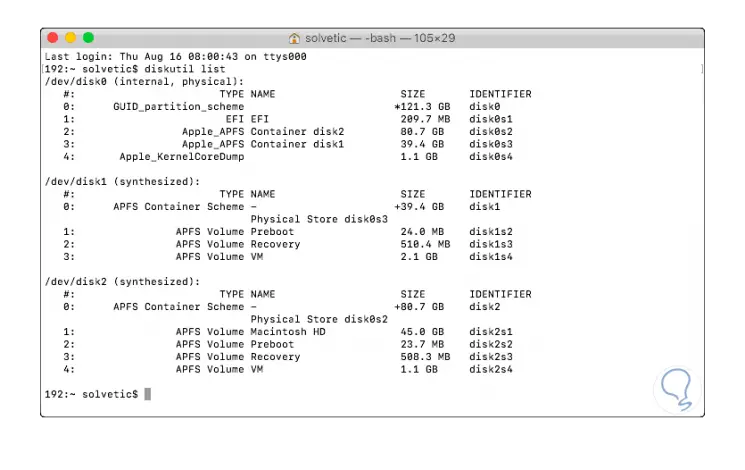
First, if we wish, we can execute the following command to see the current devices of the equipment, but without connecting the USB:
diskutil list
Step 2
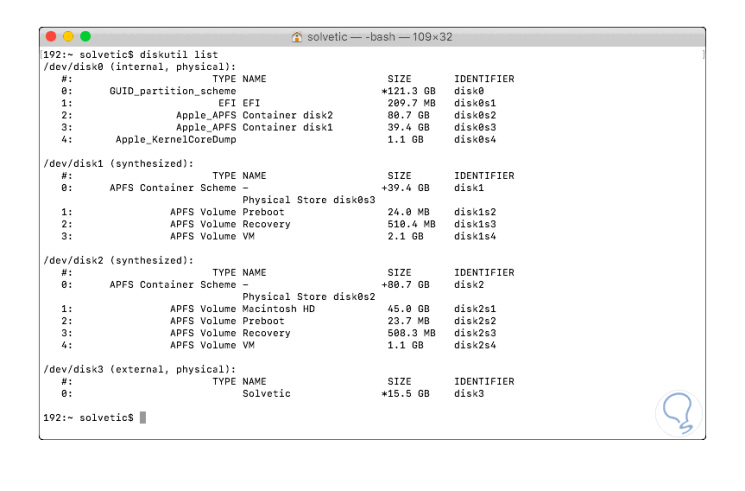
We connect our USB media and run “diskutil list†again to detect the path assigned to the USB media:
Step 3
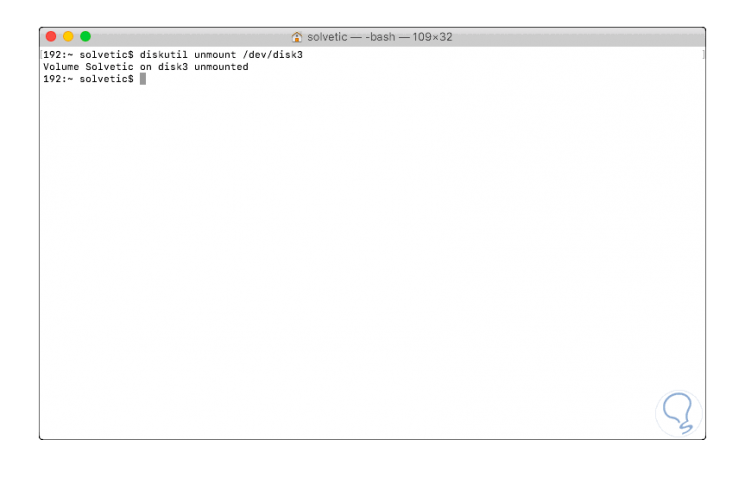
In this case, the path “/ dev / disk3†has been assigned. The next step is to disassemble said unit by executing, in this case, the following:
diskutil unmount / dev / disk3
Step 4
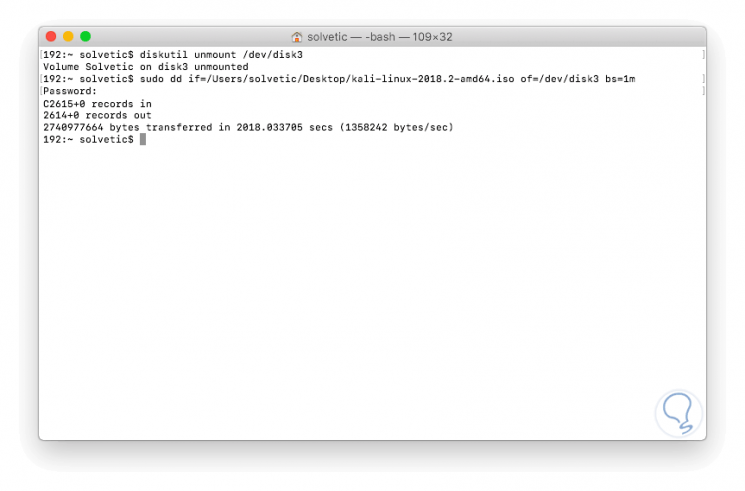
Once the unit is disassembled, we execute the following syntax with the dd command:
sudo dd if = Imageen_Kali.iso of = / dev / disk3 bs = 1m
Step 5
Increasing the block size (bs) will accelerate the writing progress, but also increase the chances of creating a USB memory with errors. Press Enter and we will enter our password and this will be the result obtained:
Step 6
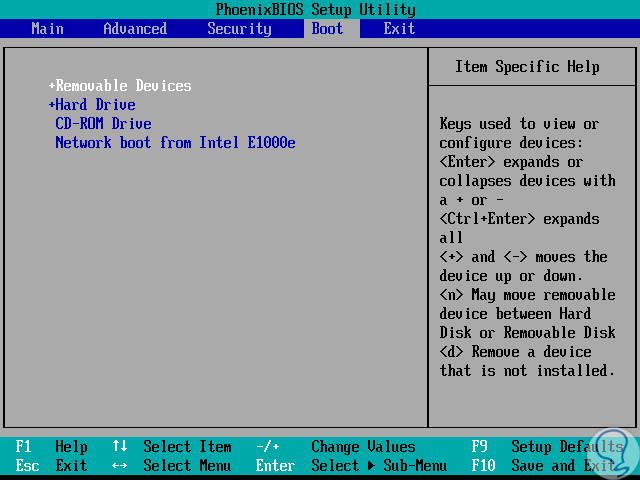
Now, with this USB medium created, just go to the computer's BIOS and in the "Boot" section define "Removable Devices":
Step 7
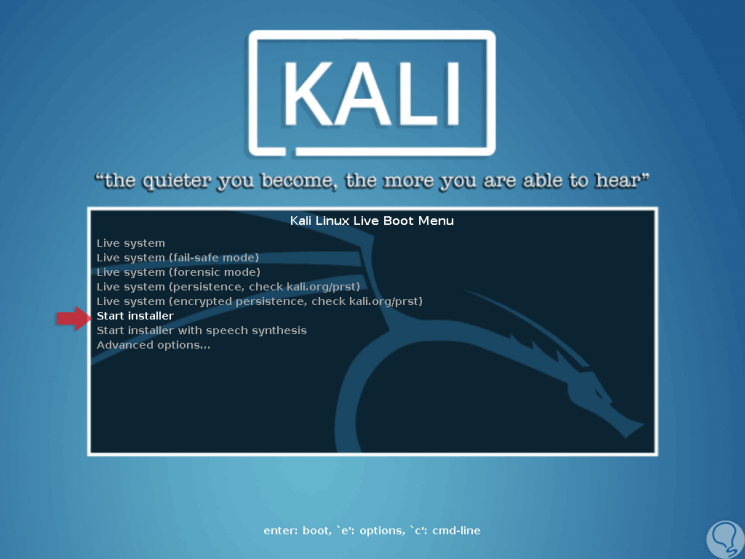
This will start the installation process of Kali Linux from a USB media:
As we have seen, these are the most useful options for creating a Kali Linux boot medium from USB in a simple and practical way.