Each operating system is created designed to reach a special audience, so you can see how we have server-level operating systems for companies ( Windows Server , CentOS , RedHat ), systems for traditional users ( Windows 10 , Ubuntu , macOS ), special operating systems for games (SteamOS), etc., but there is one that stands out, if you are a security lover, and it is Kali Linux ..
Kali lINUX advantages
Kali Linux is an open source project that is managed by a security expert company many years ago called Offensive Security and therefore developed Kali as a Debian-based Linux distribution which has two special purposes:
- Run advanced penetration tests.
These two objectives will allow to analyze, evaluate and improve the security of an organization where sensitive information is handled and do not want any attacker to put his claws.
Kali Linux features
Some of the features of Kali Linux are:
- It has more than 600 penetration tools to test vulnerabilities
- Complies with FHS standard (Filesystem Hierarchy Standard)
- It has support for wireless devices
- All packages and repositories are signed by GPG for greater security and reliability.
- Available in different languages
One point we will talk about today is how to create a persistent USB from this great operating system. When we talk about persistent, we mean that by creating the USB media with Kali , you can install it on any computer (or try it) without losing anything you do on it. Remember that many times you can create a USB media with an operating system but all changes are lost when you log out or remove the device, this does not happen with the persistent USB.
Previous requirements
To achieve this you must have a USB of minimum 8 GB of space, we recommend a 16 GB and additionally have the following:
- Kali Linux ISO image which you can download at the following link:
Kali Linux
- WIN32DISKIMAGER tool to create the persistence of the USB and that you find in the following link:
Win32 Disk Imager
- Minitool Partition Wizard tool which is available at the following link:
MiniTool Partition Wizard
Now we will proceed to see how to create our persistent USB from Kali Linux..
1. Create persistent USB from Kali Linux
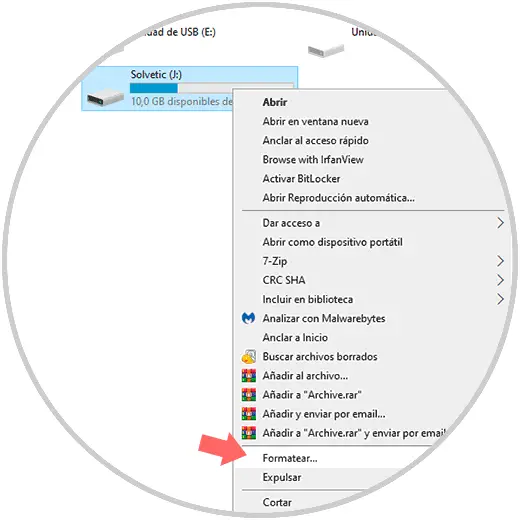
Step 1
The first step to take will be to format our USB memory, for this we access the File Explorer, right click on the drive and select “Formatâ€:
Step 2
In the displayed window we can select the NTFS format and assign a name to the unit:
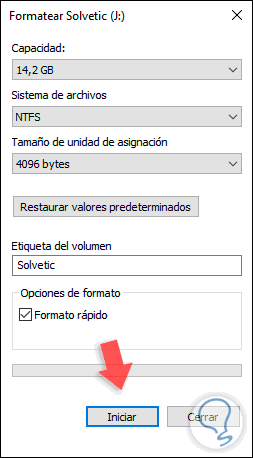
Step 3
Click on "Start" to start the format of the USB drive and receive the following warning:
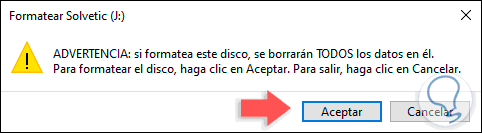
Step 4
Click on Accept to proceed with the format:
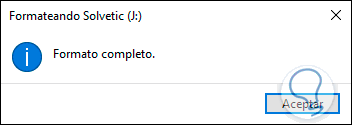
Step 5
Once this process is done, we open the Win32DiskImager utility:
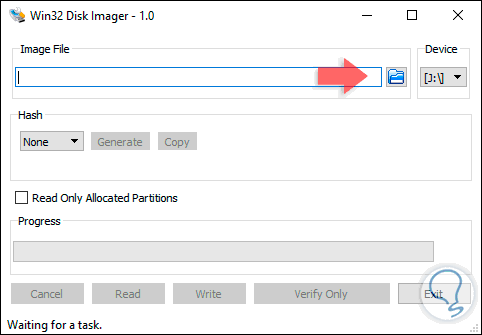
Step 6
In the "Image File" field, click on the Browse button to go to the path where we downloaded the Kali Linux ISO image:
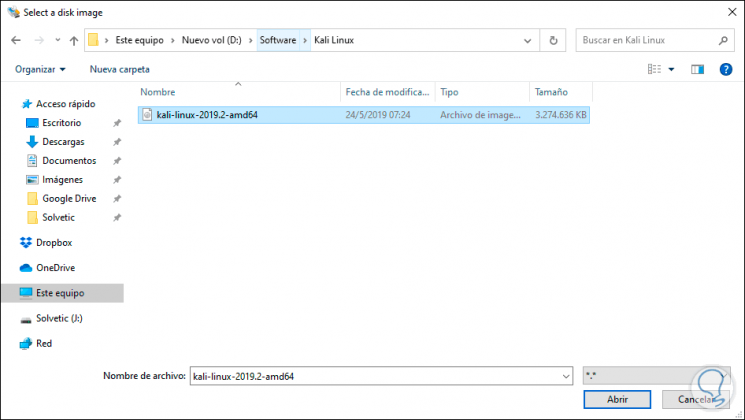
Note
It is important that in the “Type†field at the bottom select *. * To recognize the ISO image.
Step 7
Click on Open and validate in the "Device" field that the letter assigned is that of the USB drive:
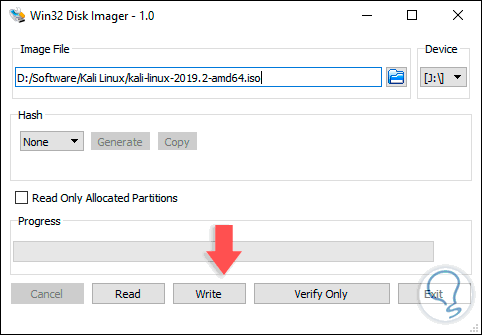
Step 8
We click on the “Write†button and the following warning message will be displayed:
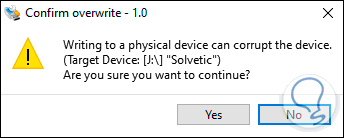
Step 9
We click on “Yes†to proceed with the writing of the ISO image on the USB:
Note
If an error is generated when clicking Yes, TechnoWikis recommends that you run the utility as an administrator.
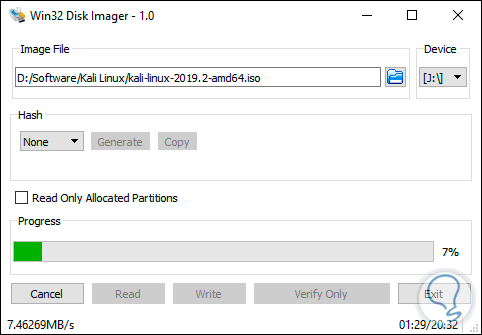
Step 10
This process will create the USB in persistence mode with the operating system selected in this case Kali Linux. When this process ends we will see the following:
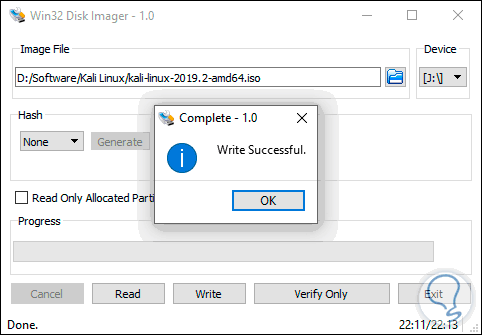
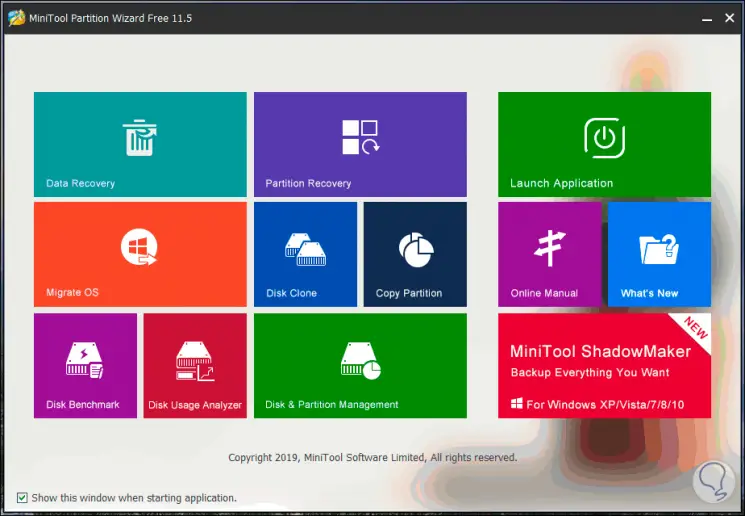
Step 11
There we click OK to complete the process and exit the wizard. Now we open the MiniTool Partition Wizard application where we will see the following environment:
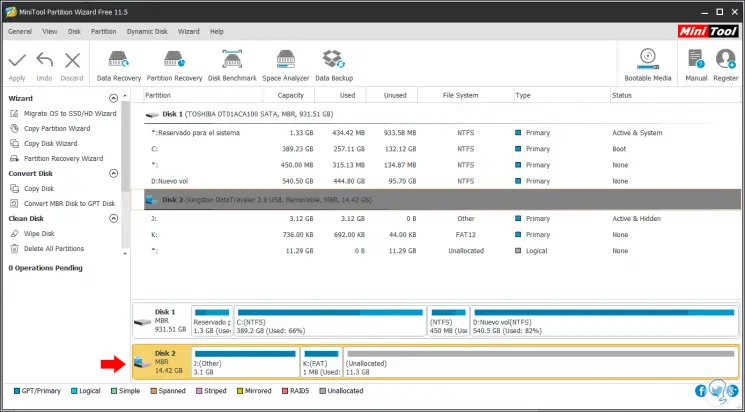
Step 12
There we select the “Disk & Partition Manager†category and in the next window we can see the USB drive that we have previously processed:
Step 13
There we will right click on the line (Unallocated) and in the options displayed we choose “Createâ€:
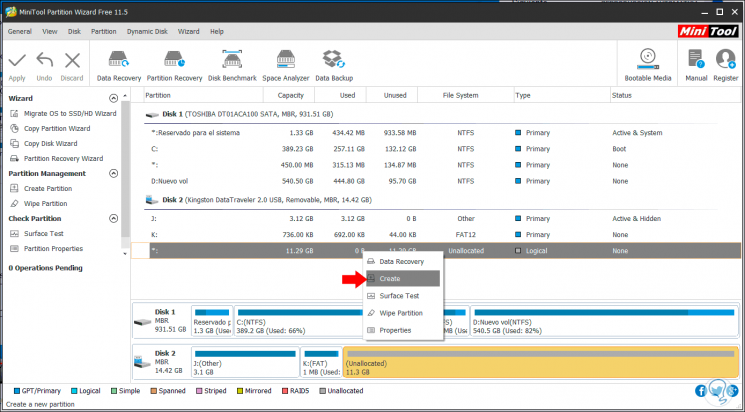
Step 14
We will see the following message:
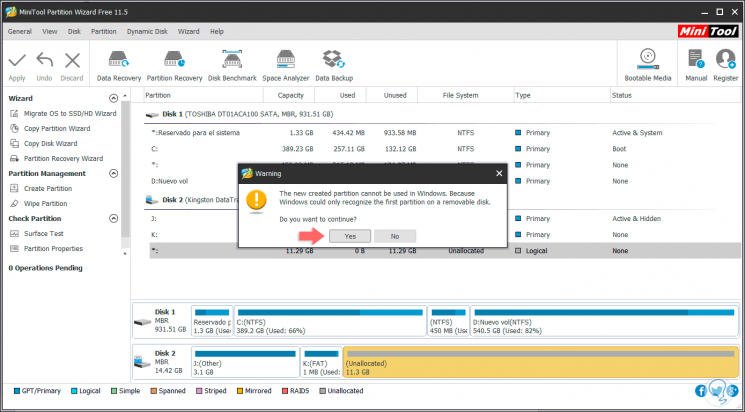
Step 15
It is an indication that we cannot use this partition in Windows, we click on “Yes†and the following window will be displayed where we define the following:
- In the File System field we select “Ext4â€.
- We assign the name "persistence" in the "Partition Label" field.
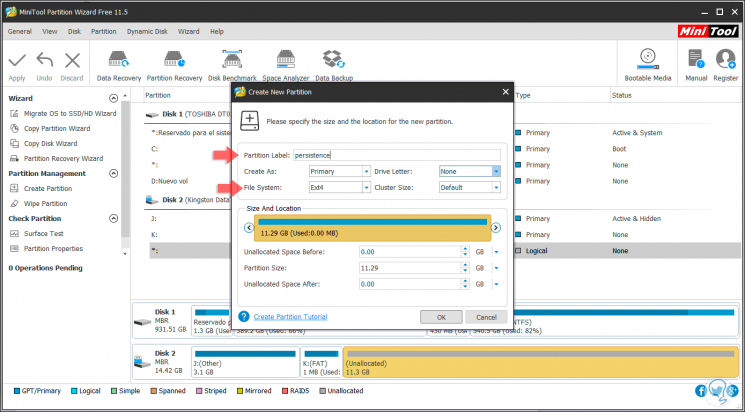
Step 16
Selecting Ext4 by default will make the other settings. We click on OK and now we must apply the changes, for this we click on the Apply button located in the upper left:
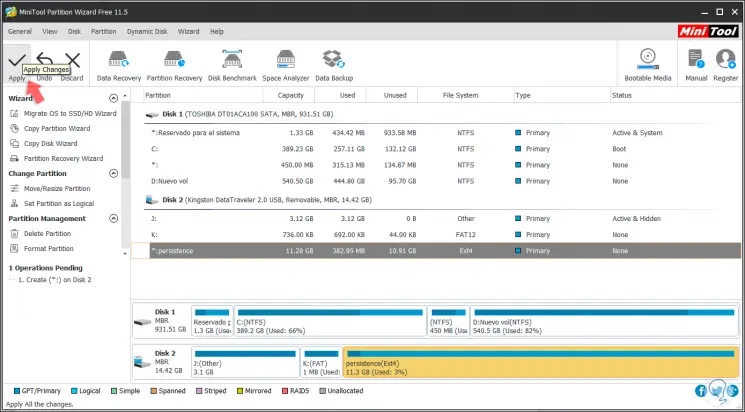
Step 17
The following message is displayed:
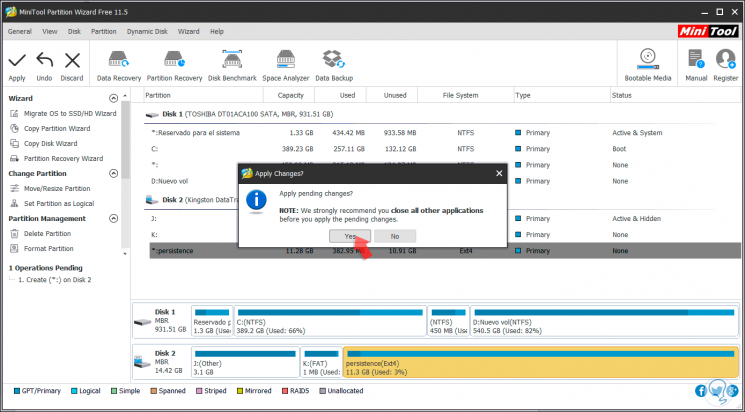
Step 18
We click Yes and start the process of creating the persistent USB of Kali Linux:
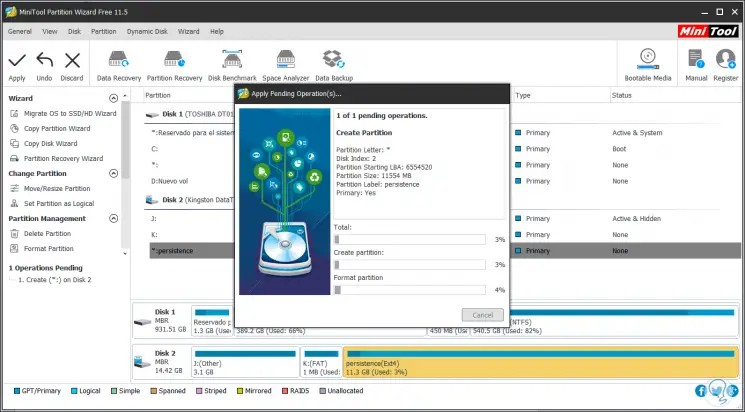
Note
This process takes between 20 to 25 minutes.
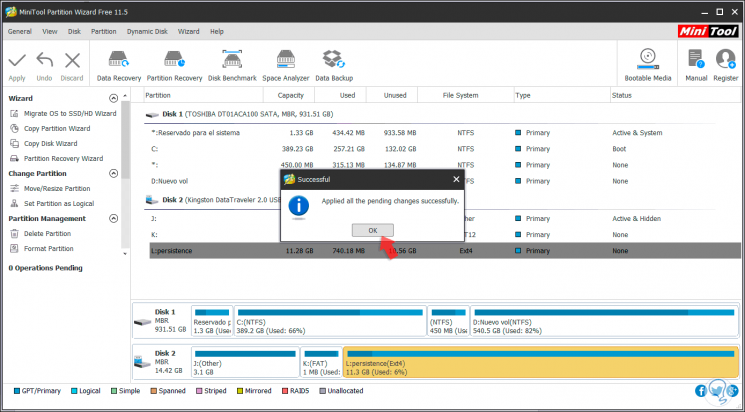
Step 19
When it concludes we will see the following:
2. Configure persistent USB from Kali Linux
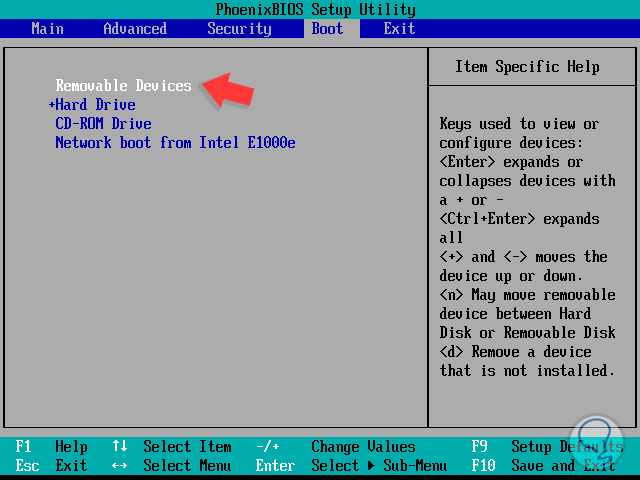
Step 1
Once this process is finished, we proceed to restart the computer and configure the boot in the BIOS from the persistent USB, for this during the restart we press the ESC key, or F2, or Del (this depends on the manufacturer) and in the Boot section we select "Removable Devices":
Step 2
Press the F10 key to save the changes and continue the restart from there. When the system is started, we can see the option "Live USB Persistence":
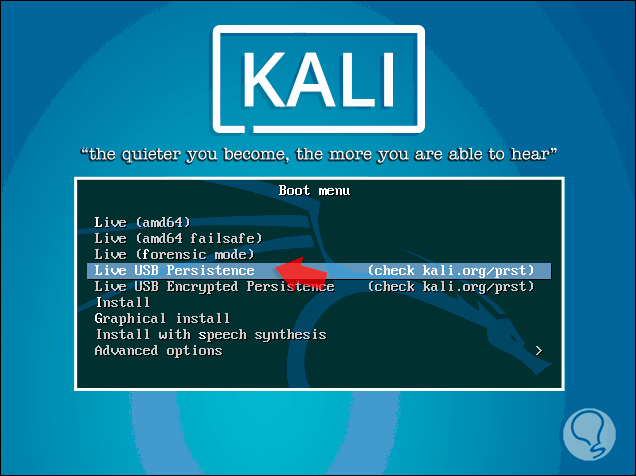
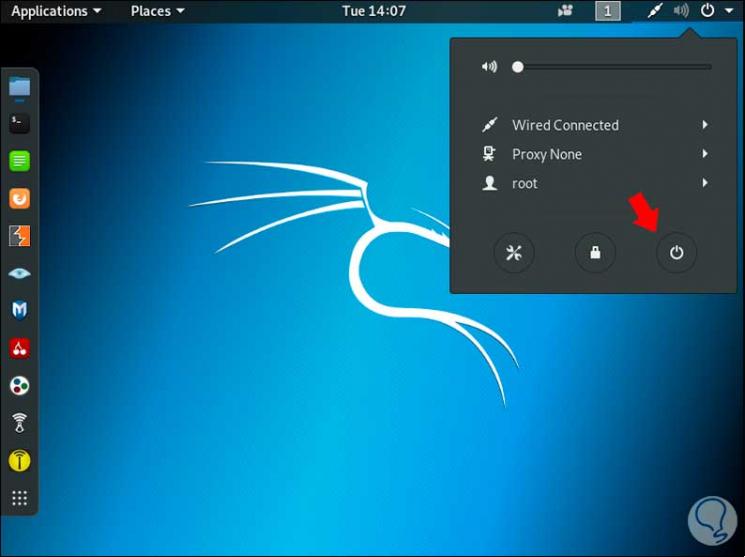
Step 3
Select this option and press Enter to continue, this will allow us to access Kali Linux in that way. Once we are in the environment, we go to the terminal and execute the following:
setkxbmap is
Step 4
This command allows you to configure the Spanish language in Kali Linux.

Step 5
Now we will execute the following:
fdisk -l
(Checking disks)
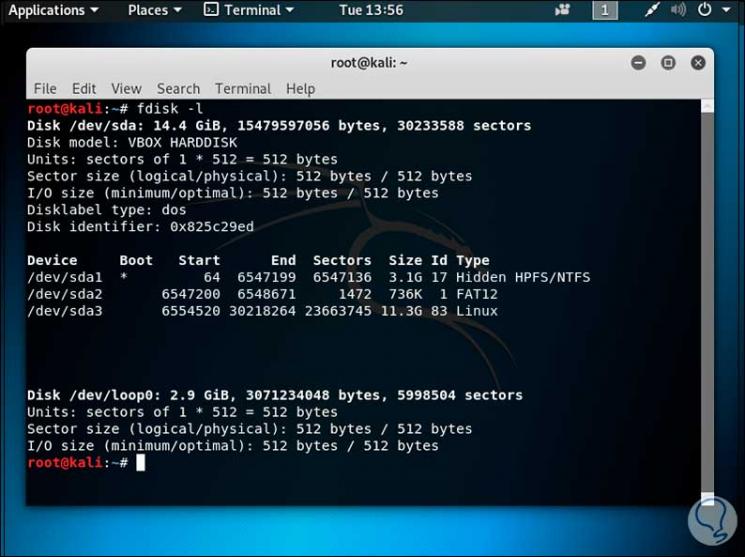
Step 6
There we note that / dev / sda3 is the route of the assigned USB, then we will execute the following commands in their order:
mkdir -p / mnt / Linux mount / dev / sda3 / mtn / Linux echo “unionâ€> /mnt/Linux/persistence.conf umount / dev / sda3
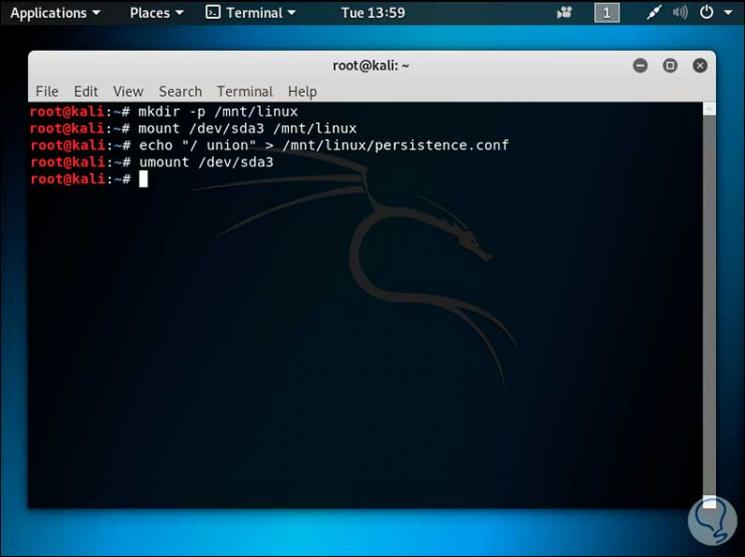
Step 7
Finally we exit with the exit command. We can verify that the “persistence†file has been created in the USB path:
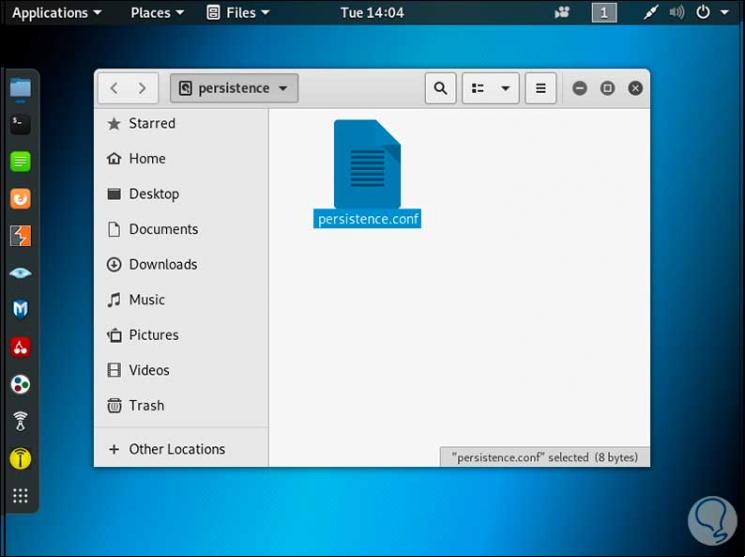
Step 8
After this we proceed to restart the computer and in the Kali menu we select “Live USB Persistence†again, once we access we proceed to create some type of file in Kali Linux:
Step 9
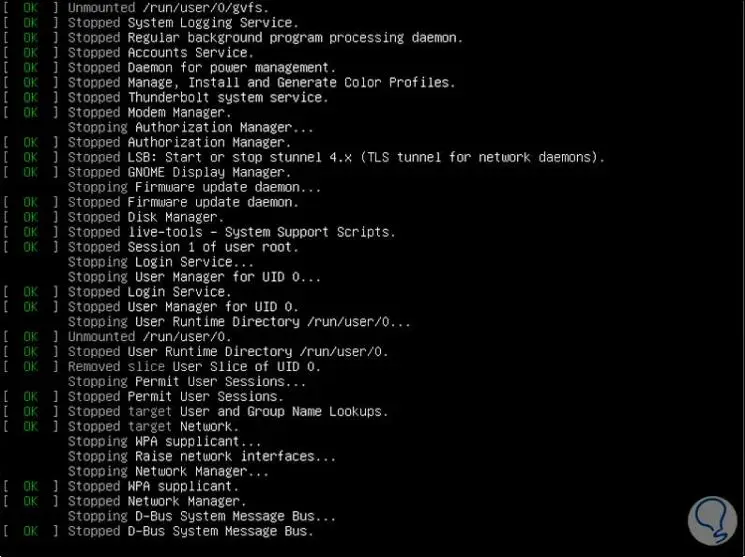
We restart the system:
Step 10
There the restart process begins:
Step 11
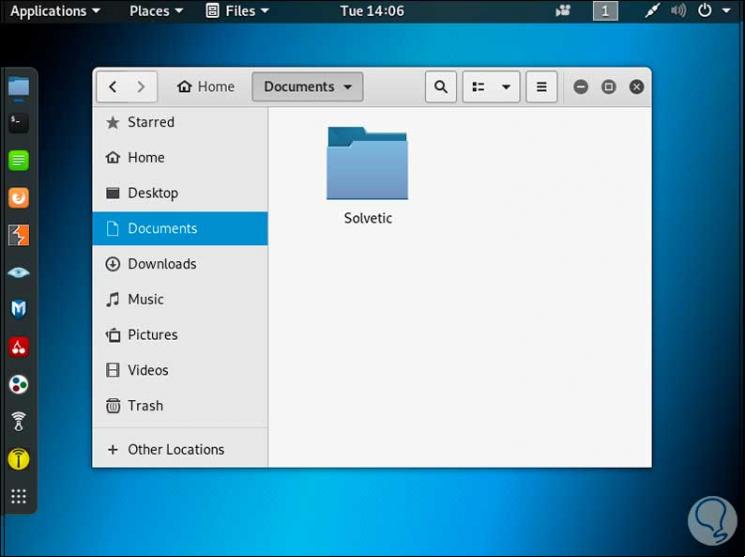
Once we access Kali Linux we can verify that the folder is still available there:

Thanks to persistence it is possible to work on Kali Linux and be certain that all our information will be available there without being lost at any time, but without it being mandatory to install the operating system locally on the hard disk.