Windows 10 is a system that has been modernizing little by little, and that is why now more often than before we receive updates either security, cumulative and more, this is very important to know that the system has the latest patches of security and measures of prevention before attacks of any type . This is achieved through Windows Update automatically, but many users have reported the error 0X8000FFFF during the update tasks which can cause more than one user to lose not only the patience and that is why TechnoWikis will explain to you what it is about This error and how to solve it if it occurs..
What is error 0X8000FFFF in Windows 10
To begin with, this is an error that may appear during the process of downloading updates, when buying or downloading applications from the Windows Store or when trying to carry out a restoration of the operating system.
The error 0X8000FFFF refers to the fact that the operating system did not have the ability to communicate with the update or use of the Windows Store on the remote Microsoft servers. Much of this error is not always our fault but a matter of availability of Microsoft servers either because they are down or because they have information overload.
Causes errors
Some causes of this error are:
- Presence of viruses or malware
- Incorrect configuration of the operating system
- Incorrect system time and date
- Volume Shadow Copy Service Disabled (VSS)
Now we will learn different solutions for this error and thus enjoy the most of the available system updates..
1. How to make use of the Windows 10 problem solver to fix error 0X8000FFFF Windows 10
As we all know, Windows 10 integrates a utility called Troubleshooting thanks to which we have a tool that analyzes and corrects the failures of most of the components of Windows 10.
Step 1
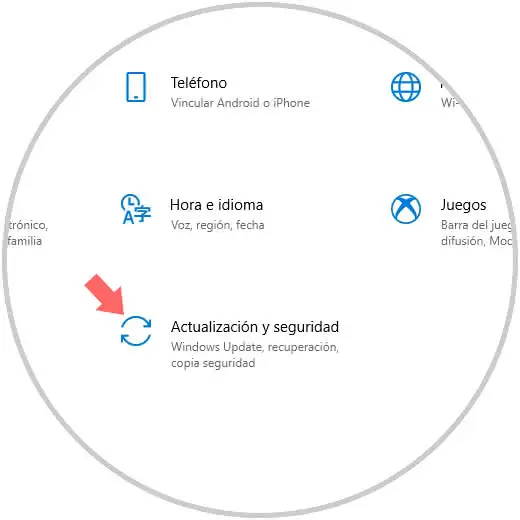
To use this method we will go to the Start menu and there we select the Configuration utility, we will see the following:
Step 2
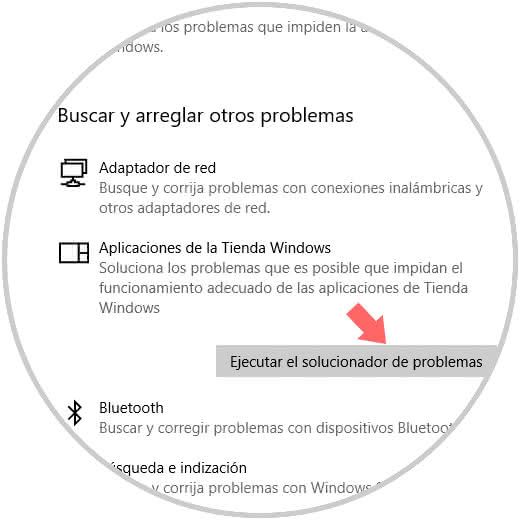
We go to the category "Update and security" and in the next window we will go to the section Troubleshoot, as we mentioned that this error also affects the Windows store, we will locate the line "Applications of the Windows store" and by clicking on it we will see the button "Run the problem solver":
Step 3
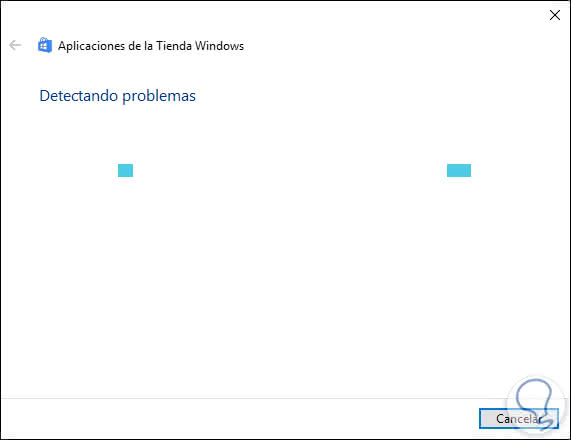
We click on it and the analysis process will automatically start:
Step 4
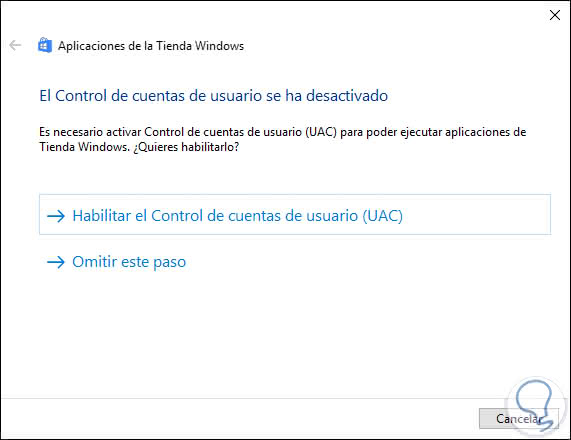
As the analysis is executed we will observe some suggestions:
Step 5
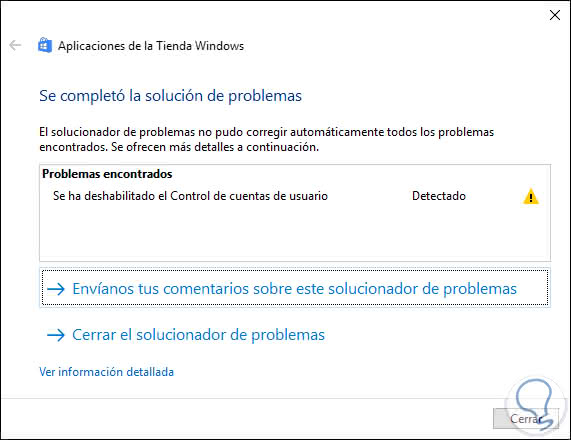
Finally we find, if they exist, the errors found in the Windows 10 store. Click on Close to exit the wizard.
2. How to reconfigure or reinstall the Windows 10 store to fix error 0X8000FFFF Windows 10
Errors in the configuration of the store can trigger the error 0X8000FFF so that in some cases the ideal solution is to reinstall it to be executed with its initial configuration at the level of services and processes.
To stay up to date, remember to subscribe to our YouTube channel! SUBSCRIBE
Step 1
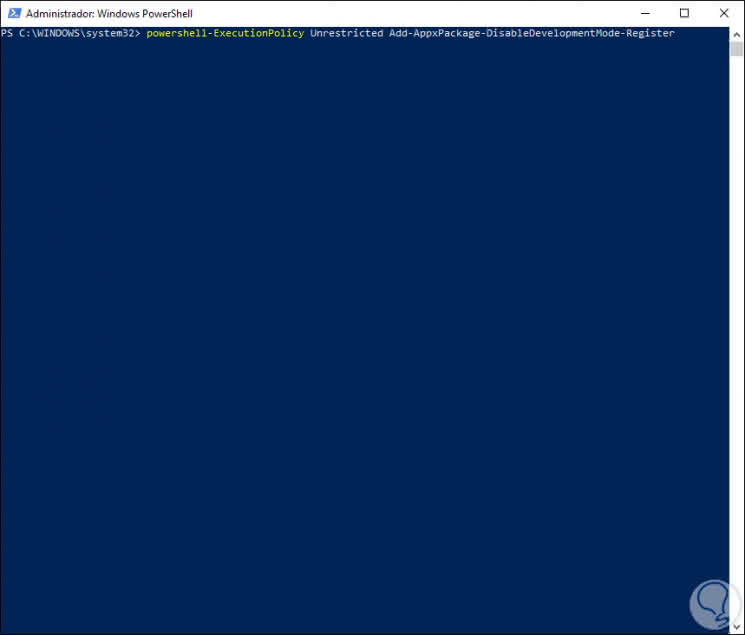
To achieve this, we will access Windows PowerShell as administrators and execute the following:
powershell-ExecutionPolicy Unrestricted Add-AppxPackage-DisableDevelopmentMode-Register
Step 2
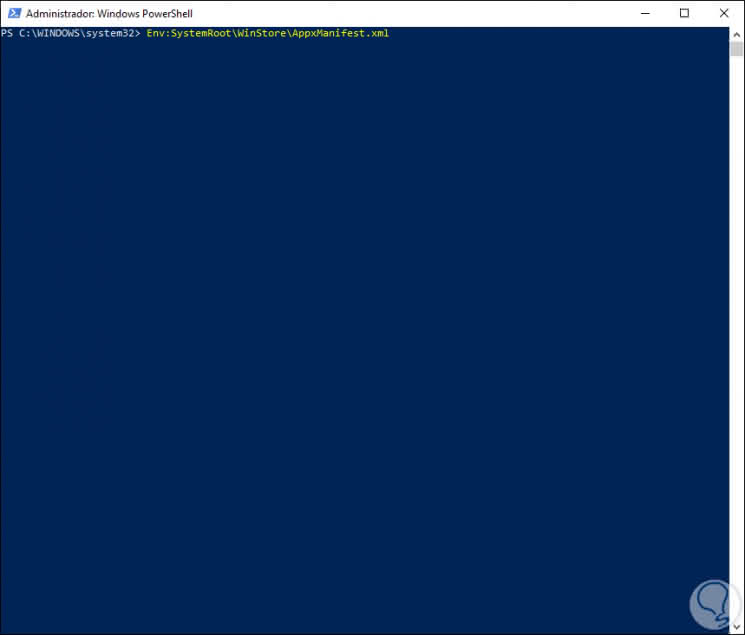
Press Enter and then execute the following:
Env: SystemRoot \ WinStore \ AppxManifest.xml
Step 3
The previous method will reconfigure the Windows store, but if the error persists it is better to uninstall it by executing the following:
Get-AppXPackage * WindowsStore * -AllUsers | Foreach {Add-AppxPackage -DisableDevelopmentMode -Register "$ ($ _. InstallLocation) \ AppXManifest.xml"} We restart the system and verify that the error no longer appears.
3. How to clean system cache Windows 10 to fix error 0X8000FFFF Windows 10
In some cases, the error 0X8000FFFF arises due to the cache stored by the system. Recall that the cache allows faster access to websites and other applications of the system but excessive use of this can trigger various errors.
Step 1
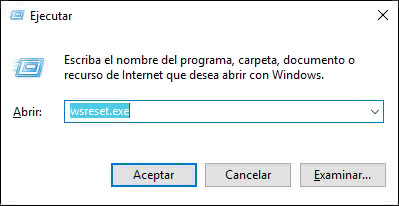
To eliminate this cache, we will use the Windows + R keys and execute the following:
+ R
wsreset.exe
Step 2
Click OK and we will see a clean terminal:
Step 3
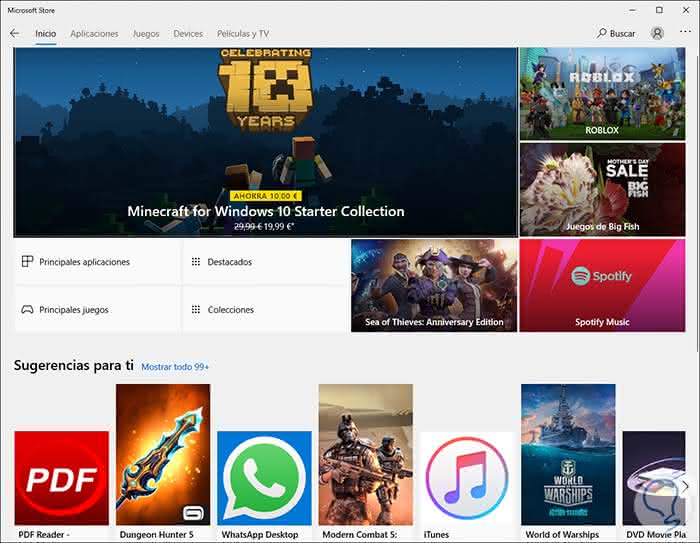
After a period of time the Windows 10 store will open:
Note
In case this process does not work properly, we must use the Windows + R keys and there execute the following:
+ R
C: \ Users \% USERNAME% \ AppData \ Local \ Packages \ Microsoft.WindowsStore_8wekyb3d8bbwe \ LocalState
4. How to execute the CHKDSK command in Windows 10 to fix error 0X8000FFFF Windows 10
CHKDSK (Check Disk) is a command integrated in Windows 10 thanks to which a detailed analysis of the file system of the disk will be made and if there are errors, it will be corrected.
Step 1
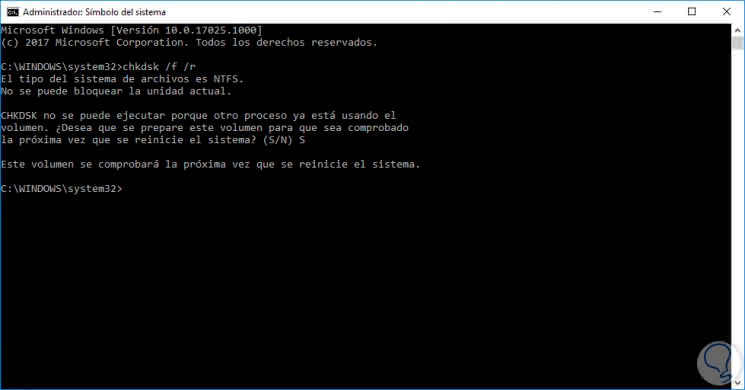
To use this method, we access the command prompt as administrators and there we execute the following:
chkdsk / r
Step 2
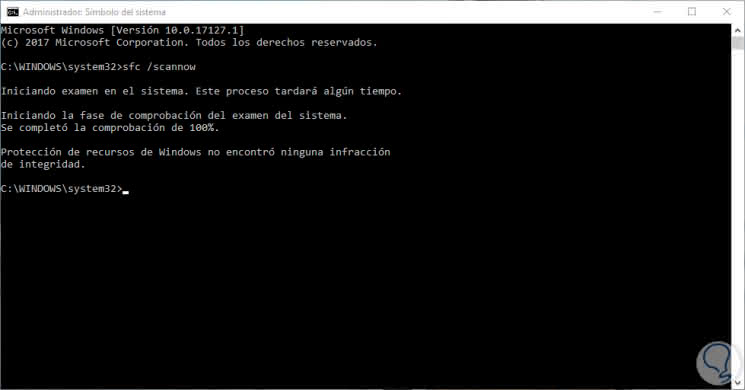
In case the error persists after this execution, we can carry out the analysis of the System File Check (SFC) command, this command will specifically check the Windows system files where the error can be found, for this we will execute the following:
sfc / scannow
Step 3
Finally we can execute the following command:
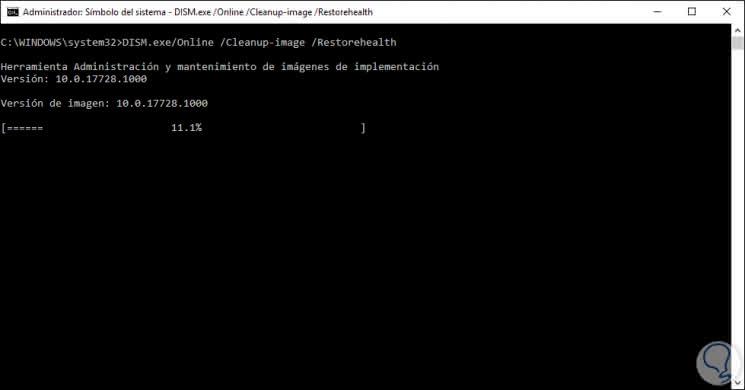
DISM / online / cleanup-image / restorehealth
Step 4
This will be responsible for analyzing the system image and restore corrupt files:
5. How to remove the Windows 10 software distribution folder to fix error 0X8000FFFF Windows 10
In the folder of Software Distribution or Software Distribution we find all the installation files of Windows Update, so that if any file there has failures will give rise to error 0X8000FFFF.
Deleting this folder will delete the Windows Update history so that in the next update the process may take a little more time.
Step 1
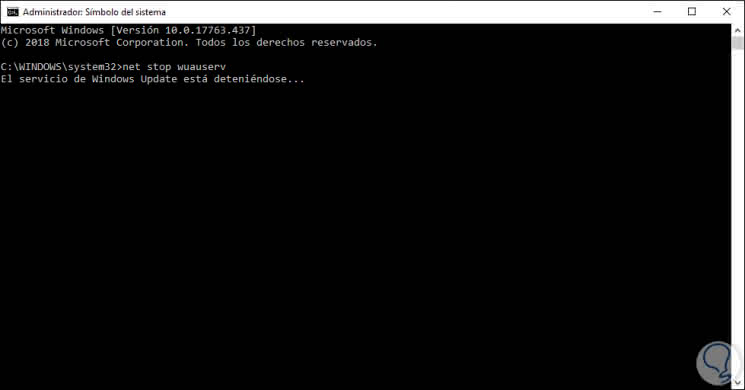
To delete this folder we access the command prompt as administrators and there we execute the following:
net stop wuauserv
Step 2
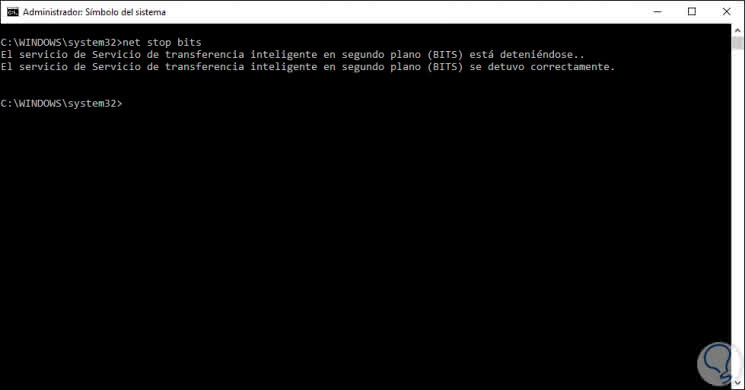
Then we will execute the following:
net stop bits
Step 3
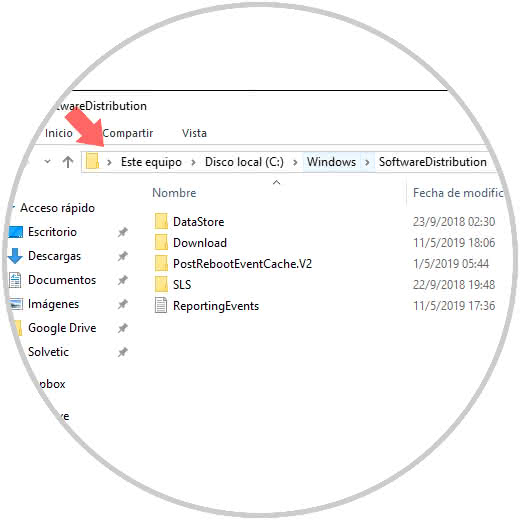
Then we go to the explorer and go to the next route. There we will select all available folders and files and delete them.
C: \ Windows \ SoftwareDistribution
6. How to check network errors Windows 10 to fix error 0X8000FFFF Windows 10
A failure in the network without a doubt that is why communication with Microsoft's servers is impossible, so we must monitor that everything works correctly at the network level.
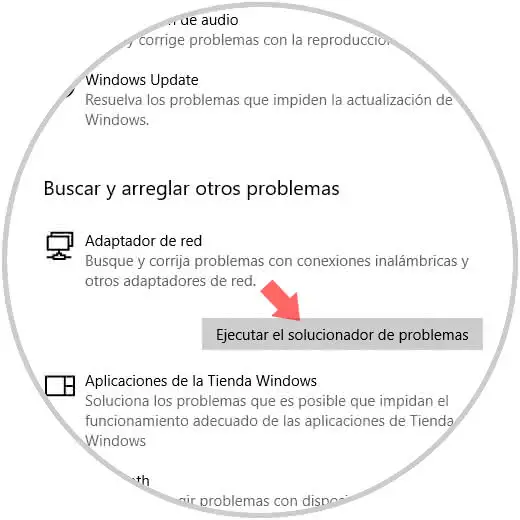
Step 1
For this we will access again to solve problems and this time we select the option Network adapter:
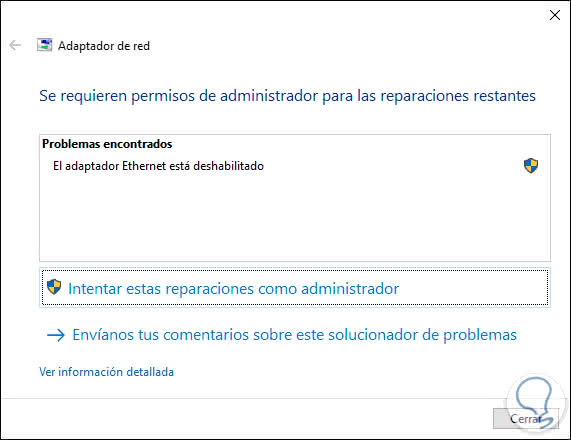
Step 2
There we click on the button Run the problem solver to check the status of this:
Step 3
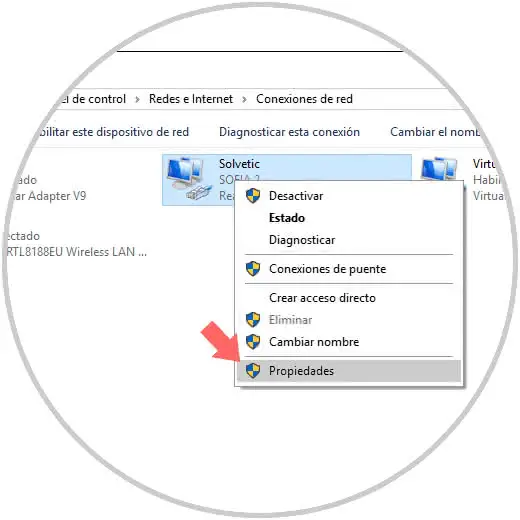
Alternatively, we can change the DNS settings of the network adapter since the default DNS can get to be collapsed, for this we will go to the following route:
There we will right click on the network adapter and select Properties:
Step 4
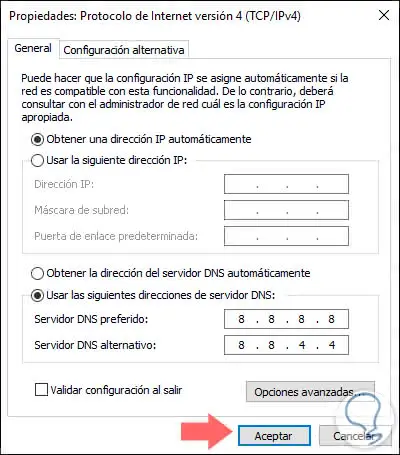
In the displayed window we go to the Internet Protocol line (TCP / IPv4):
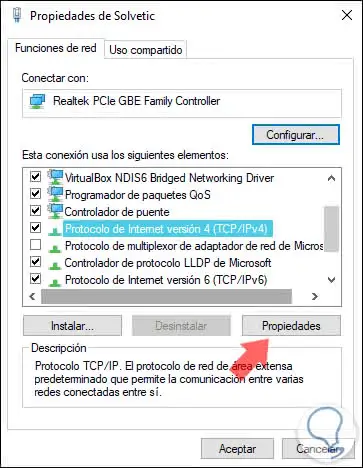
Step 5
We click on the Properties button and activate the box "Use the following DNS server addresses" and assign the address 8.8.8.8 as main and 8.8.4.4 as secondary. Click on OK to save the changes.
6. How to reset Windows 10 to fix error 0X8000FFFF Windows 10
Step 1
A slightly more drastic method is to restore Windows 10, which means formatting the computer but Windows 10 allows us to keep the current files, for this we will go to the route:
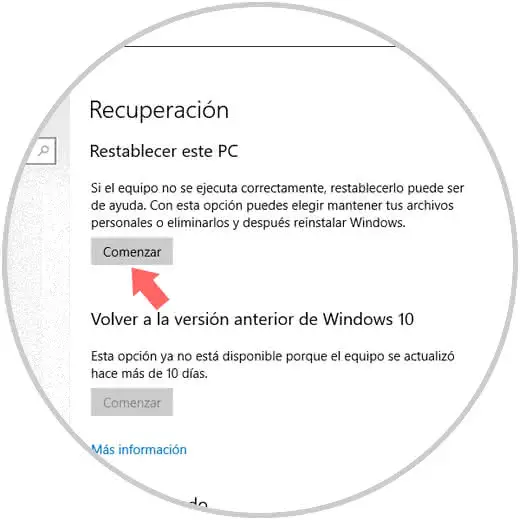
Step 2
There we click on the Start button located in the section Reset this PC and later we can keep the files or not:
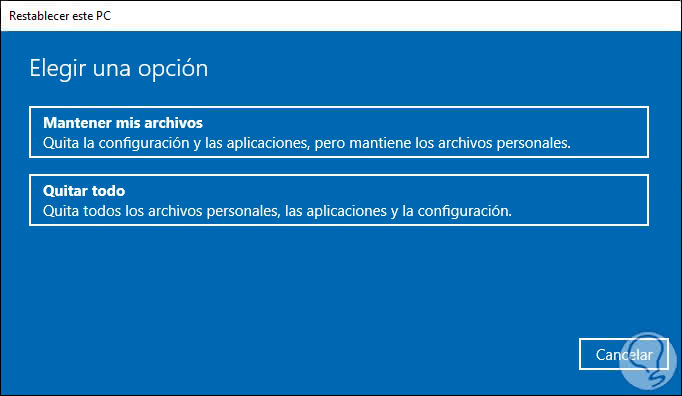
There we will follow the steps of the assistant but without a doubt this will make Windows 10 return to its natural state of use..
7. How to set system date and time Windows 10 to fix error 0X8000FFFF Windows 10
We mentioned at the beginning that one of the errors that generate code 0X8000FFFF res an incorrect date and time because it generates a bad synchronization with Microsoft servers, to validate this we will go to the utility.
Enter the configuration and this time we select the Time and language category and there we validate that everything is in accordance with the current date and time:
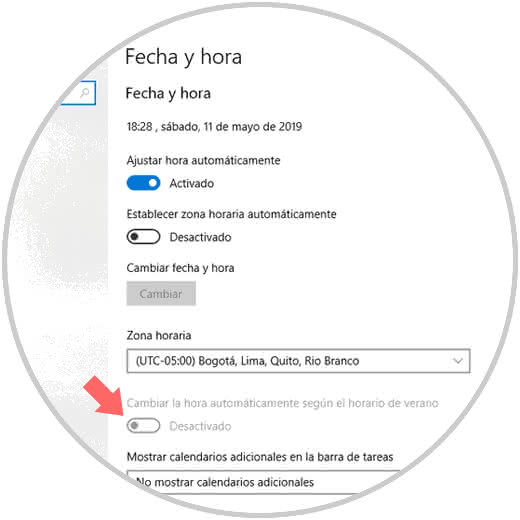
If this is not the case, we can deactivate the "Set time automatically" switch and then click on the Change date and time button to set the appropriate values.
8. How to enable the Windows 10 Volume Shadow Copy service to fix Windows Error 10X8000FFFF
This service is responsible for managing the volume snapshots that we use for backups.
Step 1
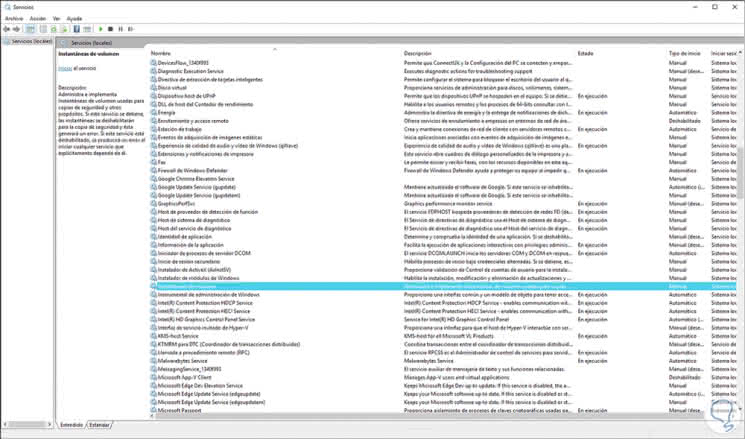
To activate it, we will use the Windows + R keys and execute the services.msc command and in the expanded window we will locate the service called "Volume Shadow Copies":
+ R
Step 2
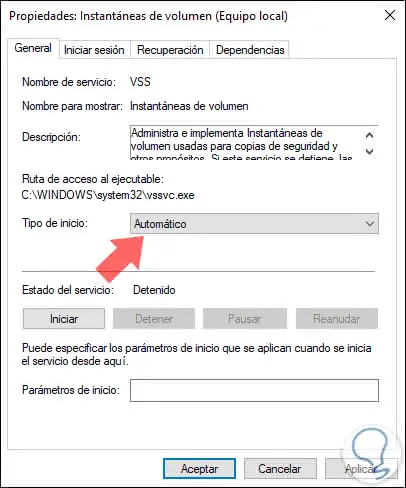
We double click on this and in the Start type field we define the Automatic value. Click Apply and then OK to confirm the changes.
With any of these solutions we will undoubtedly correct the 0X8000FFFF error and have a fully configured system.