On numerous occasions we visit Web pages that show very little content, this presents itself as a major inconvenience, especially in the event that we want to read the text displayed. To avoid this type of inconvenience, web browsers such as Google Chrome, incorporates a Zoom function that allows you to zoom in on the view, enlarging the content.
Related: How to create tab groups in Google Chrome with colors
The problem is that the standard Google Chrome Zoom settings are not suitable for all web pages as each one shows the content in a different size or dimension. This means that if we modify the Chrome default Zoom to correctly view a website, when we visit a different one, we may have to adjust the Zoom again to get a better user experience..
Fortunately Google Chorme also allows you to establish a specific Zoom for each Web that you want and that you visit from the Chrome browser. This is really useful if we frequently use certain Webs that require a different Zoom. In this way, whenever we visit these Webs again, each one will automatically be shown with a specific Zoom scale and configured specifically by you.
Having said this, we show you step by step how to configure an automatic zoom for specific Websites in Google Chrome. We will also teach you how to configure a default Zoom (general / standard) in the browser as well as manage the Zooms configured specifically for the desired Webs;
How to configure a General Zoom in the Google Chrome browser.
1. Open your Google Chrome web browser
2. Click on the three vertical dots at the top right of the interface..
3. Select the option: Configuration
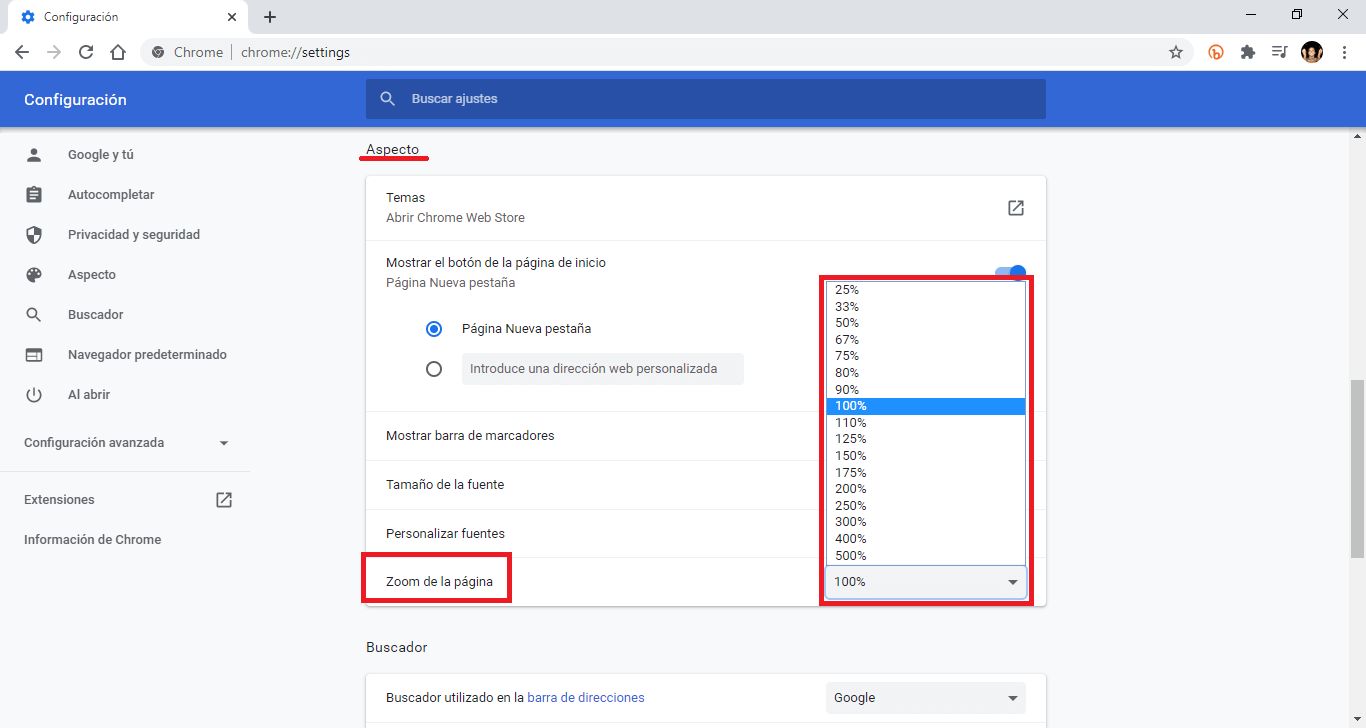
4. Scroll down to the section: Appearance
5. Here you will have to go to ZOOM and click on the drop-down menu and select the Zoom percentage with which you want Chrome to show in general any new website that you visit.
Important Note: This will apply to all websites you visit in Chrome unless you have set a specific zoom level for a particular website by following the steps in the following method..
How to configure a specific Zoom for a specific Web in Google Chrome.
1. Access the Chrome web browser.
2. Go to the website where you want to set a specific zoom.
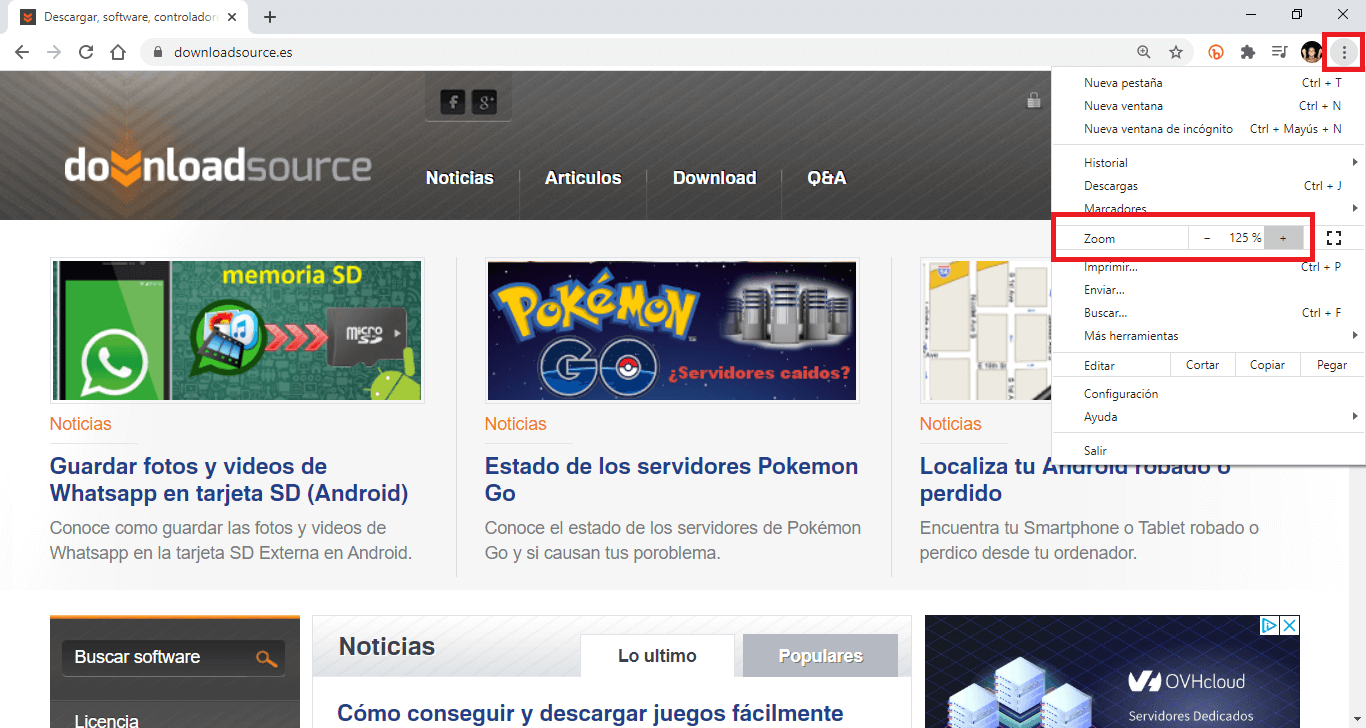
3. Now click on the three Vertical dots icon.
4. In the drop-down menu you will find the Zoom setting.
5. Set the desired Zoom using the controls: Minus (-) or More (+)
- Alternatively you can also change the Zoom of a specific Web using the following keyboard shortcuts:
- Ctrl + Mouse roulette up or down.
- Ctrl + the Minus (-) or Plus (+) key.
- Ctrl + 0 (reset zoom to 100%)
Once the zoom is configured for a specific website, it will be saved. This means that the other Webs you visit do not matter, when you open the Web with a specific Zoom, it will be shown with the Zoom configured the last time you visited it.
How to manage the specific Zooms of specific Websites in Google Chrome.
1. Open Chrome browser
2. Click on the three ellipsis icon
3. In the menu select the option: Configuration
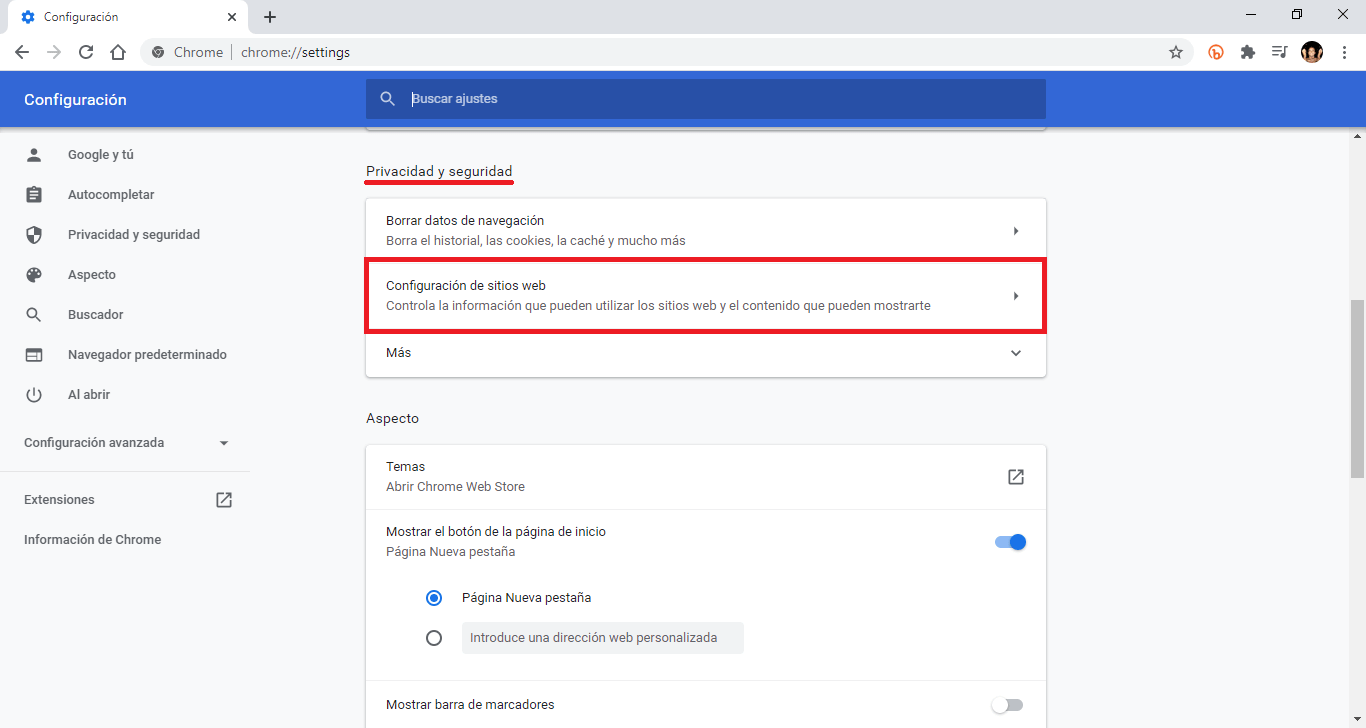
4. On the new screen, you will have to select the Website Configuration option found under the section: Privacy and Security .
5. On the next screen you will have to click on the option: Zoom Levels
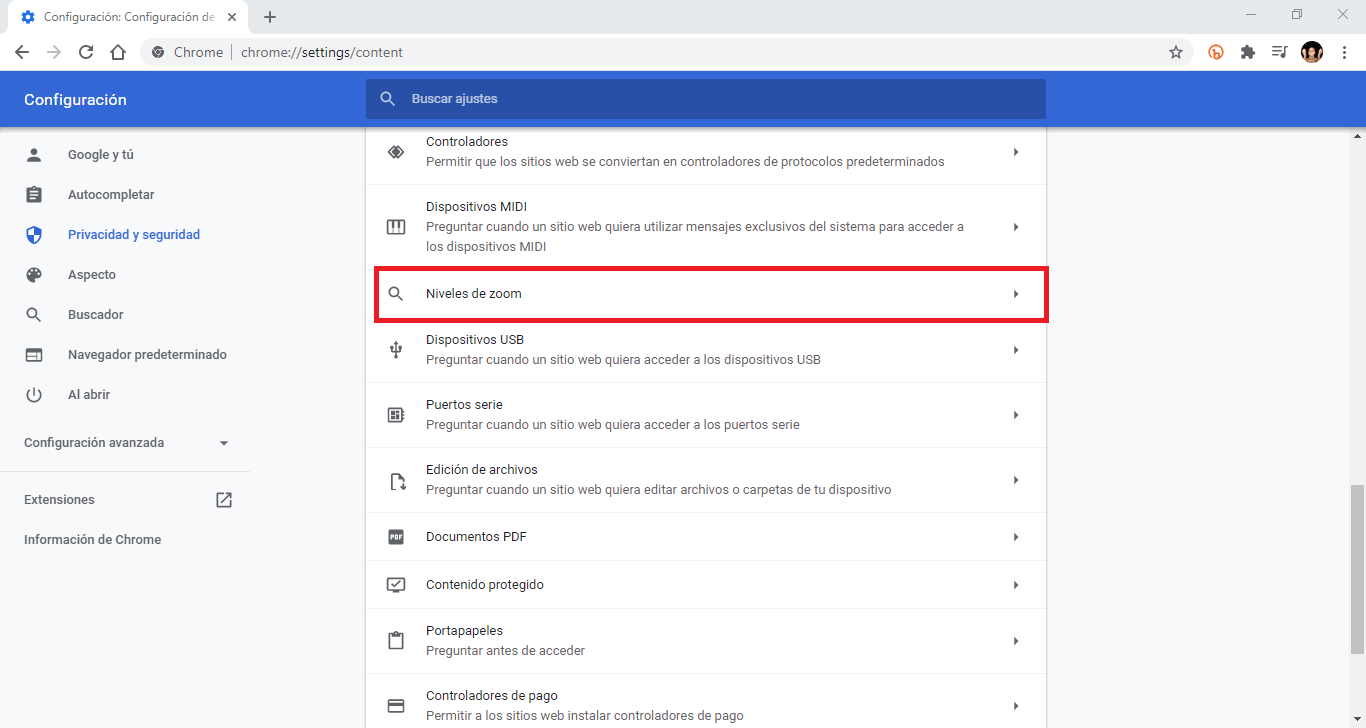
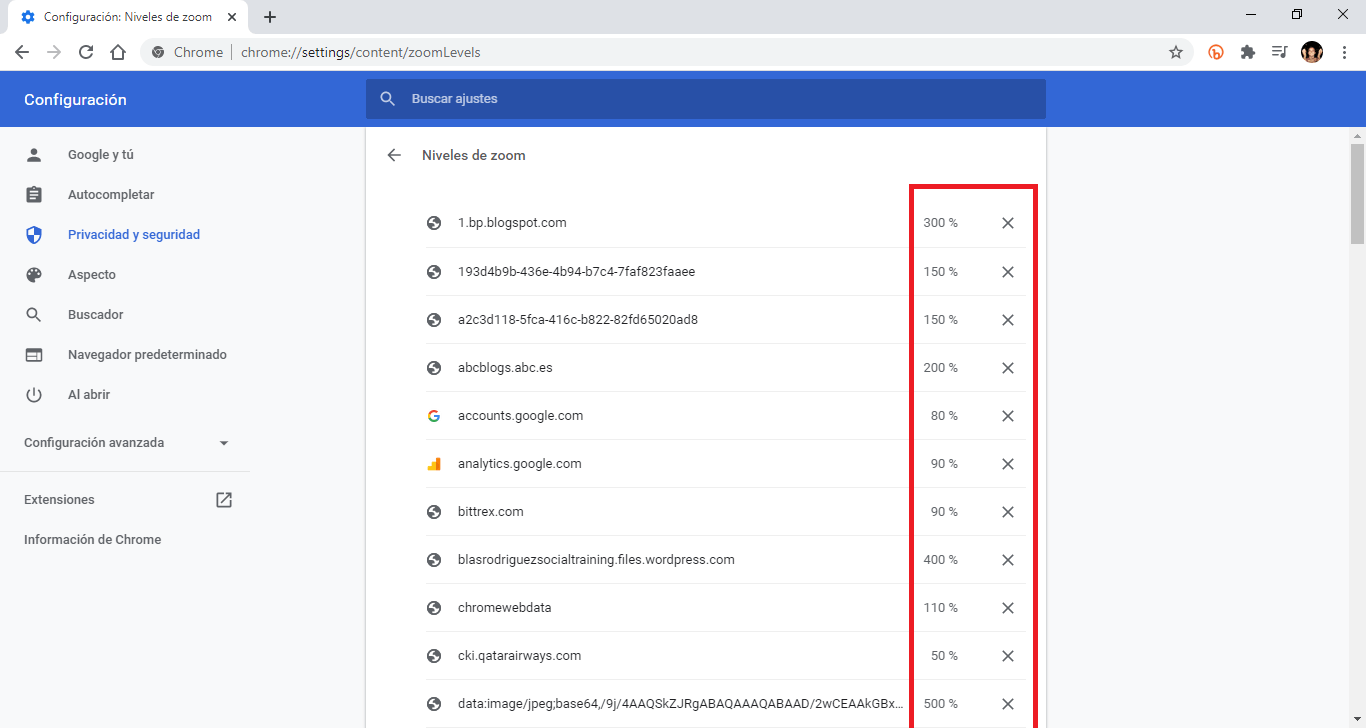
6. This will display a complete list of the Webs for which you have configured a specific Zoom level. This Zoom level is displayed next to each Web.
7. Click on the "X" icon shown next to each of the Webs to remove this setting. If you click on X that web will be shown with the General Zoom configured as we indicated at the beginning of the tutorial.
