VSCO is one of the most used and powerful photo editing apps for both Android and iPhone. This app allows you to apply filters for both photos and video as well as the possibility of editing specific aspects of the image such as: Contrast, exposure, saturation, white balance, etc. However after the last VSCO update when we save the edited photos on our phone, we will see how a watermark is added.
Related: How to create photo collages in Instagram Stories
Watermarks make sense to image owners as it is a way to protect their content and copyright from the unauthorized and fraudulent use of their content by third parties. However, this is not the only reason for using watermarks. Many free programs, software and apps that have a paid version include watermarks in the final files resulting from the use of these tools..
In these cases, this is nothing more than a strategy for the user to be forced to buy the app or software if you want to prevent the final file from displaying a watermark of the type: Edited with App Name.
This is exactly what VSCO does since its last update. When we edit a photo and proceed to save it to the reel or gallery of our iPhone or Android, you will see that by default the image shows a watermark on the right side..
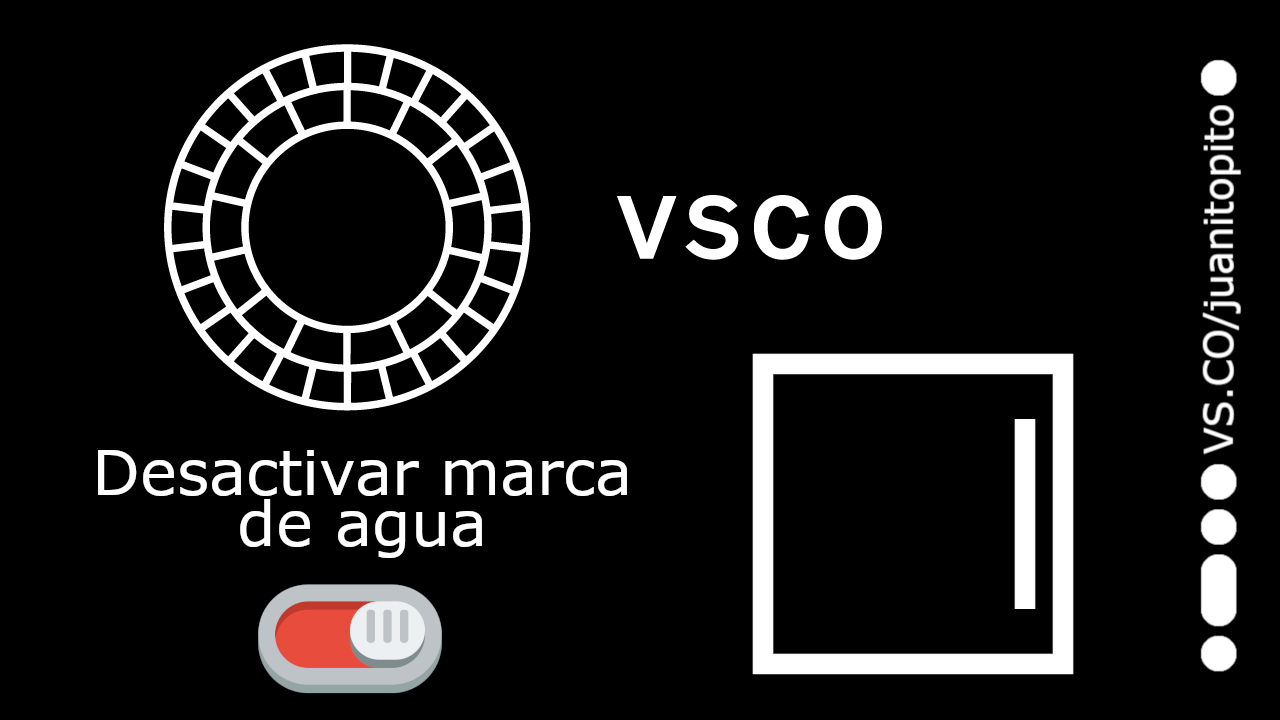
This VSCO watermark will display your profile name next to the VSCO app name and several small circles. Fortunately, VSCO does not force users to show the watermark on photos edited in the app, even with a premium paid version.
That said, below we show you in detail how to remove the watermark from the edited photos of VSCO on both Android and iPhone:
How to remove the watermark displayed on photos edited with the VSCO app
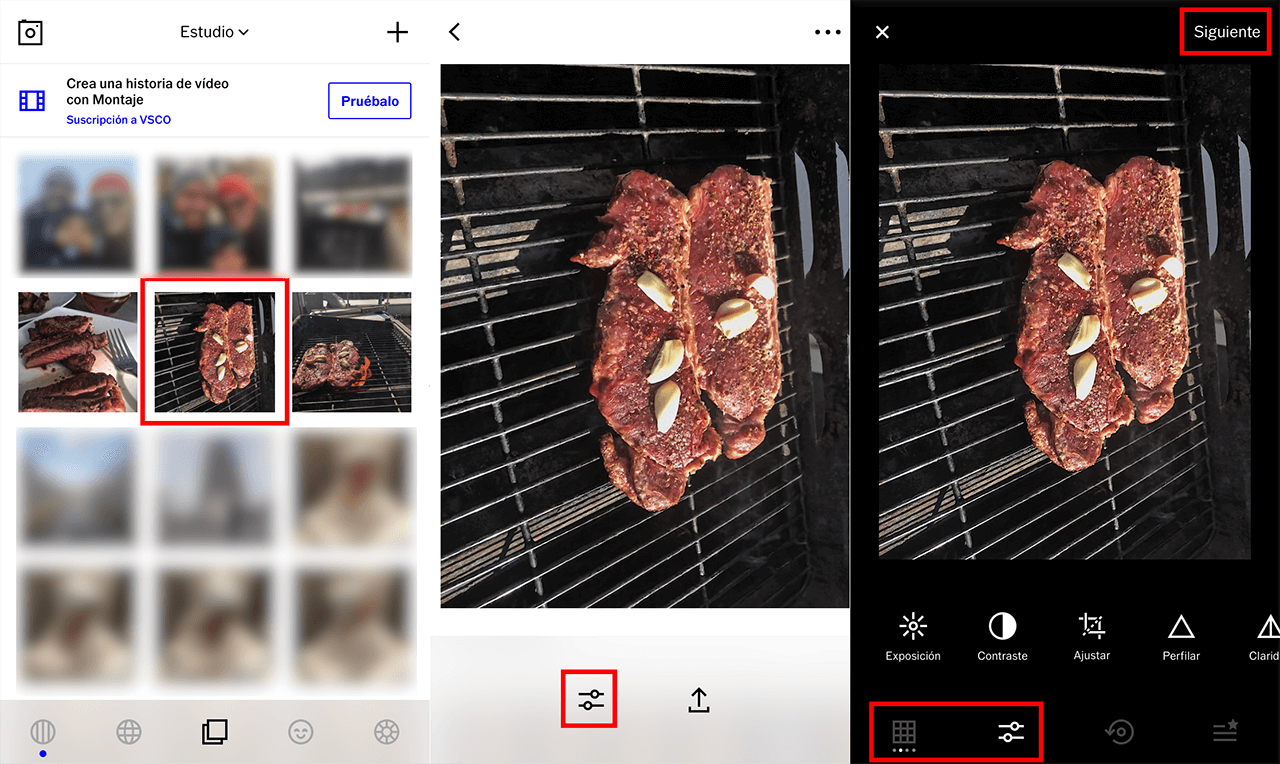
1. Open the VSCO app
2. Add a photo or select one of those already uploaded..
3. Click on the edit icon (two slider bars)
4. Use one of the filters or proceed to manual image editing.
5. Once you are satisfied with the edition click on: Next
6. On the next screen you will see a square icon with a line on the right side of it. Make sure it is disabled (light gray color)
7. Finally you only have to click on the Save button.
8. The image will now be saved without your VSCO profile as a watermark.
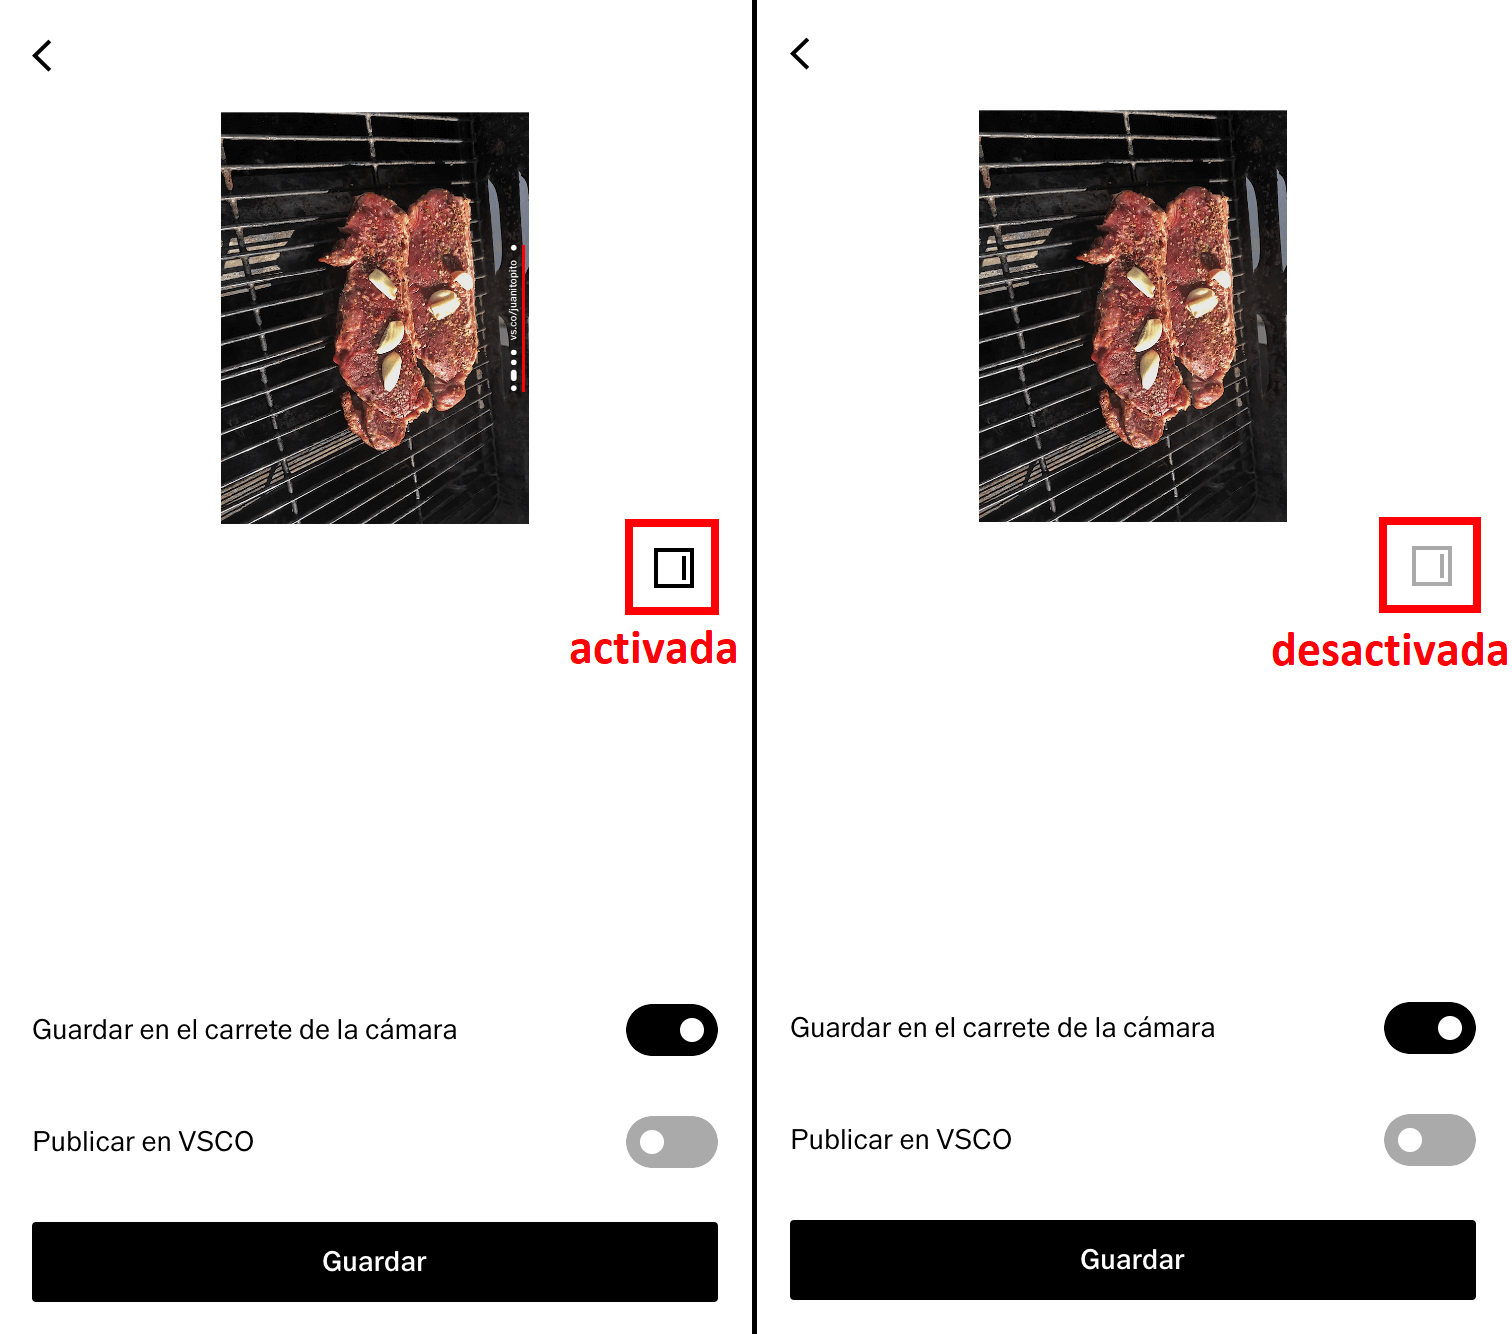
Note: It should be noted that although by default the watermark function is activated, once you deactivate the option, from that moment on the function will remain deactivated unless you activate it manually.