The protection of our files is fundamental, especially if they are unique or framed within intellectual property, it is almost mandatory to protect them in some way. At TechnoWikis we have already written about the possibility of hiding any file or document so that it is not available to other people, but what happens with documents printed on paper and that in many cases we have to show or share with other personnel.

Related: How to activate the Developer tab in Microsoft Office Word.
Surely on some occasion you have had to show a sensitive document such as a degree project or a text that you do not want to be plagiarized. This is quite common also in administration documents or legal documents in which those that are not original are marked as COPY..
This way of protecting your paper documents is usually done using watermarks that can be embedded from your text editor such as Microsoft Word. The Microsoft Office text editor allows you to include watermarks on any document so that when you print it on paper it will be clearly displayed on the document.
Having said this, we show you step by step how to include a watermark in any text document from Microsoft Word:
How to add watermark to a document with Microsoft Word.
- Open in Microsoft Word the document to which you want to add a watermark..
- When this is displayed within Word, you must access the Page Layout section located on the ribbon at the top of the interface.
- This will expose a sub-category with the name: Page Background
- This will be where you find the function you must click on: Watermark
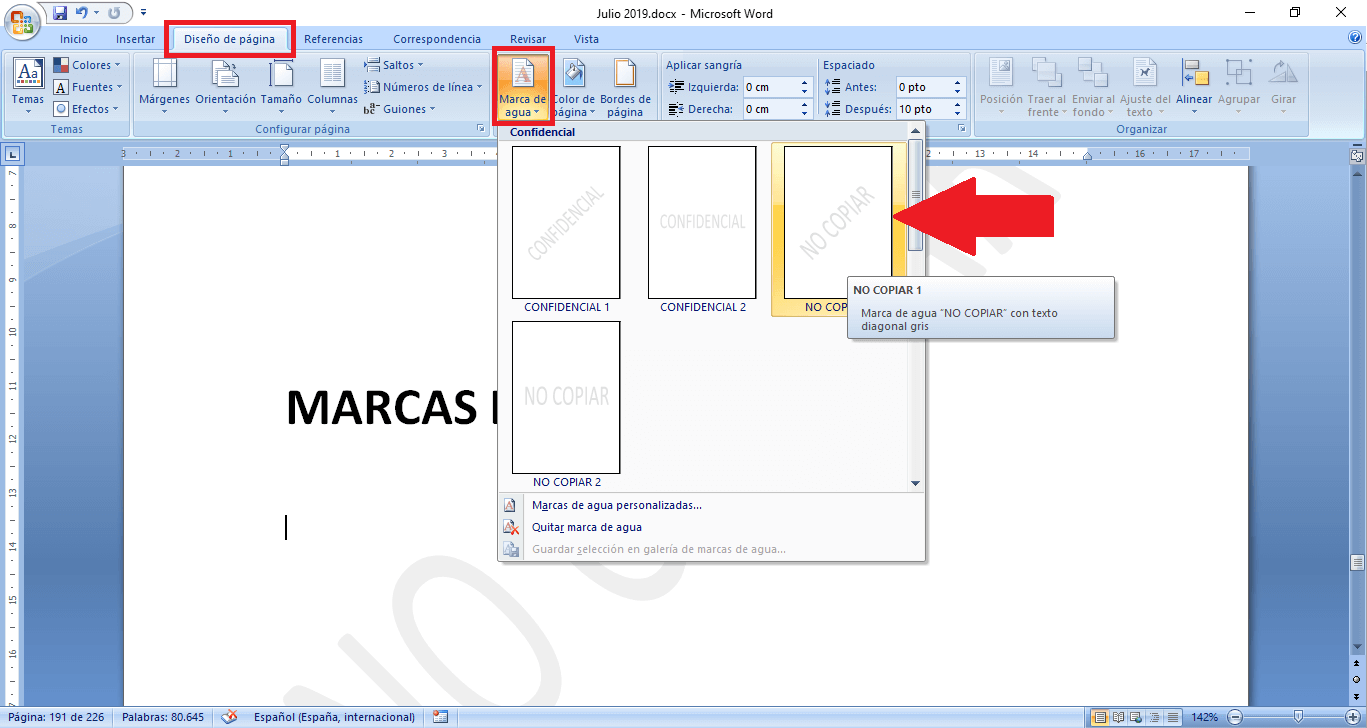
- This causes it to display a menu where you can choose any of the default watermarks such as: CONFIDENTIAL, DO NOT COPY, DRAFT OR DO NOT COPY

How to add custom watermark to a document with Microsoft Word.
- In case you want to use a different watermark than the default ones, you must carry out the same process shown above..
- However, when the watermark menu is displayed, instead of selecting any of the default ones, you must click on the option: Custom watermarks .
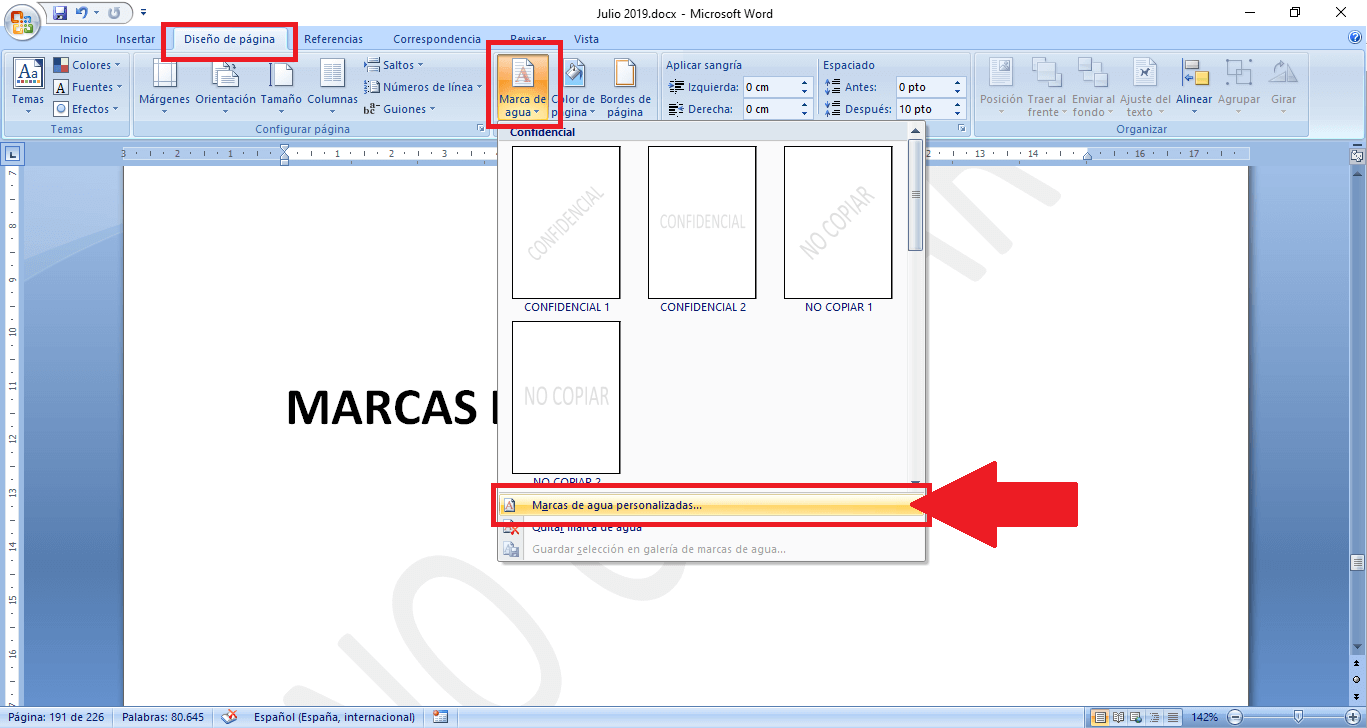
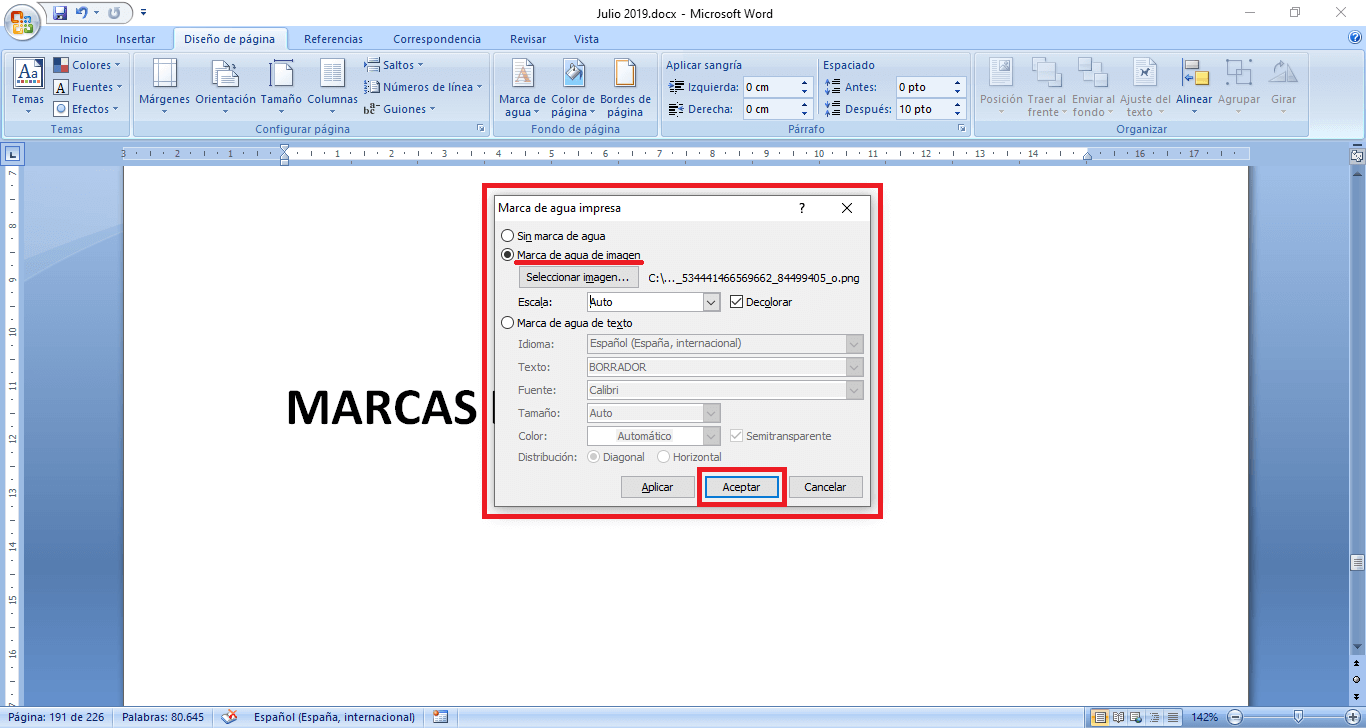
- Now a small window will be displayed in which you can add and configure the desired watermark. You can select to use an image as a watermark or text.
- If you check the Image option, you must upload an image from your computer. Once you have added the watermark image, you can scale it to the page size as well as a Discoloration that allows the document content to be viewed.
- On the other hand, if you check the watermark option with text, you can configure parameters such as: Language, Text, Font, Color Size and its distribution.
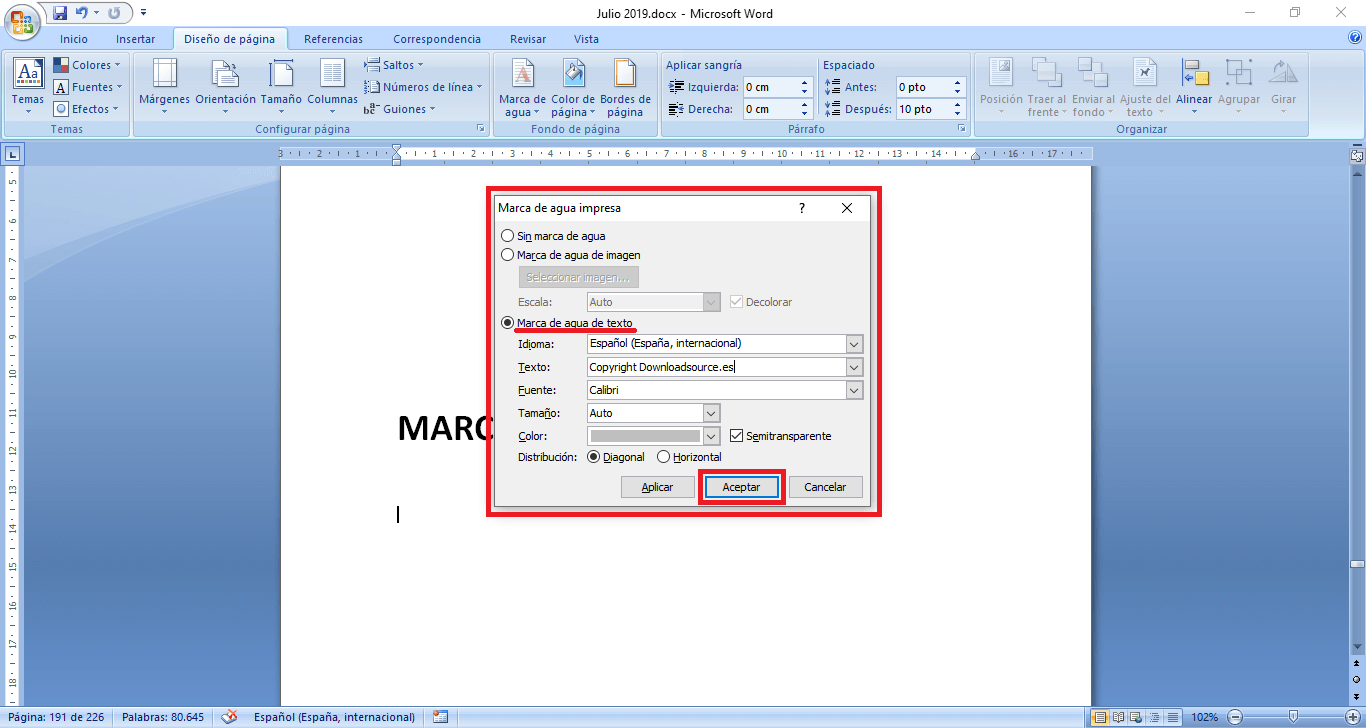
- When everything is ready you just have to click on the Apply button and then OK .
- This will automatically show the watermark on the Word document. Finally, you will only have to print the document to check how the watermark will be shown on each and every page of the document.
