Every day we do a lot of things on our computer, so having our system protected is important so that all the information we have stored on it is protected. That is why the use of an antivirus is unpredictable for it..
Windows Defender is the solution integrated in Windows 10 with which it seeks to add a touch of security and privacy to everything we do in the operating system . That is why improvements and new security functions have been added to Windows Defender for files, folders or executables. By default, each action performed there is saved in a history where the following is recorded:
- Date and time of the action
- Level of importance of this
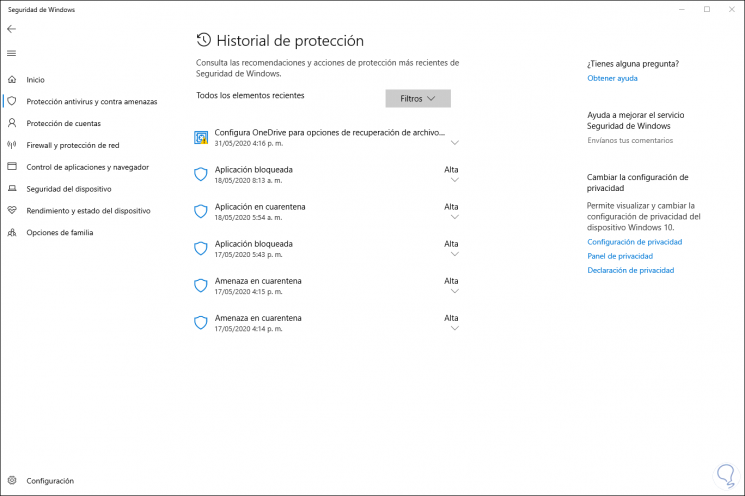
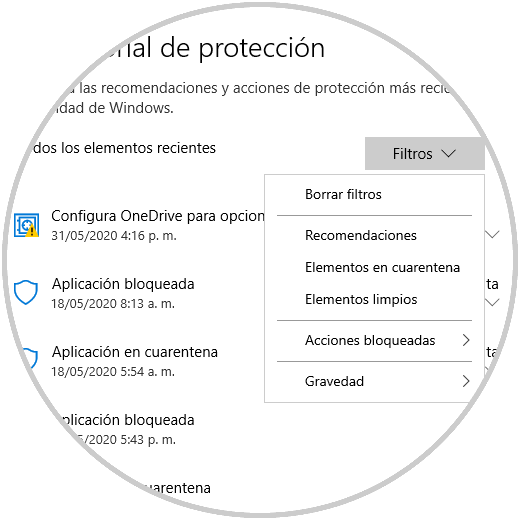
This protection history can be filtered by different sections that are categorized by Windows Defender as:
This is important for centralized control of Windows Defender actions, but it is likely that if the actions have been too many we will want to erase this protection history. For this reason TechnoWikis will explain how to do it in Windows 10 in an effective way.
To stay up to date, remember to subscribe to our YouTube channel! SUBSCRIBE
How to erase history from Windows Defender Windows 10
Step 1
For this we go to the route:
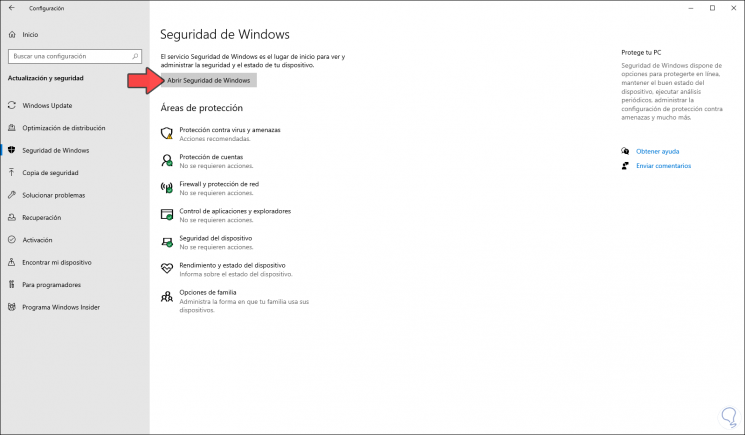
We go to "Windows Security" where we will see the following:
Step 2
We click on "Open Windows Security" and the following will be displayed:
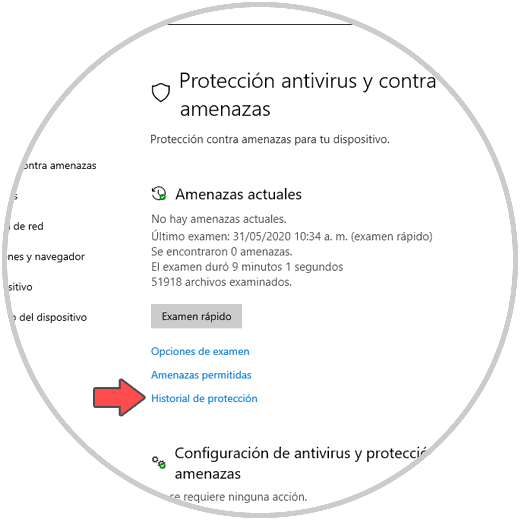
There we go to the category "Antivirus and threat protection" and click on the line "Protection history" in the "Current threats" section..
Step 3
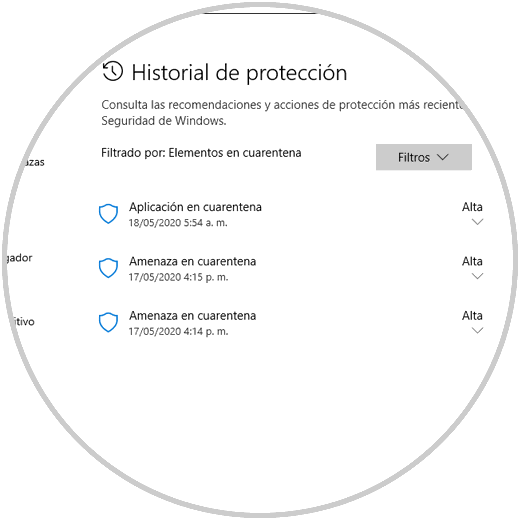
As we mentioned earlier, we can apply filters to list the history only based on what we want:
Step 4
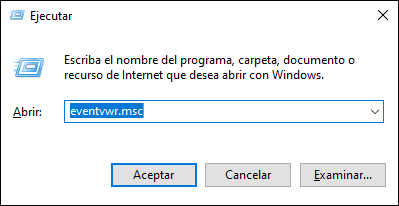
Windows Defender does not have a direct option to delete this history. We will go to the system event viewer using the Windows + R keys and executing the command “eventvwr.msc”:
Step 5
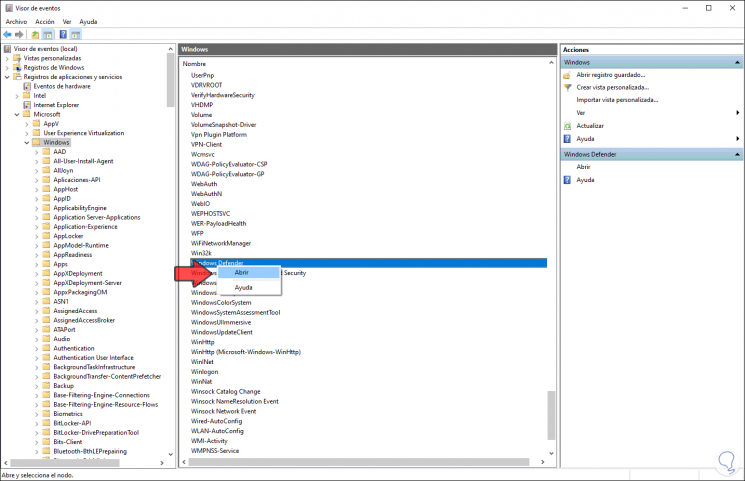
Press Accept or Enter and in the event viewer we go to the section "Application and service logs - Microsoft - Windows", there we place "Windows Defender" on the side and right click on it to select "Open":
Step 6
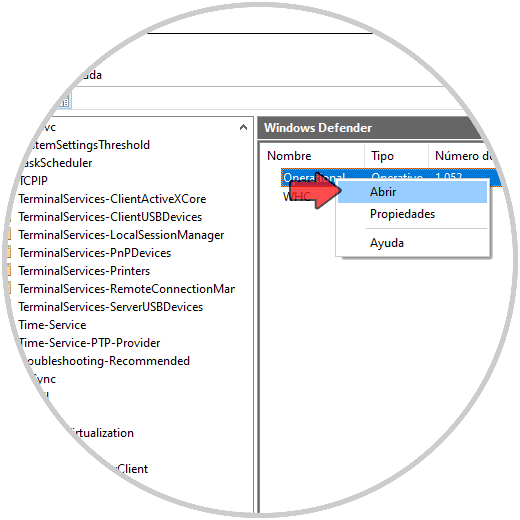
We right click on “Operational” and select “Open”:
Step 7
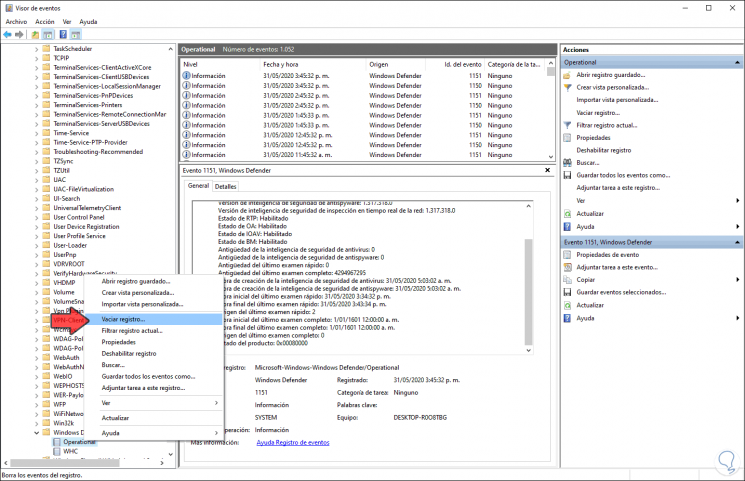
We right click on "Operational" on the left side and select "Empty record":
Step 8
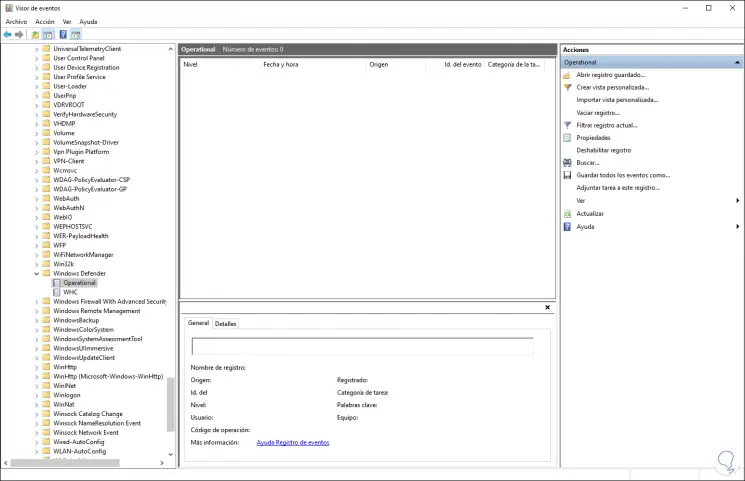
The following will be displayed:

Step 9
We click "Delete" to delete these records:
Step 10
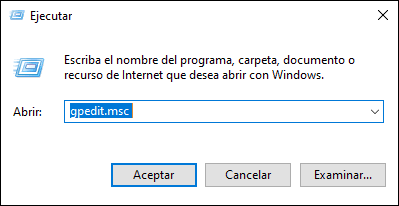
After this we combine the Windows + R keys again and this time run “gpedit.msc” in order to access the local group policies of Windows 10:
Note
This feature is only available in Windows 10 Pro and Enterprise.
Step 11
We will go to the route:
- Windows Defender Antivirus
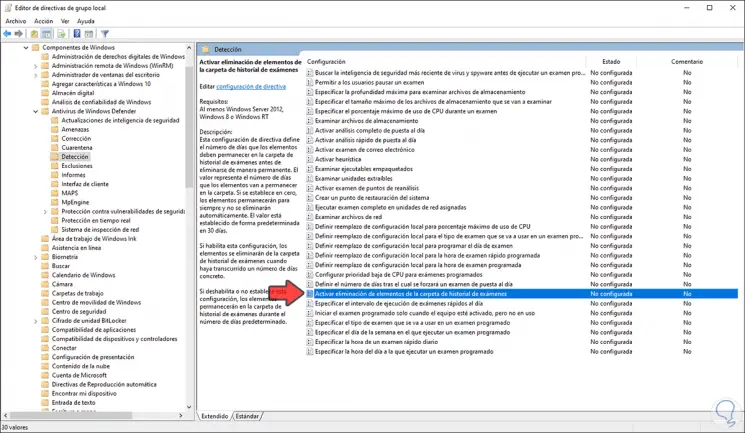
In the central policies we locate the policy called "Enable deletion of items from the exam history folder":
Step 12
This policy has the task of specifying how many days the items will be in the Windows Defender history folder, the default value is 30 days. We double-click on it and activate the “Enabled” box and define how many days the items will be there:
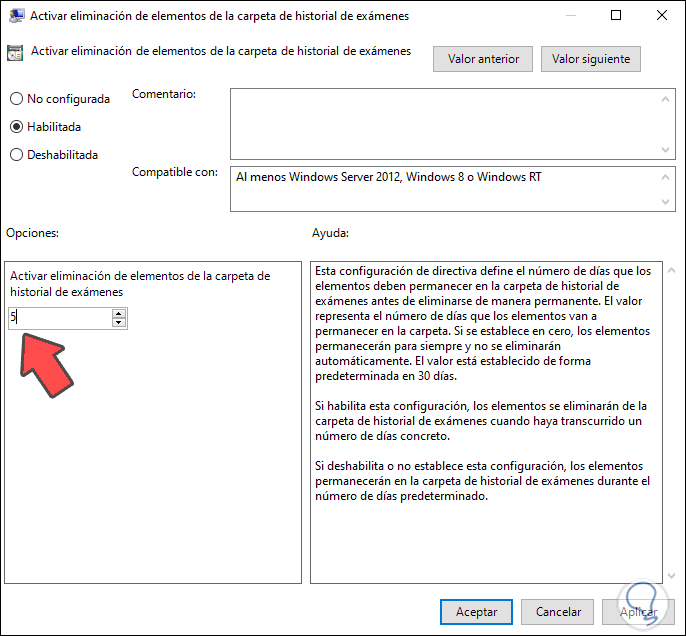
We click Apply and then OK to save the changes.
Note
If set to 0 the elements will be forever in the history.
With these steps we have cleaned the history of Windows Defender and we can establish how long it will be available there..