Today, the computer has become an indispensable device for most of us, both personally and professionally. That is why having it configured in the best possible way is very important for most users, and one of the main objectives is to feel comfortable and productive during its use..
As people who love new distributions of operating systems, we always look for ways to know in advance the new releases by developers and this is achieved thanks to trial versions as various operating systems have them. For example, Microsoft has the Insider program and Linux offers us in Ubuntu and Debian daily versions with the next news.
However, systems like CentOS or Red Hat are a somewhat more complex issue since these systems do not have a test system. That is why CentOS has decided to take a step in this direction and has developed CentOS Stream..
CentOS Stream is an integral part of the CentOS project which has been developed in conjunction with the Red Hat Enterprise Linux (RHEL) engineering team, and its objective is that through this system we can contribute to the development of RHEL with new functions and features. . That is why CentOS Stream is basically an advanced distribution for developers, being open source and allowing it to be modified and redistributed. This allows all the content of the distribution to be what we will see in the next updates of the stable versions of RHEL.
The CentOS Stream download is available at the following link:
CentOS Stream
Image containers
CentOS Stream does not integrate image containers and allows you to build sections as follows:
- Yum repository: x86_64, ppc64le and aarch64
- EC2 images: x86_64, ppc64le and aarch64
- Generic cloud images: x86_64, ppc64le and aarch64
Architectures
The architectures where we can install CentOS Stream are:
To get an idea of how CentOS Stream helps us get an idea of what is coming in the medium and long term, all official CentOS Stream packages are the mirror of the RHEL development code. Now we are going to see how to install CentOS Stream and learn more about its environment..
1. How to install CentOS Stream
Step 1
When downloading the ISO image and burning it to a DVD, we start the computer and we will see the following:
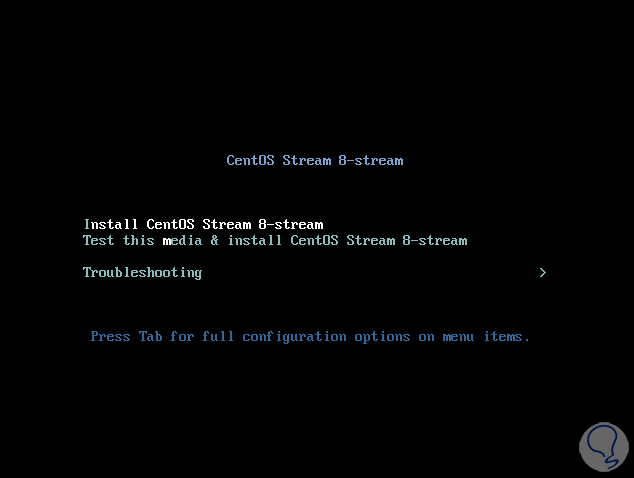
There it is possible:
- Install CentOS Stream locally
- Test the installation media and hardware
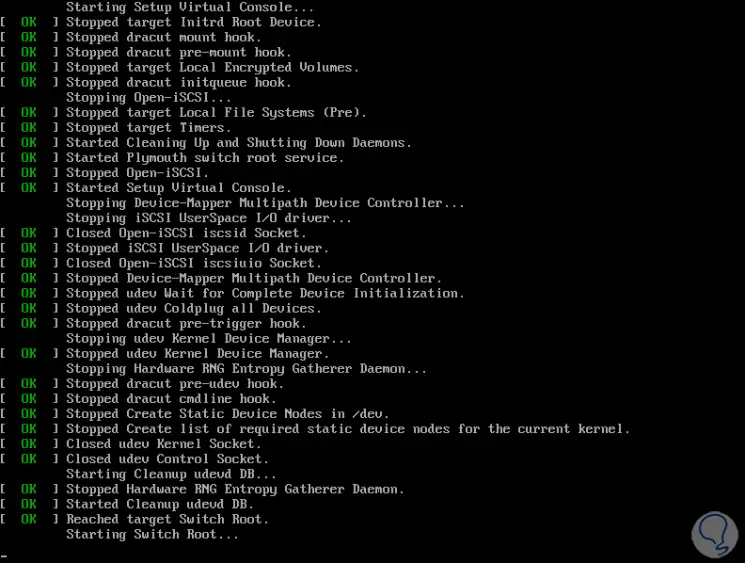
Step 2
We select the first option and the service load will start:
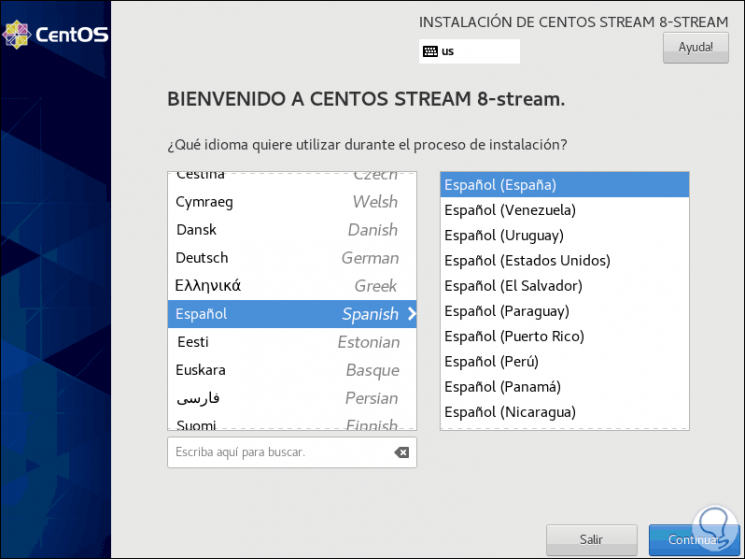
Step 3
After that we select the installation language:
Step 4
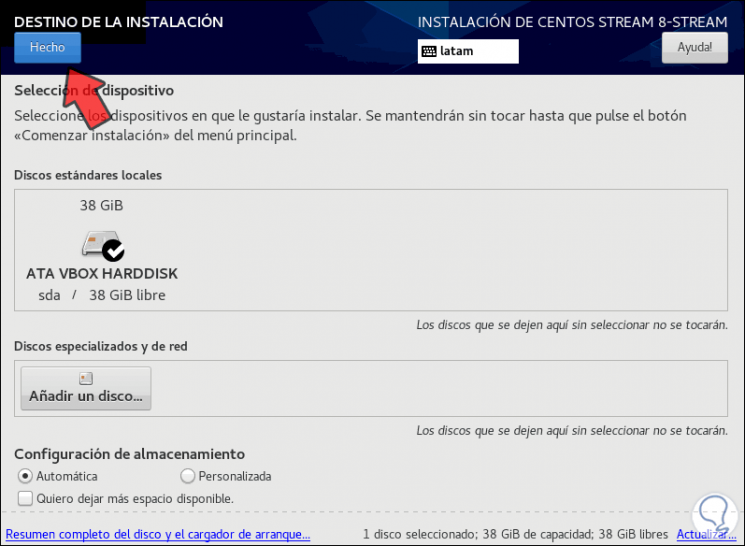
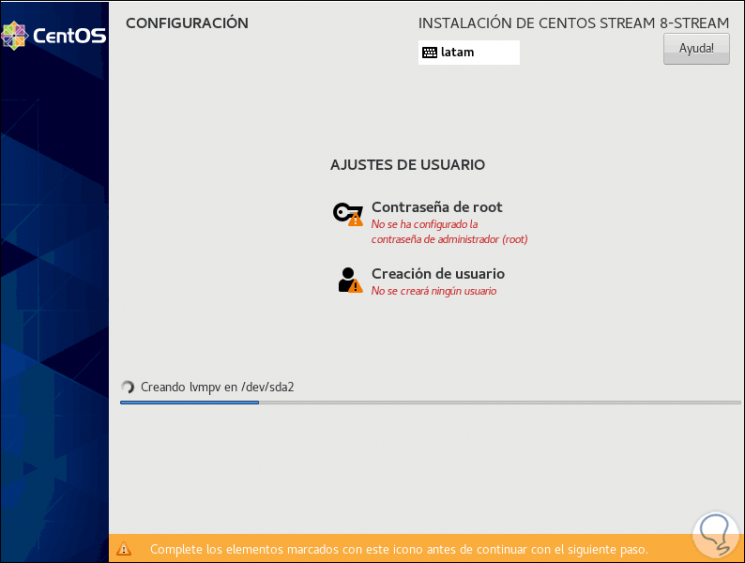
Then we access the following window. There it will be necessary that the fields with warning are complete. First, we go to "Installation destination" where we must select the local hard drive:
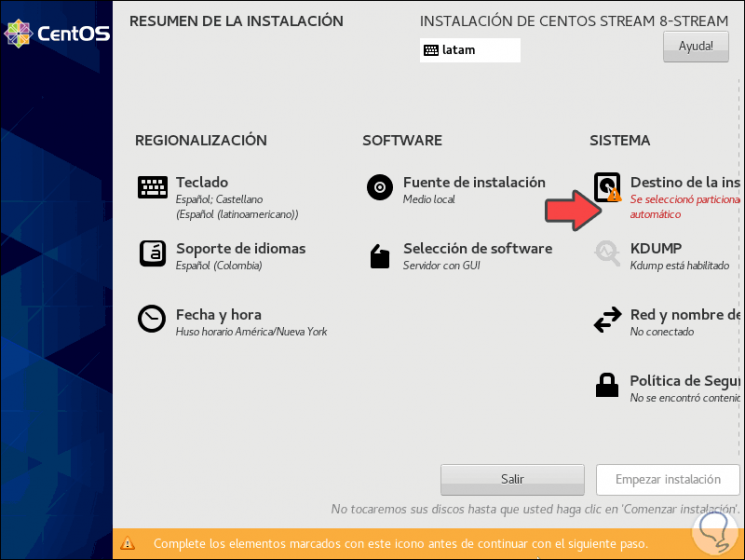
Step 5
Some additional options include adding more hard drives or creating partitions manually.
Once we select the disk we click on "Done".
Step 6
TechnoWikis recommends you go to "Network and computer name" to activate the network switch and take the IP address and gateway:
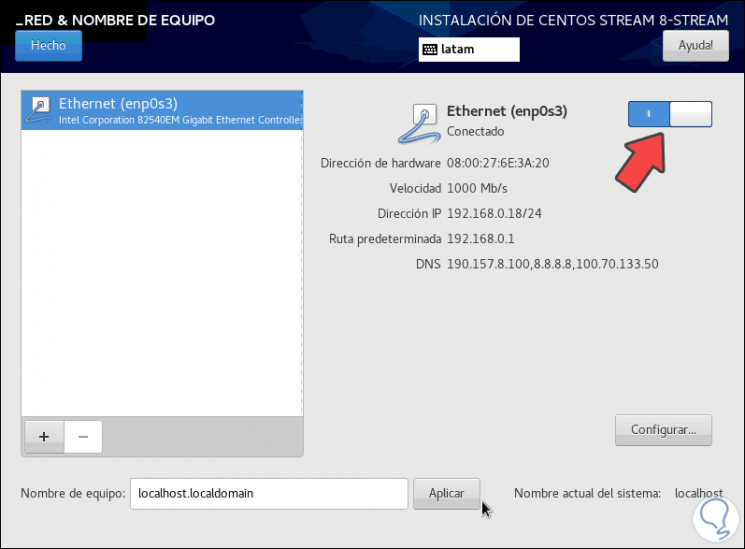
Step 7
It is possible to go to the section "Software selection" to choose which add-ons or environments we want for CentOS Stream:
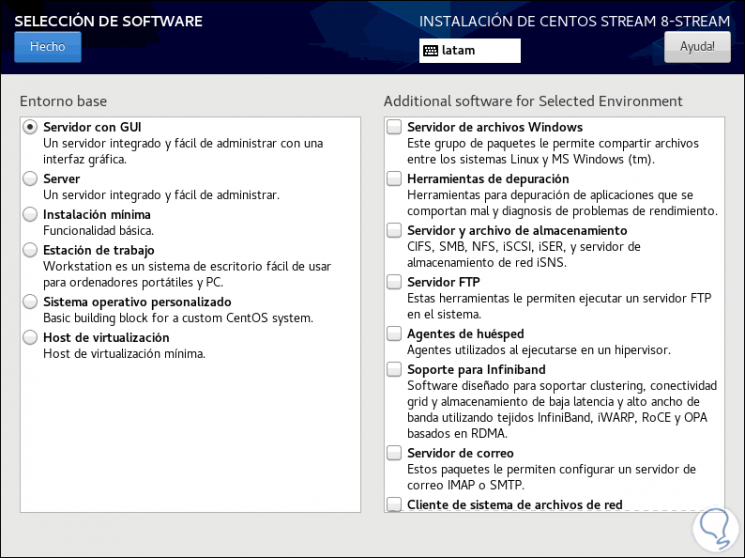
Step 8
Once we complete the fields with a warning, the "Start installation" button will be activated:
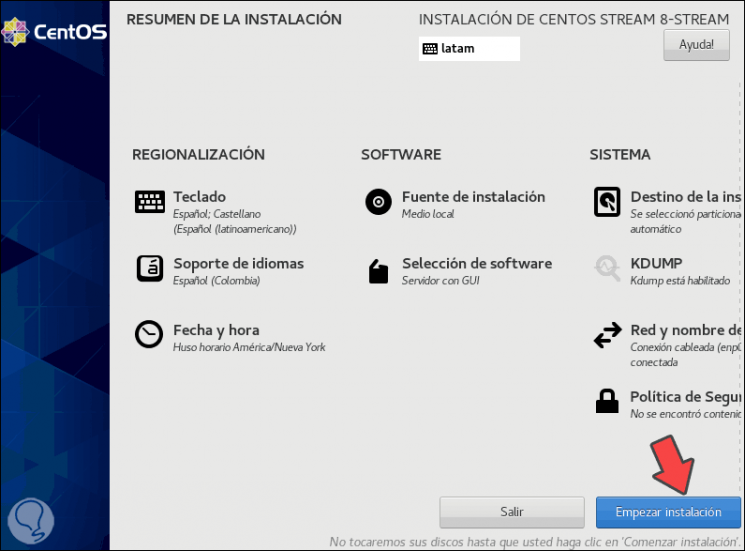
Step 9
We click on it to start the CentOS Stream installation process:
Step 10
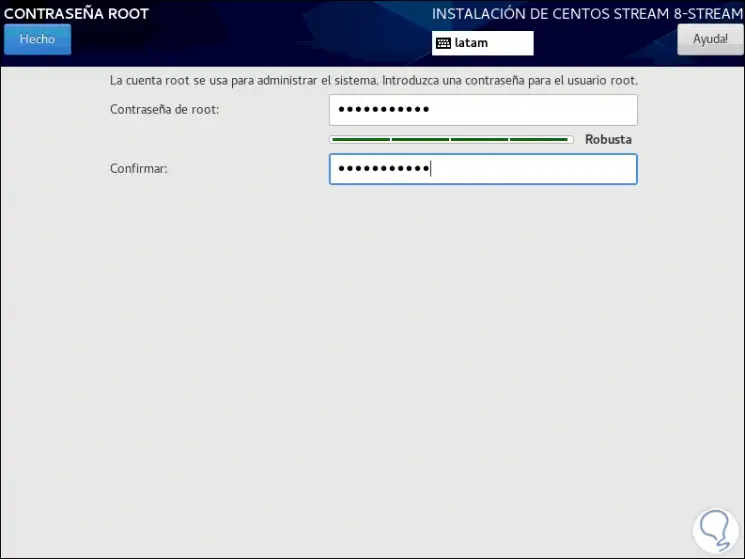
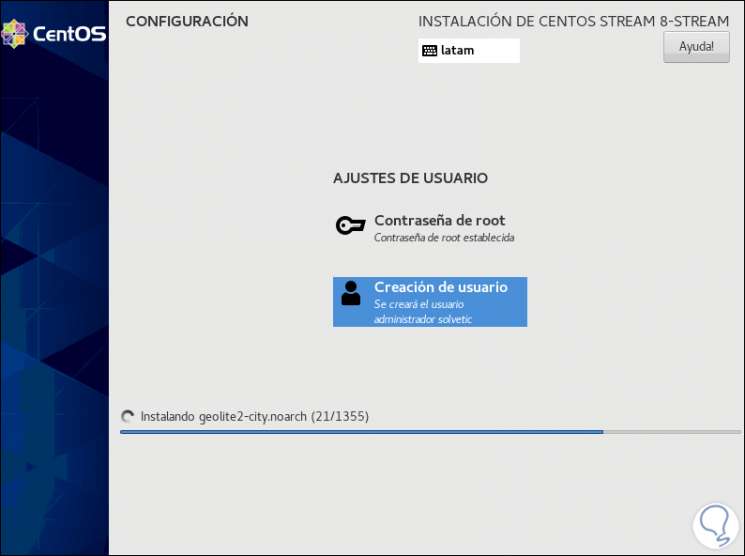
We click on “Root password” and assign the respective password:
Step 11
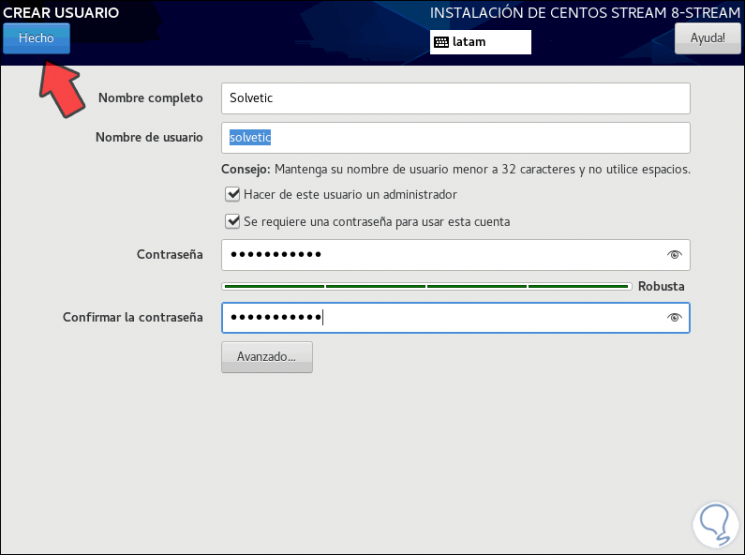
We click on "Done" and now we go to "User creation" and enter the administrator user with their respective password:
Step 12
We click "Done" and continue with the CentOS Stream installation:
Step 13
Once the system is installed we will see the following:
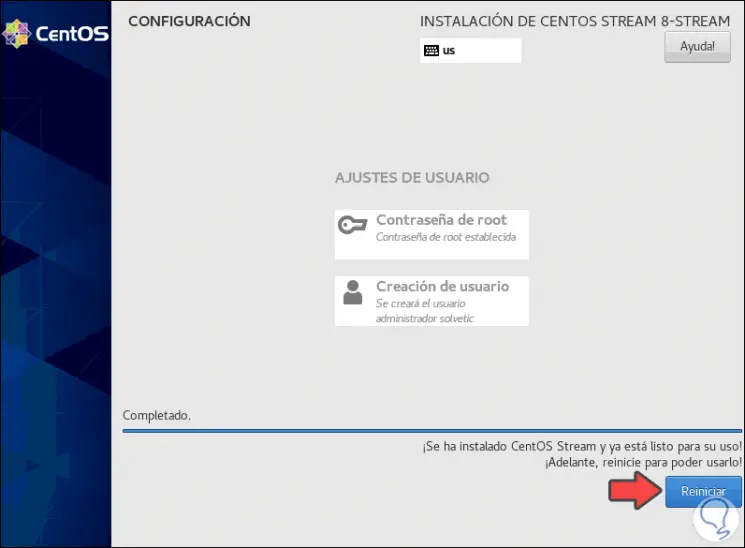
Step 14
We click "Restart" to complete the process and we will see the following:
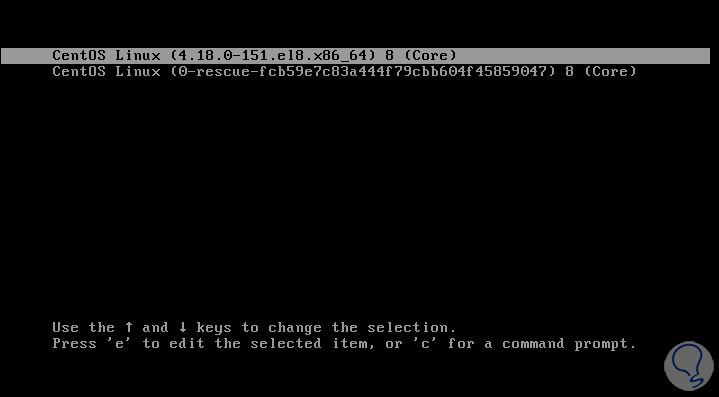
Step 15
We select the first option and press Enter, after this we access the login, but first we must accept the license:
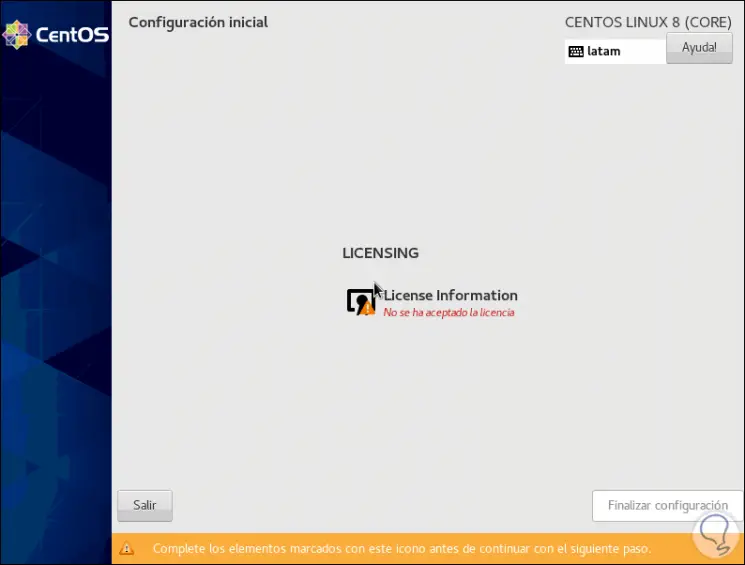
Step 16
We click on “License Information” and we must activate the license acceptance box:
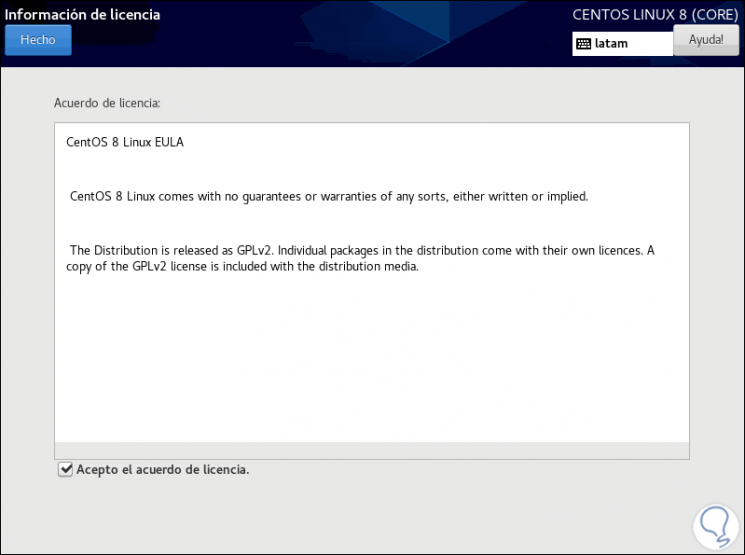
Step 17
We click on "Done" and we will see the following:
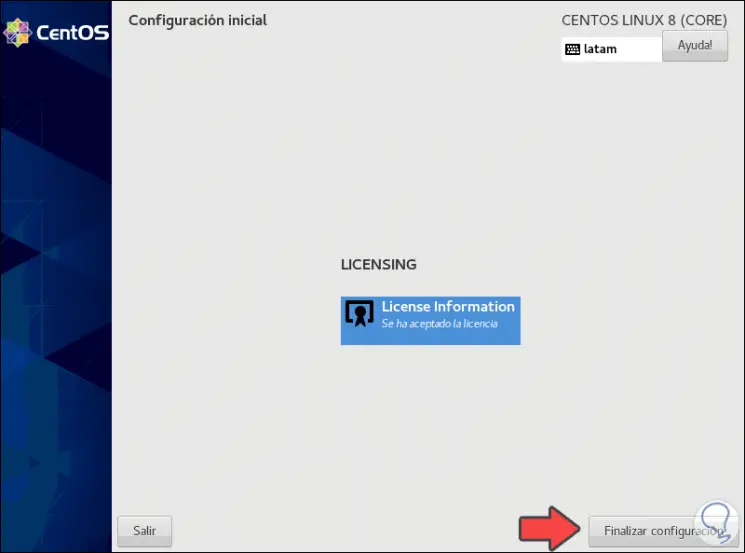
Step 18
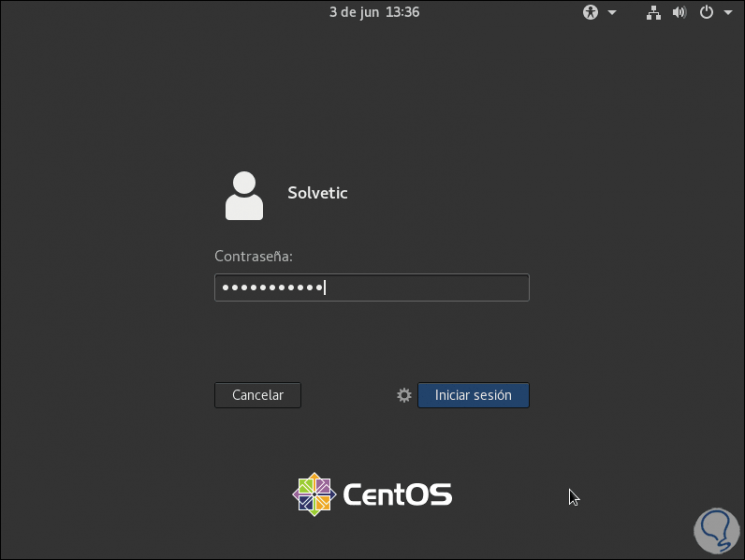
We click "Finish configuration" and after this we access the login:
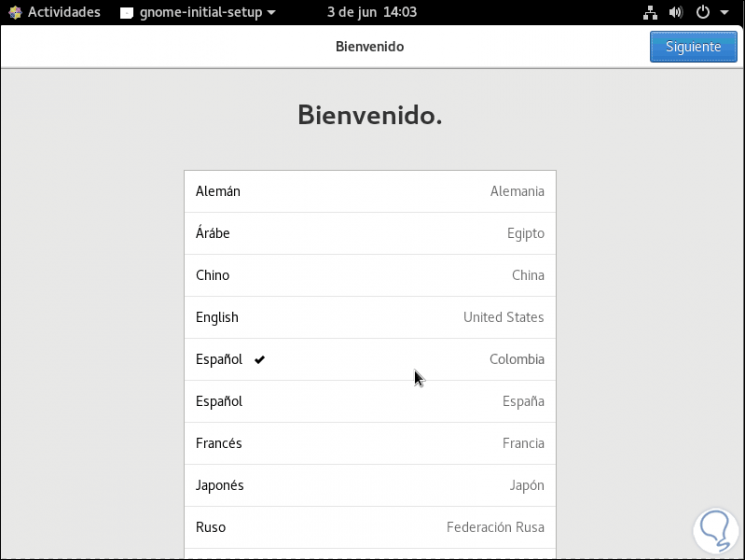
Step 19
When accessing, we must define the language of use of CentOS Stream:
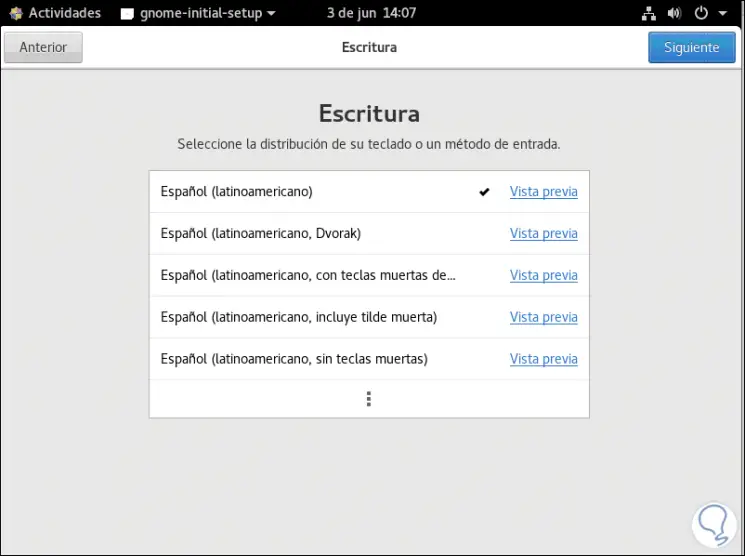
Step 20
Then we select the script:
Step 21
We define privacy:

Step 22
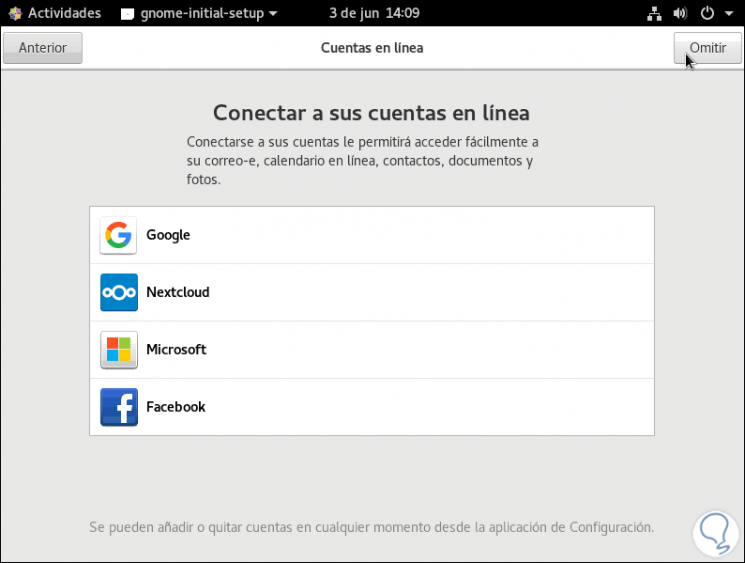
Then we integrate, if we wish, an online account:
Step 23
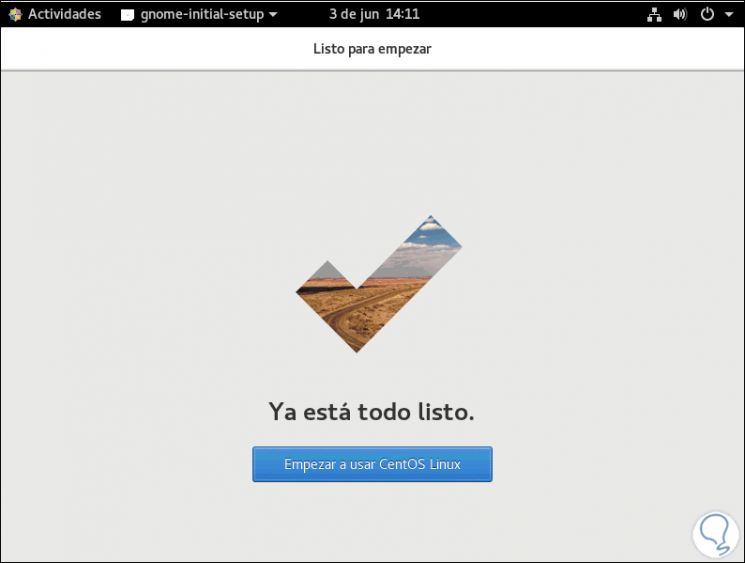
With this we have finished the CentOS Stream configuration:
Step 24
We can close the wizard and enjoy this edition of CentOS Stream:
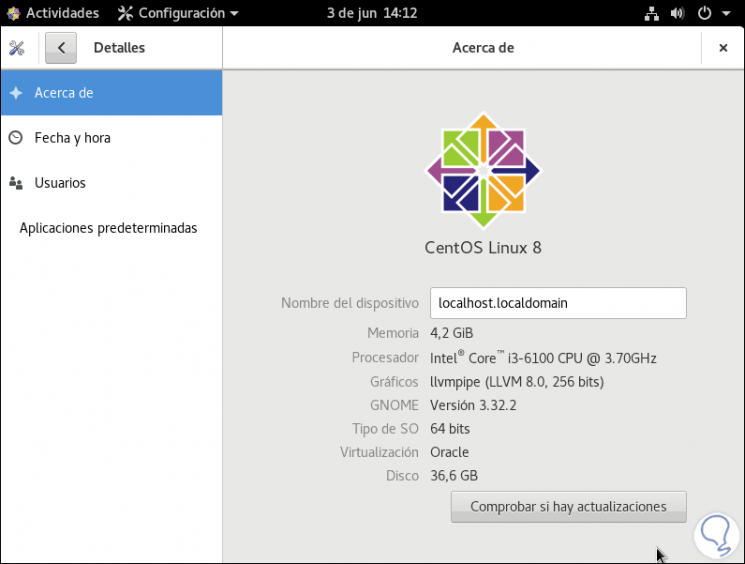
Finally we will see that we have the CentOS Stream version installed on our PC and we can already start using it and all the possibilities it offers us.