Odoo is designed to be the integral management software that provides the end user with the best work options but without complexity, Odoo integrates more than 30 main applications which are constantly updated to have their functionalities ..
Odoo aims to be a CRM with high availability and scalability since its use is diverse, ranging from electronic commerce , project management, technical assistance, accounting, inventory to various levels of ERP.
features
Some of its characteristics are:
- Modern user interface with modern and dynamic panels
- Large screen view function
- It has a mobile application
- GeoIP function to detect potential clients as well as to be able to find countries, states or cities automatically from the IP address
- It has more than 30 marketing applications to increase sales and management
- Option to create rules that allow to be based on memberships and segments
- Record calls or initiate VoIP calls with just a few simple steps
- Activity and call management
- Complete history of all processes with a client
- Integrate email templates to facilitate the writing processes
- Compatible with VoIP telephony
TechnoWikis will explain how to install Odoo on CentOS 8 and thus have the best option to manage your CRM..
1. Install Odoo on CentOS 8
Step 1
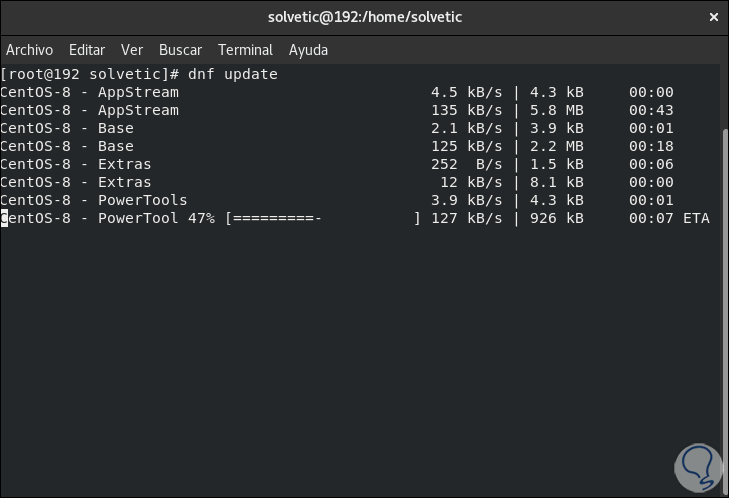
The first thing to do is update the system and its repositories, for this we will use the following command:
dnf update
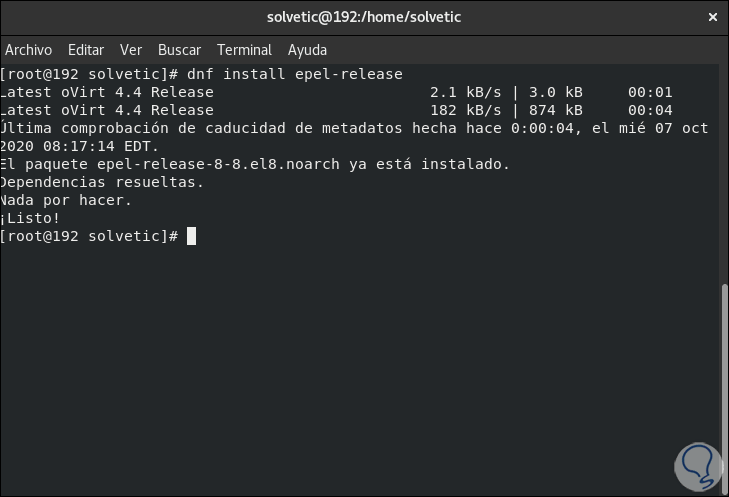
Once the system has been updated, we are going to install the EPEL repository with the following command:
dnf install epel-release
Step 2
This repository is designed so that the CentOS 8 options are greater.
2. How to install Python and its dependencies
Step 1
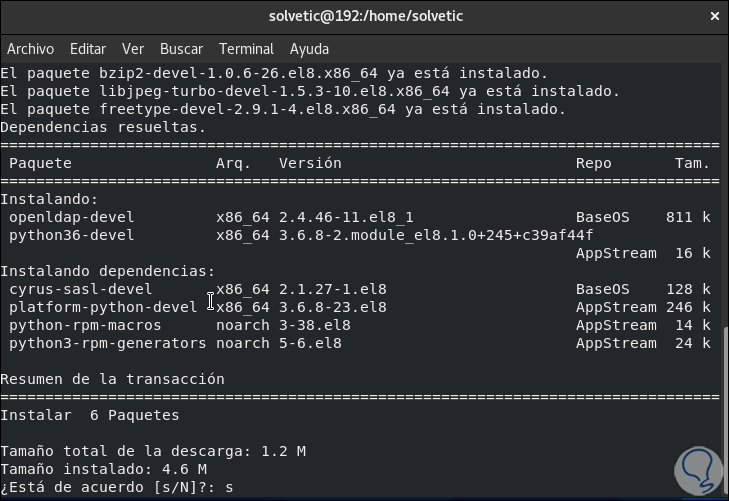
Odoo requires Python 3 and some dependencies on it for optimal work, to install this we are going to use the following command:
dnf install python36 python36-devel git gcc wget nodejs libxslt-devel bzip2-devel openldap-devel libjpeg-devel freetype-devel
Step 2
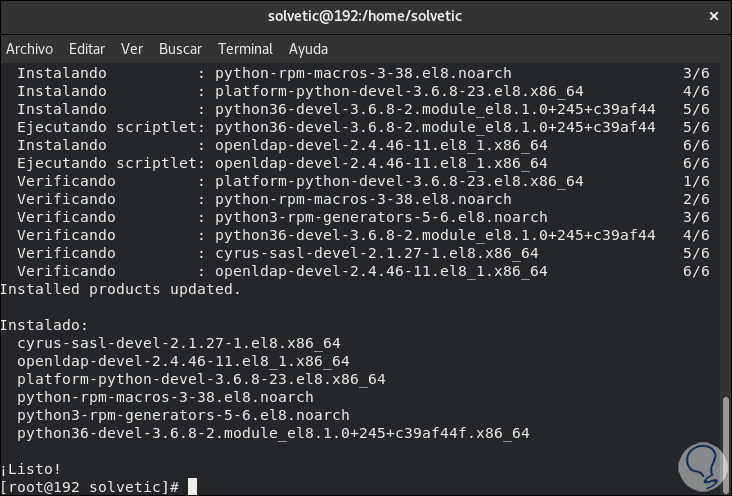
We enter the letter "s" to confirm the download and installation of these:
3. How to install and configure PostgreSQL on CentOS 8
Step 1
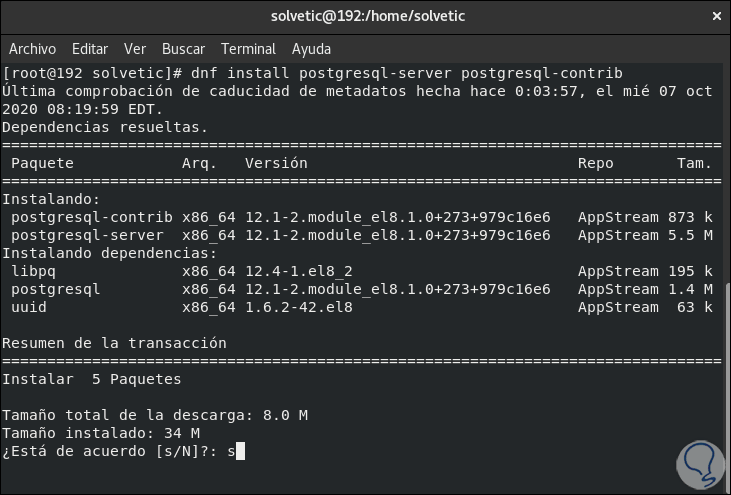
PostgreSQL is an open source relational database management system which allows you to store data in a safe way, to carry out this installation we are going to execute the following:
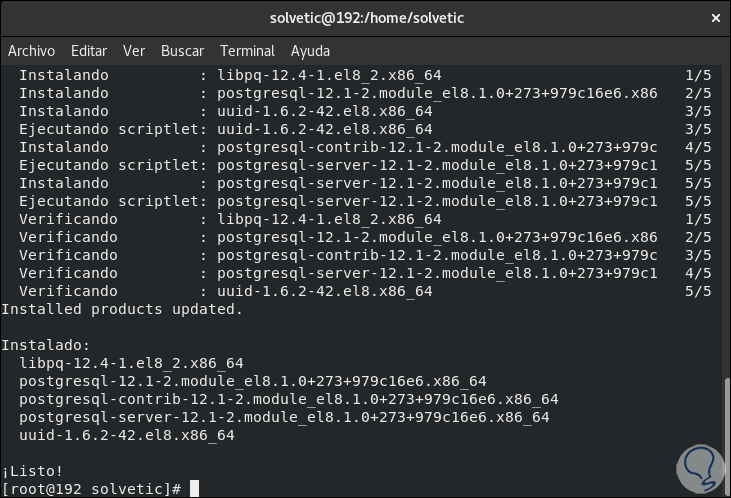
dnf install postgresql-server postgresql-contrib
Step 2
We enter the letter "s" to accept the download and installation of PostgreSQL:
After this we are going to initialize the PostgreSQL cluster:
sudo postgresql-setup initdb
Step 3
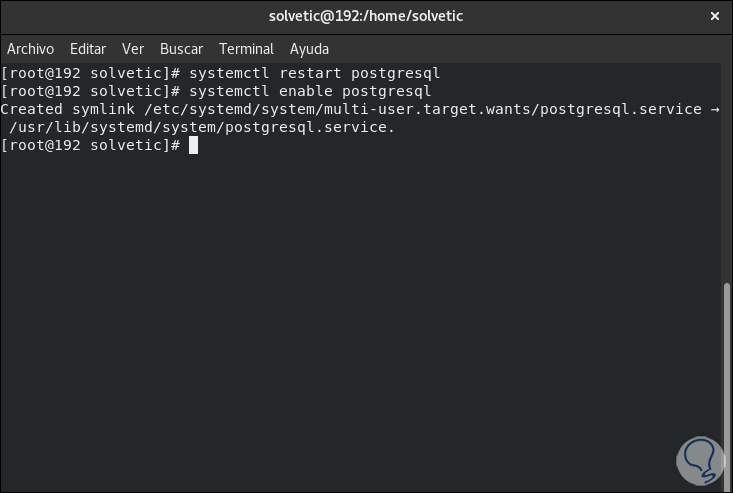
We restart the service and enable it at the startup of CentOS 8 with the following command:
sudo systemctl restart postgresql sudo systemctl enable postgresql
Step 4
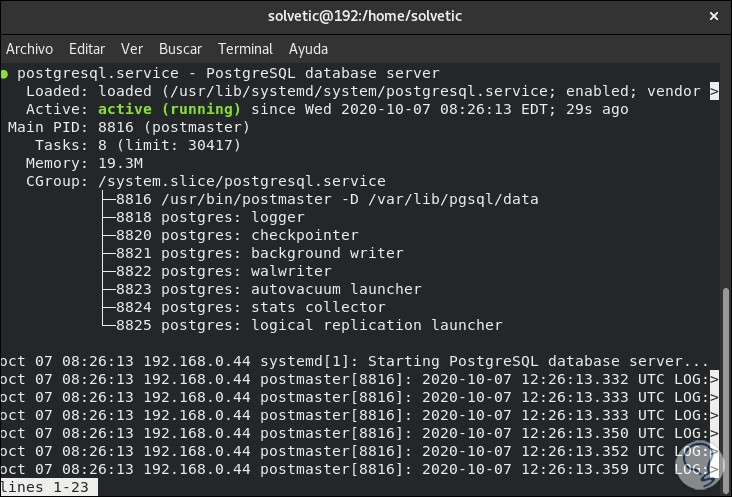
We check its current status:
systemctl status postgresql
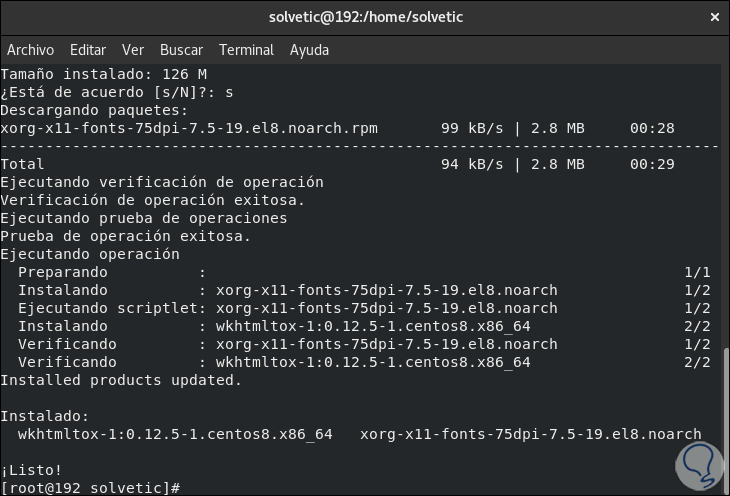
4. How to install Wkhtmltopdf CentOS 8
Step 1
This is a utility which allows Odoo to print reports in PDF, it can convert HTML into PDF and more formats if we need it, for its installation we execute the following:
dnf install https://github.com/wkhtmltopdf/wkhtmltopdf/releases/download/0.12.5/wkhtmltox-0.12.5-1.centos8.x86_64.rpm
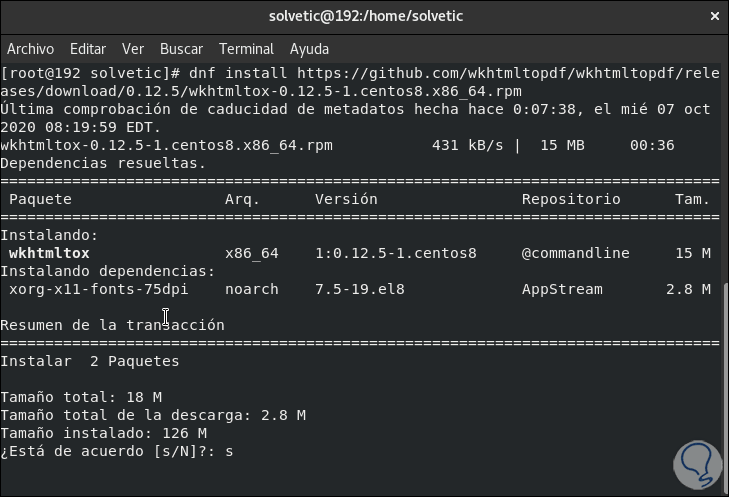
Step 2
We accept the download and installation:
5. How to install and configure Odoo on CentOS 8
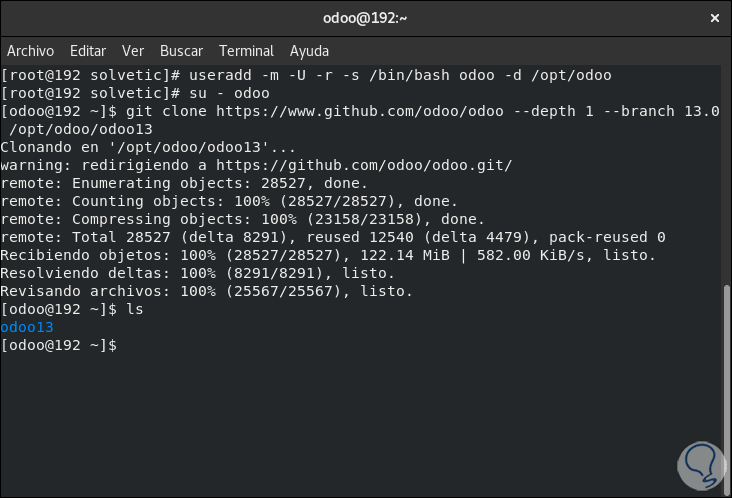
Step 1
It is time to install Odoo on the server, first of all we are going to add a new system user to run the Odoo service, it will be hosted in the / opt / odoo directory:
useradd -m -U -r -s / bin / bash odoo -d / opt / odoo
We change the user account:
su - odoo
We clone the Odoo repository with the following command:
git clone https://www.github.com/odoo/odoo --depth 1 --branch 13.0 / opt / odoo / odoo13
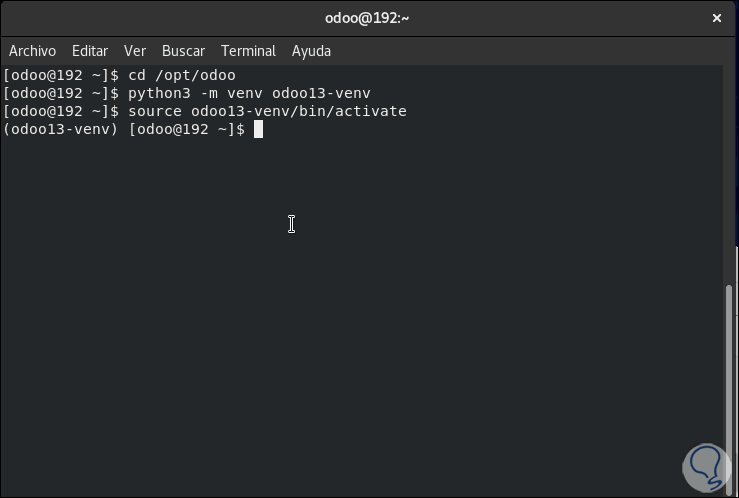
Step 2
We access the directory:
cd / opt / odoo
We clone the virtual Python environment:
python3 -m venv odoo13-venv
With the environment created we are going to activate it with the command:
source odoo13-venv / bin / activate
Step 3
In this virtual environment we are going to install the required Python dependencies with the following command:
pip3 install -r odoo13 / requirements.txt
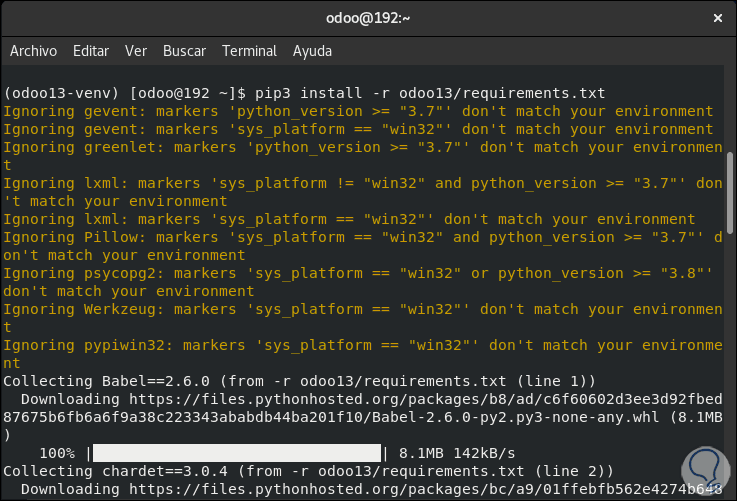
Step 4
At the end of this process we will see the following:

Step 5
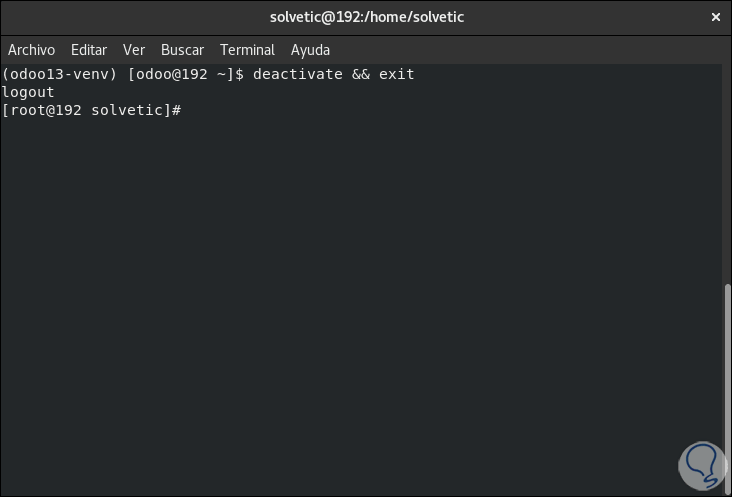
We exit the virtual environment with the command:
deactivate && exit
Step 6
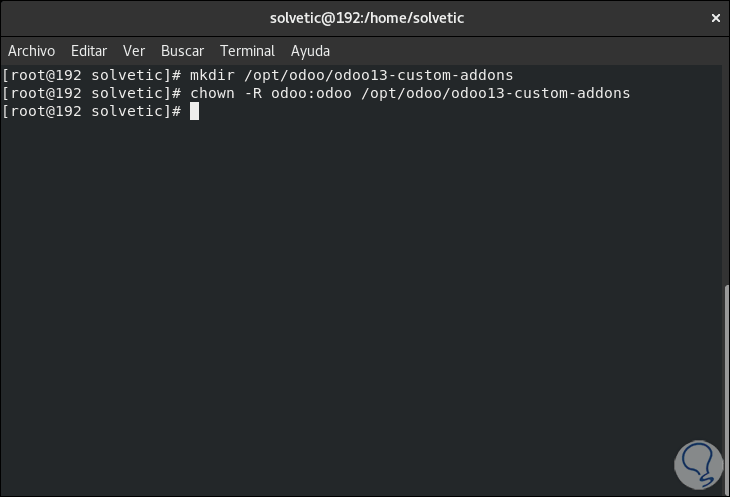
Now we are going to create a directory for custom modules and then we grant ownership of the directory to the user "Odoo" with the following commands:
sudo mkdir / opt / odoo / odoo13-custom-addons sudo chown -R odoo: odoo / opt / odoo / odoo13-custom-addons
Step 7
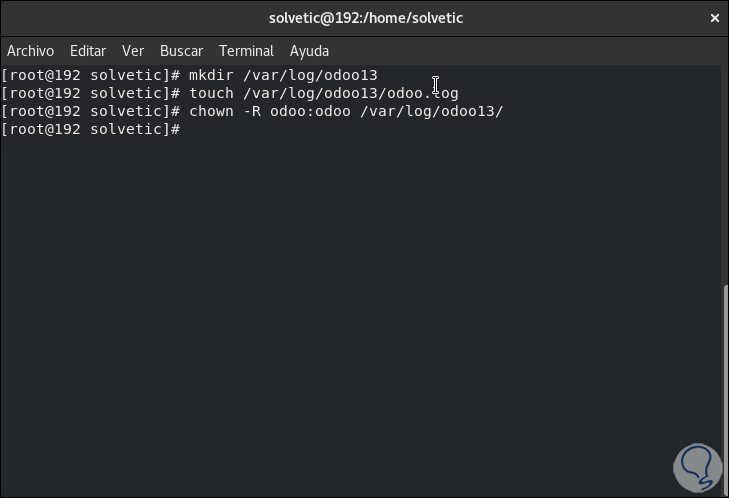
We are going to create the directories for the logs:
sudo mkdir / var / log / odoo13 sudo touch /var/log/odoo13/odoo.log sudo chown -R odoo: odoo / var / log / odoo13 /
Step 8
The next step will be to create the Odoo configuration file with the following command:
sudo nano /etc/odoo.conf
There we enter the following:
[options] ; This is the password that allows database operations: admin_passwd = "password" db_host = False db_port = False db_user = odoo db_password = False xmlrpc_port = 8069 ; longpolling_port = 8072 logfile = /var/log/odoo13/odoo.log logrotate = True addons_path = / opt / odoo / odoo13 / addons, / opt / odoo / odoo13-custom-addons

We save the changes with the keys Ctrl + O and exit with Ctrl + X.
Step 9
It is time to create the system service file for Odoo, we will use the desired editor for it:
sudo nano /etc/systemd/system/odoo13.service
In this file we will enter the following:
[Unit] Description = Odoo13 # Requires = postgresql-10.6.service # After = network.target postgresql-10.6.service [Service] Type = simple SyslogIdentifier = odoo13 PermissionsStartOnly = true User = odoo Group = odoo ExecStart = / opt / odoo / odoo13-venv / bin / python3 / opt / odoo / odoo13 / odoo-bin -c /etc/odoo.conf StandardOutput = journal + console [Install] WantedBy = multi-user.target
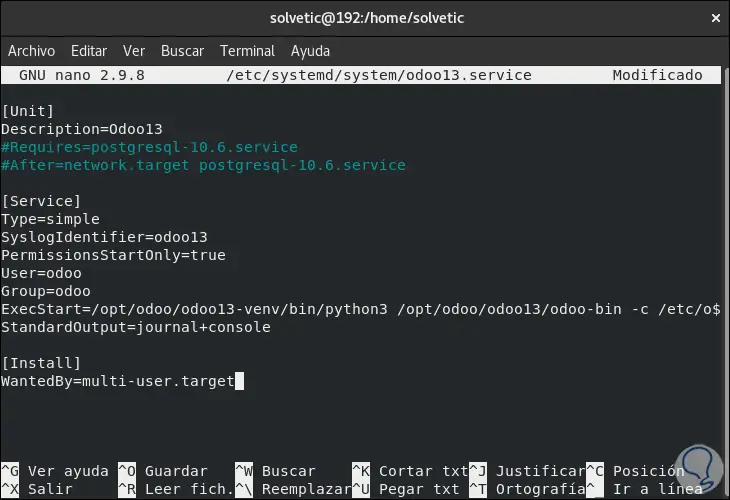
We save the changes and exit the editor..
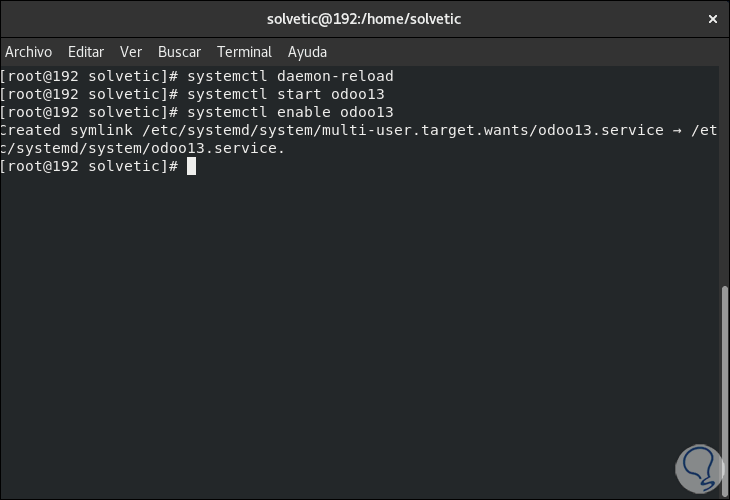
Step 10
We restart the service:
systemctl daemon-reload
We execute the following:
sudo systemctl start odoo13 (we start the odoo service) sudo systemctl enable odoo13 (we enable the service with the start of CentOS 8)
Step 11
We check the status of Odoo with the following command:
systemctl status odoo
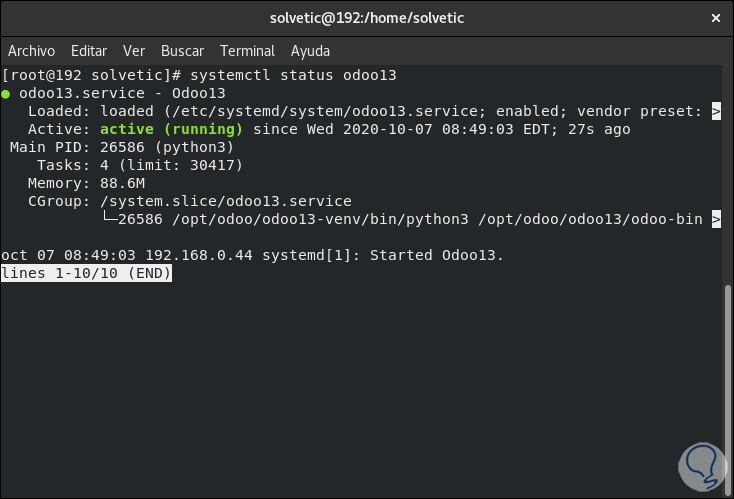
As we can see, its status is active and running.
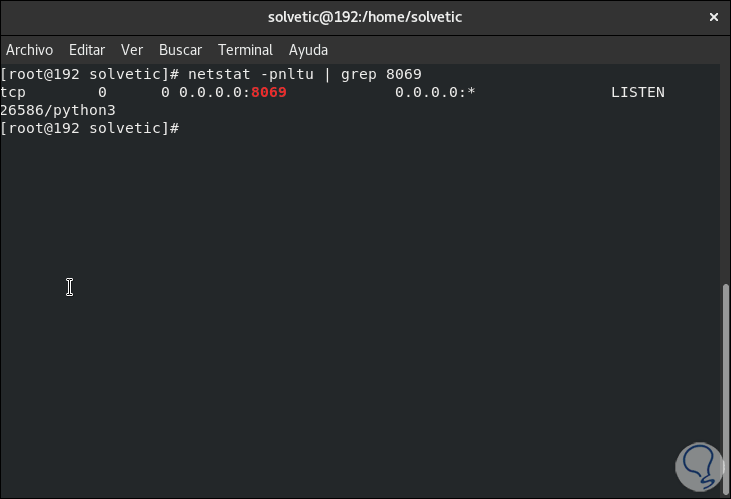
Step 12
With the Netstat command we validate the status of the Odoo port:
netstat -pnltu | grep 8069
Step 13
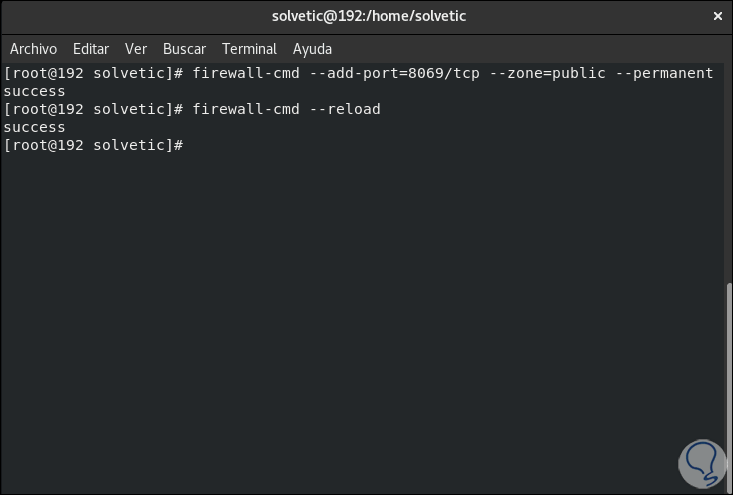
We enable the permissions in the Firewall:
sudo firewall-cmd --add-port = 8069 / tcp --zone = public --permanent sudo firewall-cmd –reload
6. How to install Nginx as a proxy server
Step 1
First we install Nginx with the following command:
dnf install nginx
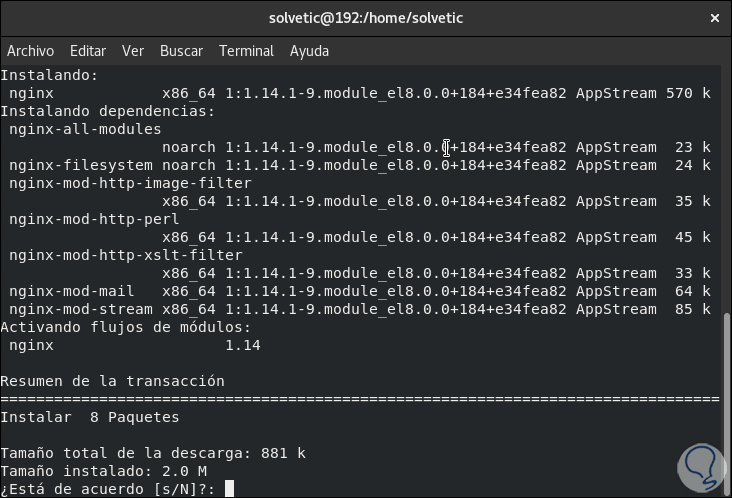
Step 2
We enter the letter "s" to accept the download and installation of Nginx.

Step 3
Let's create the file for the virtual host:
sudo nano /etc/nginx/conf.d/odoo13.conf There we are going to enter the following: upstream odoo { server 127.0.0.1:8069; } server { listen 80; server_name server-IP; access_log /var/log/nginx/odoo13.access.log; error_log /var/log/nginx/odoo13.error.log; location / { proxy_set_header X-Forwarded-Host $ host; proxy_set_header X-Forwarded-For $ proxy_add_x_forwarded_for; proxy_set_header X-Forwarded-Proto $ scheme; proxy_set_header X-Real-IP $ remote_addr; proxy_redirect off; proxy_pass http: // odoo; } location ~ * / web / static / { proxy_cache_valid 200 90m; proxy_buffering on; expires 864000; proxy_pass http: // odoo; } gzip_types text / css text / less text / plain text / xml application / xml application / json application / javascript; gzip on; } 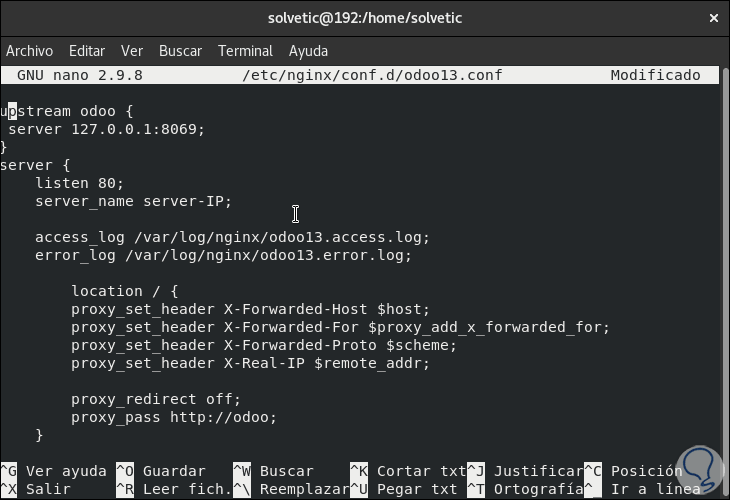
We save the changes with the Ctrl + O keys and exit with the Ctrl + X keys.
Step 4
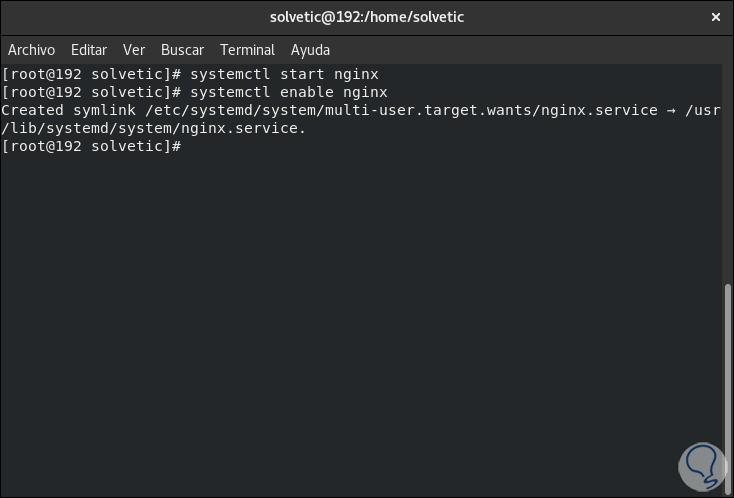
We are going to start and enable Nginx with the following commands:
sudo systemctl start nginx sudo systemctl enable nginx
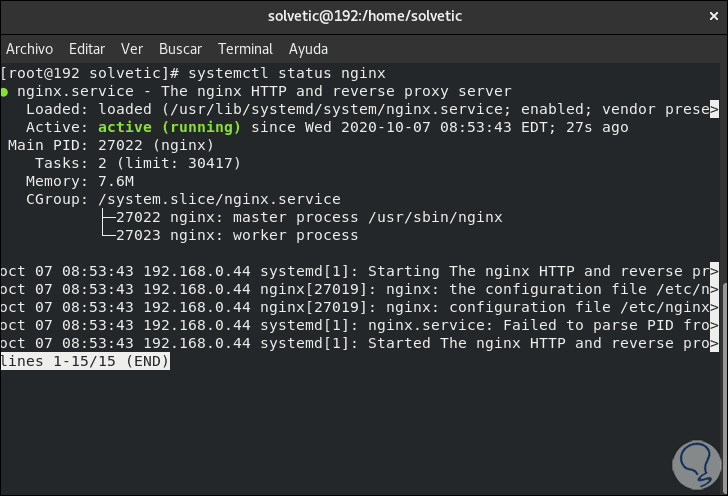
Step 5 / plain] We
validate your status:
systemctl status nginx
7. How to access Odoo CentOS 8
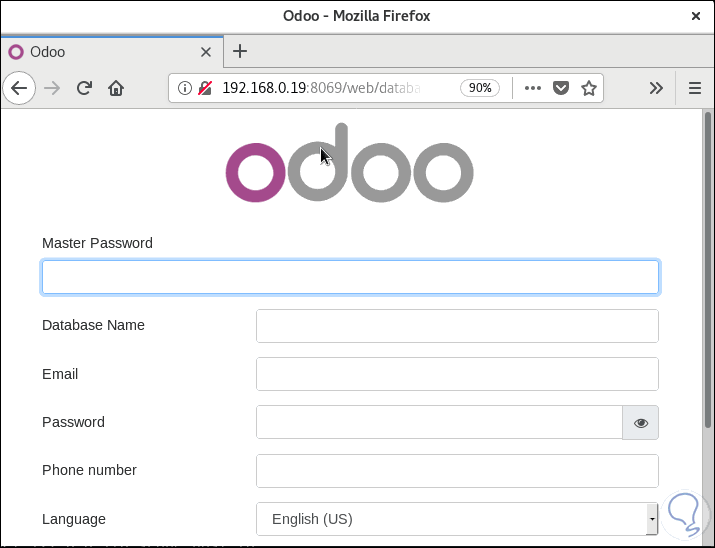
Step 1
We go to a browser and enter the following:
http: // IP_CentOS: 8069
The following will be released:
Step 2
In the Master Password field we enter the password established during the process and complete the fields with the desired values:
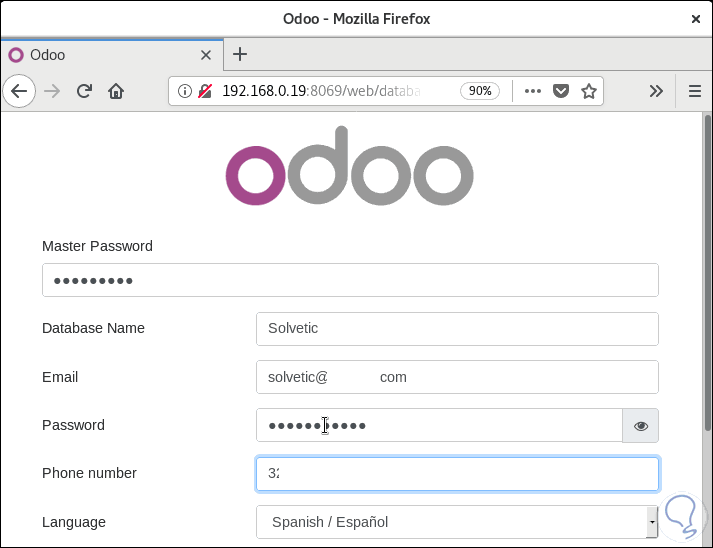
Step 3
We click on "Create Database" and we will access the Odoo environment in CentOS 8:
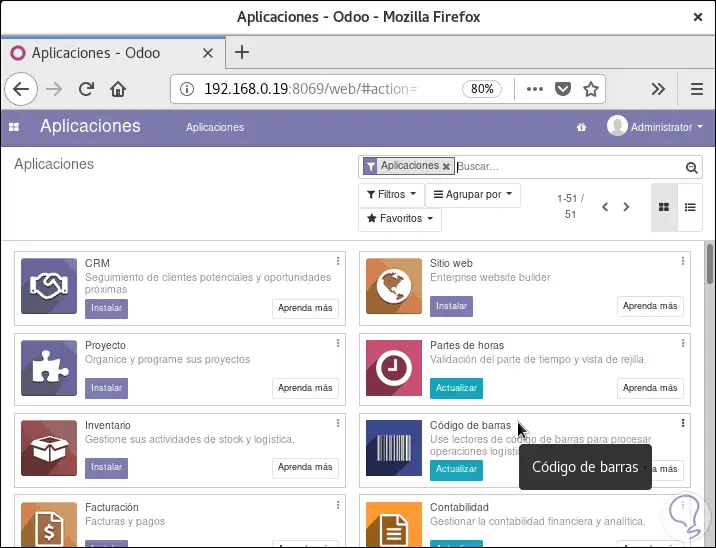
[plain] Step 4
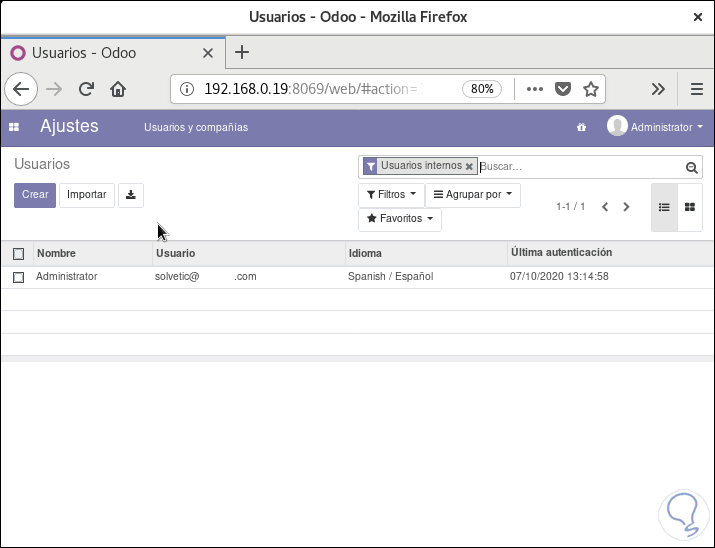
From here we will have all the applications to be installed, from the top we can access the administrator:
TechnoWikis has explained the complete process to install and configure Odoo in CentOS 8 and have a valuable utility for CRM management.