Text editors play an essential role in Linux, in this case CentOS 8, since thanks to them we can access both system and user files and make changes. By default the distributions integrate some Linux text editor such as Vi / Vim or Nano, the latter being perhaps one of the most popular for its simplicity of use and search and analysis functions, Vim is traditional, but it is usually a little more complex than which affects those users who are starting in Linux.
With Nano we have the possibility to edit text files from the Linux terminal and thus be able to easily modify files. For this there are a series of Linux commands that we will see below and that will help us manage Nano. TechnoWikis will explain in this tutorial how to install and use the nano editor in CentOS 8 and thus manage the system text files.
We leave you also the video tutorial below to be able to install Nano in CentOS 8.
To stay up to date, remember to subscribe to our YouTube channel! SUBSCRIBE
1. Install Nano on CentOS 8
Step 1
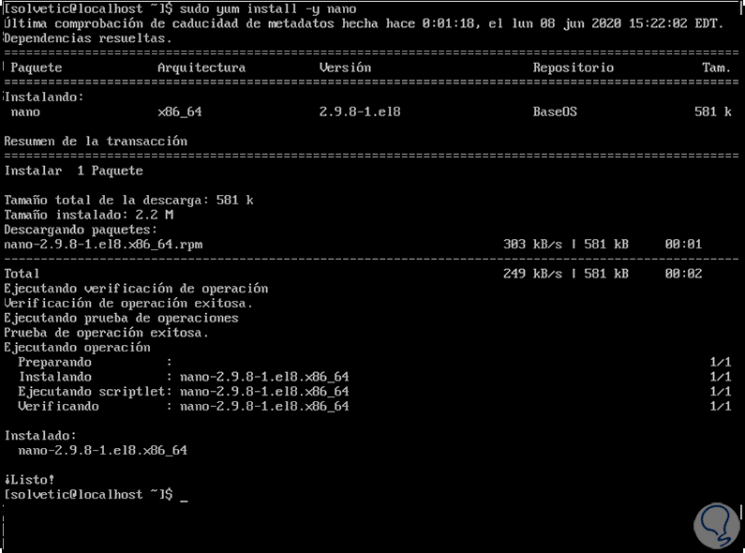
When executing the “nano” command we may see the following:

Step 2
If this is the case we must install nano with the following command:
sudo yum install -y nano
Step 3
In the case of other distributions such as Ubuntu, Debian or Linux Mint:
sudo apt-get install -y nano
2. Use Nano in CentOS 8
Step 1
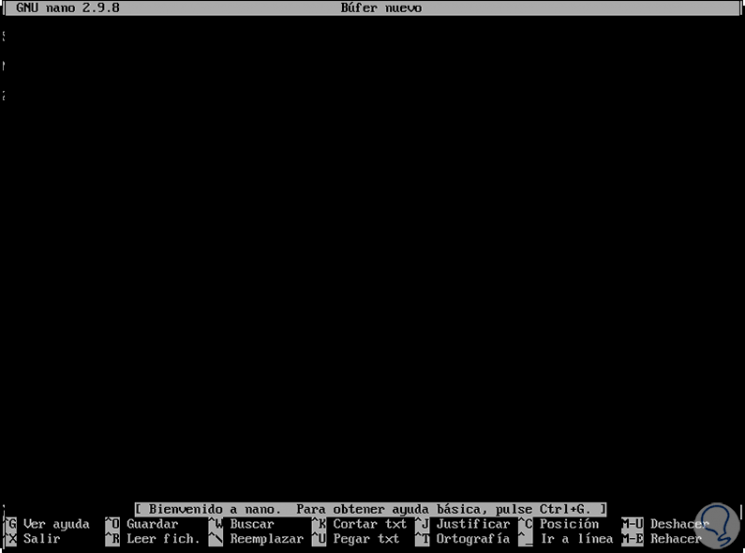
If we execute the nano command directly we will be redirected to the console of this editor:
Step 2
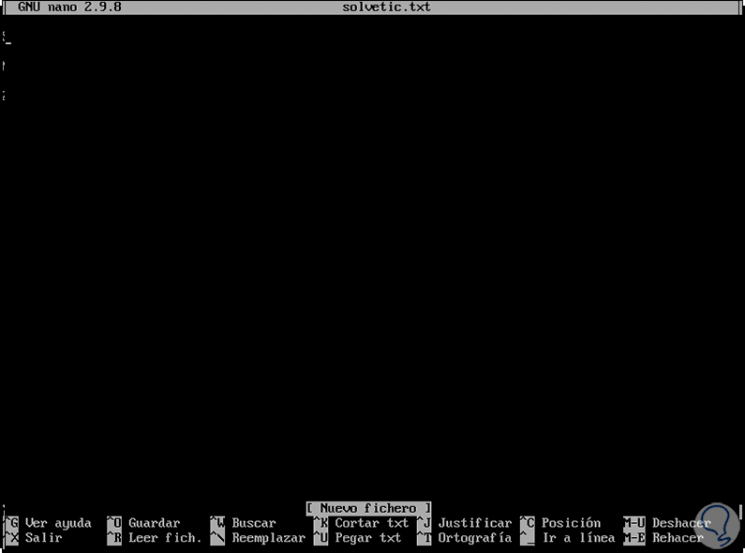
Now, it is possible to run nano followed by the name of the existing file or the new file:
sudo nano technowikis.txt
Step 2
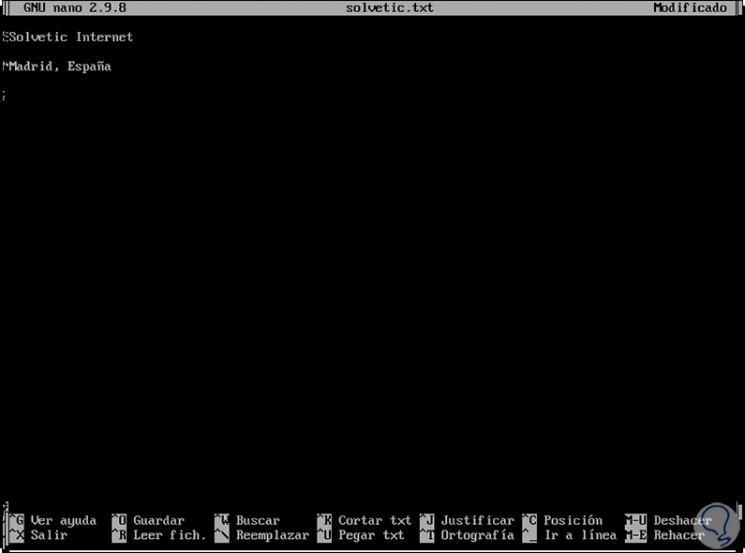
As we can see, the editor is made up of some elements that are:
Title bar
is the bar on the top line, there we can see the name of the open file and if we only execute "nano", we will see the legend "New Buffer", in the left corner it is possible to see the version of nano used, in case of applying any change there we will see the legend "modified"
Text area
It is where the content is entered and where the writing and editing tasks will be carried out.
Status bar
this bar displays informational messages and nano editor errors, likewise it can be used for additional entries such as file names or search terms
List of shortcuts
It is available at the bottom and is only visible with nano basic mode, there we find all the keyboard combinations to work with the editor
Step 3
With this editor, the common keys such as Enter, Delete or direction arrow, work in the same way as with traditional editors:
Step 4
In the list of commands at the bottom we highlight two types that are:
- '^': this is the caret, it means the use of the control + x keys and its syntax is used to work with the Ctrl key and a character, alternatively it is possible to press the Esc key twice and press the character wanted.
- 'M-': the letter M means it is 'meta' commands, that is, it applies as the combinations of the Alt, Cmd or Esc keys and an additional character.
2. Exit the Nano editor in CentOS 8
After editing the desired text we can use the Ctrl + X or ^ X keys to exit nano, if we have not saved the changes we will receive a warning so that they are saved:
Ctrl + X
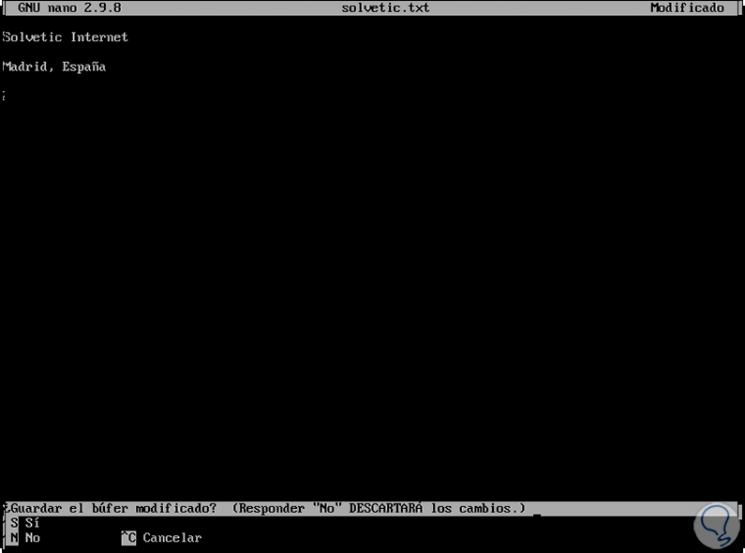
There we can use the S key to confirm or the N key to discard them.
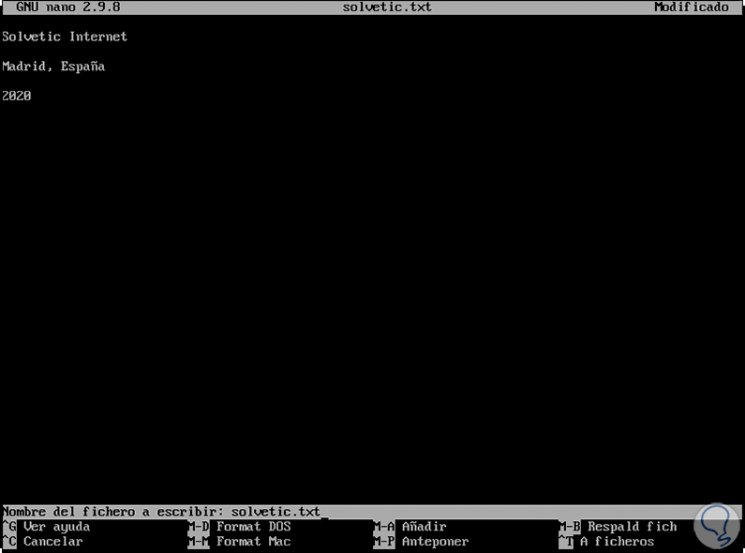
3. Save files with Nano in CentOS 8
When a file is to be saved, the nano editor will ask which name to assign, if we agree, press Enter, this overwrites the name of the existing file, if we enter a different name If we change the name, we receive another Yes / No message asking us if we want to save the file with a different name the warning will be launched.
To save a job we use the keys Ctrl + O or ^ O:
Ctrl + O
4. Navigate within Nano in CentOS 8
Step 1
When browsing files with different content, we can use the Ctrl + C or ^ C keys to see the current cursor position: line, column and character position in the nano status bar:
Step 2
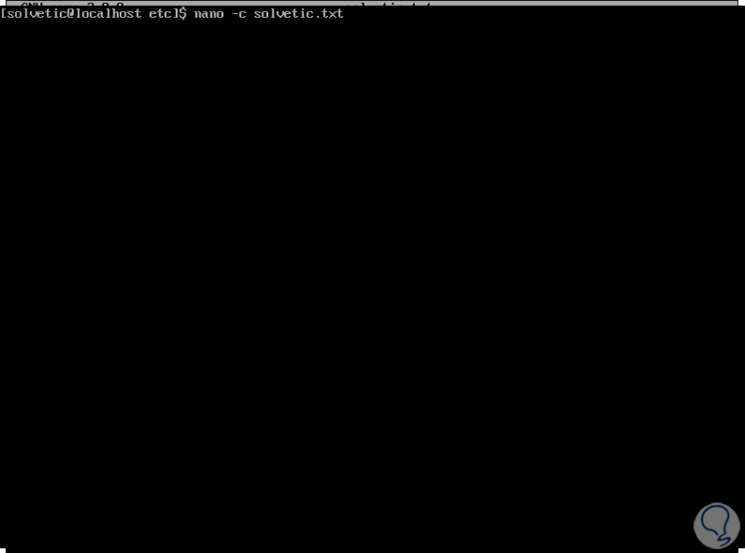
It is possible to start nano with the -c parameter in order to permanently see the cursor position in the editor status bar:
nano -c technowikis.txt
Step 3
When accessing we will see the following:

Step 4
The general commands to use with nano are:
- up [^ P]: go to the previous line
- down [^ N]: go to the next line
- left [^ B]: go back one character
- right [^ F]: advances one character
- ^ top: go to the previous text block
- ^ below: next block of text
- ^ left [M-space]: previous word
- ^ right [^ space]: next word
- page up [^ Y]: move up one screen
- page down [^ V]: move down one screen
- start [^ A]: go to the beginning of the line
- end [^ E]: go to the end of the line
- ^ start [M- \]: go to the first line of the file
- ^ end [M- /]: go to the last line of the file
- M-space: move one word back
- M– [M-_]: scroll up one line without moving the cursor
- M- + [M- =]: scroll down one line without moving the cursor
With this nano is a key ally to work with files in CentOS not only in a simple way but with the best options to edit and manage their content.