With the leaps and bounds that technology gives us, it is normal that we can combine multiple devices simultaneously so as not to lose any detail of their activities, that is why Microsoft has integrated a new utility called “Tu phone â€which will allow us to synchronize a large part of the actions that are executed in Android directly in Windows 10 such as the reception of notifications , messages, calls and more..
When installing and configuring this functionality of Windows 10 , we will be able to access content such as photos, text messages and many more mobile settings directly on our Windows 10 computer , this will prevent access to two computers constantly which It can translate into time savings.
To use correctly, Android 7.0 or later is required for everything to work as expected since when the Android phone is linked to Windows 10 if we receive any message or notification we can see it in a dedicated space on the screen for this purpose .
Today TechnoWikis will explain how to link your Android phone to Windows 10 and enjoy this new functionality..
How to get “Your phone†application
To obtain the Your phone application we can use two options that are:
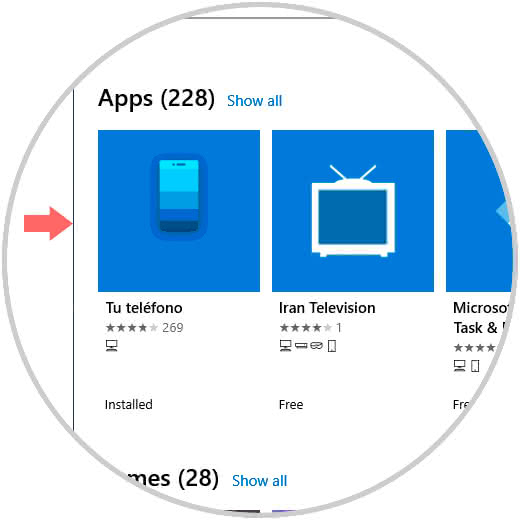
- Download it directly from the Windows 10 store at the following link:
Your telephone
- Another option is to install the application directly from Android in the following link:
Your telephone
To keep up, remember to subscribe to our YouTube channel! SUBSCRIBE
1. Link Android mobile on Windows 10
Step 1
Once we install the application, if it is not installed, we proceed to its execution and we will see the following:
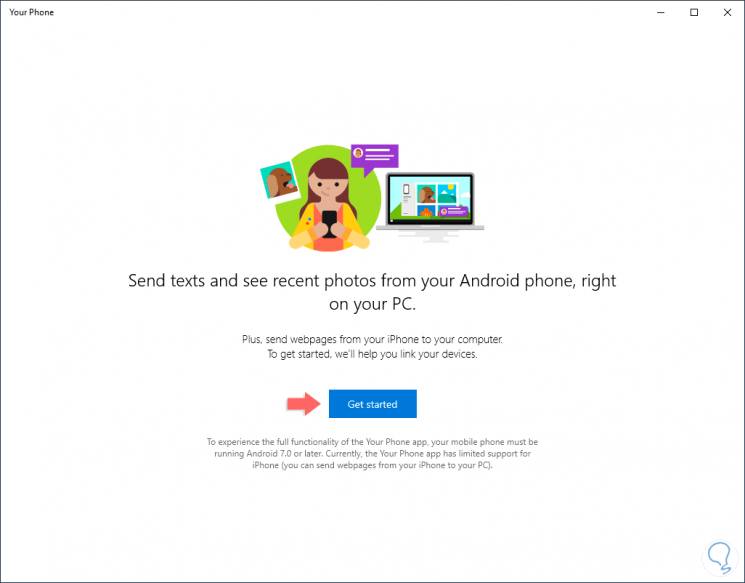
Step 2
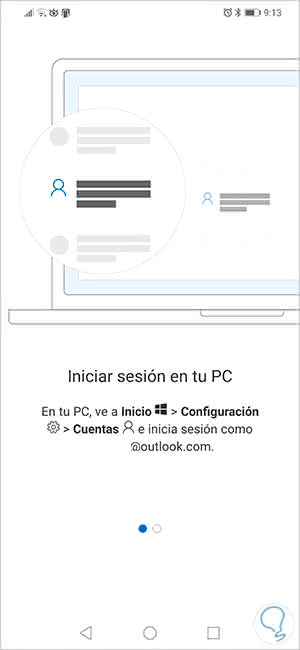
We click on the Get started button and then define the email account with which the link will be made, if we have logged in with an online account this will be the default one, in case you want to use another account we must click on the line “Sign in with another account (Sign in with a different account)â€:
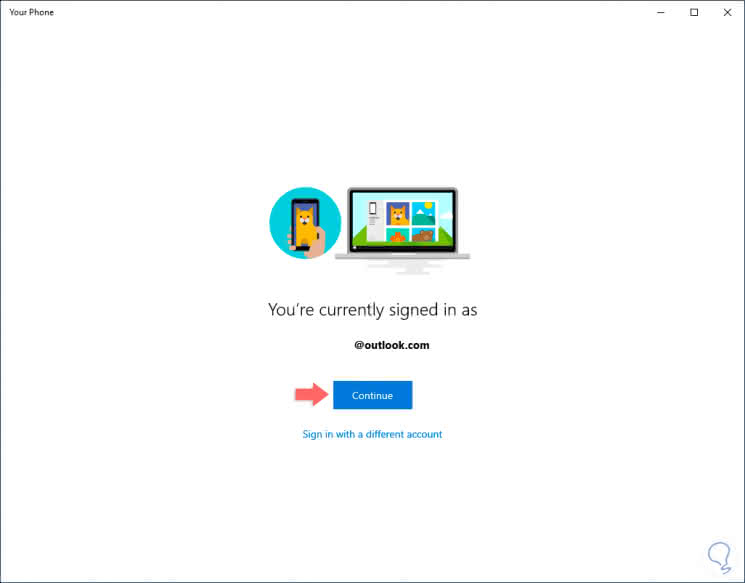
Step 3
Once this is defined, click on “Continue†and we will see the following:
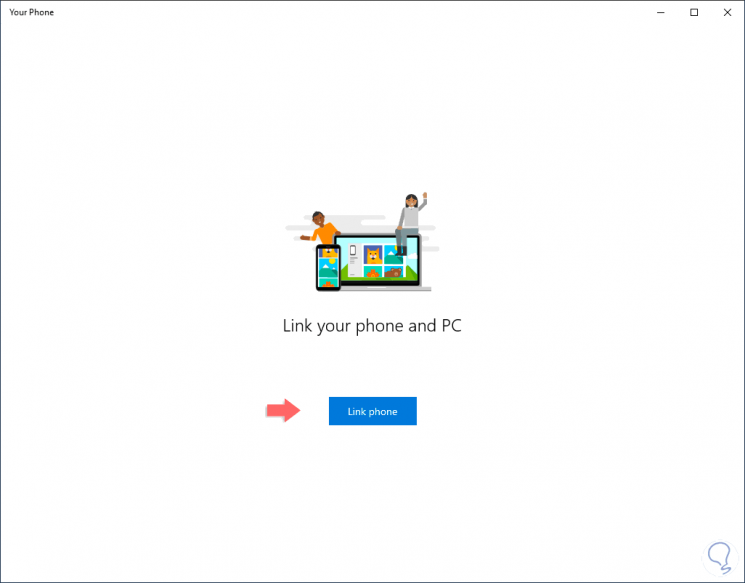
Step 4
There we click on the “Link puts (Link phone)†button and a new window will open where we will define the following:
- Android mobile number to link
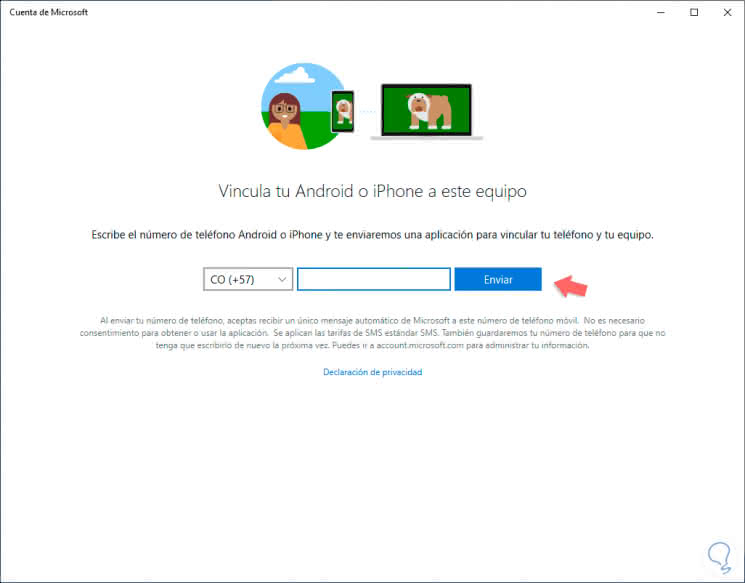
Step 5
We click Send to send a text message to the mobile with the URL of the app of Your phone:
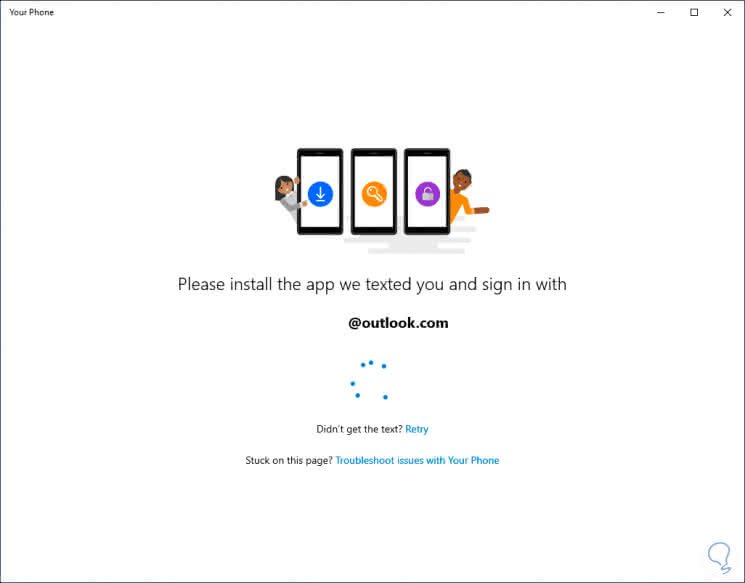
2. Set up mobile to Link Android in Windows 10
Step 1
On our Android device we will receive a message similar to the following:
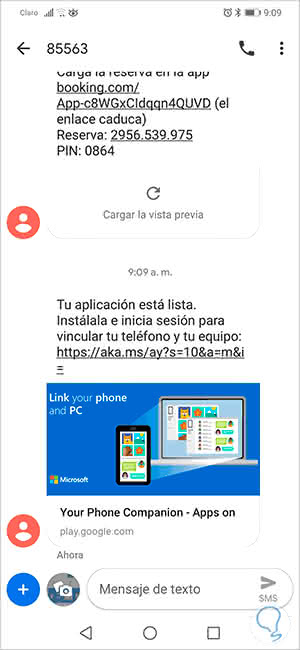
Step 2
There we click on the link and we will be redirected to the Play Store to install the utility:
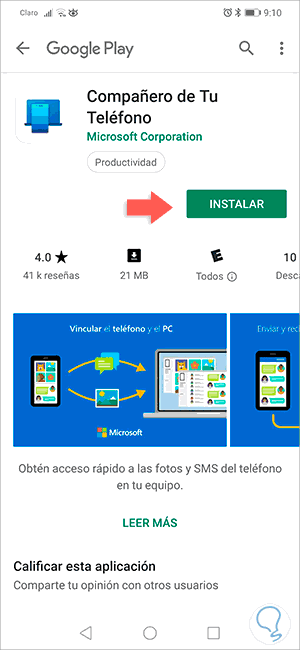
Step 3
Click on Install and once downloaded proceed to open it and see the following:
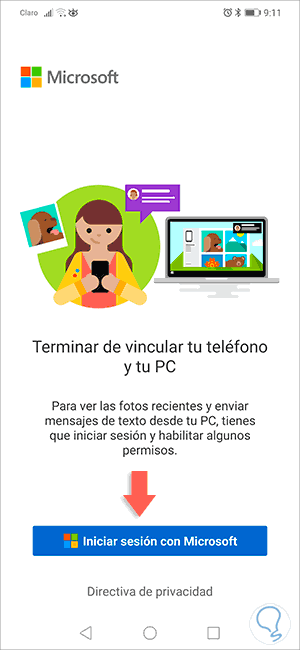
Step 4
There we click on the "Start session with Microsoft" button and proceed to enter the same account that we have assigned in Windows 10:
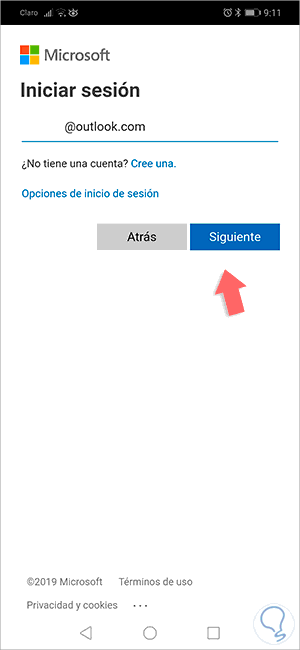
Step 5
Click Next and now enter the account password:
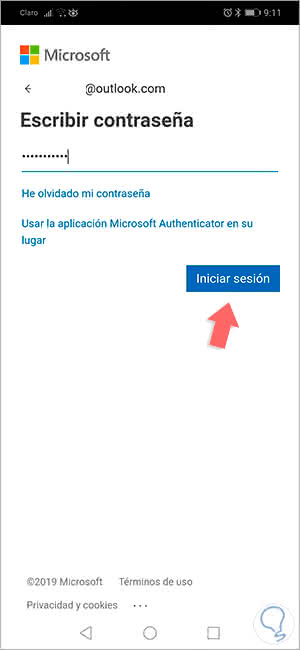
Step 6
Click on Login and the application process Your phone will follow:
Step 7
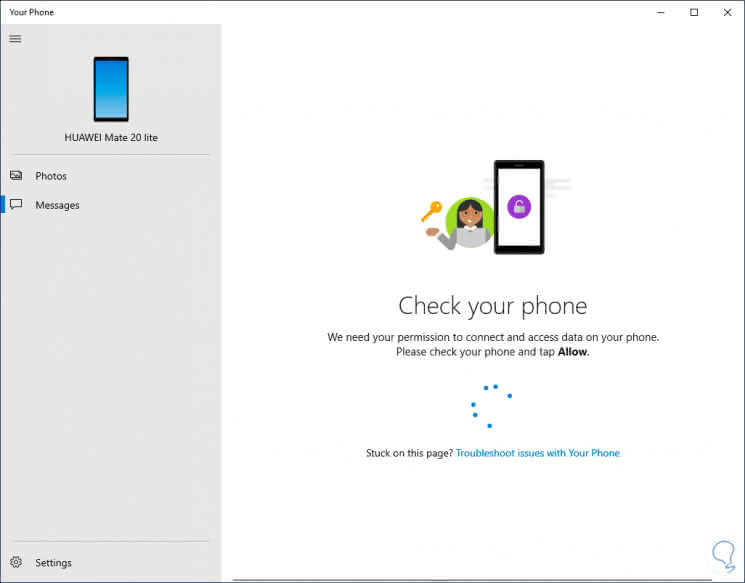
Once this process is completed we will see the following:
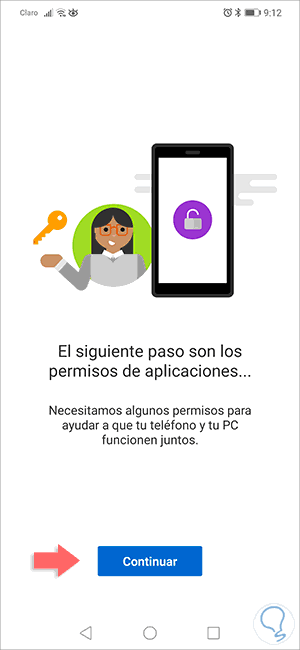
Step 8
As we see, it is time to grant the permissions on Android so that the application works in the correct way, first, we grant the permissions to the photos, messages and media files:
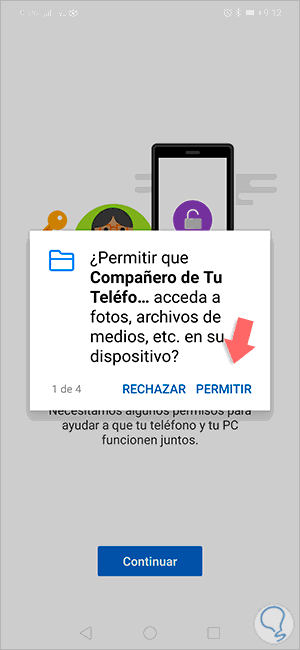
Step 9
Next, we give permissions to the SMS:
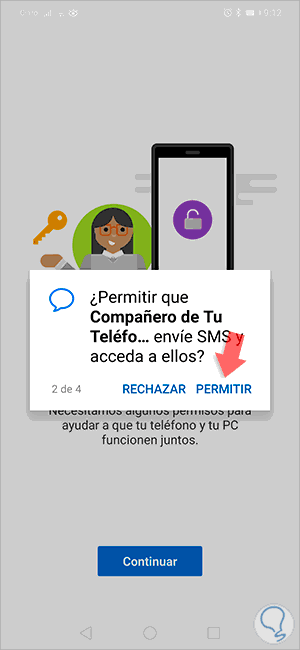
Step 10
Then we grant the permissions to the calls:
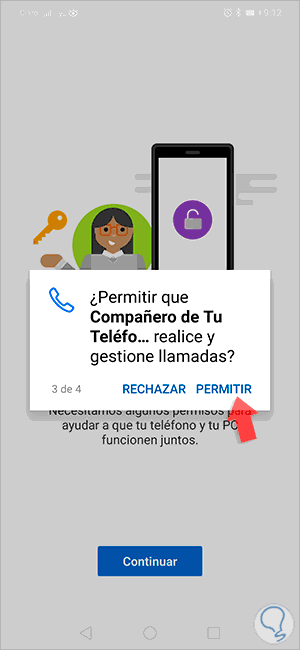
Step 11
We give permission to contacts:
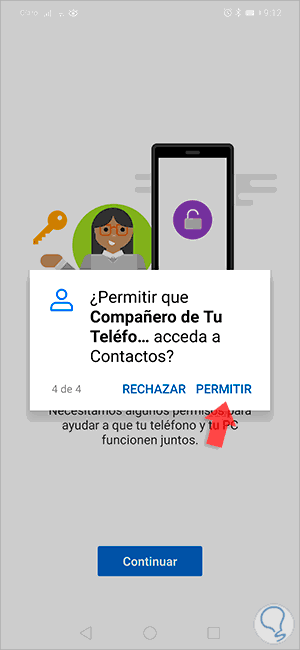
Step 12
When the permission section is completed we will see the following:
Step 13
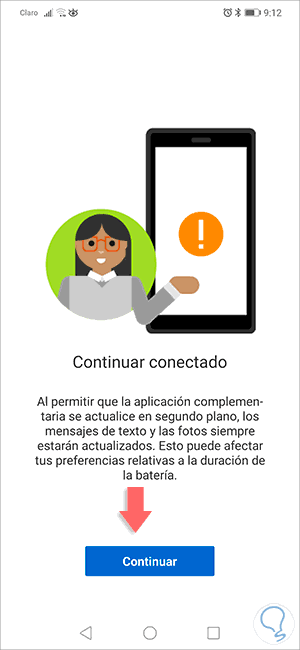
There we click on Continue and then we will see the following message where we can configure Your phone to be executed in the background:
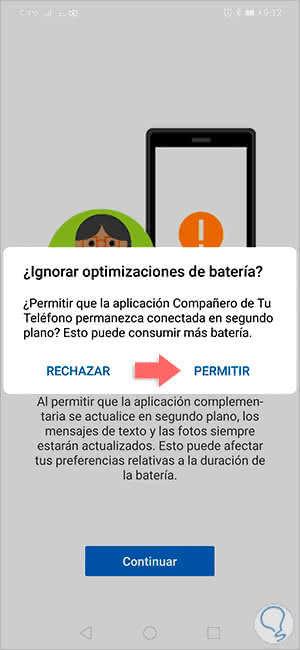
Step 14
Click on "Allow" and now we will see the following:
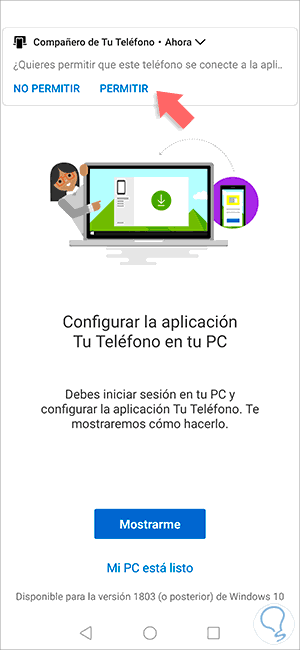
Step 15
If we click on "Show me" we will see the step by step to perform the process in Windows 10:
Step 16
In our Windows 10 computer we will observe that the mobile has already been linked, we can see the model of the same in the upper left, and notice that a warning is sent:
Step 17
If we go to Android we will see the following:
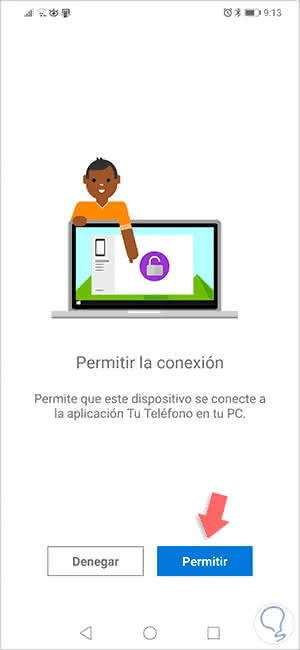
Step 18
Click on Allow and we will see that the linking process has been successfully completed:
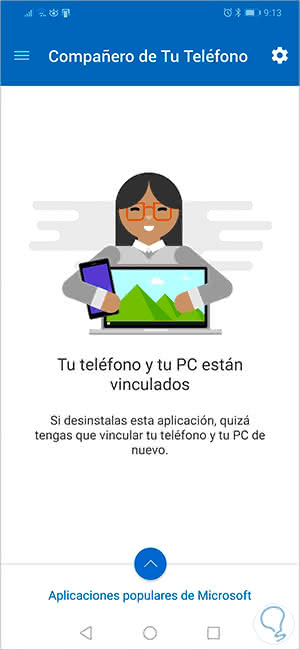
Step 19
Back in Windows 10 we check that everything is configured correctly:
Step 20
On the left side side we can access the recent photos:
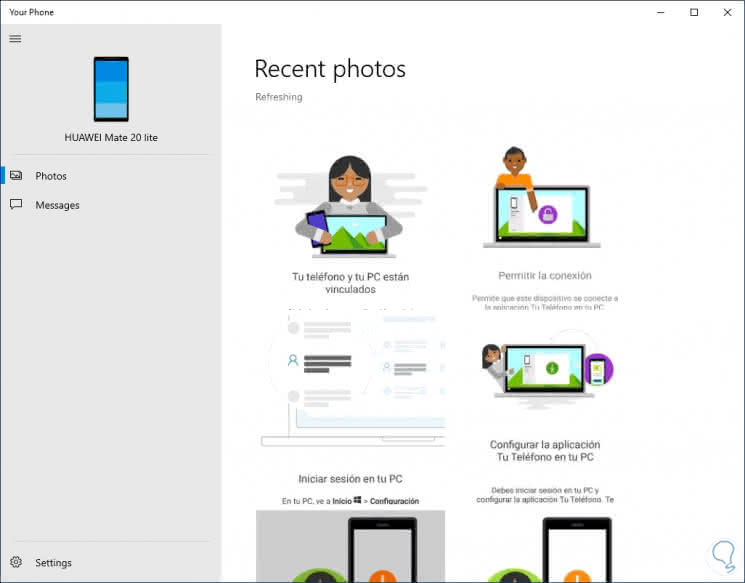
Step 21
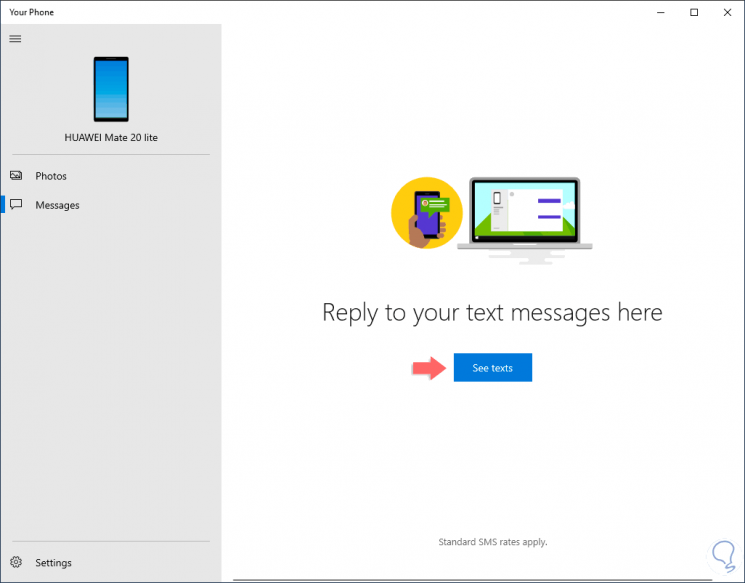
Or we can access Android messages:
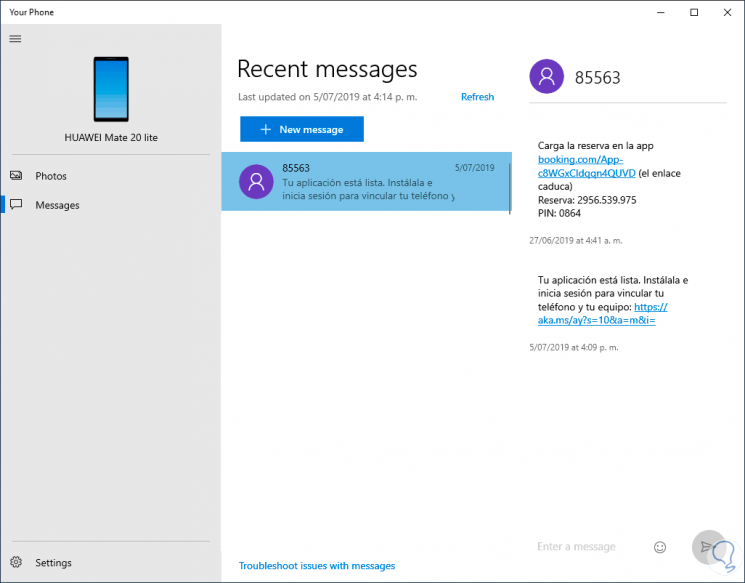
Step 22
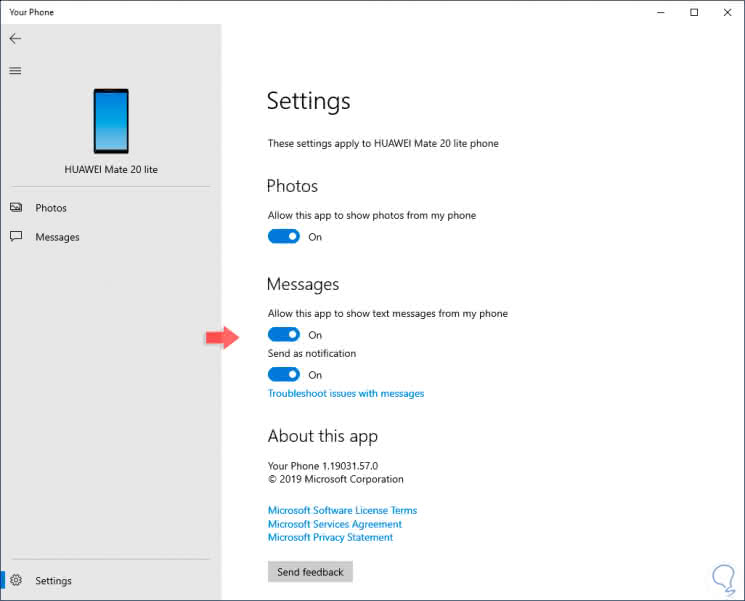
If we click on the gear icon (Configuration) we can access details such as:
- Show or not the messages.
- Allow the sending of notifications.
- See the version of the Your phone application.
Step 23
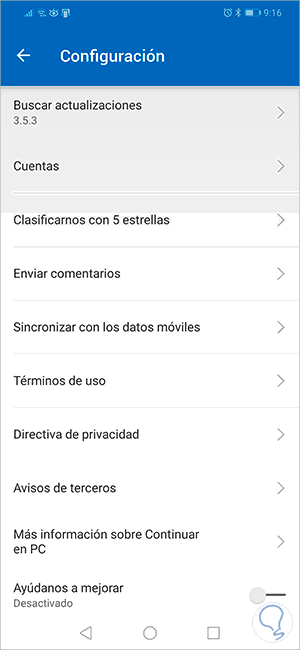
If we go to the configuration of “Your phone†on Android we can configure details such as:
- Synchronize with mobile data usage
- See the license of use and more
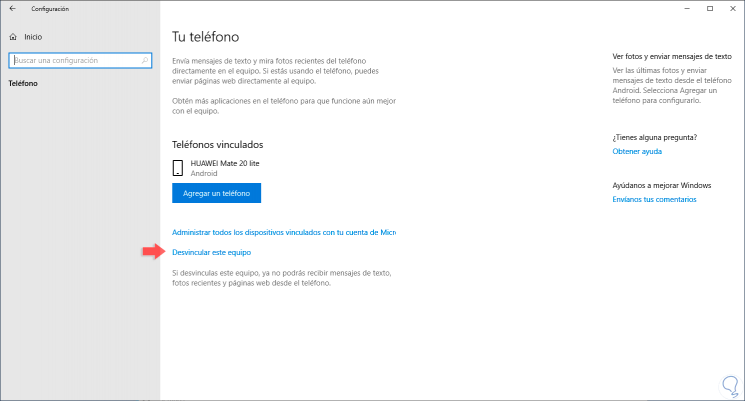
3. Unlink Android mobile on Windows 10
At the moment we do not want to make more use of the application Your phone just go to the Start menu / Settings / Your phone where we will see the linked mobile. There we simply click on the line "Unlink this device" and it will be deleted immediately from the device.
Note
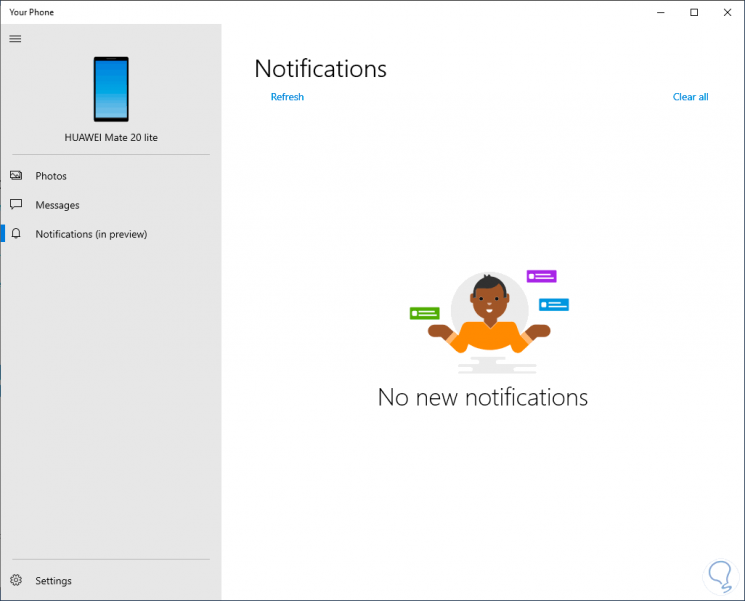
It is possible that after a system update the notifications option on your phone is added (apart from the photos and messages):
That simple TechnoWikis has taught you step by step how to receive and view notifications from Android in Windows 10 in a practical way..