Virtualization is one of the best aids that as administrators, IT professionals and in general all technology lovers have. When we implement virtual machines, we not only save costs, but we can also learn about new operating systems, test applications and configurations, assemble architectures and perform more actions without affecting the physical equipment or its configuration..
Microsoft integrates its own virtualization platform in its operating systems and is Hyper-V , this platform offers us a great assortment of functions and features that will make working on virtual environments something really practical, but at the same time dynamic.
TechnoWikis will explain in detail what Hyper-V is and how you can install it on Windows Server 2019 to increase the functionality of the server..
What is Hyper-V?
Hyper-V is a platform of Microsoft operating systems thanks to which we will be able to mount and manage virtual machines of multiple operating systems. One of the advantages of Hyper-V is that each virtual machine that we create has its own isolated space with which it will be possible to run multiple virtual machines using the physical hardware of the server, this is an advantage if we talk about costs.
Hyper-V benefits
Hyper-V seeks to gain strength and allow us to manage some variables within the organization such as:
- Improve business continuity by testing various products without licensing.
- Increase and make the most of the hardware.
- Create or expand a private cloud environment by being compatible with this technology.
- Create and manage a virtual desktop infrastructure (VDI).
Hyper-V features
Some of the features we find in Hyper-V for Windows Server 2019 are:
- We can execute a live migration of virtual machines from one computer to another.
- Hyper-V replica creation.
- Virtual fiber channel assembly.
- Configuration of virtual machine versions much simpler.
- Integration of the new .VMCX format of virtual machines which contains great improvements in various usage parameters.
- Creation of QoS (Storage Quality of Service).
- It is compatible with Windows containers with support for websites and applications through HTTPS.
- Easy to integrate network and memory adapters to the virtual machine.
Hyper-V compatible systems
By implementing Hyper-V on our server with Windows Server 2019, it will be possible to create virtual machines with operating systems such as:
TechnoWikis will explain the different methods to activate and enable this Hyper-V role in Windows Server 2019.
1. Enable Hyper-V using Server Manager in Windows Server 2019
Step 1
This Administrator is a central console from where it is possible to carry out multiple administrative tasks in Windows Server 2019, to install Hyper-V from there we must go to the “Server Administrator†where we will see the following:
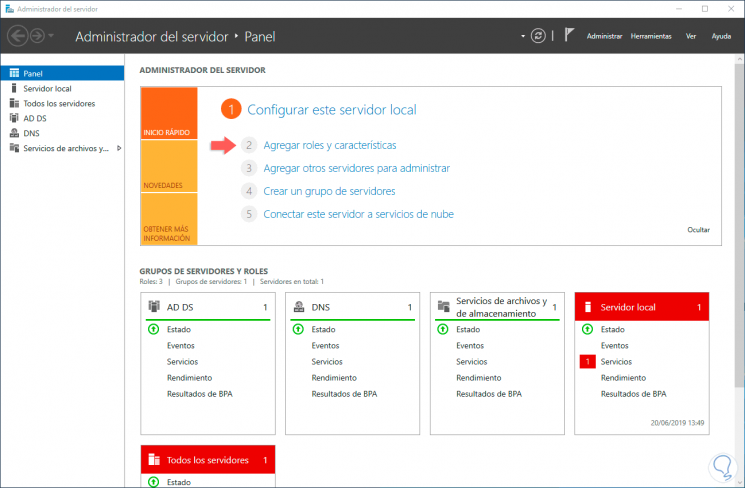
Step 2
We click on the “Add roles and characteristics†line or we can select the same option from the Manage menu, the following informative window will be displayed:
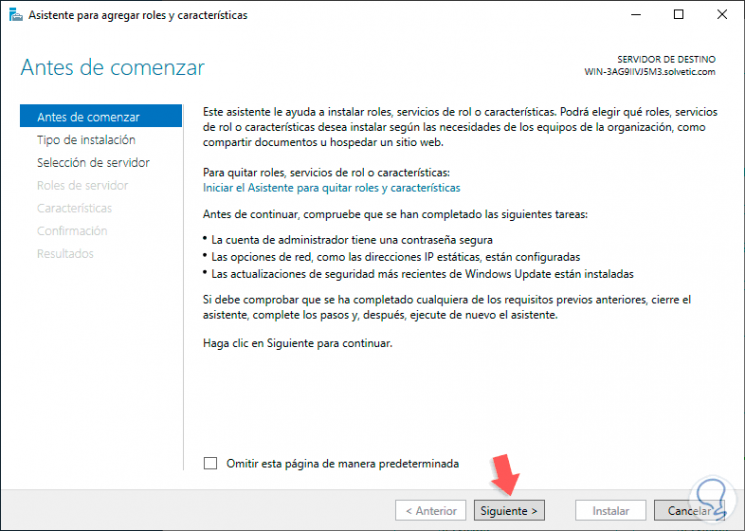
Step 3
We click Next and now activate the “Installation based on features or roles†box:

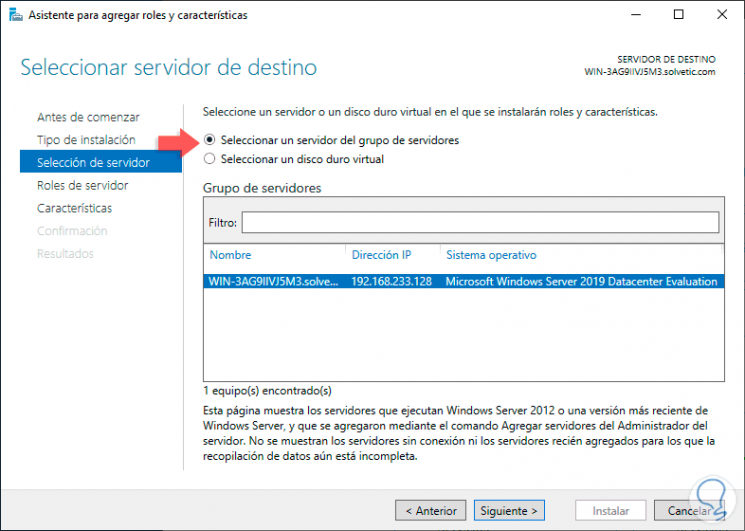
Step 4
In the next window we will select the server where Hyper-V will be installed:
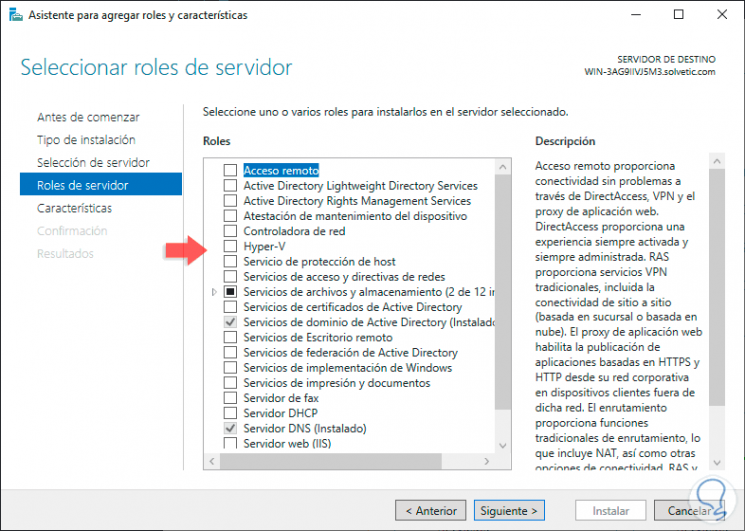
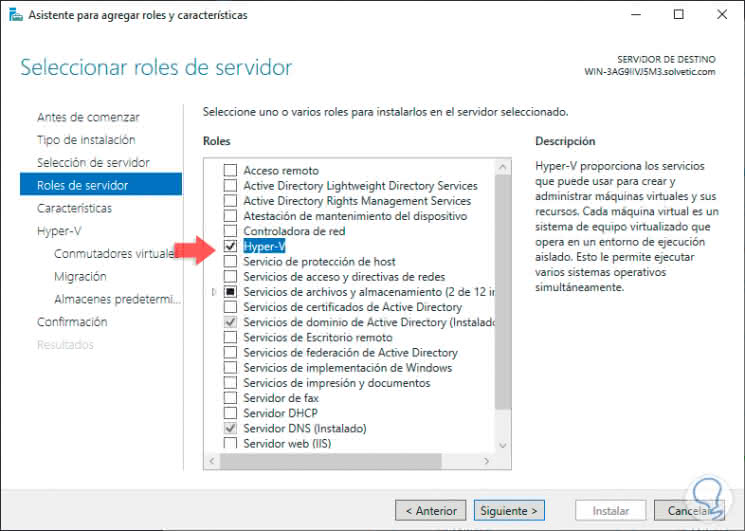
Step 5
Click Next again to be redirected to the Roles section of the server where we will see Hyper-V:
Step 6
When activating this box, the following pop-up window will be displayed where we must click on the “Add features†button located at the bottom:
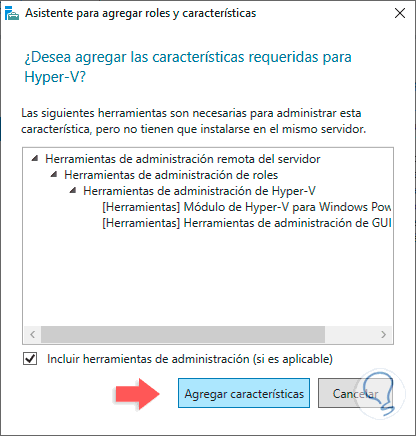
Step 7
It will now be possible to see that the Hyper-V role has been activated before continuing with the process:
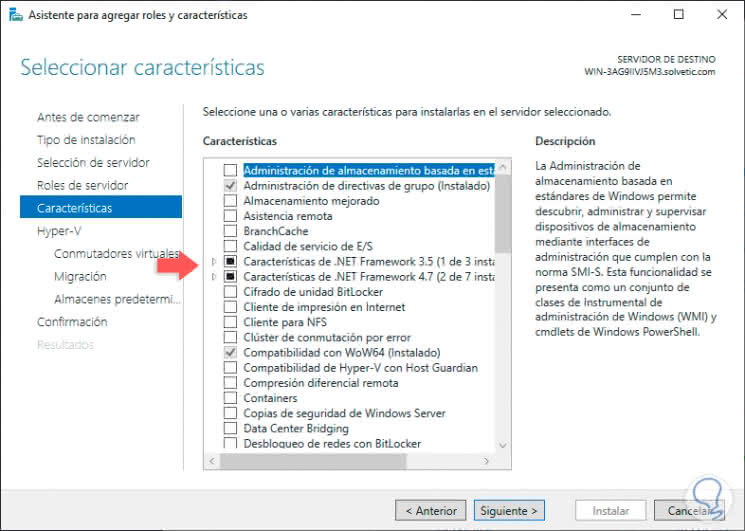
Step 8
We click on Next to access the "Features" section:
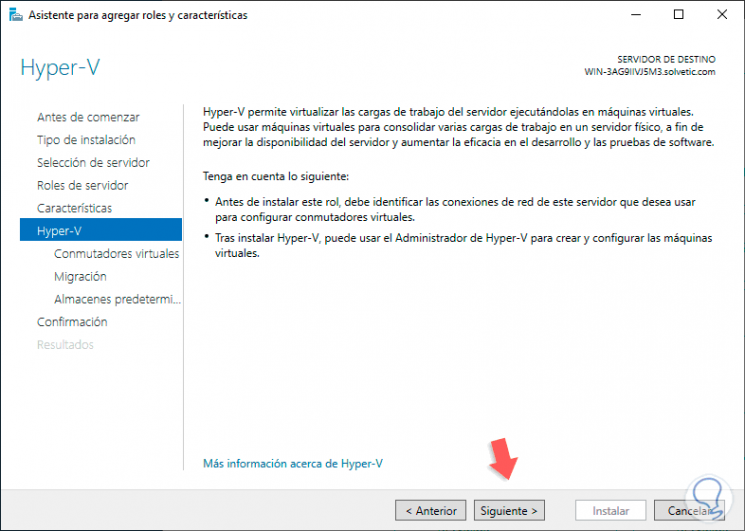
Step 9
There we will not configure anything and by clicking Next we will be directed to the Hyper-V information window where a small explanation of its operation is given:
Step 10
By clicking on Next we will display the "Virtual switches" window. Here we clarify that all virtual machines that are created in Hyper-V require a virtual switch to establish communication with both other computers on the network, as well as with the external network. In Windows Server 2019 a virtual switch will be created by default for each physical network adapter:
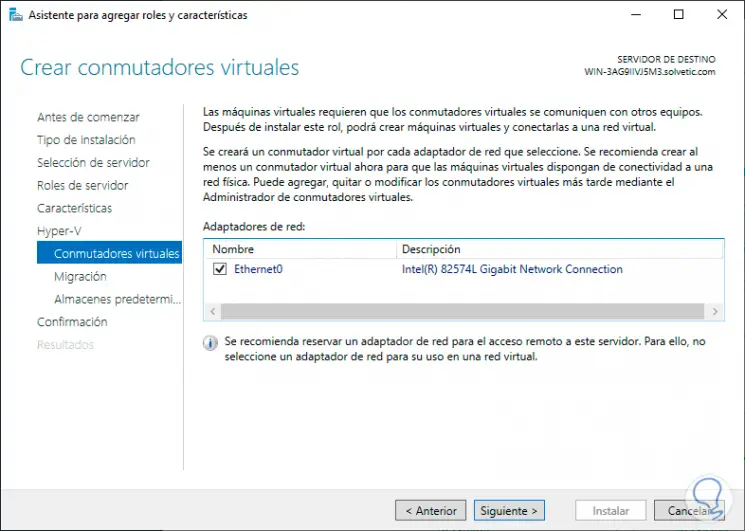
Step 11
There we select the main adapter to manage the communication from there and click Next. Now we can configure Hyper-V to be able to send and receive migrations of new virtual machines live:
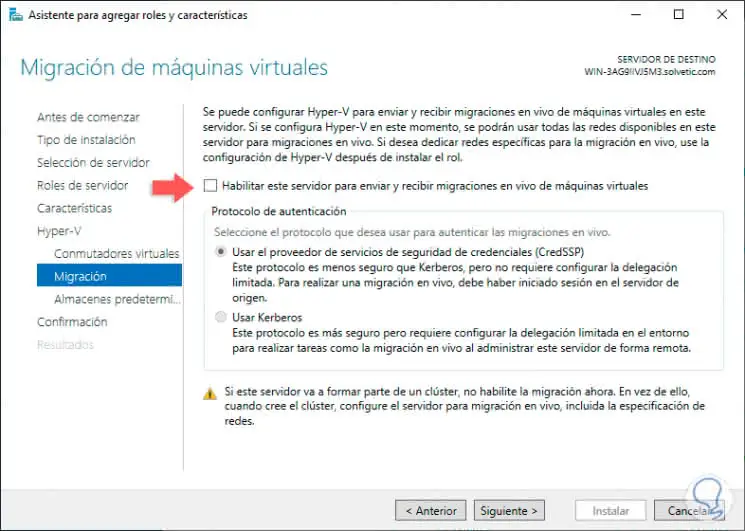
Step 12
If we want this action we will activate the “Enable this server to send and receive live migrations from virtual machines†box and after this define the type of protocol to use, in this case we omit this function and click Next and now we can Define the location where the virtual hard drives of the created machines will be hosted:
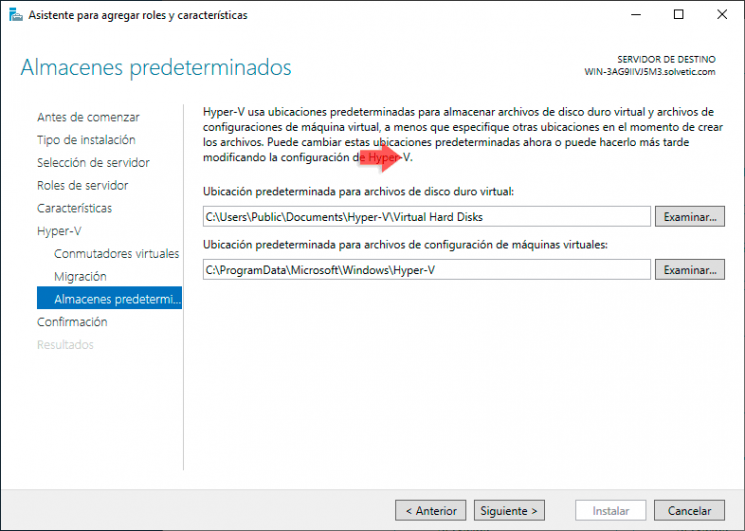
Step 13
If we want a new route we must click on Browse and select the new location. By clicking Next we will see a summary of the task to be executed in Windows Server 2019:
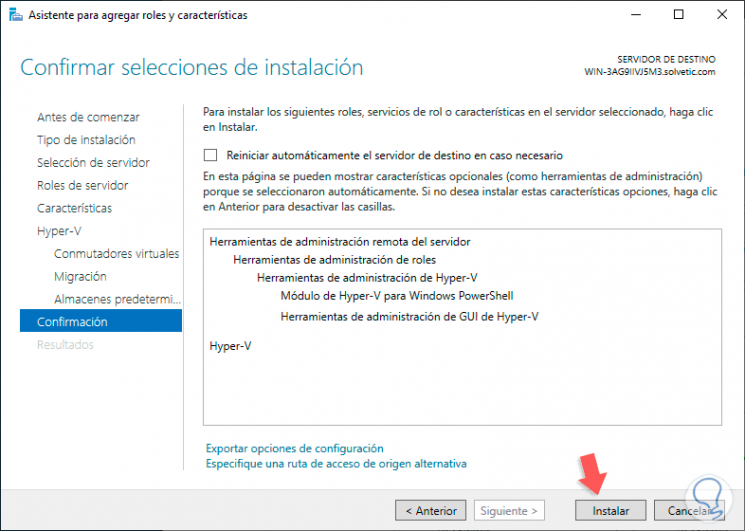
Step 14
We proceed with the installation process by clicking on the "Install" button:
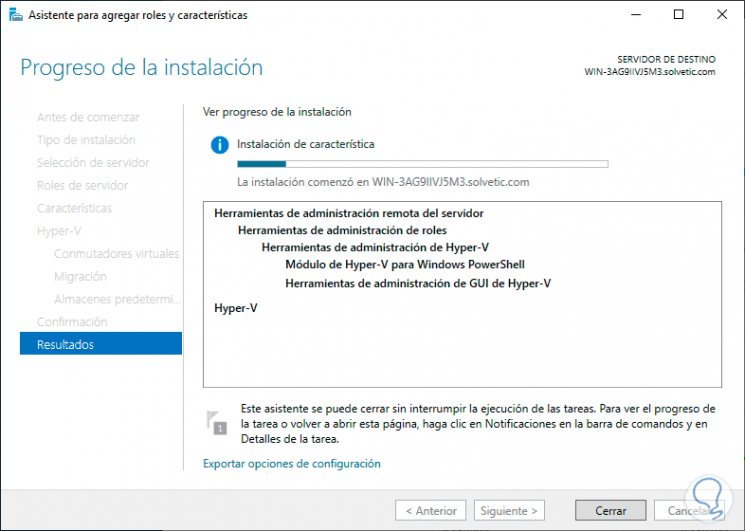
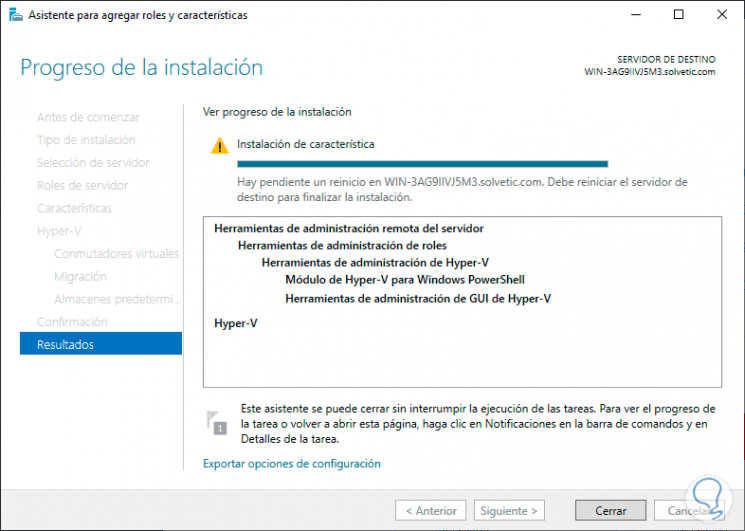
Step 15
Once this task is finished we will see the following. The next step is to restart the server so that Hyper-V is ready for use.
2. Enable Hyper-V using PowerShell in Windows Server 2019
Windows Server 2019 integrates the PowerShell console as the management point of hundreds of tasks through cmdlets which automate and manage system variables, within this it is possible to install Hyper-V in a practical way..
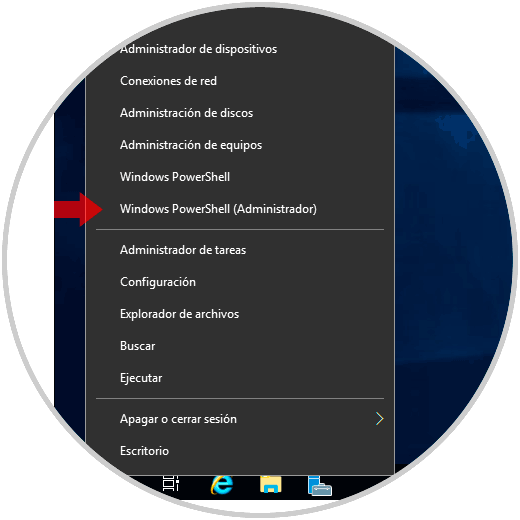
Step 1
The first step to take is to access Windows PowerShell as administrators by right clicking on the Start menu and selecting the respective option:
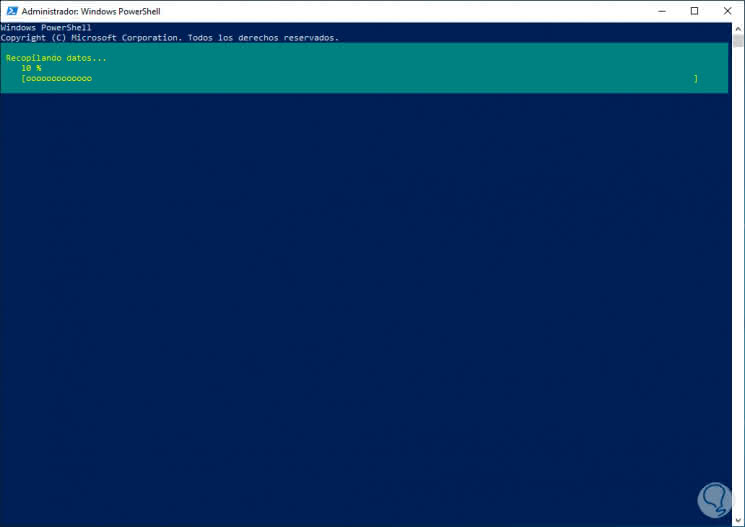
Step 2
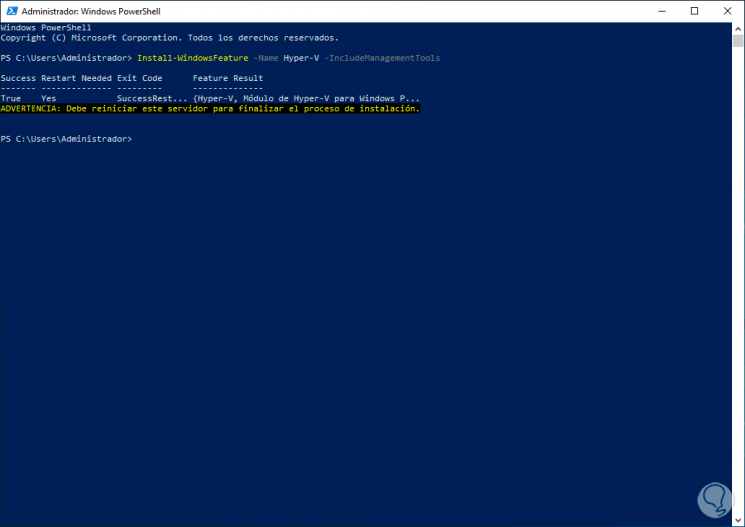
Once we access PowerShell, we will execute the following:
Install-WindowsFeature -Name Hyper-V -IncludeManagementTools
Step 3
There we are telling PowerShell to install the Hyper-V feature next to the administration tools, by giving Enter we will see that the process takes place:
Step 4
When it finishes we will see the following:
Step 5
As we can see, Hyper-V has been installed correctly and now it only remains to restart the system to complete the process, if we want the restart to be automatic we must execute the following:
Install-WindowsFeature -Name Hyper-V -IncludeManagementTools -Restart
3. Enable Hyper-V using DISM in Windows Server 2019
DISM (Deployment Image Servicing and Management) is a functionality of Windows operating systems thanks to which we can manage everything related to the system image.
Step 1
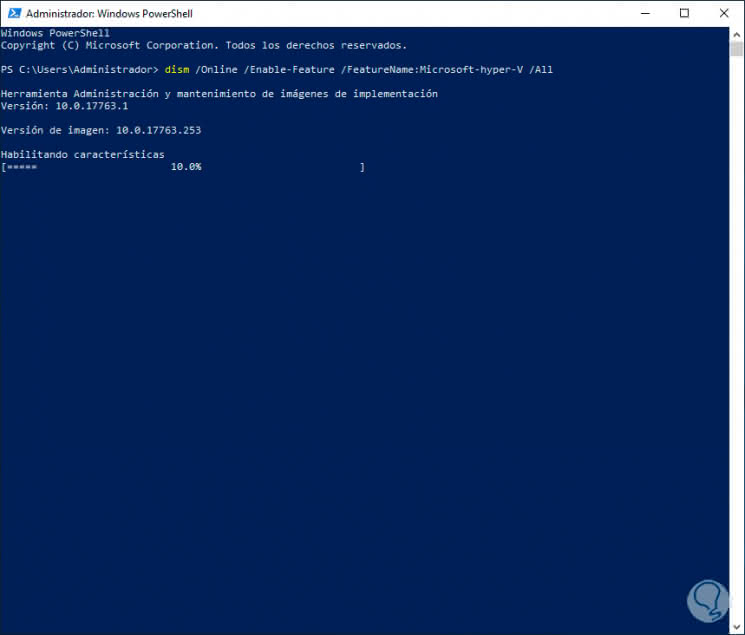
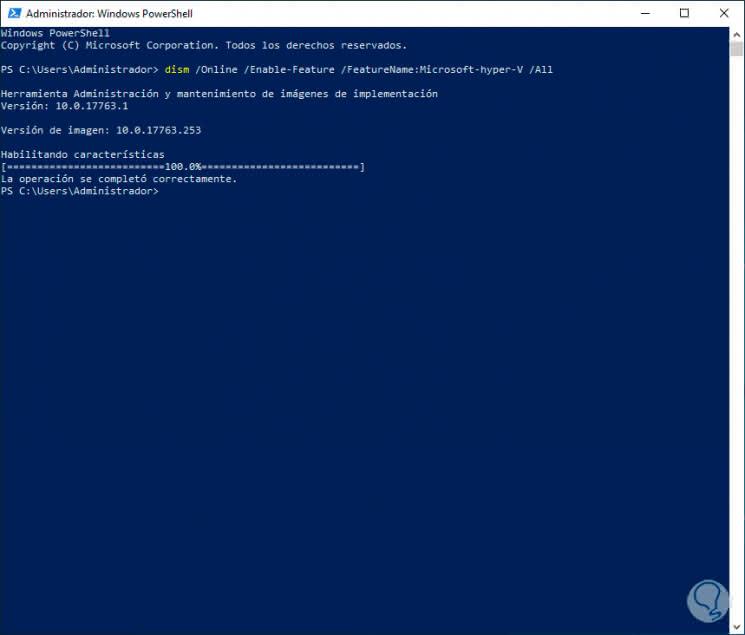
Through DISM it is possible to install Hyper-V, for this we go back to PowerShell as administrators and this time we execute the following:
dism / Online / Enable-Feature / FeatureName: Microsoft-Hyper-V / All
Step 2
Once this task is complete we will see the following message:
Step 3
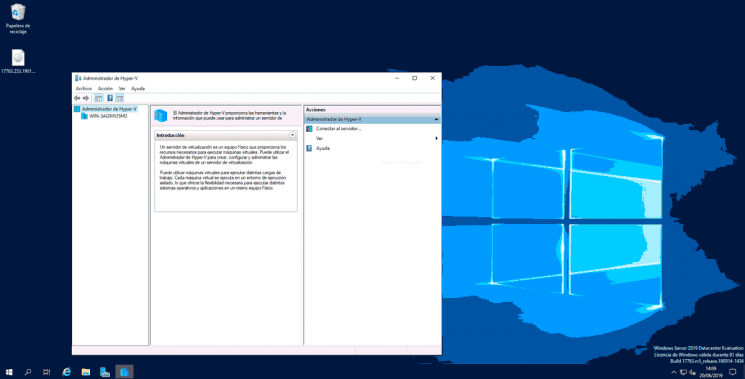
With any of the methods described, it will be possible to install Hyper-V on Windows Server 2019 and have more equipment management functionality:
4. Troubleshoot Hyper-V in Windows Server 2019
As in TechnoWikis we like to do things complete and that you feel identified, we know that you will not always install Hyper-V on a physical device but on a virtual one, this implies a small configuration on the available platforms since by default a Hyper-V conflict is a virtualization role.
Configure VirtualBox
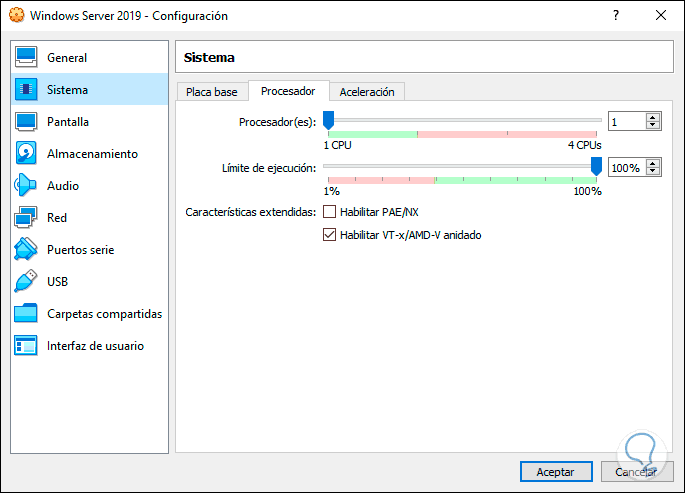
If you use VirtualBox it is necessary to access the virtual machine settings and in the System section go to the Processor tab and there check the box “Enable nested VT-x / AMD-V:
Now, you must access the command prompt as an administrator and execute the following commands:
C: \ Program Files \ Oracle \ VirtualBox (Access to the VirtualBox directory) VBoxManage list vms (List available virtual machines) VBoxManage modifyvm "VM-Name or {VM-ID}" --nested-hw-virt on (Activation of nested virtualization) 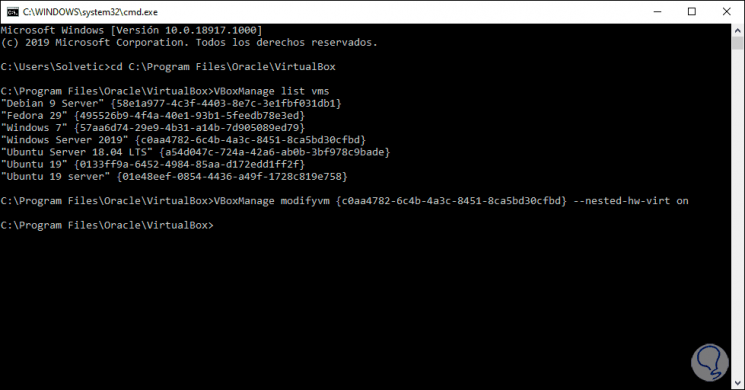
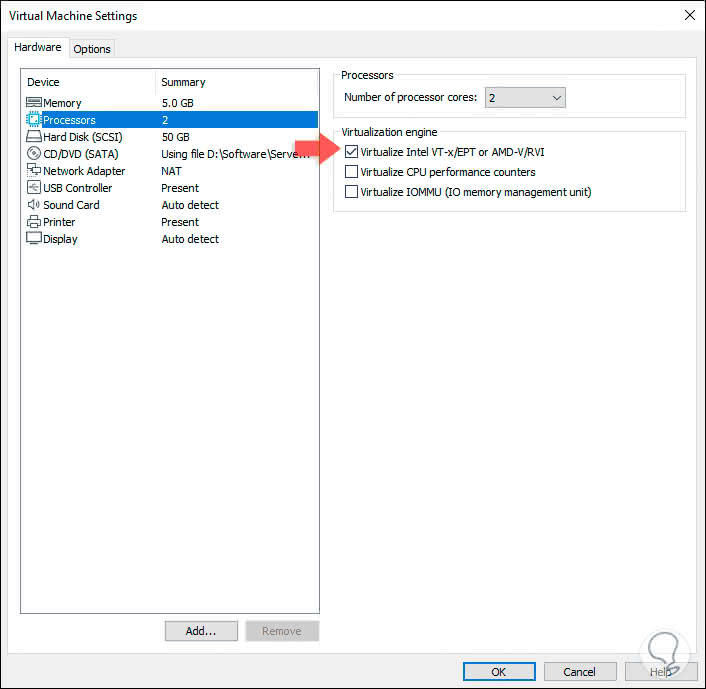
[panelplain = 'Configure VMware'] In the case of VMware we must access the virtual machine configuration and in the “Processors†section, activate the “Virtualize Intel VT-x / EPT or AMD-V / RVI†box:
After this we must go to the path where the virtual machine is hosted and there select the virtual machine configuration file. We save the changes and now we are ready to start the Windows Server 2019 virtual machine and install Hyper-V.
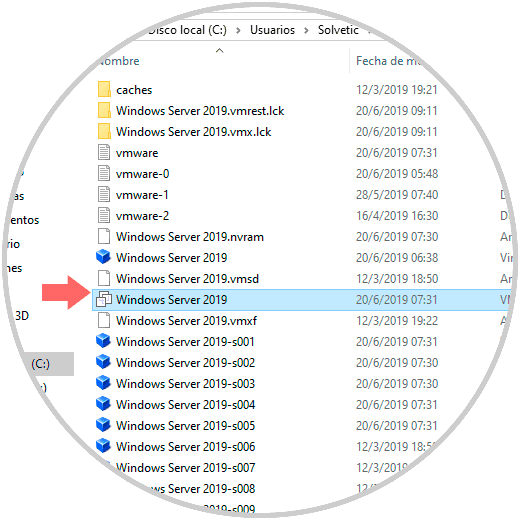
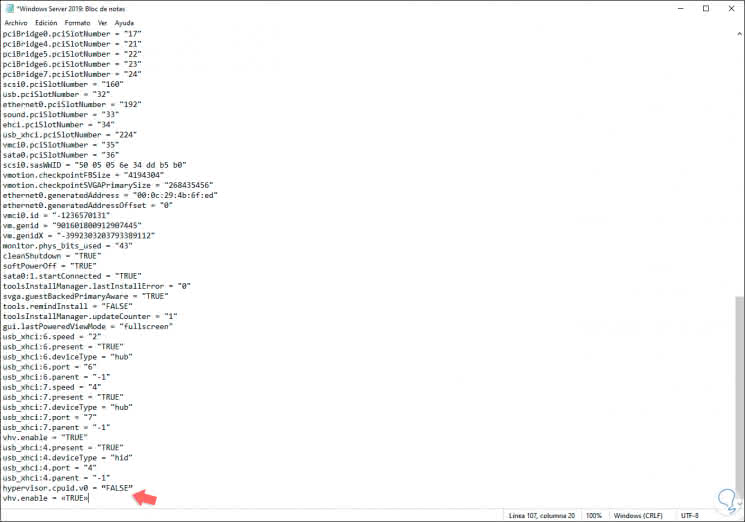
We open it with the notebook and in the final part we add the following lines:
hypervisor.cpuid.v0 = “FALSE†vhv.enable = «TRUE»
With TechnoWikis you have learned to install and activate Hyper-V on your server to test new operating systems and everything new that will come.