The cloud platforms have become one of the current methods that take force and exponentially increasing as the cloud offers security, availability and integrity. Currently we have different platforms for this and one of the best known is the one developed by Microsoft and it is Azure.
Azure has been built as a set of cloud services thanks to which we can carry out tasks such as creating, managing or implementing applications not only on the local Windows 10 network but on a large global network using multiple tools available for it. Microsoft offers us Azure PowerShell which is a group of cmdlets based on the Azure Resource Manager model thanks to which we can manage Azure resources at a general level..
This segment of Azure PowerShell can be used with a browser with Azure Cloud Shell or we can install it locally and thus make use of it in a PowerShell session.
Uses Azure PowerShell
Azure PowerShell can be used in scenarios like:
Note
Since Azure PowerShell version 6.0, Azure PowerShell needs to use PowerShell version 5.1
We are going to learn how to install Azure PowerShell in Windows 10..
Requirements to install Azure PowerShell
The requirements for everything to work as expected are:
- PowerShell version 5.1º higher
- .Net Framework 4.7.2 or higher
Let's see how to install Azure PowerShell Windows 10.
To stay up to date, remember to subscribe to our YouTube channel! SUBSCRIBE
How to install Azure PowerShell Windows 10
Step 1
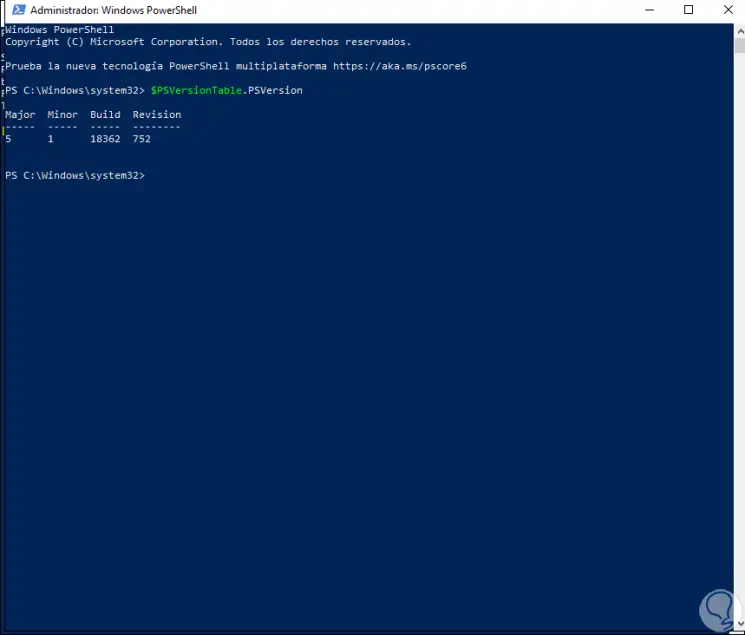
The first thing is to see our version of PowerShell. To check this we access Windows PowerShell and there we execute the following. We can verify that we have version 5.1 of PowerShell.
$ PSVersionTable.PSVersion
Step 2
After this we proceed with the installation of the Azure module by executing the following:
For all Windows 10 users
Install-Module -Name Az -AllowClobber -Scope AllUsers
For the current user
Install-Module -Name Az -AllowClobber -Scope CurrentUser
Step 3
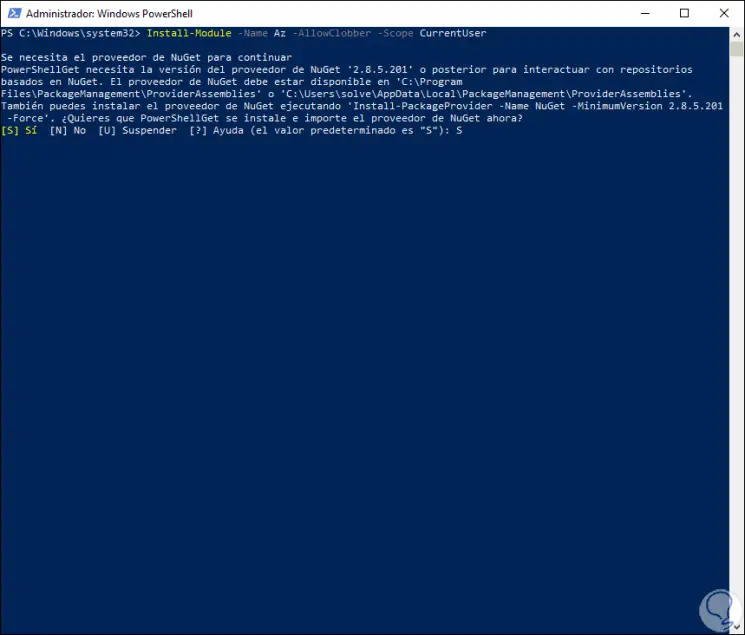
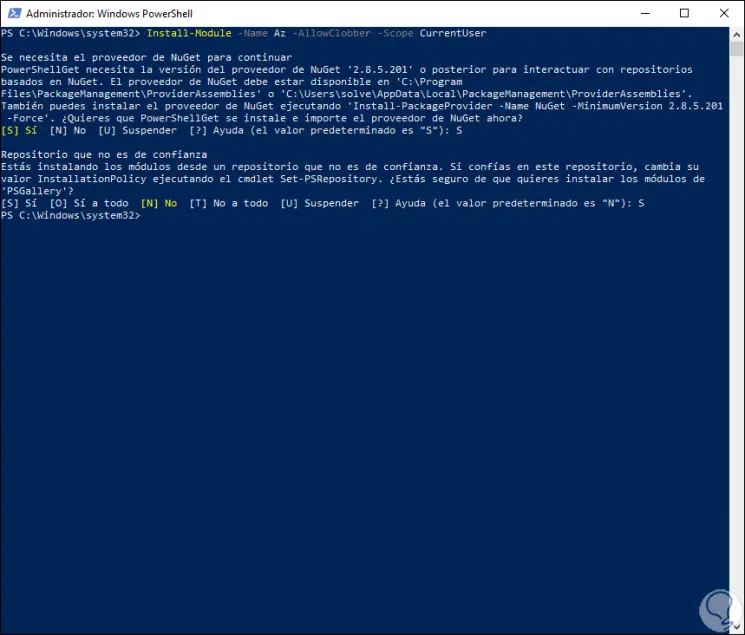
When executing this we will see the following:
Step 4
In this case it is indicated that PowerShell needs Nuget 2.8.5 and this can be installed manually or automatically installed by entering the letter S and then we will see the following warning:
Step 5
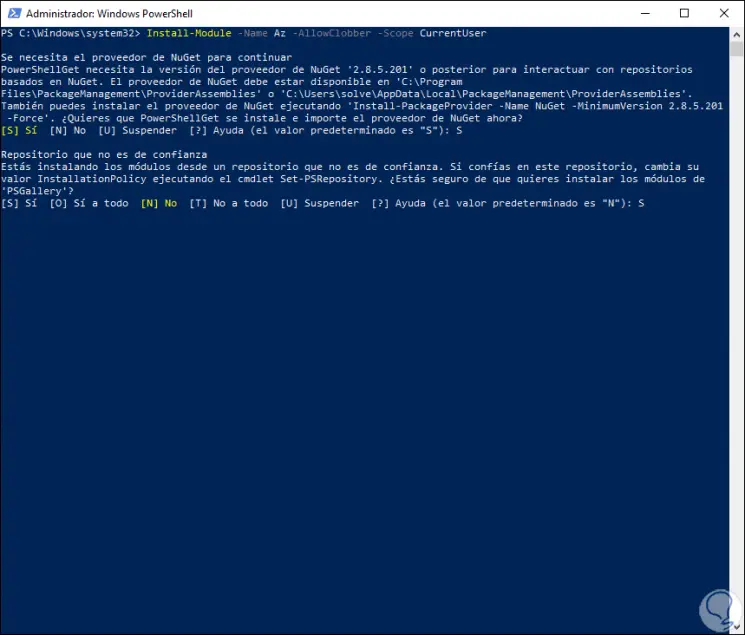
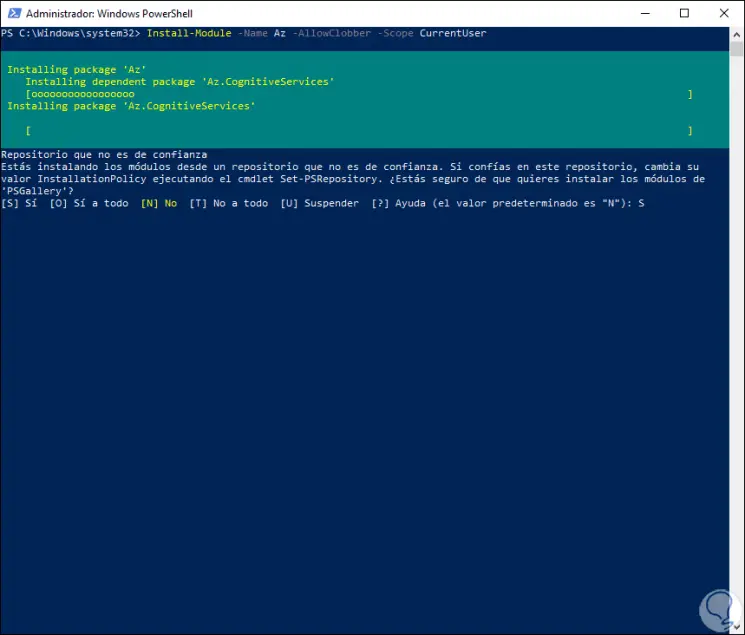
In this case, this message is launched because the repository is not trusted, there we enter the letter S to allow the PSGallery modules to be installed:
Step 6
When this ends we will see the following:
Step 7
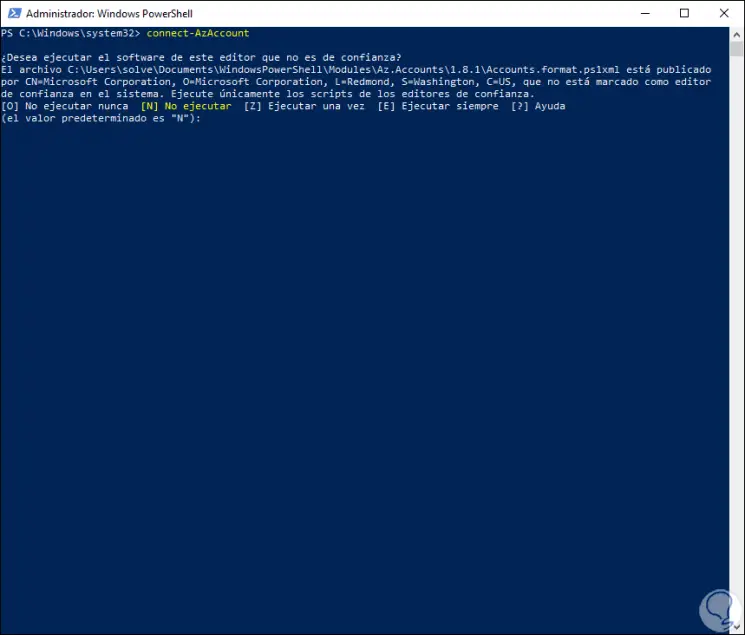
After this we connect to Azure by running the following:
connect-AzAccount
Step 8
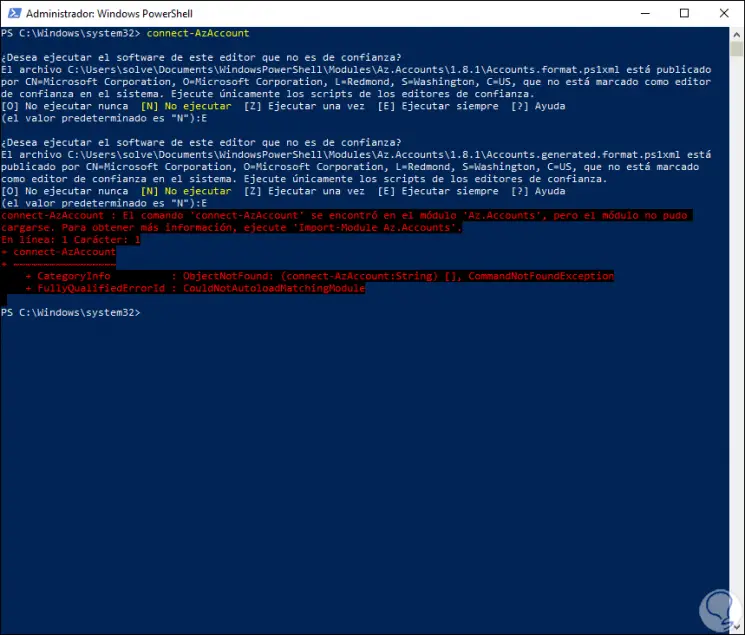
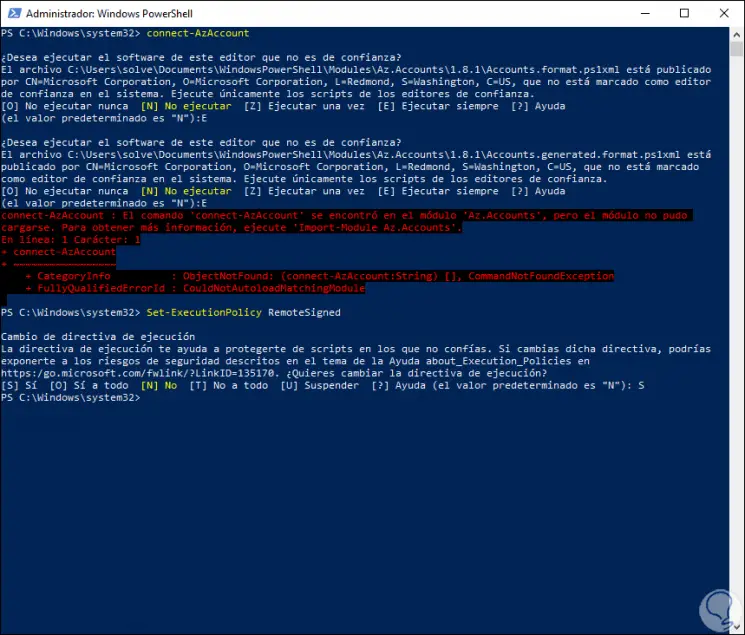
In this case we can see that a warning about the trust of the software is displayed, we enter the letter E and we may see the following error:
Step 9
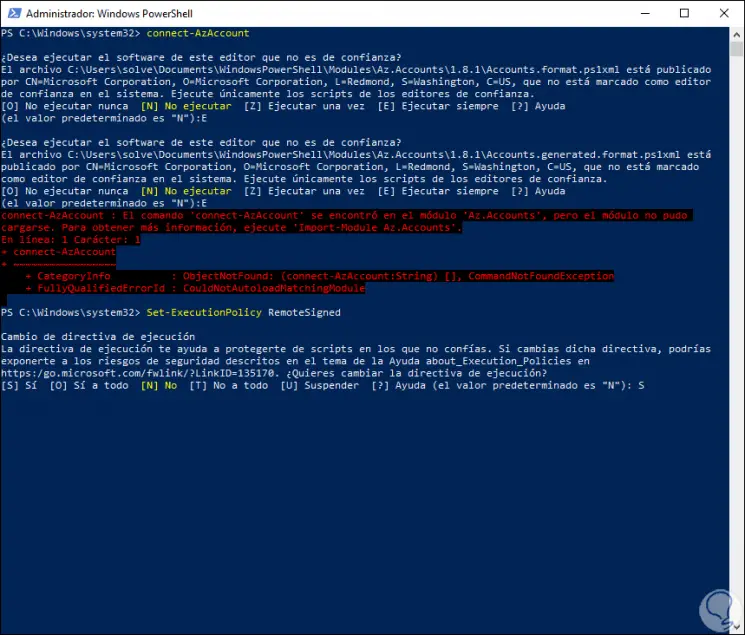
To correct it we will execute the following:
set-ExecutionPolicy RemoteSigned
Step 10
We enter the letter S and press Enter.
Step 11
Again we execute:
connect-AzAccount
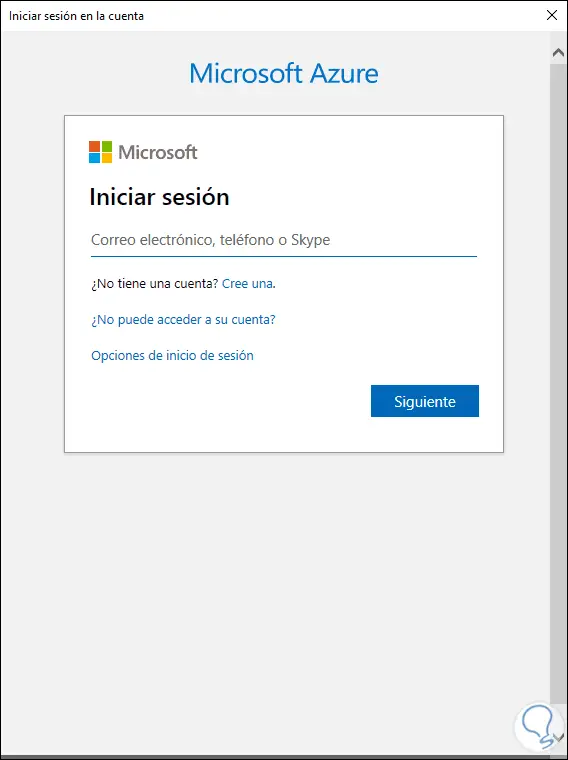
This will display the following pop-up window where we can enter Azure access credentials:
Step 12
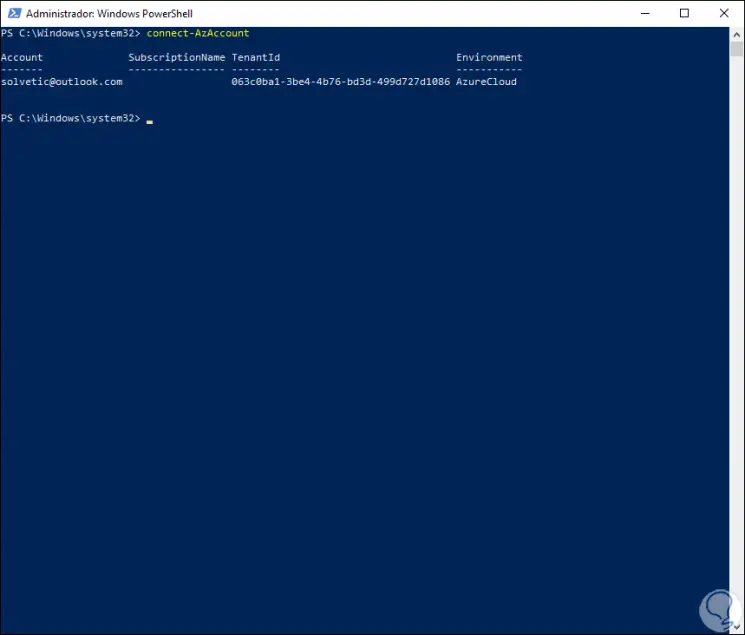
We enter username and password and after starting the session we will see the connection established with Azure:
Step 13
After that we will execute the following to access subscription details:
Get-AzResourceGroup
Step 14
In this case we see the following because we do not have an active subscription:
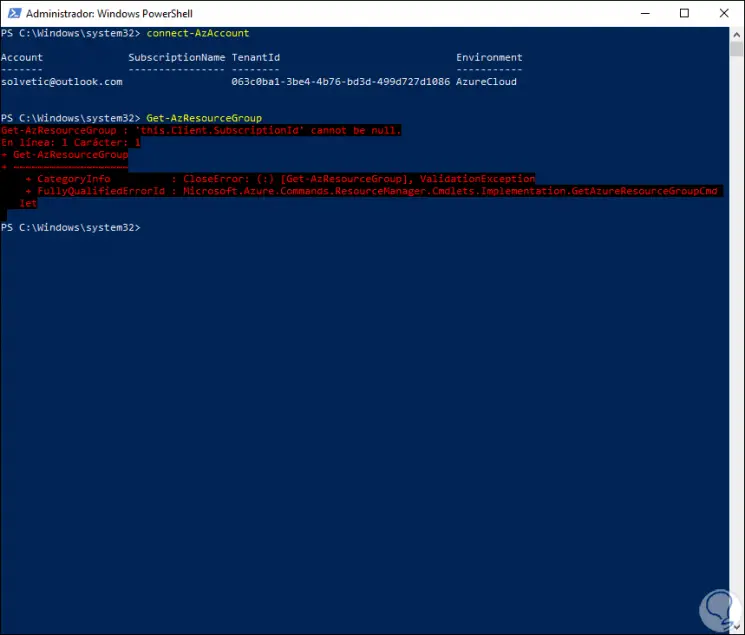
In case of having an active subscription we will see details of it.
So we have seen how to install Azure directly from PowerShell in Windows 10 and take full advantage of what the cloud offers us..