The virtual Azure networks are an essential part of communication and virtual machine Azure Virtual Network a (VNet) allows Azure resources can create communication with each other and with objects of local and external network..
Azure virtual networks
Virtual networks in Azure are made up of:
- Address space: when we create a virtual network, it is necessary to indicate a private IP address space with public and private addresses, with that, Azure allocates resources in a virtual network to any of those private IP addresses based on the assigned address space
- Subnets: the objective of the subnets is to segment the virtual network into one or more subnets, with this it is intended to assign a part of the address space of the virtual network to each subnet created in Azure
- Regions: The virtual network is comprised to work in a single region or location, but it is possible to connect multiple virtual networks from different regions with virtual network pairing.
- Subscription: There is a subscription scope through which we can implement multiple virtual networks in each Azure subscription and Azure region.
Azure virtual connections
Virtual networks in Azure allow the connection in three ways which are:
- Through a virtual network
- Through a virtual network service endpoint
- Through virtual network pairing
We talk about this because to connect from our physical equipment to Azure, it is necessary that the Azure network can communicate with the physical network, and the connection was achieved through RDP. RDP (Remote Desktop Protocol) is ideal to connect to the public IP of the Azure machine and this time we will learn to configure RDP in Azure and connect to it.
To stay up to date, remember to subscribe to our YouTube channel! SUBSCRIBE
How to create an RDP in Azure
Step 1
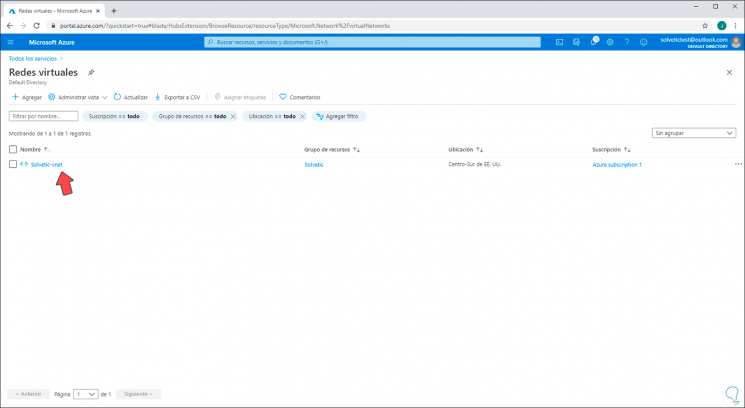
For this we will go to the Azure platform and go to the "Virtual networks" section where we find the current network (if we have already created a virtual machine):
Step 2
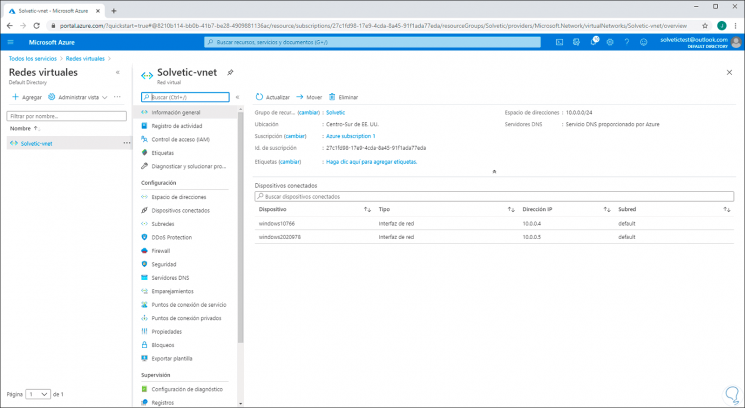
We can click on it to access details and utilities such as:
Step 3
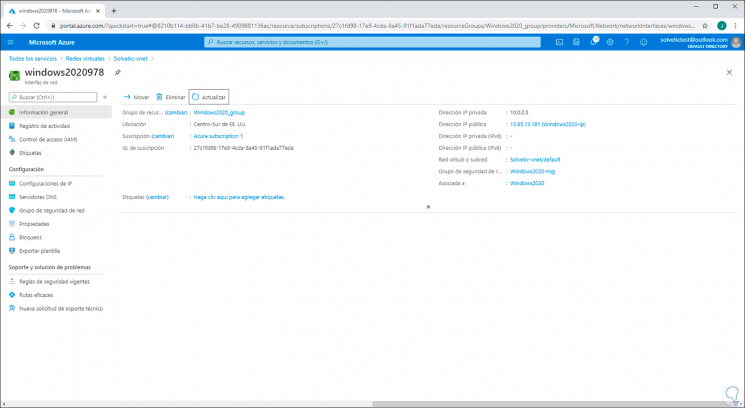
In this virtual network we must keep in mind the public IP address assigned to each computer, for this we click on the computer to verify:
Step 4
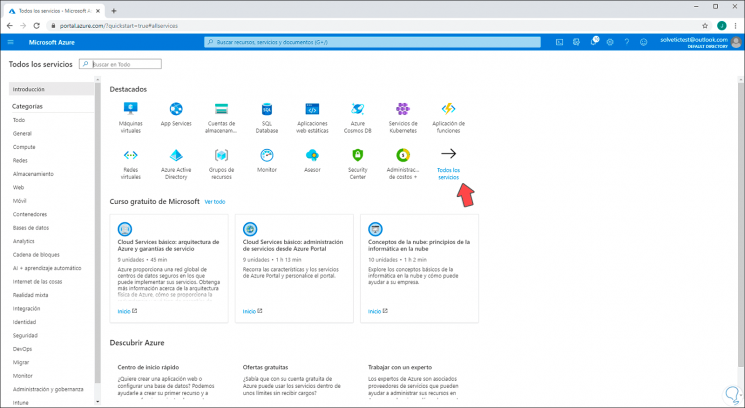
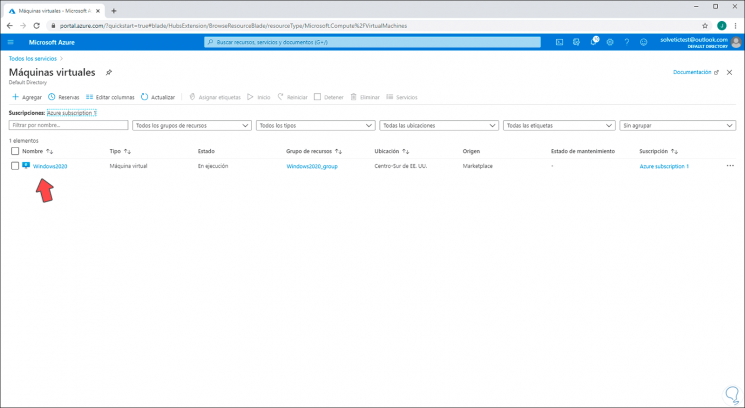
To create and make use of the RDP in Azure we go to "All services" and in the displayed options we select "Virtual machines":
Step 5
We access the following:
Step 6
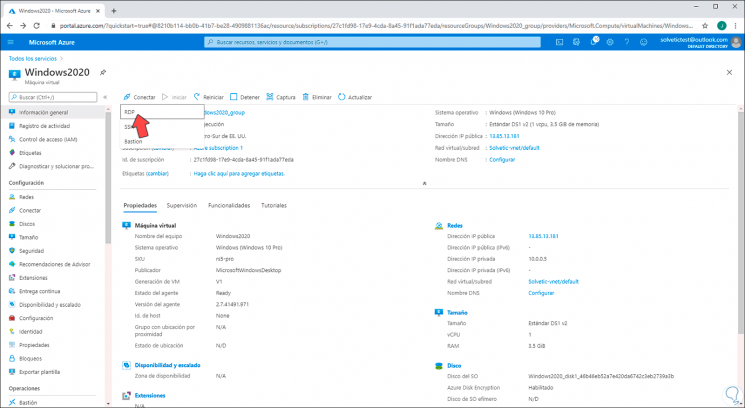
We click on our virtual machine and then click "Connect", in the displayed options select "RDP":
Step 7
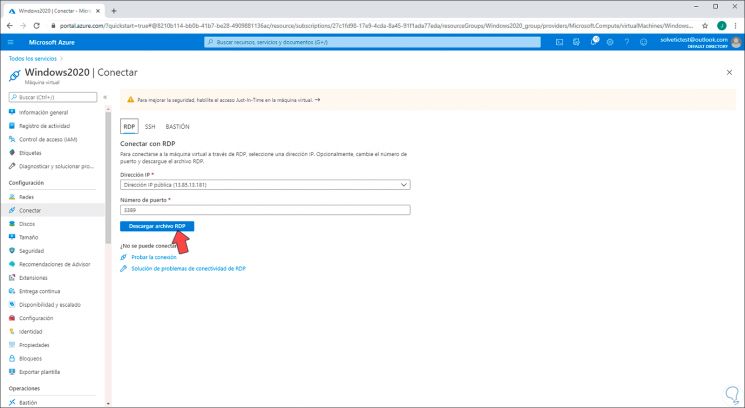
By clicking there we will see the following. There we must keep in mind the public IP to use and we will click on "Download RDP file":
Step 8
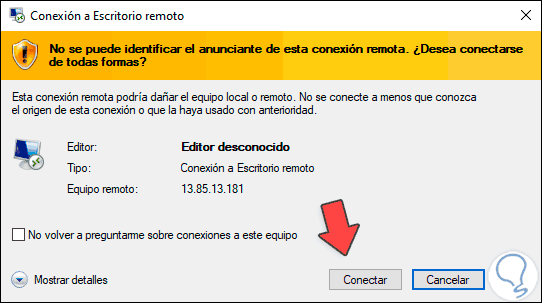
Once downloaded we run it and we will see the following:
Step 9
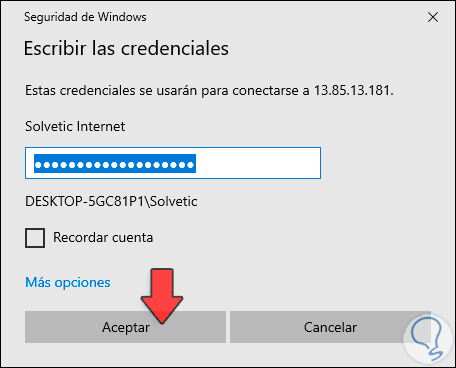
We click "Connect" and enter the credentials to access the Azure virtual machine:
Step 10
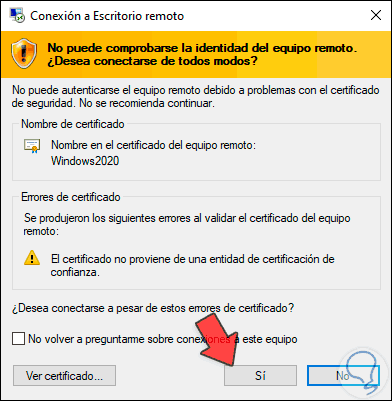
We click OK and when establishing the connection for security we will see the following:
Step 11
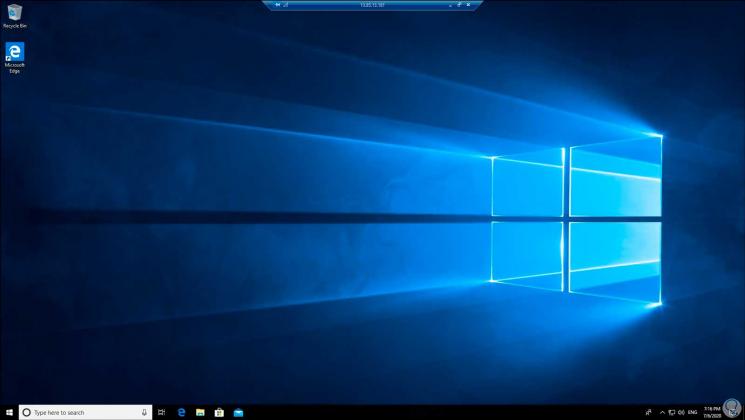
We confirm the connection by clicking Yes and establish connectivity with the Azure virtual machine:
Step 12
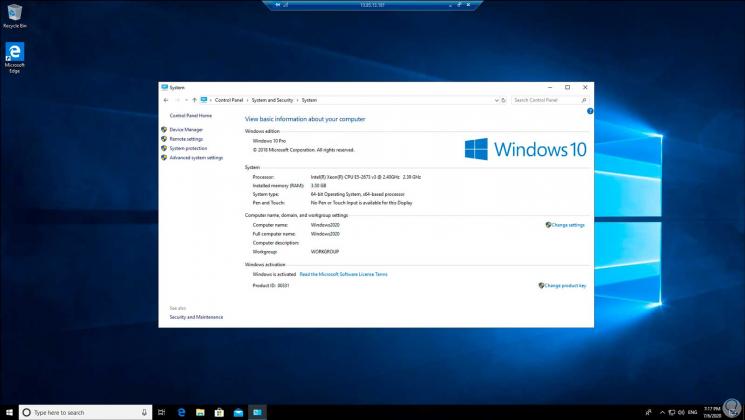
When accessing we can see the properties of the virtualized system:
Step 13
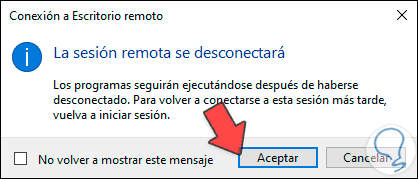
By no longer using the remote session we exit the connection and we will see the following. We click OK and so we have correctly used RDP in Azure to work on the virtual machines as necessary.
In this way we will have been able to create RDP Azure or Azure Remote Desktop completely..