Each new release of an operating system or application is a great expectation for all of us since these releases do not come alone, they bring with them novelties, improvements, functions that have been eliminated..
However, there will always be a vital aspect for optimal operation of the operating system in general and it is storage on the hard drive . Although it may sound like a non-essential issue, with the introduction of the new solid-state SDD hard drives on macOS computers , storage is drastically reduced on our computers since, as you know, storage on these types of discs by default starts at 128 Gb.
This improves many more features such as security and speed of reading and writing. However, if you are a user who downloads many elements of the network , you save many files such as images, music or movies and in general you make good use of the hard disk, we recommend that you continue reading this tutorial since TechnoWikis will explain how you can free space. This speeds up the tasks of the new Apple operating system called macOS Catalina . It is true, it is still in beta, but it is certainly good to know how to carry out these actions so that when it is officially launched it does not take us by surprise..
1. How to make use of the macOS Catalina integrated storage optimization function
Step 1
From High Sierra we saw how the operating system integrated a function focused on helping us with the tasks of managing space on the hard disk of macOS and it is the storage optimization function which focuses on specific areas such as:
- Administration of system elements
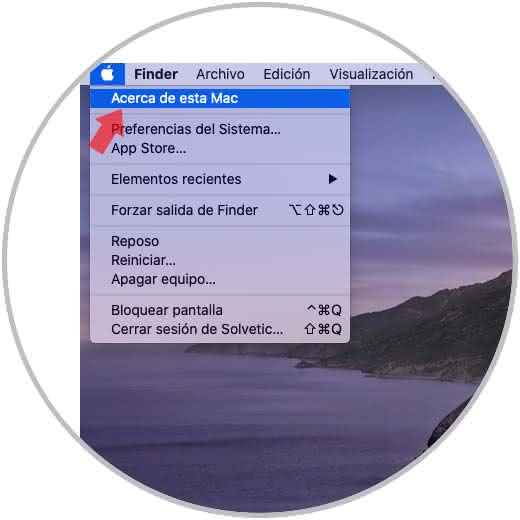
To access this functionality and see how it works in action we must click on the Apple logo and select the option “About this Macâ€:
Step 2
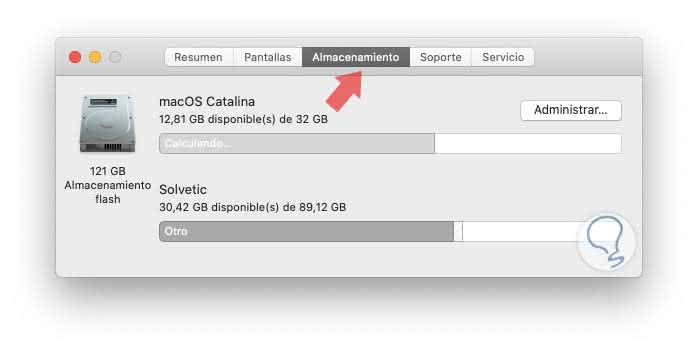
The following window will be displayed where we must click on the Storage tab. There we must click on the "Manage" button
Step 3
In the main window of space optimization we will find segmented as follows:
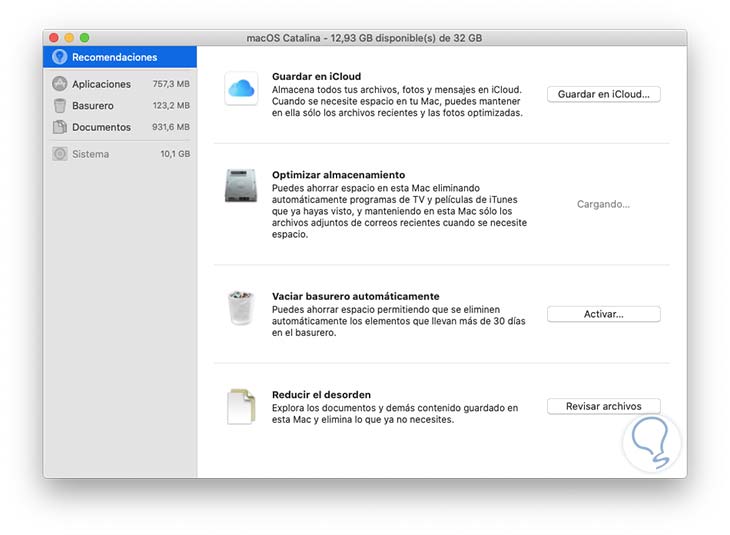
Recommendations Section
In this section it is divided into 4 different options and it is one of the most used since much of the storage is centralized here, there it is possible to use the following:
- “Save to iCloud†section, through this option we can make use of the free 5 GB of our Apple ID to host items such as messages, photos, music and more in the cloud to prevent them from staying directly on the hard drive, if we want to use more storage we must purchase a paid plan
- “Optimize storage†section, through this section we can configure that the elements of iTunes, TV programs and others that we have already seen, and therefore occupy space, are removed from the system and with this activation we will only see the attached files of mail
- "Emptying the trash automatically" section allows us to activate the functionality that each object there that takes 30 or more days is automatically removed, come on, surely it has happened to you and me that we forget to delete the trash.
- “Reduce clutter†section allows you to access a view of the files in the system to see their size and define whether or not they are important for storage.
Step 4
This is the main point of the optimization in macOS Catalina, but the other sections as we can navigate over them to see the content of each one:
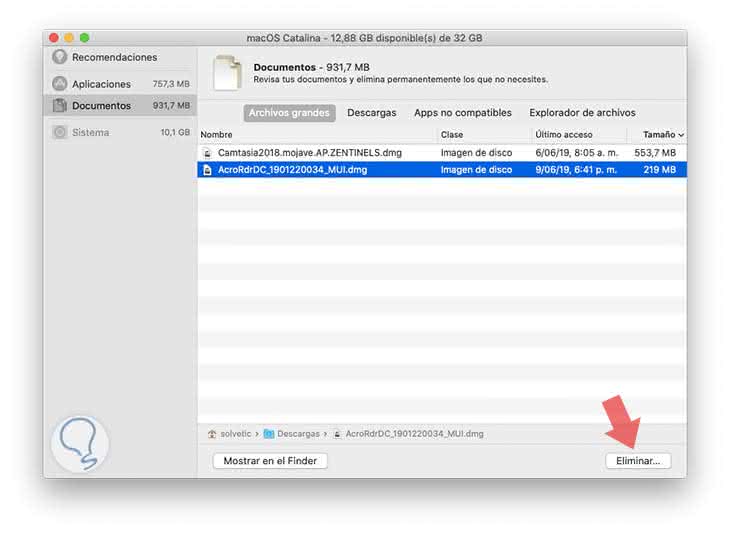
Step 5
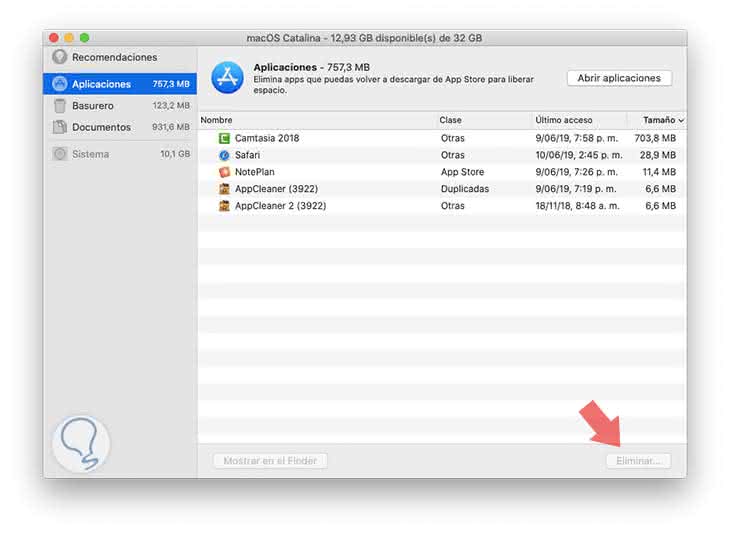
From this administration point we can free up space thus accelerating macOS Catalina, if we select files or applications of little or no use and by clicking at the bottom on the Delete button:
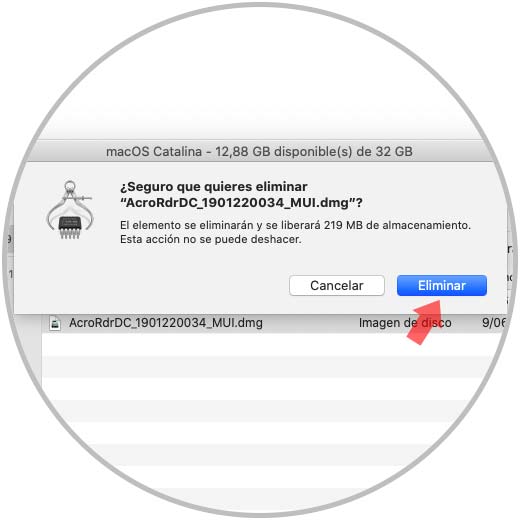
Step 6
Performing this action will display the following warning:
This is the method most used today as it is the one offered by macOS Catalina by default for cleaning and system improvement tasks.
2. How to clean the macOS Catalina hard drive
A key point in the macOS Catalina acceleration process is to clean files or applications not used in the system, this will help to optimize reading and writing processes as well as improve internal processes.
For this we can use two methods, the first is to delete the files manually using the Finder and then delete the trash..
However, many operating system files are hidden for security so that the Finder method is not always adequate. That is why we often have to resort to third-party applications and that better than using one of the best known as it is CleanMyMac which you find available in the following link:
CleanMyMac
This app is compatible with macOS Catalina and its function lies in an intelligent and deep reading of the hard disk to display the way space is used there, this works for hidden files.
Step 1
Once we install the application we will see the following:
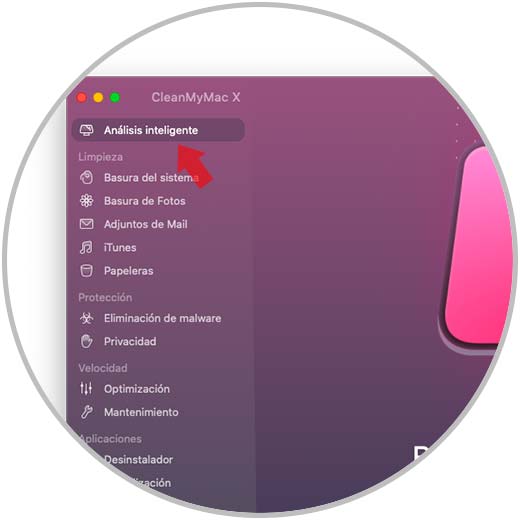
Step 2
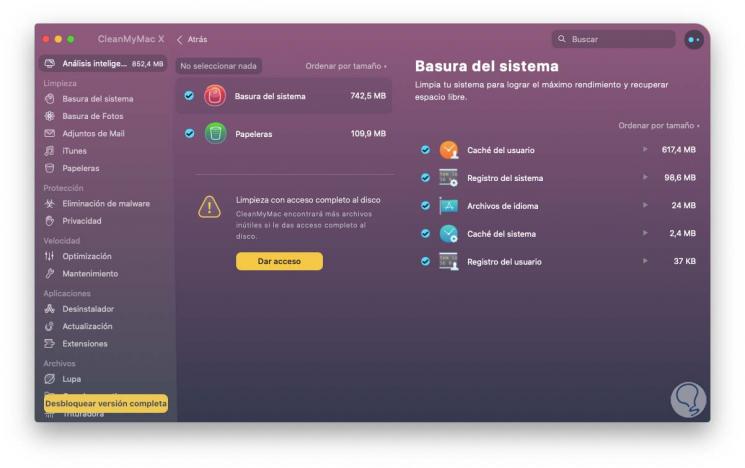
There we go to the “Smart Analysis†section and we can click on the Analyze button to run the utility:
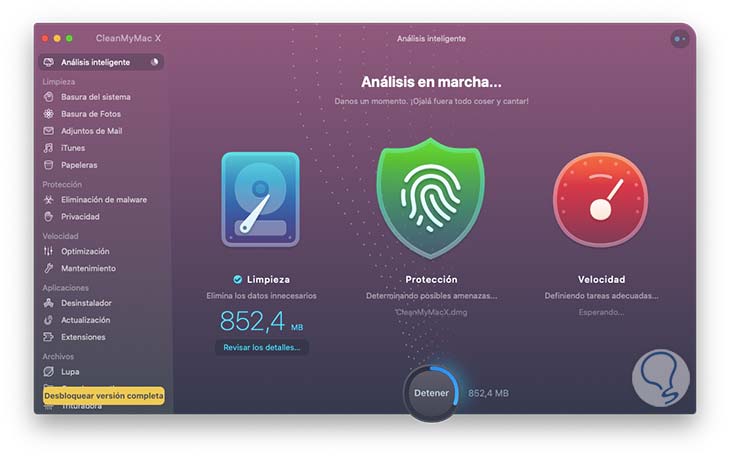
Step 3
Once the analysis process is completed we can access the details to check which items have been selected as garbage and have better control of them:
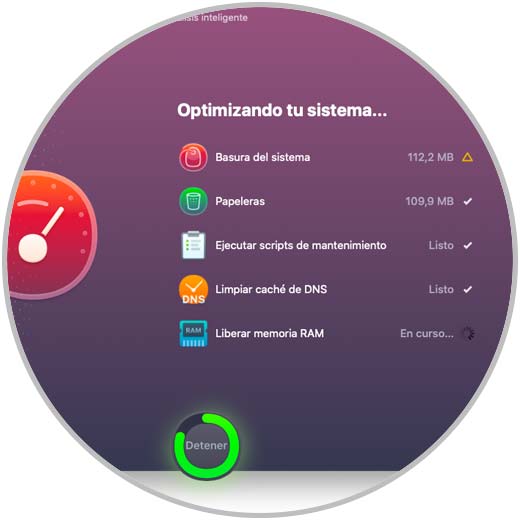
Step 4
Finally we can click on Clean to erase these elements in a few seconds and thus accelerate macOS Catalina:
3. How to manage macOS Catalina applications
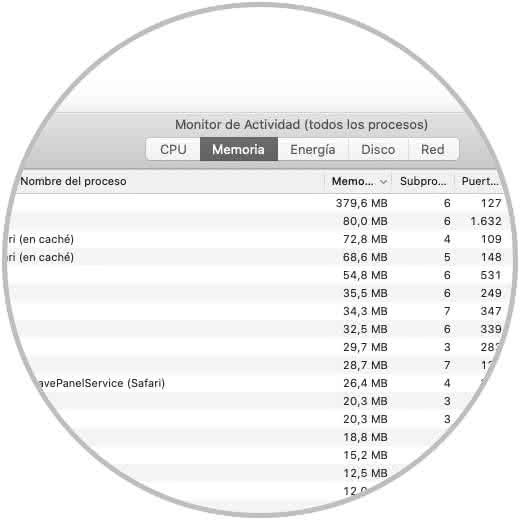
macOS Catalina integrates a function to analyze in detail the real-time consumption of equipment resources such as the CPU, memory, disk, network and energy, each of them has an essential role in system performance In general, therefore accessing this utility and checking the processes will never be left over.
Step 1
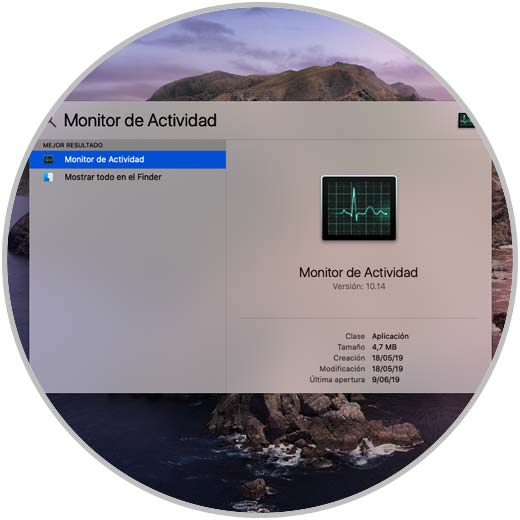
To access the Activity Monitor we can use one of the following methods:
- Using the ⇧ + ⌘ + U keys and then select the utility
- On the route Go / Utilities / Activity Monitor
Step 2
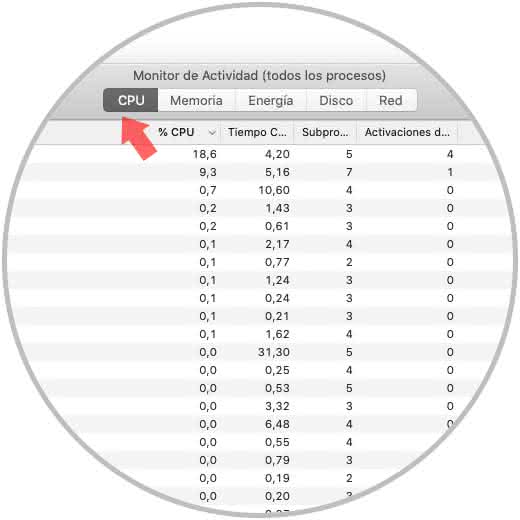
When the default column will be displayed, we will see CPU, there we can click on this column to sort the CPU consumption from high to low:
Step 3
The same process can be applied to the other sections (Memory, Energy, Disk and Network):
Step 4
An essential point to keep in mind is that at the bottom of each section, we access a graph where it will be possible to visualize each process in specific detail.
4. How to manage the graphical user experience in macOS Catalina
We do not lie, we all like an innovative, modern aspect and if possible in 3D but behind this a high consumption of system resources is executed. Therefore, if your device has the basics to install or update macOS Catalina, it is likely that you will feel in the ice age and occasionally freeze the system.
Therefore, macOS Catalina allows us to edit some configurations associated with the graphic environment of the system that can help improve its stability and speed.
Step 1
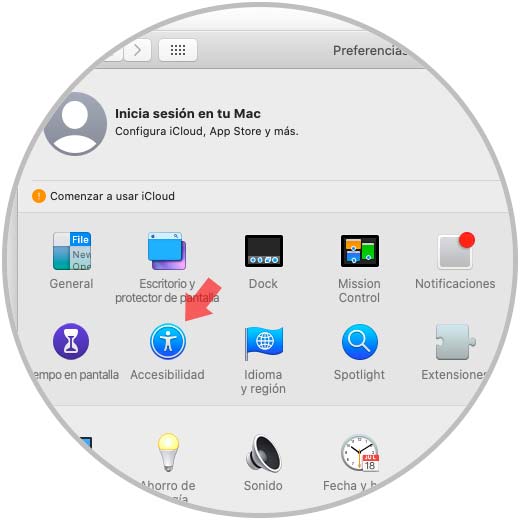
For this we will access the System Preferences where we will see the following:
Step 2
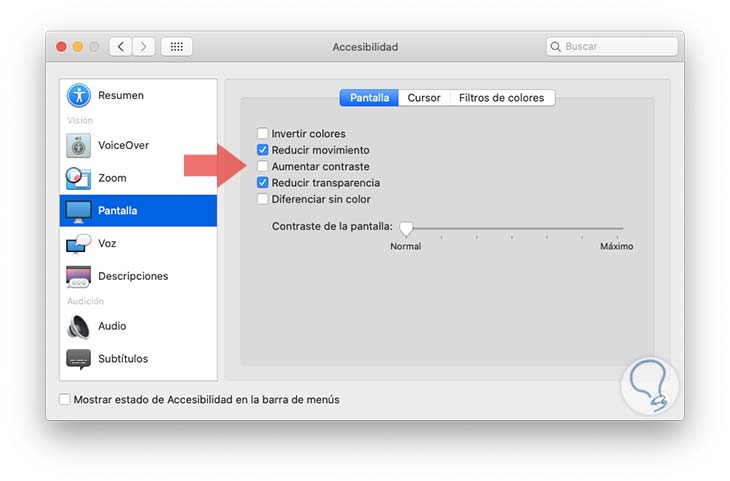
We click on the “Accessibility†category and then go to the Screen section where we must activate the following boxes:
Step 3
The change is really noticeable, if we use the default values ​​we will see the following:
5. How to control programs executed at macOS Catalina startup
Many of the programs and applications that we install in macOS Catalina are configured to be executed automatically with system startup. This causes a double task of resources since they must not only load the processes and services of the system but also the applications.
Step 1
We can verify and disable this by accessing System Preferences and there selecting the category "Users and groups":

Step 2
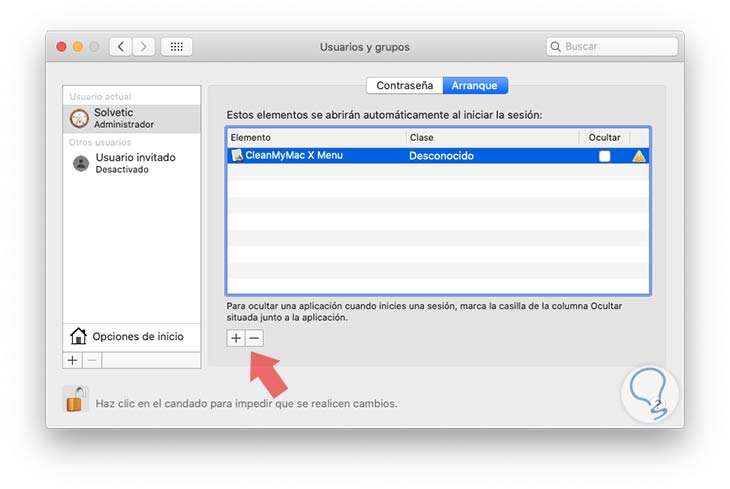
In the window that will be displayed we must select our user, click on the lock icon at the bottom and enter our administrators password to make changes, after this we will go to the Startup tab where we will see which applications are active for this process:
Step 3
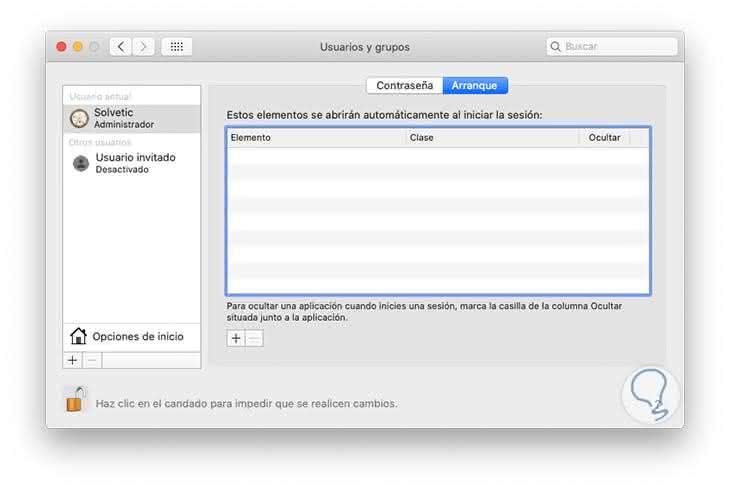
To remove one or more applications during startup, we must select it and click on the sign - located at the bottom, this will cause that app to be deleted from the macOS Catalina boot:
6. Optimize the use of iCloud macOS Catalina
We have mentioned previously that iCloud is the bet in the Apple cloud and that it gives us 5 GB for free so that we can host various elements of the system but not on the hard disk.
Step 1
To configure this option, we go to System Preferences and we will see the following in macOS Catalina:

Step 2
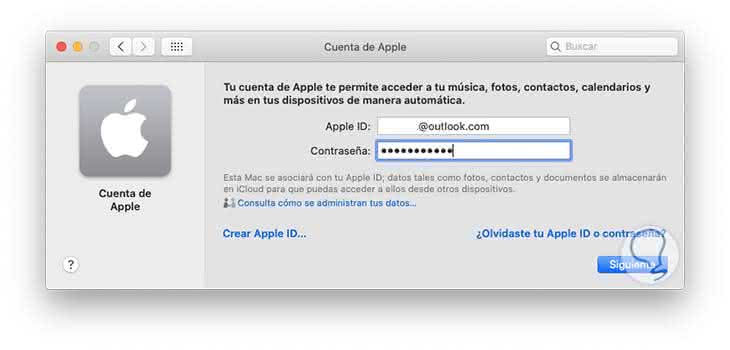
Click on the Login button and then enter the Apple ID and the associated password:
Step 3
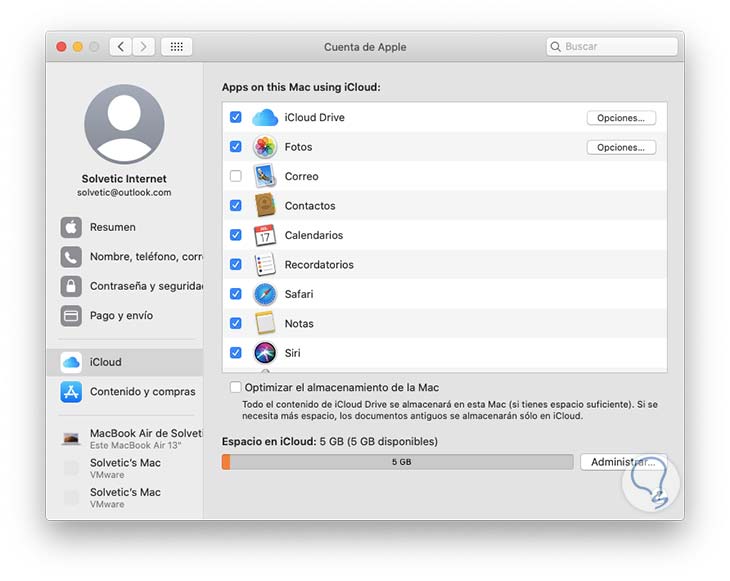
We log in and then we go to the iCloud category and there we will edit the elements to upload to the cloud as necessary:
7. Reset SMC and PRAM / NVRAM on the macOS Catalina system
The RAM and SMC memory are integrated in order to improve system performance so that if we reset the SMC memory we help correct various problems associated with the battery and fans. By resetting the NVRAM module we will help to adjust the correct boot disk, screen resolution and battery charge, which will give better optimization and perception of improvements in macOS Catalina.
Reset NVRAM
If we want to reset the NVRAM, it will be necessary to restart the operating system and in this startup process press the Command + P + R + Option keys. When we release the keys we will have released this memory.
+ P + R + ⌥ ⌘ + P + R + ⌥
Reset the SMC
On the contrary, if we want to reset the SMC we must first turn off the equipment and leave it off for 15 to 20 seconds, then press the Shift + Command + Option + power button for 10 seconds.
+ ⌘ + ⌥ + ON ⇧ + ⌘ + ⌥ + ON
Manage Spotlight
Spotlight is the macOS Catalina automatic search engine, so it uses indexing technology to launch the best results. Therefore, if Spotlight is configured to index all the elements of the equipment, when the reindication process is carried out, it will take longer than normal, affecting the normal use of resources while giving a negative impact on system performance. .
To verify this we go to System Preferences and there we click on the Spotlight category and in the window we will go to the Privacy tab:
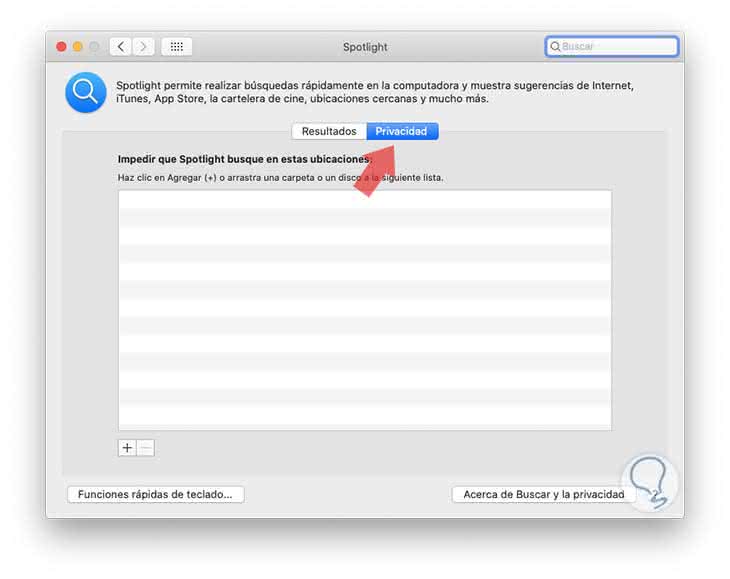
There it will be possible to drag the folders that we do not want to be added into the indexing process in macOS Catalina which helps improve system response times.
Additional tips
Now TechnoWikis will give you some additional tips to improve the performance of macOS Catalina.
- Run an antivirus and antimalware periodically.
- Turn off the computer constantly as this helps to eliminate temporary files and free up space in VRAM memory.
- Close tabs in browsers that we do not use since they consume CPU and memory frequently.
- Constantly update and whenever new updates are available both the operating system and applications.
- Remove unusable programs and add-ons from the system as they may cause an opposite effect on the speed of the system.
You can see that the tips to accelerate macOS Catalina are multiple and each of them will help you enjoy more and more of macOS Catalina.