Has it ever happened to you that you need to send some kind of evidence and you don't know how to do it? Do not worry, the screenshot , whether as an image or recording, is common today, since it is not only used to show some task or action but is also widely used to create courses, attach files , support, submit claims and many more actions..
With the imminent arrival of the new version of macOS Catalina operating system it is ideal that you and I know how to capture a screen there and its integrated tools are simple but practical for it.
It is for this reason that today in TechnoWikis you will learn to capture the full screen or only the active window in macOS Catalina step by step..
1. How to capture the entire screen in macOS Catalina
This is one of the most used actions since this capture will take the entire desktop environment.
Step 1
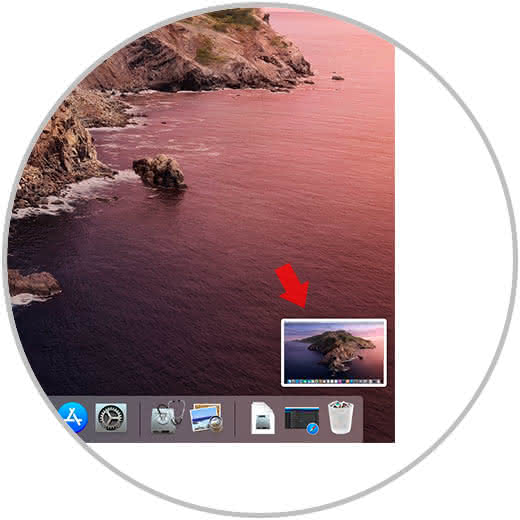
For this macOS Catalina offers us to use the following key combination in order to do it:
+ ⌘ + 3 ⇧ + ⌘ + 3
When we use this combination we can see that in the lower right corner the thumbnail of the capture taken is displayed:
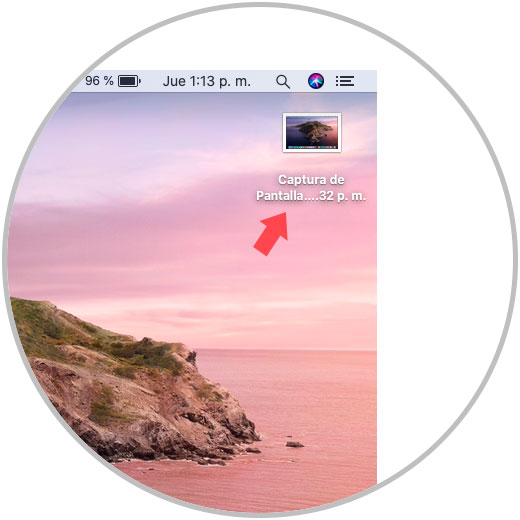
Step 2
There we could drag it directly to the trash can if it has been taken by mistake or click on it to access the edition, but if we do not take any action, in 5 seconds the image will be saved by default on the macOS Catalina desktop:
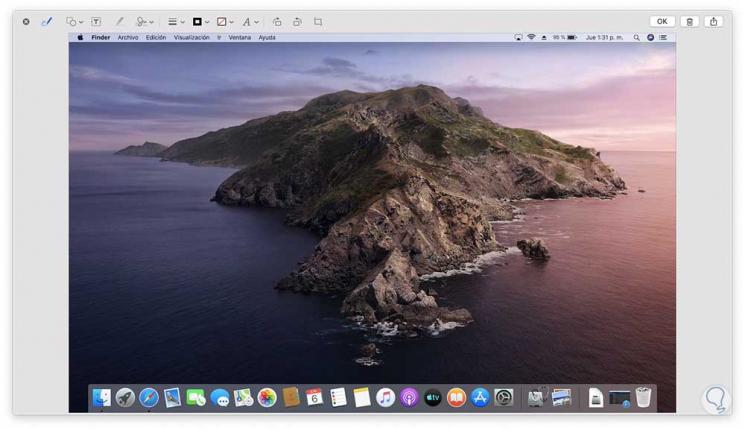
Step 3
If at the moment of capturing the entire window with the described combination we click on it, the image editing wizard will be displayed where it will be possible:
2. How to make a screenshot of the current window in macOS Catalina
It is another frequent task since it is not necessary to use the entire desktop but only capture the window on which we are working.
Step 1
In this case, in macOS Catalina, we must use the following key combination:
+ ⌘ + 4 ⇧ + ⌘ + 4
After this, click on the desired window (the pointer will have the shape of a cross), and this will only capture that window and nothing else. It is important to mention that when we select only that window it will be highlighted:

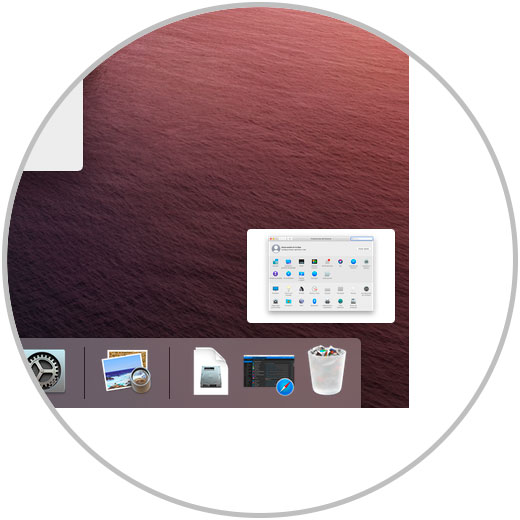
Step 2
Once we click there again we will see the capture made in the lower right corner:
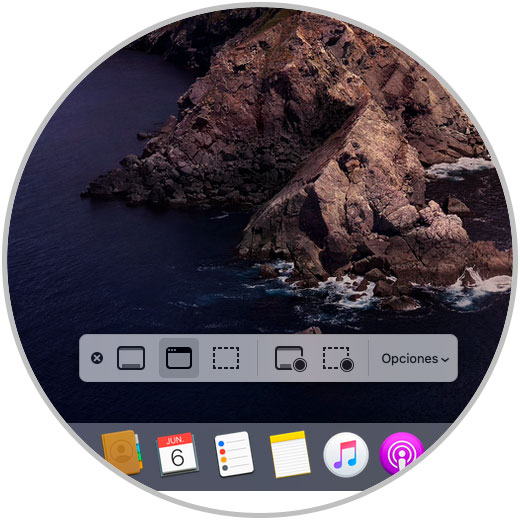
3. How to use the toolbar in macOS Catalina
It is one of the most innovative parts which was introduced from macOS Mojave and is the capture toolbar with which we can perform various actions on this type of tasks.
Step 1
To access it we must use the following key combination:
+ ⌘ + 5 ⇧ + ⌘ + 5
We will see the following, the options displayed in your order are:
- Capture the entire screen
- Access the macOS Catalina capture options
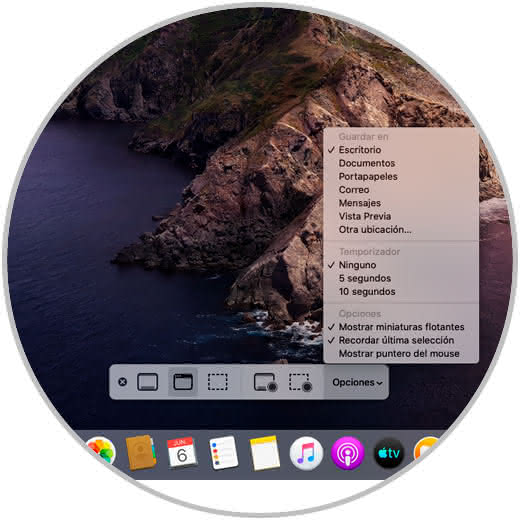
Step 2
If we click on the "Options" section it will be possible:
- Define where captures will be saved from now on
- Use timer for screen capture or recording
- See the floating thumbnails which are the ones we see in the lower right corner
- Allow the system to remember what the last capture was
- Show or not the mouse pointer
Step 3
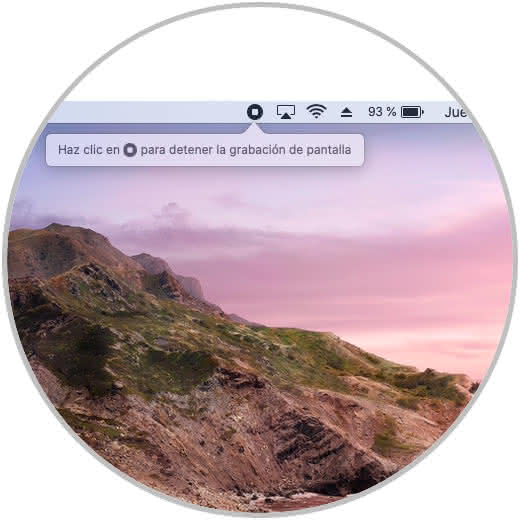
An important aspect of the screen capture options in macOS Catalina is the possibility of recording either the full screen or only the selected part. For this we use the following key combination:
+ ⌘ + 5 ⇧ + ⌘ + 5
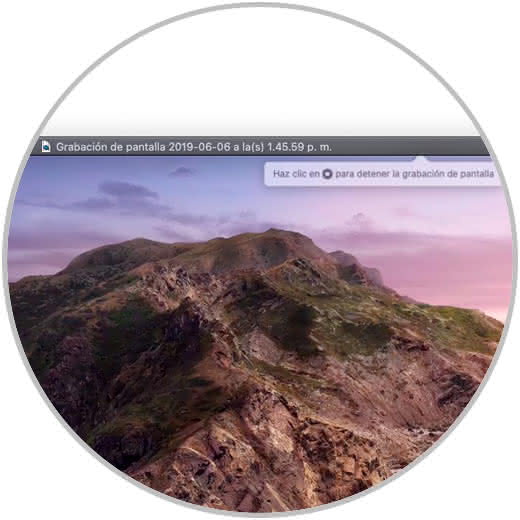
We choose the desired recording method, the recording icon will be visible in the title bar and from there we can click on it to stop recording:
Once the video is recorded, it will be played with Quick Time:
Thanks to these integrated tools we have the possibility not only to capture or record the screen in macOS Catalina but also to edit the captures as necessary using functional and fully practical tools.