Microsoft Word , the text processor program that belongs to the Microsoft Office suite, is one of the most used by users (not to mention the most) due to its ease of use together with the intuitive it seems and the large amount of actions that allows us to perform..
When we are writing any text , the use of uppercase and lowercase letters in it is one of the main aspects, either to differentiate the first letter of each phrase, the proper names and all the other options in which they are used. But it is true that the use of a capital letter is always at the beginning of a sentence.
In the case of Word, it is possible to configure this automatically, which will save us a lot of time and will make the task a lot easier since we do not have to continually press the "Capital Lock (Caps Lock)" key in keyboard. It is for this reason that in this tutorial of TechnoWikis we will explain step by step how to make the capital letter put automatically after each point we write in Word 2019 and 2016..
For this we are going to have to follow the steps that we can see in this video and read in this tutorial:
To stay up to date, remember to subscribe to our YouTube channel! SUBSCRIBE
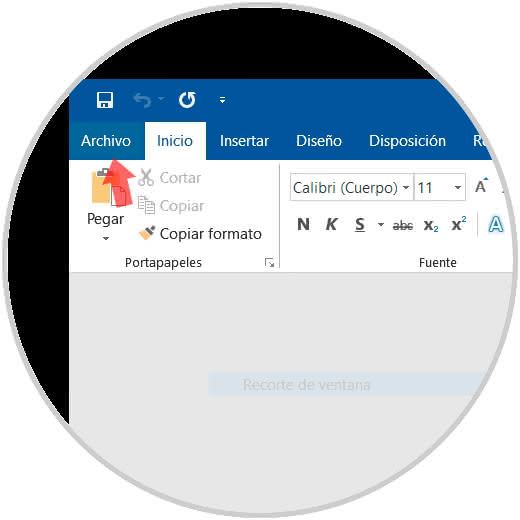
Step 1
On the Microsoft Word screen, click on the "File" menu located in the upper left corner of the screen.
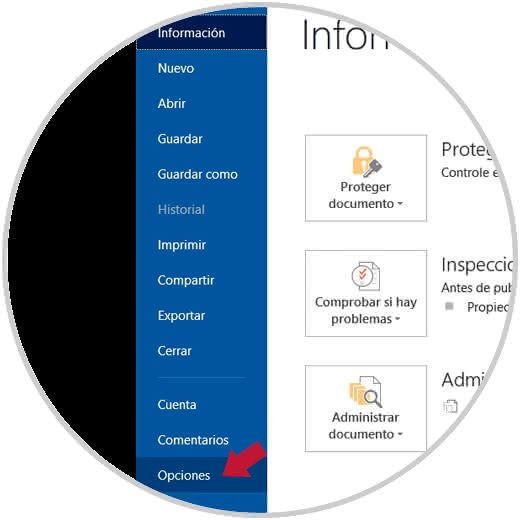
Step 2
Now, within the different options that you will see, under "Information" click on the "Options" section.
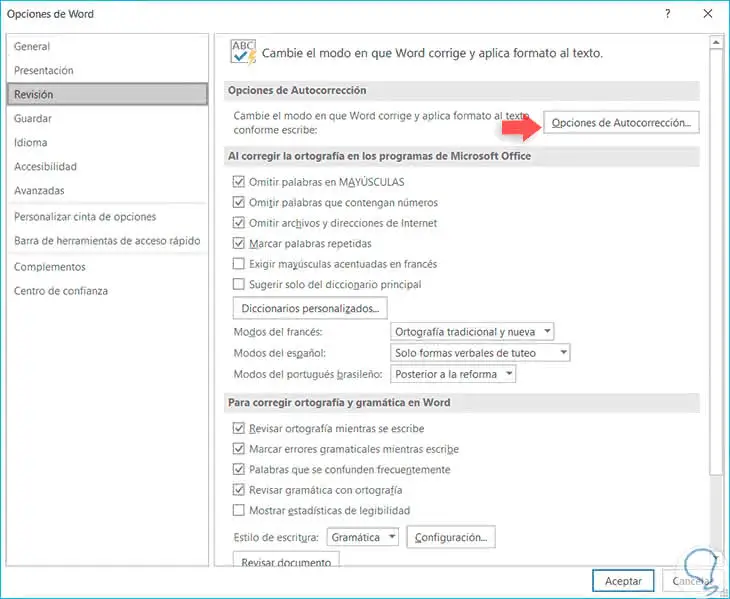
Step 3
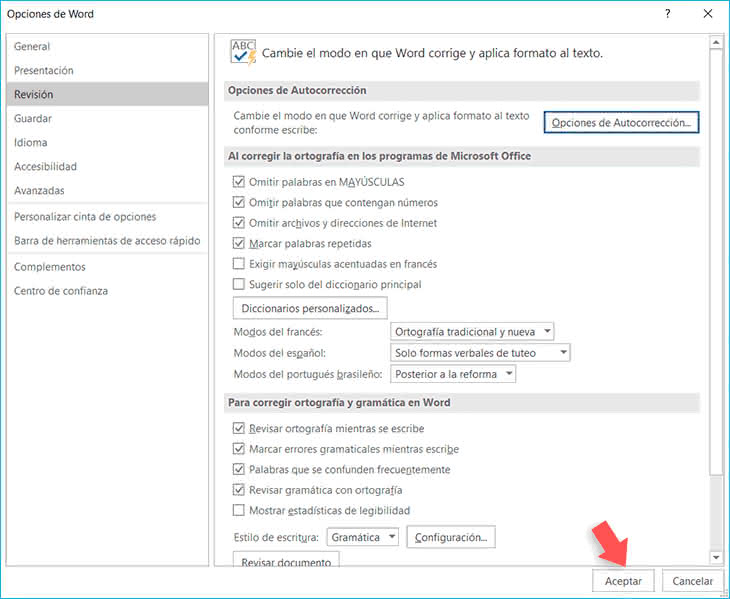
A new window like this will open, in which you will have to click on the "Review" section and click on the "AutoCorrect Options" button.
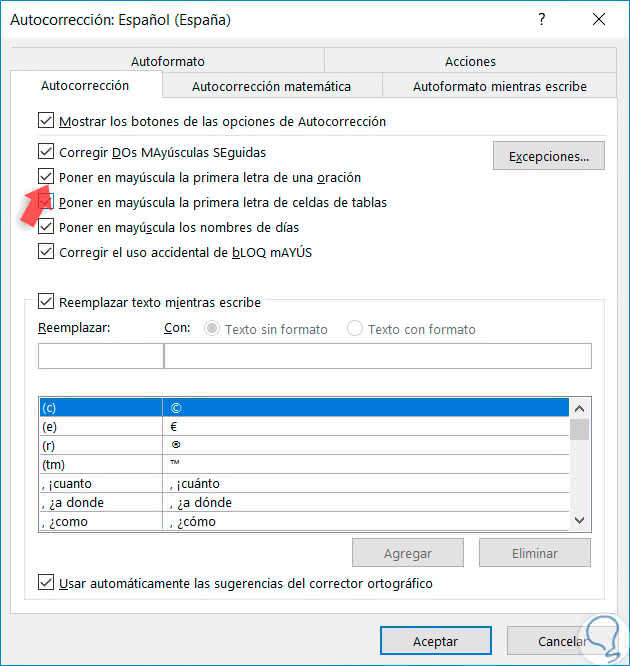
Step 4
A new window will open with the different autocorrect options Word has. You must click and mark with a Check in the "Capitalize the first letter of a sentence". Click on "OK".
Step 5
By clicking on "Accept" you will appear again in this window. Click on "OK" and you will have finished.
This is how you will be able to write and capitalize after the points without having to press the Capital Lock key step by step.