If we are in the area of ​​support and systems management, one of the tasks that are frequently performed is the installation, repair and configuration of the operating systems. What before involved loading with two or more DVDs now everything is simplified to simpler tools that help our tasks to be performed in a much more efficient way, we talk about USB sticks..
Since its use began to spread, the USB devices had the sole purpose of hosting information to be transported to other computers, but today we can configure them as bootable media for operating systems . If you wonder why, it is simple, apart from the practicality of carrying a USB and not a DVD, some of the current equipment no longer comes with a CD / DVD drive, which makes it more convenient to learn how to create a bootable USB and thus not get stuck in the path of support.
There are several tools that we find today for this, but if you are a Linux user today you will learn to perform this process directly from the terminal with few steps and in a practical way..
We will clarify that this process applies to the creation of ISO images (boot) of Linux or Windows operating systems. In this case we will create a USB with a Windows 10 image but you can download an ISO image from Ubuntu, Debian, CentOS, etc., based on the requirements of the case.
Once the ISO image is created , we must configure the boot of the computer in the BIOS or UEFI from the USB medium and thus begin to perform the traditional integrated installation or repair operations.
How to burn an ISO image using the dd command in Linux
For this case we will use the dd (Dataset Definition) command, this command allows us to perform different actions on hard drives or partitions in the system.
Step 1
Its use syntax is as follows. There, the if parameter indicates “input file = input file†which means the image we are going to record while the parameter of refers to “output file = output fileâ€, that is, the destination where it is to be recorded the ISO image.
sudo dd if = origin of = destination
Note
When we use this command, executed orders are processed immediately without the possibility of canceling or confirming them, so TechnoWikis recommends being careful with this command.
Step 2
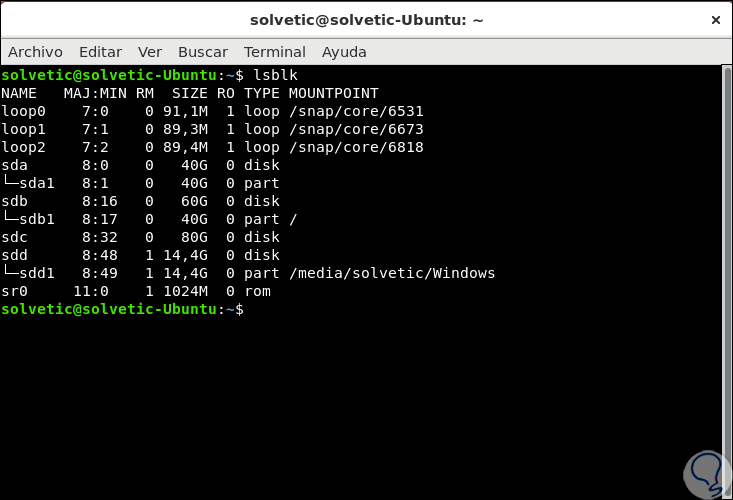
We connect the USB medium to the device and to check the assigned route, we will go to the terminal and execute the following command:
Lsblk
Step 3
This command is used to list the system blocks, as a result we will see the following. There we can verify that the path of the USB device is sdd.
Step 4
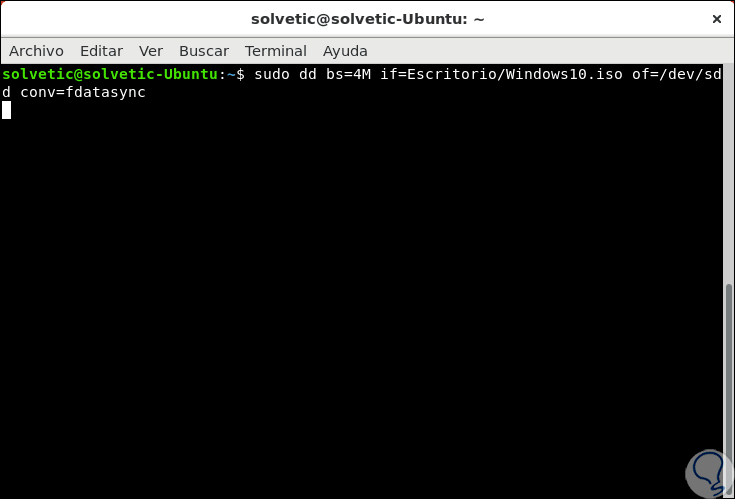
Knowing this, we will execute in this case the following order:
sudo dd bs = 4M if = Desktop / Windows10.iso of = / dev / sdd conv = fdatasync
Step 5
There the parameters that we have indicated have been:
sudo
It is required to be a superuser to correctly execute the dd commands, pressing Enter will enter the administrator password.
dd
It is the command to execute for the recording of the ISO image.
bs = 4M
This value refers to the block size, which will define the size of the fragments where the input file is to be read and then written to the output device.
if:
There we have specified the path where the ISO image to be recorded is.
of = / dev / sdd:
With this parameter we indicate the destination, that is, the connected USB drive.
[panelplain = 'conv = fdatasync:'] This is a parameter that determines how the dd command will convert the input file during the write process to the target device..
Step 6
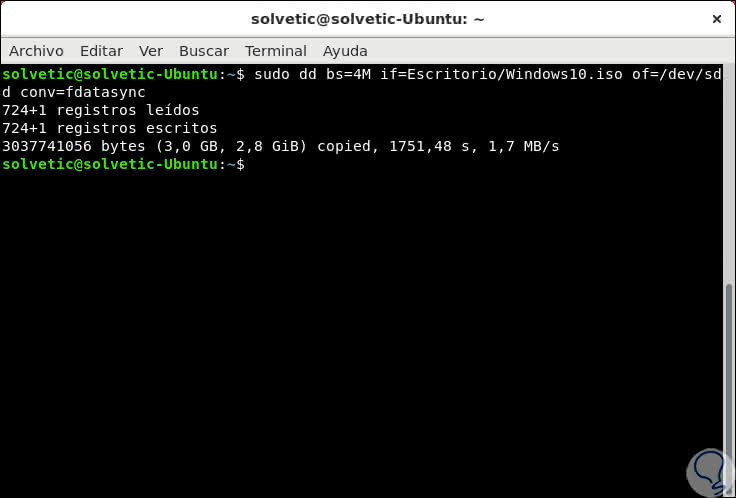
As we see, pressing Enter does not issue any warning and the process is carried out transparently for us, it will take based on the size of the image, once the process is finished we will see the following:
Step 7
There we see details like:
- number of read and written records
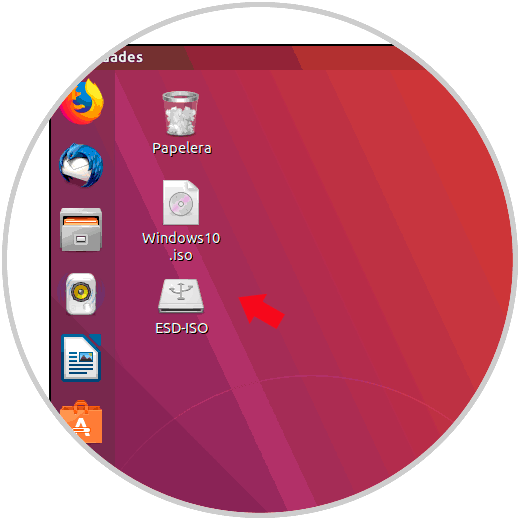
Step 8
We can see that the USB has modified its name as a bootable media:
With this method it will be possible to record the desired ISO images and use them without any problem for the tasks that are required.