Currently, in the search for the best solutions for administration tasks, we have several integral solutions and capable of providing us with the best solution to carry out this type of actions. One of the best options is undoubtedly to have a bootable or bootable USB media, thanks to which we can carry any operating system in a practical, simple and safe way..
An ISO image is the perfect solution for managing operating systems and data in our system. The use of the CD / DVD has been outdated in some areas such as computational ones due to the change of manufacturing model in computers. It is already unlikely to find a CD / DVD reader so the USB stick or flash drive has relieved them.
If we combine the complexity covered by the ISO image to be able to save an entire system in a single file, and the universality of a USB, the result in the practicality of having everything in a USB. Today we will see how we can create a USB boot that allows us to boot Linux from a pendrive easily without the need for other elements. We can do it from commands quickly or from the system tools. Remember to have a large capacity USB to avoid problems in the process..
By having a bootable USB media, we avoid loading with DVDs, external hard drives and more, which is a relief at the level of mobility. TechnoWikis will explain in this tutorial several options that we have to create a USB bootable media in Linux and thus have such a practical option to take an operating system ready for installation everywhere. If you are one of those who use different Operating Systems, you may want to know how to make a USB Boot for Windows 10 from Ubuntu itself and thus be able to install or rescue a Microsoft system.
To keep up, remember to subscribe to our YouTube channel! SUBSCRIBE
1. Create USB Boot using the built-in Linux utility
For this case we are using Ubuntu 18.04 and by default Ubuntu offers us the option to create a bootable USB medium in a simple way thanks to the integrated utility which allows us to create this type of media in a graphic and completely simple way.
Step 1
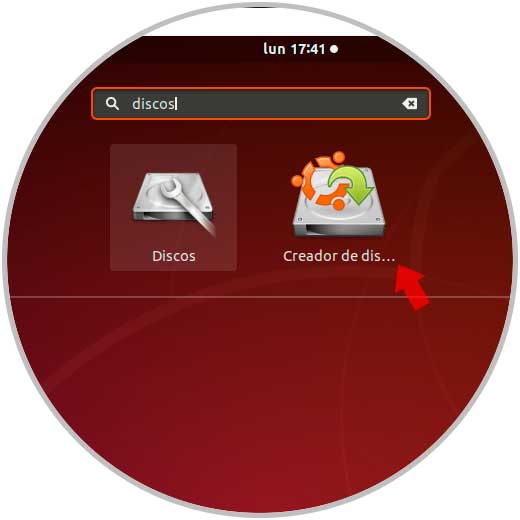
To access it, we go to the search engine and there we enter the term "discs" and select the utility "Disc creator":
Step 2
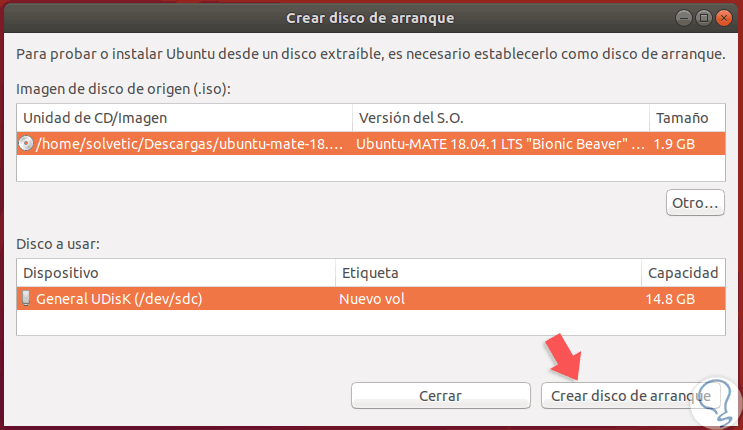
It is required that we enter our administrator password and in the window displayed
Step 3
There we must define the following:
- In the “Source disk image (ISO)†field, we must locate the ISO image of the operating system to be recorded in the USB memory.
- In the "Disk to use" field we select the USB device where the ISO is to be recorded.
Step 4
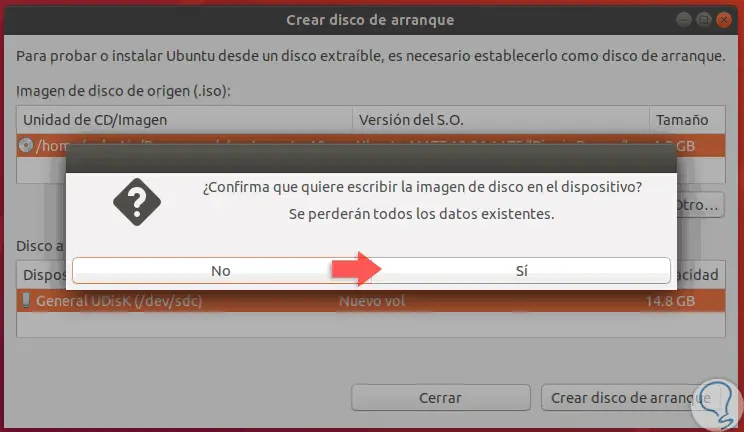
Once this is defined, click on the "Create boot disk" button and the following message will be displayed. Click on the Yes button to start the process of creating the USB media.
2. Create USB Boot using UNetBootin on Linux
UNetBootin is a free application thanks to which it will be possible to create bootable USB drives for Ubuntu and other Linux distributions without having to burn them to a CD.
Step 1
UNetBootin has the following integrated distributions that we can download in real time:
Step 2
In addition to that, when using UNetBootin we have support tools such as:
Step 3
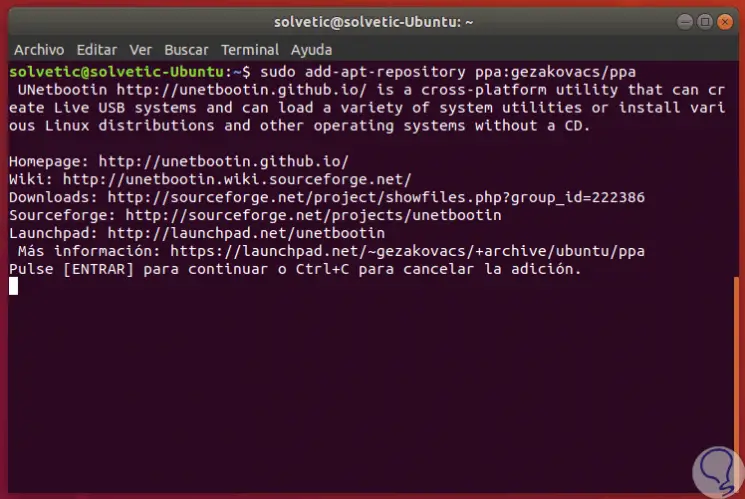
To install UNetBootin we must execute the following command to add the official PPA repository:
sudo add-apt-repository ppa: gezakovacs / ppa
Step 4
Press Enter to add the repository and then update the packages by running:
sudo apt-get update
Step 5
Then we will proceed to the installation of UNetBootin by executing the following command:
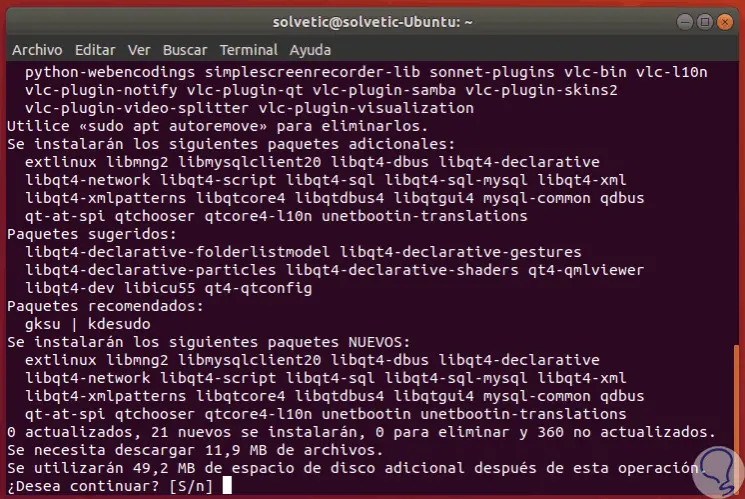
sudo apt-get install unetbootin
Step 6
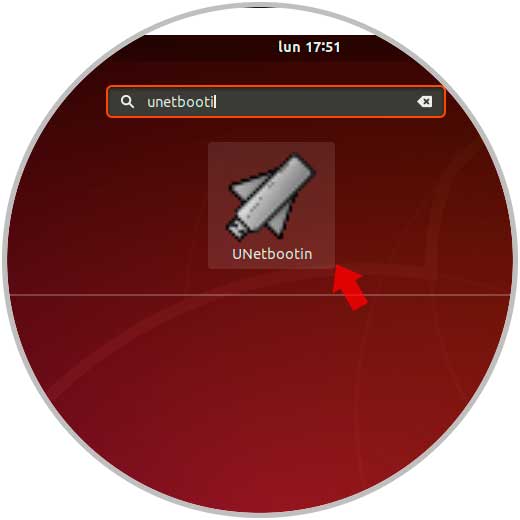
Enter the letter S to confirm the download and installation of UNetBootin. We can access the application directly from the Ubuntu 18 search engine:
Step 7
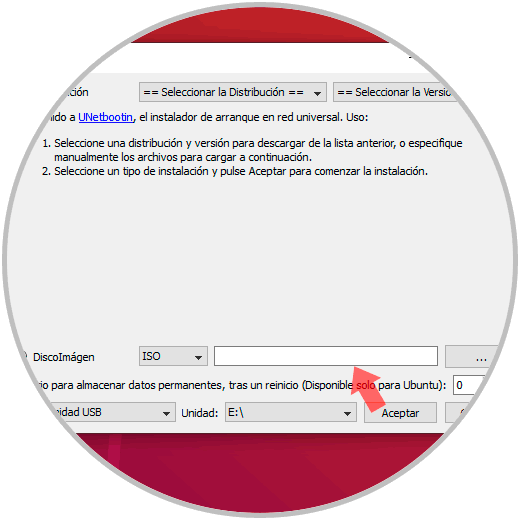
To access it is necessary to use the administrator password and when the window is displayed we will see the following:
Step 8
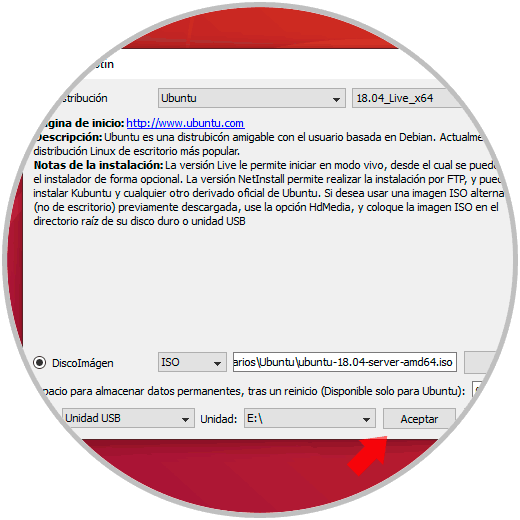
There we have the option to select the distribution to use, as well as its respective version, at the bottom we will select the USB media and locate the ISO image to be recorded. Once this is defined, click on the "Accept" button to start the recording process of the bootable USB media.
3. Convert an ISO image to USB using ddrescue on Linux
The ddrescue utility is a data recovery tool by which any storage device can be cloned and ddrescue is useful for converting ISO files to USB sticks.
Step 1
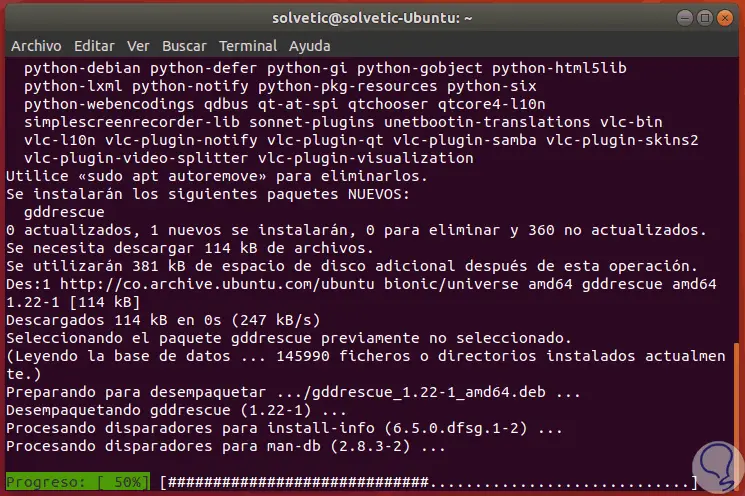
To install ddrescue on Ubuntu 18 we will execute the following commands:
sudo apt update sudo apt install gddrescue
Step 2
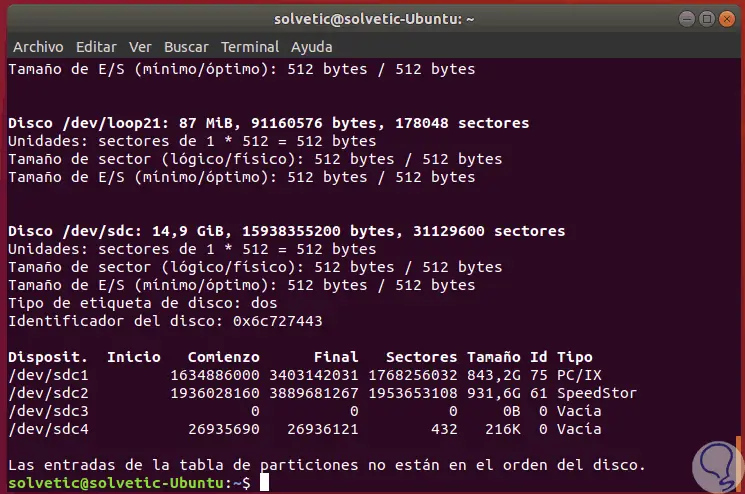
Once installed, we will verify the units connected in Ubuntu by running the following line:
sudo fdisk -l
Step 3
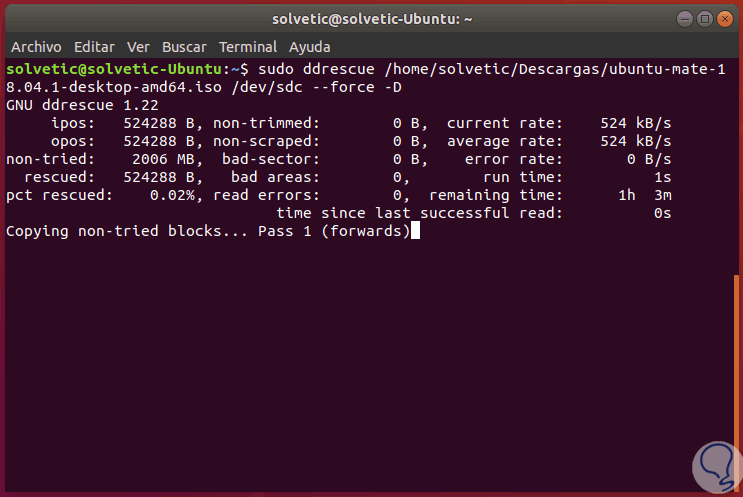
In this case the USB drive is identified as "/ dev / sdc". Now, let's run the following syntax to carry out the conversion process. Once the process is finished we will have our USB medium ready to be used and thus install a new system.
sudo ddrescue Path / Image.iso / dev / â€medium†--force -D
4. Burn a Linux ISO image to USB DD command
An ISO image is an image file that contains complete information of a different nature associated with an operating system. It can be said that it is like a compressed file that stores different types of data. An ISO file is very useful to be able to establish an intact copy of an operating system that we can install later on another computer and make it a perfect backup.
The ISO image file is born to solve problems such as those that may arise with executable files on other media such as a CD or DVD. In addition, another advantage is that the ISO image allows compressing all the information even if it is large. Then we can record this image on a USB and thus have our system easily executable with everything we need for it..
This procedure can be done in several ways, one of them is through the command console in Linux where we can burn the ISO to USB easily.
With any of these options it will be possible to have and enjoy the advantages of using a USB bootable media and thus have a USB boot with which to start Linux cleanly whenever we want.