As a general rule, the last month of the year, apart from being a month in which we share with our family, lends itself to being a month in which we organize many plans for the following year and one of the most practical ways of being able to carry a Specific order of each project is using a calendar ..
Thanks to the calendars it will be possible to establish precise dates for a certain task , dates of meetings, birthdays, events and many more options.
The good thing about all this is that we do not need to have a physical calendar in front of us, since this task can be carried out in Microsoft Word or Microsoft Excel in a simple way and accessed daily to check dates , events, add notes and comments and thus always be aware of each activity to be carried out.
TechnoWikis will explain how to create a calendar in Word or Excel 2016..
To stay up to date, remember to subscribe to our YouTube channel! SUBSCRIBE
1. How to create a calendar in Microsoft Word 2016
Step 1
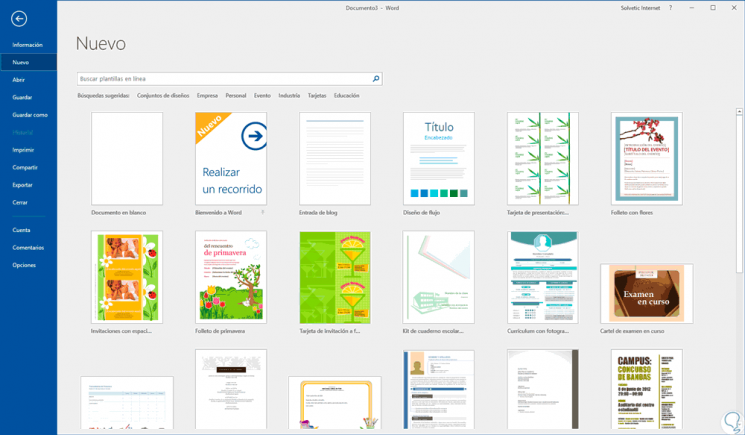
To start this process we open Word 2016 and the following will be displayed:
Step 2
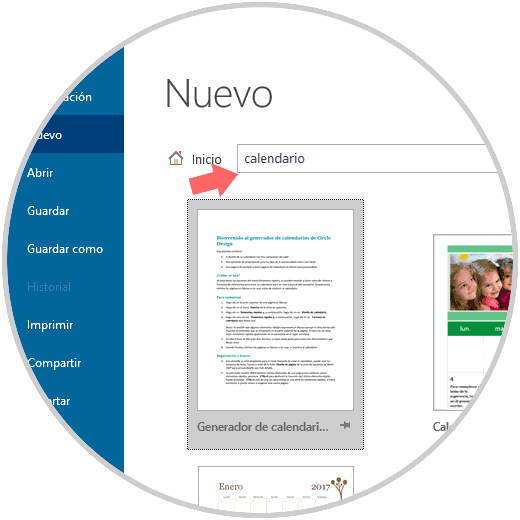
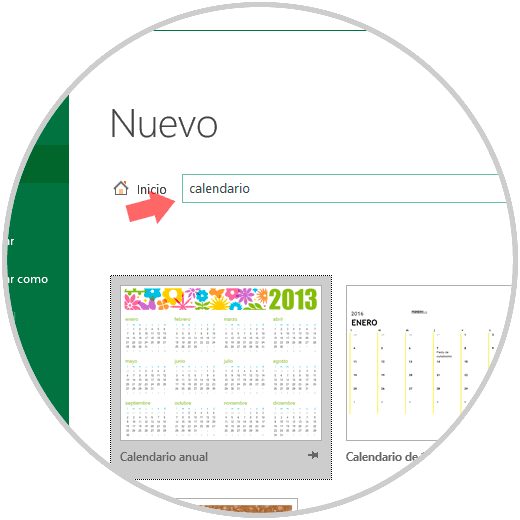
There we will enter the word "calendar" in the search box, press Enter or click on the magnifying glass icon, and all the calendar templates included in Word 2016 will be automatically displayed:
Step 3
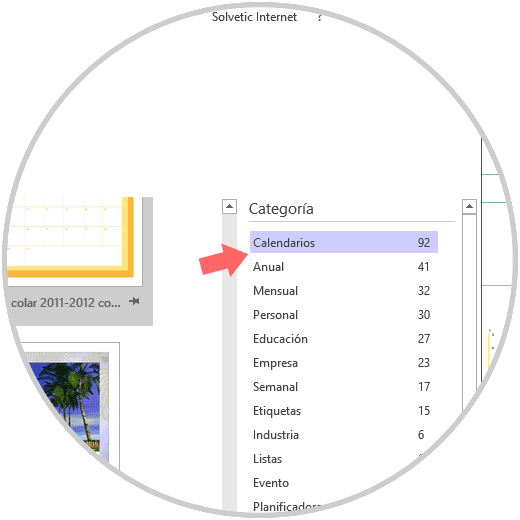
We can see thousands of options and on the right side we can select the desired category. In this case we select the category "Calendars" and click on the desired calendar:
Step 4
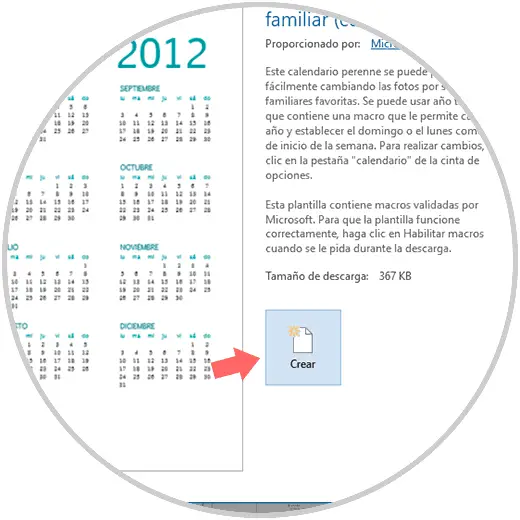
By clicking on this calendar we will see the following:
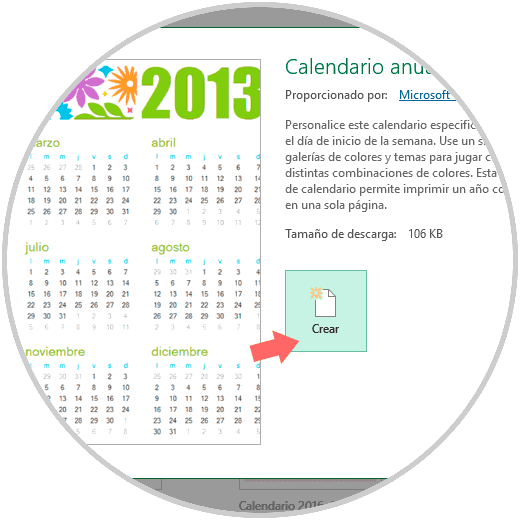
Step 5
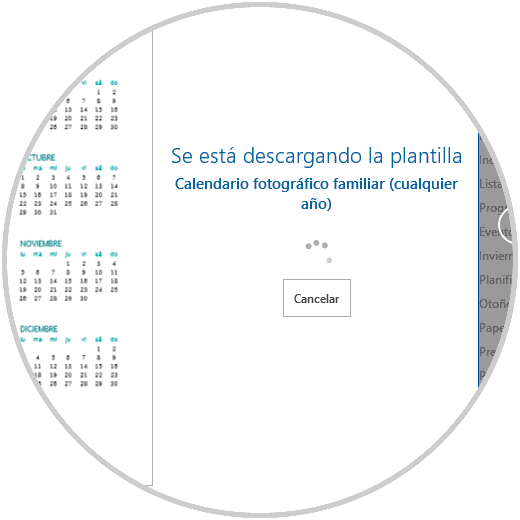
Click on the "Create" button to choose this calendar and start the process of downloading said template:
Step 6
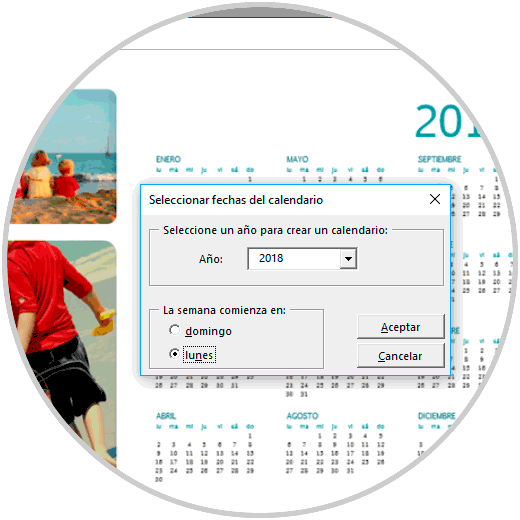
In this case, as an annual calendar has been selected, we will see the following pop-up window as soon as the calendar where we will select has been downloaded:
- The year to display, in this case 2018.
- Define the day with which the week starts, in this case Monday.
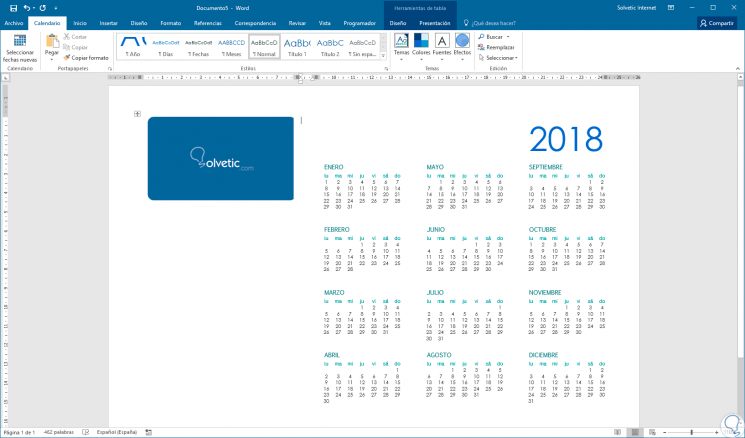
Click on OK and we will see in a new Word document that the calendar has been created successfully.
Step 7
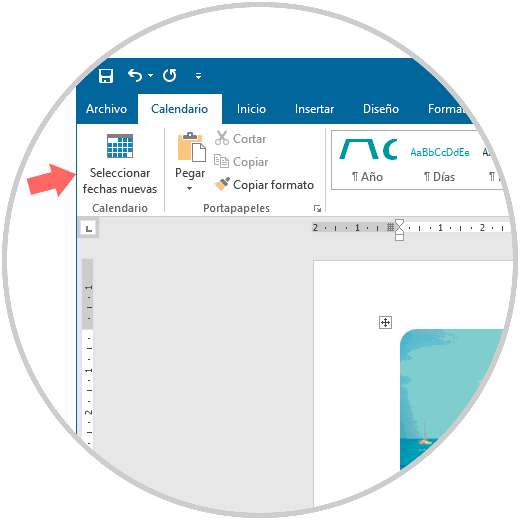
In case you want to change the date or the start day of the week, just go to the “Calendar” menu from the toolbar and click on the “Select new dates” option.
Step 8
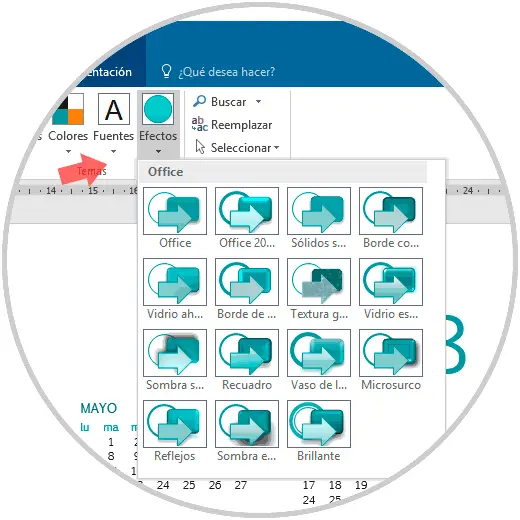
At this point we can proceed to edit the calendar that has been created.
For this we will use the “Calendar” tab which offers us options such as:
- Modify themes, colors, backgrounds, and more.
- Modify its presentation or design.
Step 9
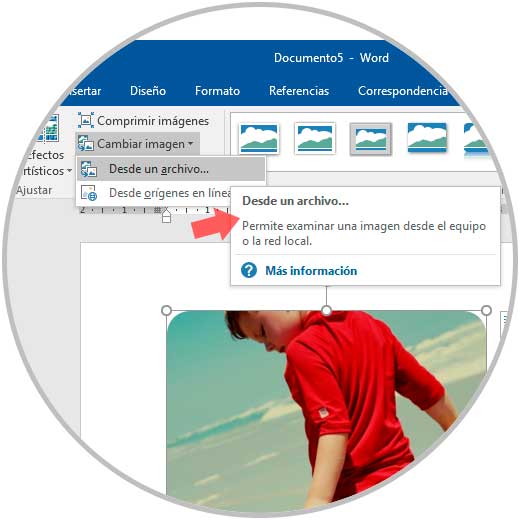
First we will edit the image, in this case we can add more images to the calendar, but at this moment we will define only one.
To do this we delete the first image, the top one, selecting it and pressing the Delete key, and then we select the second image and automatically the “Image tools” menu will be displayed and there we will go to the “Adjust / Change image” group and choose the source where the new image is located:
Step 10
Once the image is selected we can adjust it and apply the changes that we consider necessary in the Word 2016 calendar:
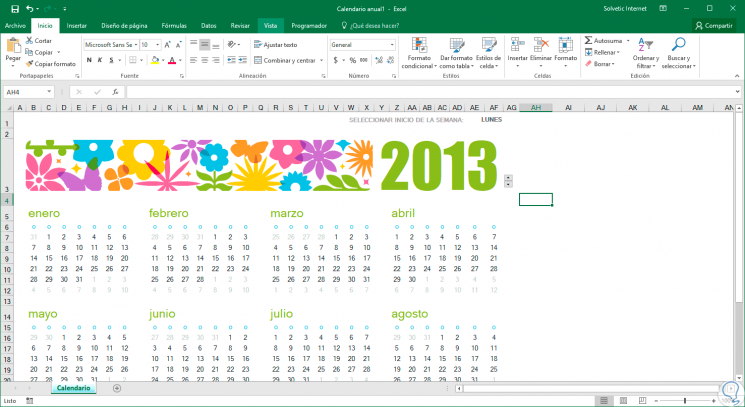
2. How to create a calendar in Microsoft Excel 2016
The process for creating the calendar in Excel 2016c is identical to that of Microsoft Word.
Step 1
To do this, we open Excel 2016 or, if it is already open, go to the "File / New" menu:
Step 2
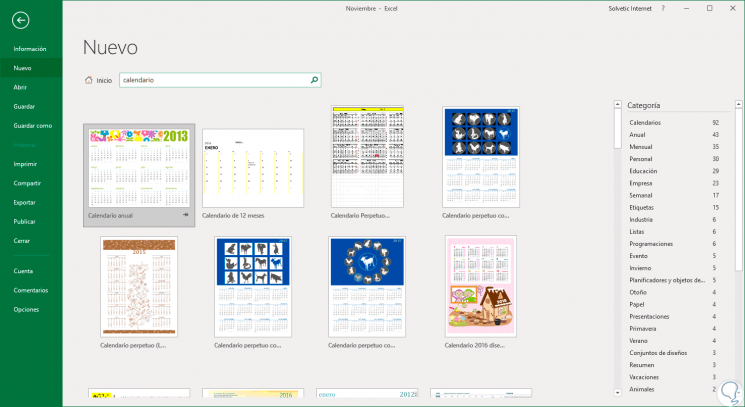
Again we enter the word "calendar" in the search box and select the desired template from the various displayed:
Step 3
Select the desired one and in the displayed window click on the "Create" button to download the respective template:
Step 4
Each calendar has its own configuration, in this case once downloaded we can define the year using the arrows located next to the year to increase or decrease the selected year:
Step 5
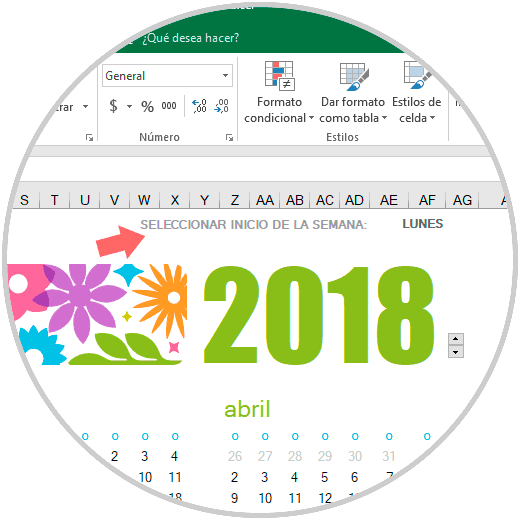
We establish 2018. In the same way we can define the day on which the week starts by selecting the cell "Monday" located on the back and there define the desired day.
Step 6
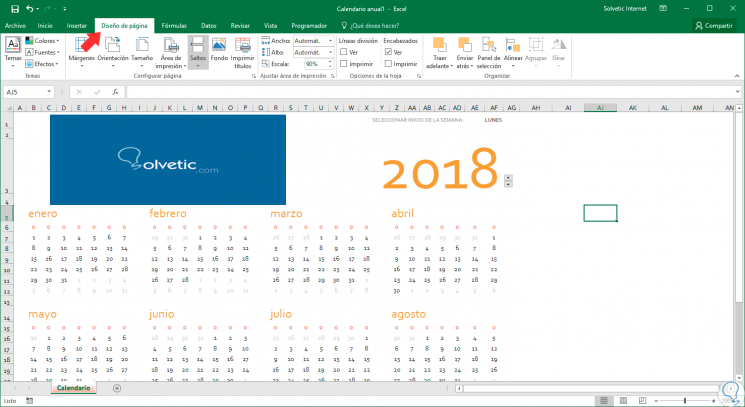
Later we can edit the image of the calendar, its sources or themes and others. Something important to keep in mind in Microsoft Excel is that we will not have the "Calendar" option as in Microsoft Word 2016.
To edit these values we must go to the "Page layout" menu and there choose the desired option..
We see that in this way it is possible to create our calendars in Microsoft Word or Excel 2016 in a simple and completely dynamic way.