A new year begins where we will undoubtedly have hundreds of events, meetings, dates to remember and special days that we should not overlook and what better way to keep these dates in mind than a calendar on our own team. This is ideal when you don't want to hang up the classic calendars either due to lack of space or simply because we want to be in line with technology..
PowerPoint is one of the most suitable applications to achieve this goal due to its versatility and ease of design, creation and effects. TechnoWikis today will teach you how to create a personalized calendar in PowerPoint and thus be attentive to our daily commitments every day.
1. Create calendar in PowerPoint Online
Step 1
The first option that Microsoft offers us is to create this calendar directly from the online PowerPoint application that we can access in the following link. There we must log in with our Hotmail or Outlook account to access.
PowerPoint Online
Step 2
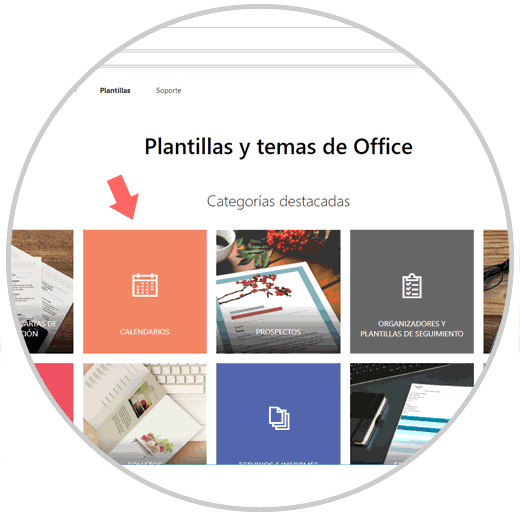
The first step to take is to go to the following Microsoft link and from there select the "Calendars" option:
Office templates
Step 3
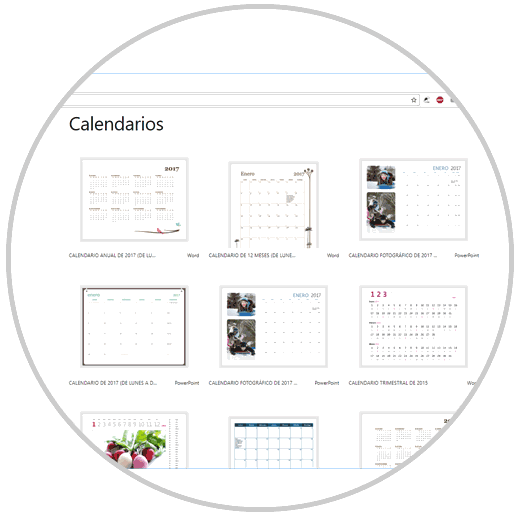
There we can see multiple options for Microsoft PowerPoint, Excel and Word:
Step 4
By selecting the desired template we can download it to the device locally, or edit it directly in the browser:

Step 5
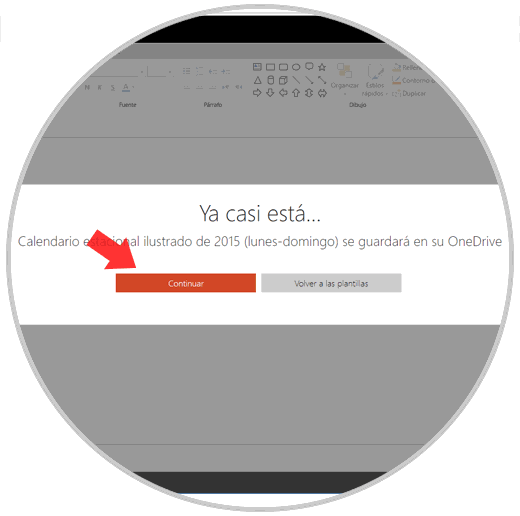
To use this template in PowerPoint Online, click on the "Edit" button in the browser and we will see the following message. Click on "Continue"
Step 6
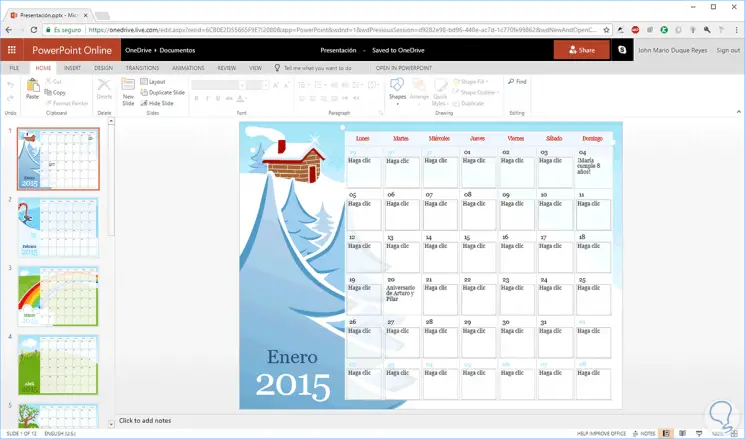
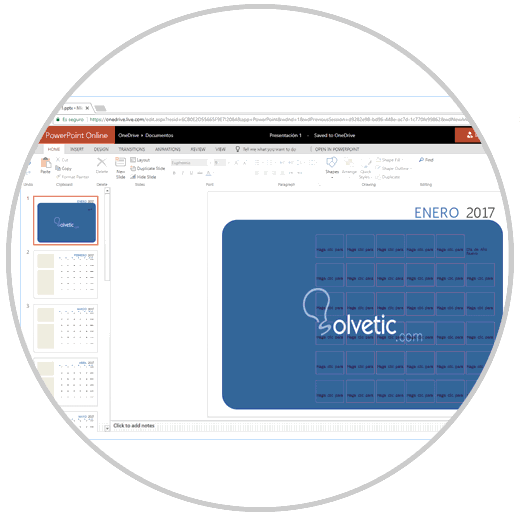
We will see the following and this means that our calendar would already be done.
2. Insert images into PowerPoint Online calendar
At this point we are ready to begin the process of editing our calendar and obviously one of the initial steps is to add our custom images. It is important to remember that based on the selected template you may or may not add images.
Step 1
To add our image we will right click on the image to be edited and select the "Change Picture" option.
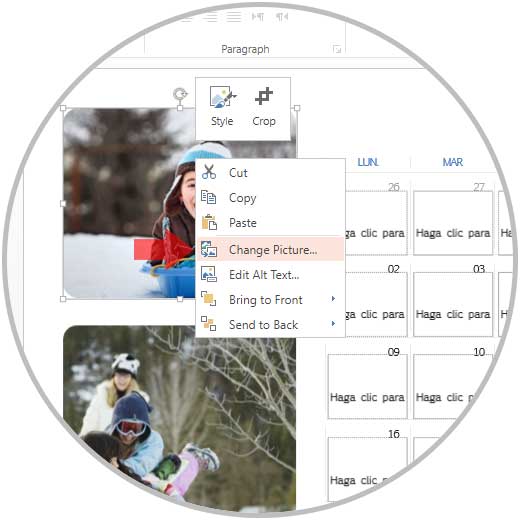
Note
It is important to remember that the size and style of the image will be preserved, including its effects. The images that we upload should not exceed 6 MB in weight.
Step 2
By inserting the image we can delete the others or adjust their size from the corners as we normally do with the images:
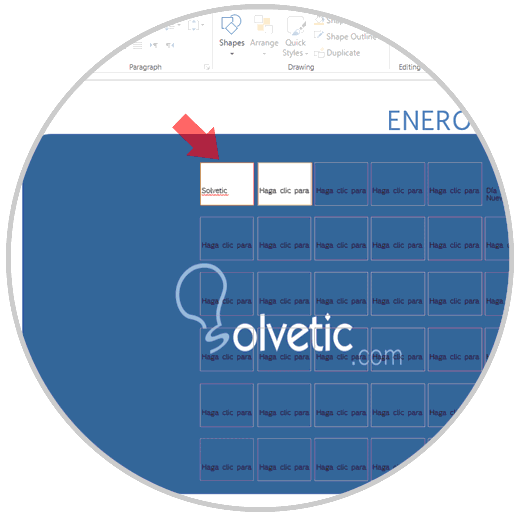
3. Add events to PowerPoint Online calendar
Step 1
By default the most important holidays will already appear printed in the calendar scheme, but to add a new event just click on the respective day and add the necessary text:
Step 2
A point to keep in mind is that when selecting any of these boxes the "Format" tab will be activated where we can edit the field with a new style, new colors, etc., and thus highlight that day in a better way:

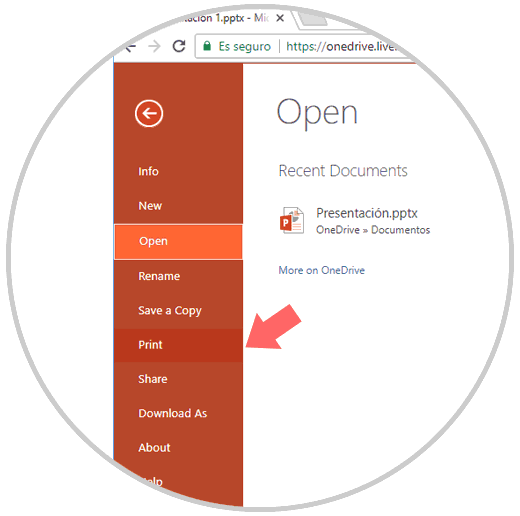
4. Print or export the PowerPoint Online calendar
Once we have set up a special month, or the whole year, we can print the calendar or export it to another format for later use.
Step 1
To do this we will click on the File / Print path:
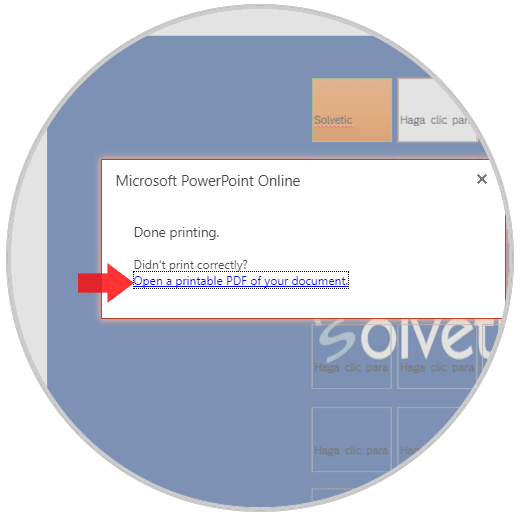
Step 2
Clicking there will automatically become a PDF:
Note
This calendar will be automatically saved in our OneDrive account and from there we can download it in PPTX format or export it as a PDF or ODP file.
5. Create calendar in the PowerPoint application
The next option is to create the calendar directly in the PowerPoint application and for this we will do the following:
Step 1
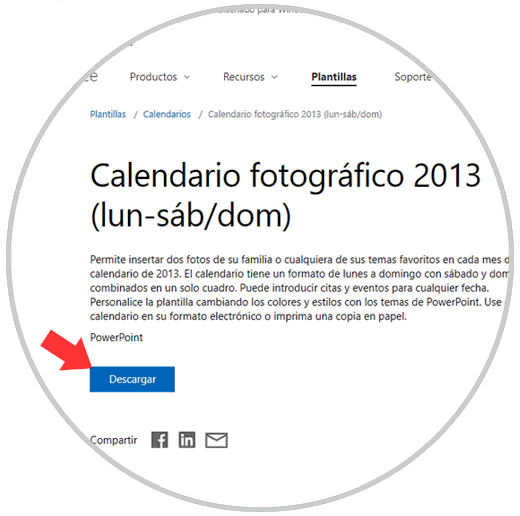
First we will go to the following route where we click on the "Calendars" option:
Office templates
Step 2
There we must select the desired template for PowerPoint and we will see the following. There we click on the "Download" button so that it is stored locally on the device and can be opened directly with the application.
Step 3
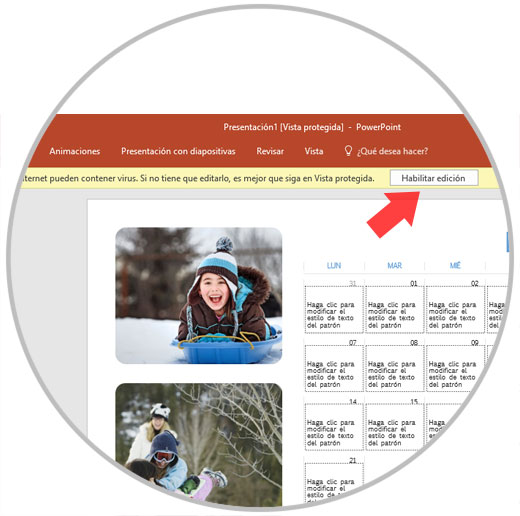
We proceed to double click on the downloaded file and for security Microsoft will display the following message: There we click on the "Enable editing" button to have the necessary editing permissions.
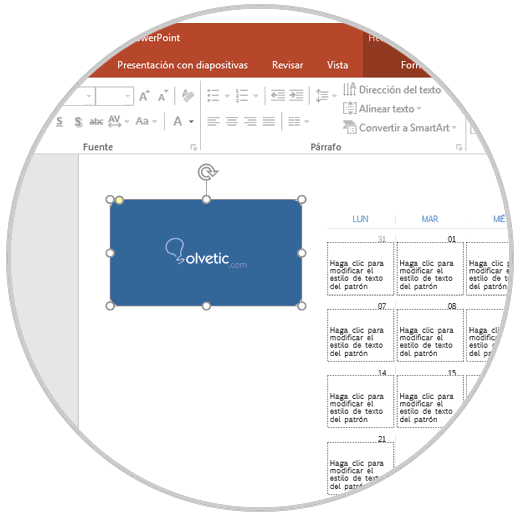
6. Add new images to calendar in PowerPoint application
Step 1
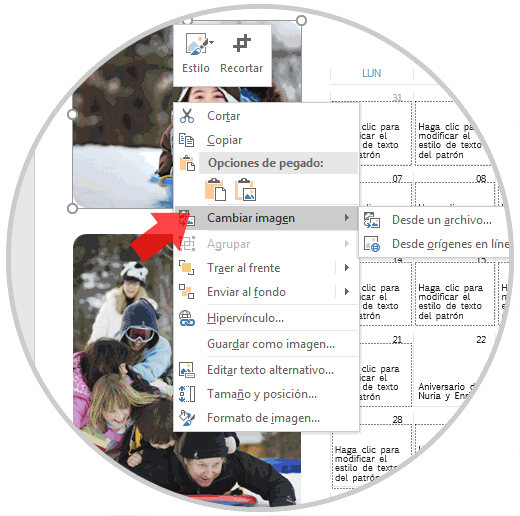
To edit the images, just right-click on one of them and select the option "Change image" and we have the option to upload the image locally (from a file) or from the network (from online sources):
Step 2
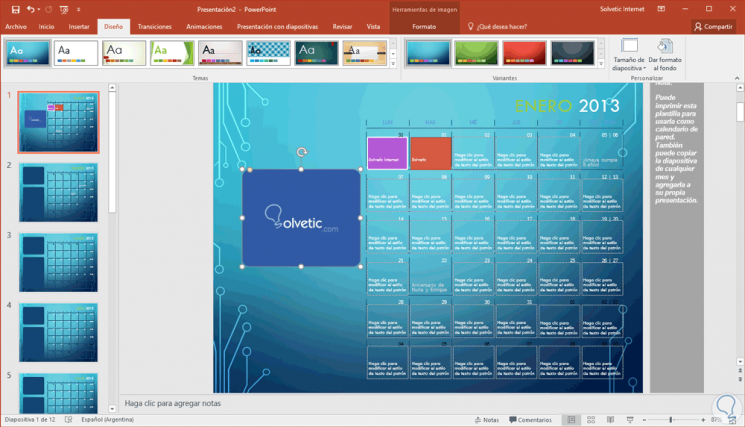
Once we upload the desired image we can see that the pointers are activated in the corners where we can adjust the size of the image as necessary. We can right click on the image and select the Send to background option so that this image is set as the calendar background.
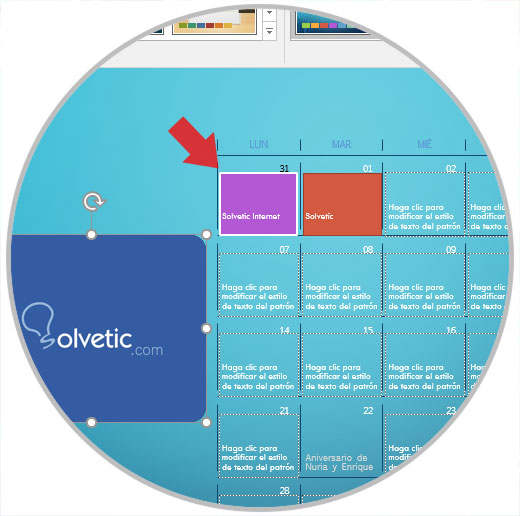
Step 3
Finally we can add the special events by clicking on each box and from the menu "Format apply" the desired designs and even adjust the default template. The other details can be adjusted based on each one's own tastes.
Note
We must keep in mind the year to download directly in the link indicated above of the Office templates.
In this way we can create our own calendars with our own styles and in a unique way..