The developers of the Windows operating system have added special functionalities to improve the end user experience. From Windows 7 to the latest editions of Windows 10, we have the availability of a tool called Magnifier which allows us to enlarge specific places on the screen..
This is ideal if we are working on some electronics, programming, etc. project, where it is required to be meticulous with the details or if we are simply observing some multimedia element and want to specifically see a point of said object.
We will not find the magnifying glass in the edition of Windows 7 Starter, currently discontinued, but in all other editions of Windows. TechnoWikis will do an analysis on how to open and use the magnifying glass in Windows 7 and Windows 10..
1. How to open the magnifying glass in Windows 10
To open this utility in Windows 10 we have some very practical options.
Option 1
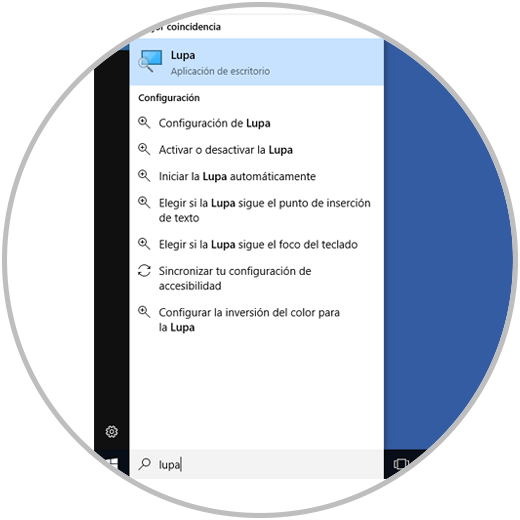
First of all, we can access the Magnifier tool by entering its name in the Windows 10 search box and select the respective option there:
Option 2
The second alternative that Windows 10 offers us is using the Configuration utility, for this we go to the Start / Configuration path and we will see the following:
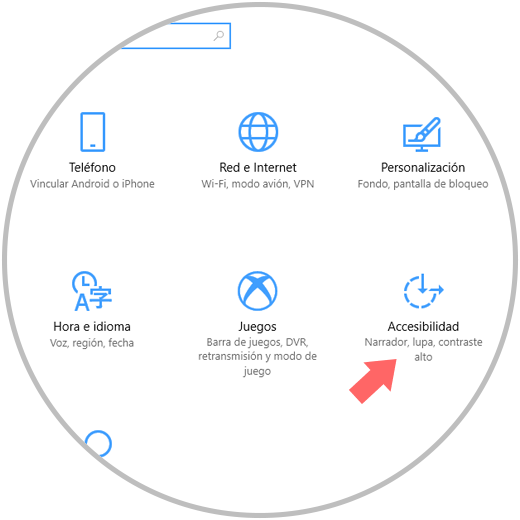
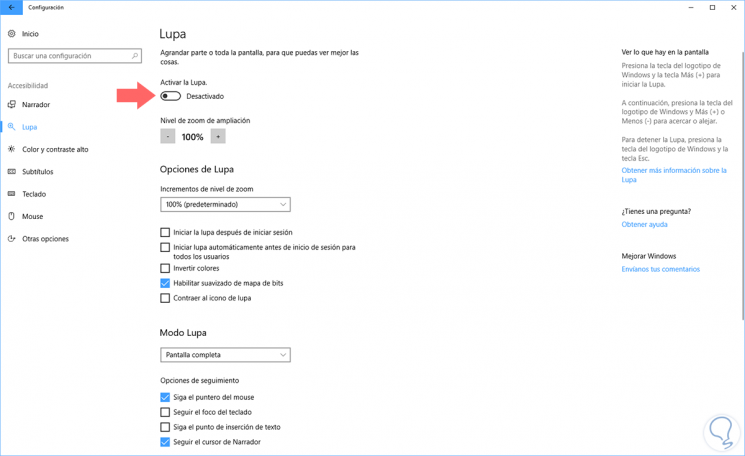
There we select the Accessibility tab and in the displayed window we go to the Magnifier section and we must click on the switch to activate the magnifying glass so that it is started:
Option 3
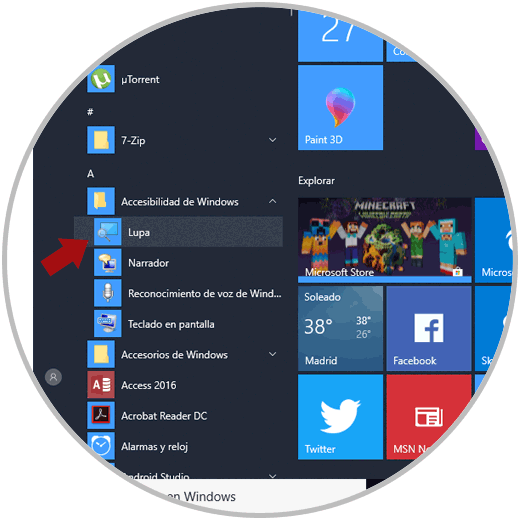
In addition to this we can see various options for configuring the magnifying glass from this section. The third option available to access the magnifying glass is on the route:
Option 4
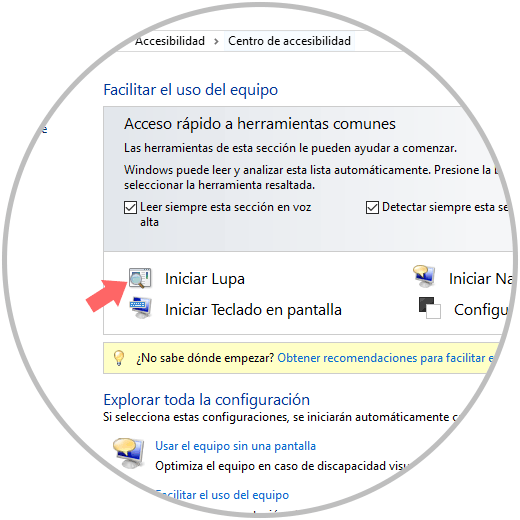
The last option is using the control panel in the following path.
- There we click on Start magnifying glass.
2. How to open the magnifying glass in Windows 7
Some methods to start the magnifying glass tool in Windows 7 are as follows.
Option 1
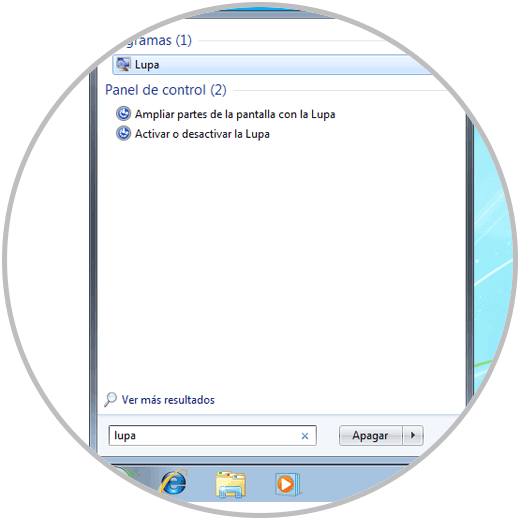
First, we can click on the Start button and in the search box enter the word magnifying glass and select the correct option:
Option 2
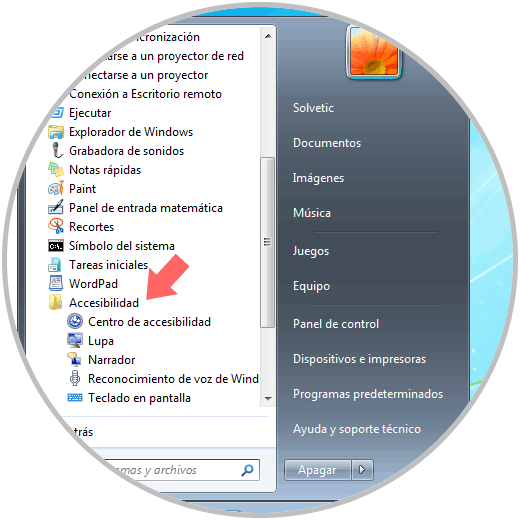
The second available alternative is on the route:
There we select the magnifying glass tool.
Option 3
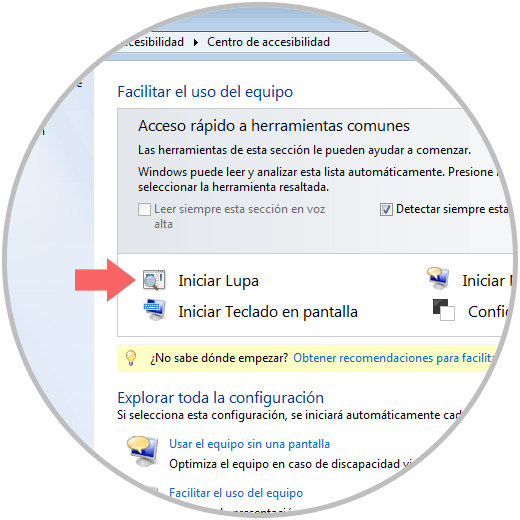
The other option that Windows 7 offers us is on the road.
With these alternatives we can easily access the magnifying glass in Windows..
3. How to use the magnifying glass tool Windows 10, 8, 7
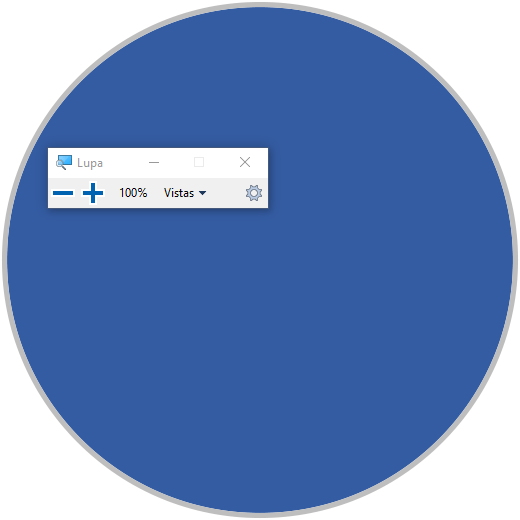
When we open the magnifying glass application in Windows 10 we will see the following:
In the case of Windows 7, the augmented view process will start automatically:
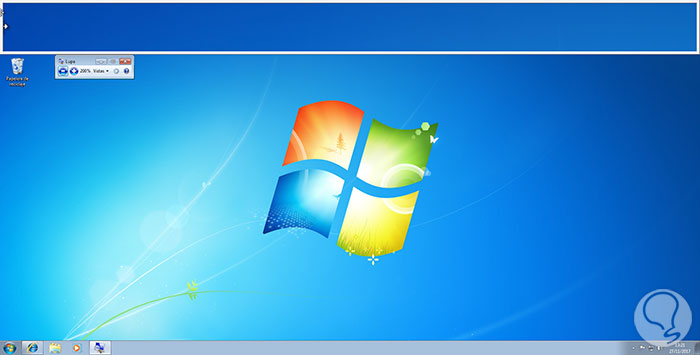
The magnifying glass tool offers us various options for use and configuration. First, we can see the default zoom level of the magnifying glass which is 100% in Windows 10 or 200% in Windows 7. We can increase or decrease this level by pressing the + or - signs as necessary.
In the Views option, the magnifying glass offers us three options:
Fullscreen
This option expands the entire available screen and it will only be possible to scroll within it, but without seeing all its general content.
Lens
This option makes us feel the sensation of using a giant magnifying glass which is administered through the mouse pointer.
Docked
This view is only available for the desktop, with it, the magnifying glass is anchored to the screen and as we move over the screen, parts of it will be enlarged in the docking area but the main part of the screen will be intact.
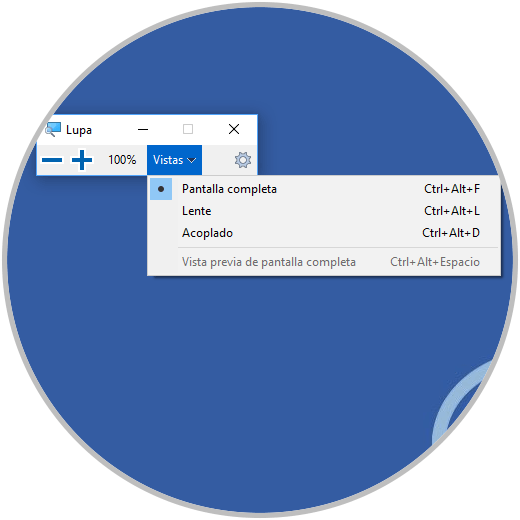
Note that to access this type of views we can use a series of key combinations.

4. How to configure the magnifying glass Windows 10, 8, 7
To access the magnifying glass settings, we must click on the gear icon and we will access the following options:
Windows 10
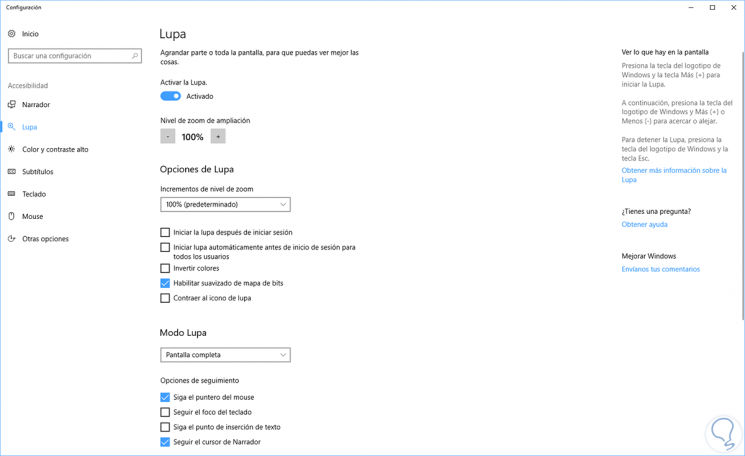
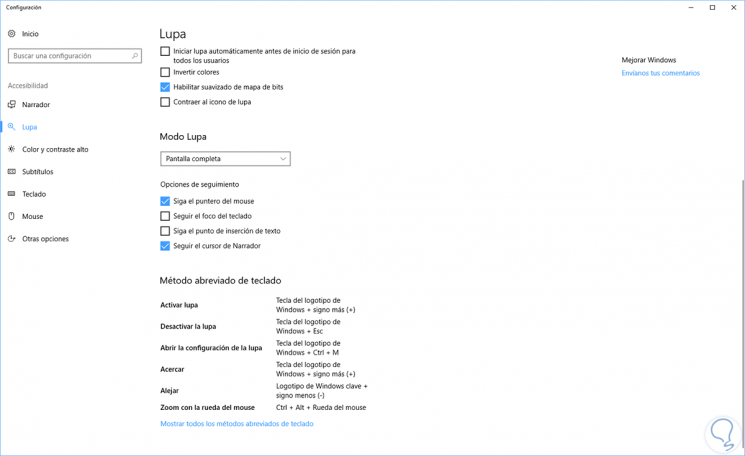
In Windows 10 we will access the general configuration with many more options:
Note
Another way to access the magnifying glass settings in Windows 10 is by using the Windows + Ctrl + M key combination.
There we have options like:
Magnification zoom level
Through this option we can determine the magnification percentage of the magnifying glass in the system using the + or - buttons.
Zoom level increments
This option allows us to define the percentage with which the magnifying glass zooms in or out.
Start Magnifier after login
By checking this box, the magnifying glass will be started automatically after logging into the operating system.
Automatically start the Magnifier before login for all users
Using this option the magnifying glass will be activated for all users before the session starts on the computer.
Invert colors
By activating this box, the screen colors are inverted, this is practical only in some cases where this process increases the readability of the selected text.
Enable bitmap smoothing
This option allows the borders of the enlarged text to have a smooth appearance when zooming.
Collapse magnifying glass icon
Activating this option collapses the Magnifier toolbar to a magnifying glass icon. To show the Magnifier toolbar, we must select the magnifying glass icon.
Magnifier mode
In this section it will be possible to select the default view that the magnifying glass will use when it is executed.
Tracking options
Thanks to these options, we can choose if the focus of the magnifying glass is still on the mouse pointer, the keyboard focus, the text insertion point or the Narrator cursor, this can be defined as necessary.
At the bottom of the settings, we can see in detail the various keyboard shortcuts to use the magnifying glass in Windows 10:
We have seen how the magnifying glass is an ally for subjects where the eye must be strained more and thus we will have precise control over each element of the screen.