One of the tools that have always accompanied us in the different editions of Windows operating systems has been the notepad or Notepad which allows us to store different notes or reminders in simple format facilitating interaction with it, but without many editing options..
With the Windows 10 notepad it is possible to execute a quick edition of various text elements and something important for us as users is that since the 17666 compilation, the Microsoft development group has given a new approach to the notepad adding various functionalities and features such as:
- Search and / or envelope replacement since now in the option to search or replace in the search dialog box, the notebook will remember the values ​​previously entered and the status of the check boxes and these will automatically fill them in next time The search dialog box opens.
- Text zoom, we now have a new menu option in the View / Zoom path in order to change the zoom level and display the current zoom level in the status bar., It is also possible to use the Ctrl + more keys (+), Ctrl + Less (-) and Ctrl + the mouse wheel to zoom in and out or use Ctrl + 0 to restore the zoom level to the default values.
- Line numbers with word setting, this function allows you to display line and column numbers when word setting is enabled in the notebook.
features
Some other features are:
- Performance improvements when opening large files in Notepad
- Support Ctrl + Backspace to delete the previous word
- The arrow keys now select the text first and then move the cursor
- When you save a file in notepad, the line and column number is no longer reset to 1
- Notepad now correctly shows lines that do not fit completely on the screen
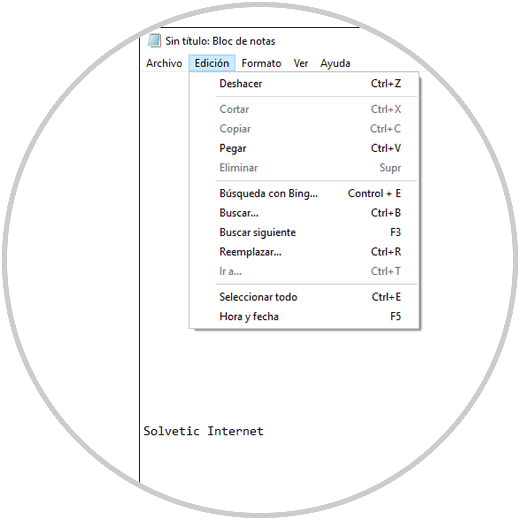
TechnoWikis will explain various ways to access the notebook in Windows 10, similar processes for Windows 8 and Windows 7, and take full advantage of these new features.
1. How to access the notebook using Windows 10 file explorer
The file explorer, in Windows 10, or the Windows explorer, in Windows 7 and 8, is one of the first practical options to access the system notebook.
For this case we will use Windows 10, so when accessing the file browser we have two options to access the notebook, these options are:
Step 1
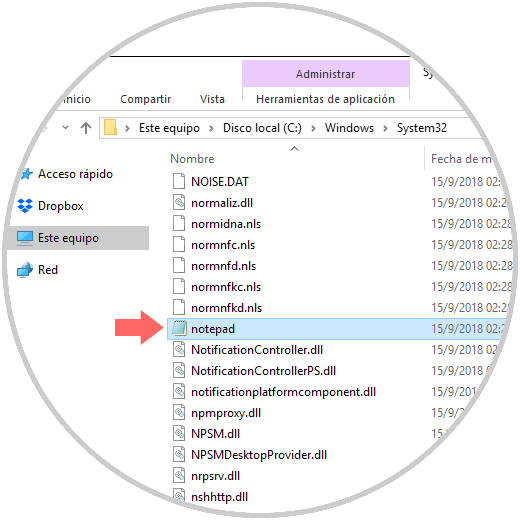
First, we must go to the next route.
C: \ Windows \ System32
There we locate the Notepad executable and double click on it:
Step 2
As a second alternative we can access a file already created with the .txt (text) format, and double click on it to open it with the notebook:
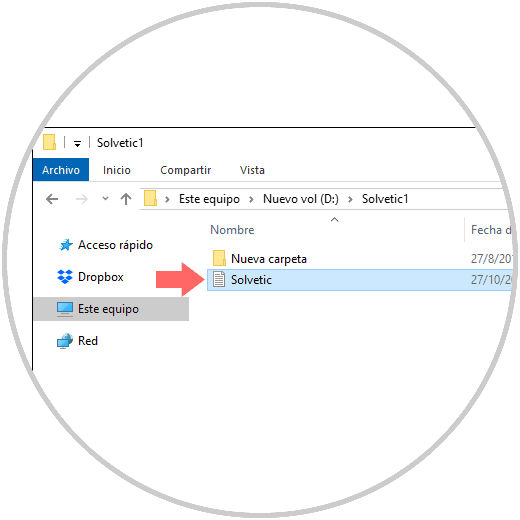
It is important to clarify that the notebook must be configured as the default application to open this type of files, otherwise we must right click on the file and select the option Open with / Notepad..
2. How to open the notebook using the Windows 10 search box
This option applies only to Windows 10 because in Windows 7 and 8 we must use the search bar in the Start menu.
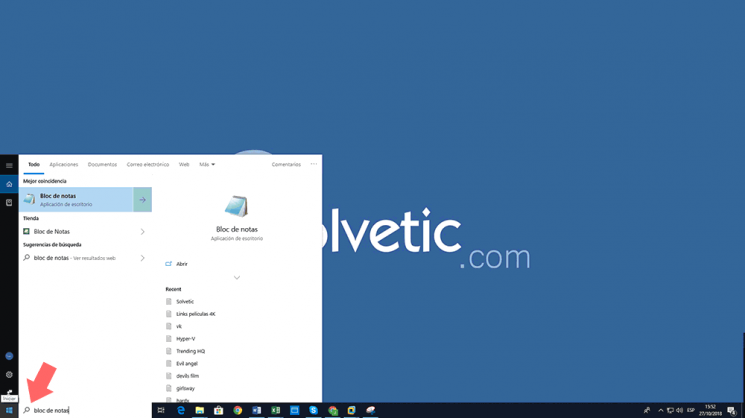
To make use of this option we must enter the term notepad or notepad in the search box and there select the respective utility:
3. How to access the notebook using the Windows 10 Start menu
All applications integrated and installed on Windows have access in the Start menu, so this is a useful method to access the notebook in the system.
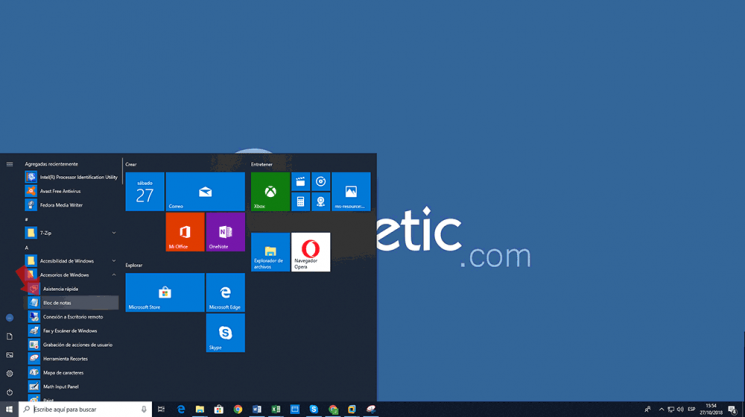
To use this method, we will go to the Start menu and there we go to the Windows Accessories section and there we click on the notebook:
4. How to access the notebook using Windows 10 shortcut
It is undoubtedly one of the most practical methods since when creating a shortcut, just double click on it to access the application.
Step 1
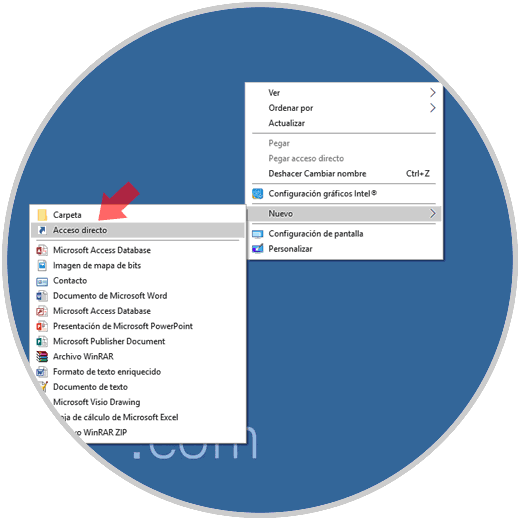
To create this shortcut we will right-click somewhere free on the desktop and there we select the New / Shortcut option:
Step 2
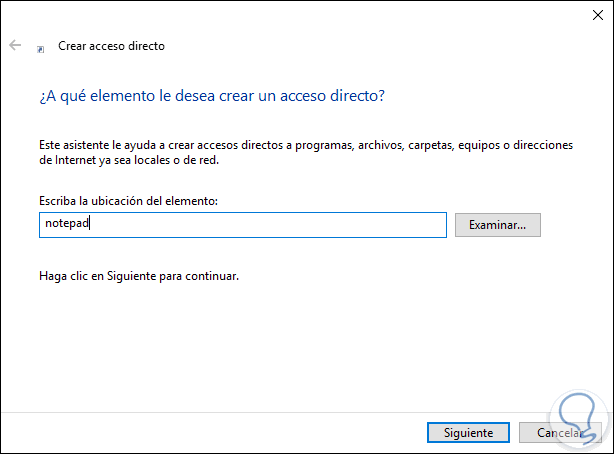
In the window displayed enter the term notepad:
Step 3
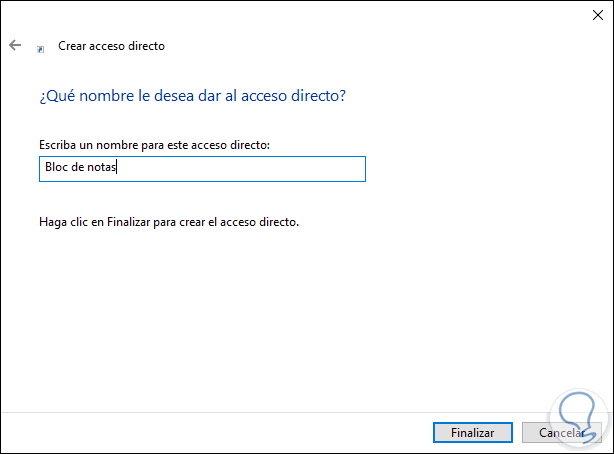
Click on Next and assign a name to this shortcut:
Step 4
Click on Finish to complete the process and see the shortcut on the desktop that can be accessed by double clicking or right clicking / Open:
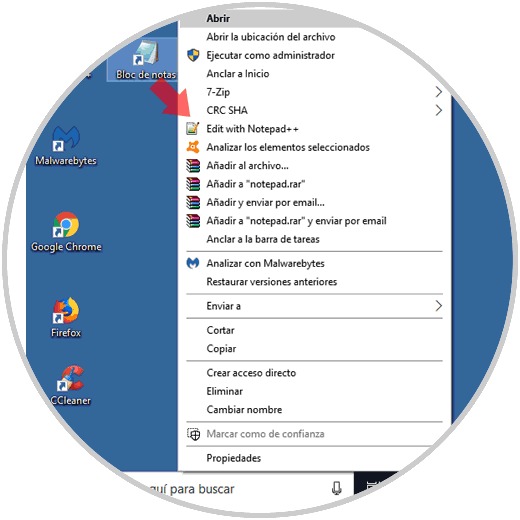
5. How to pin the notebook to the Windows 10 taskbar
This is another of the practical options that we have since it will be possible to anchor the access to the notebook directly in the taskbar and then just click on it to open the application.
To achieve this, we must find the notebook in the search box and then right click on it and select the option Anchor to the taskbar:
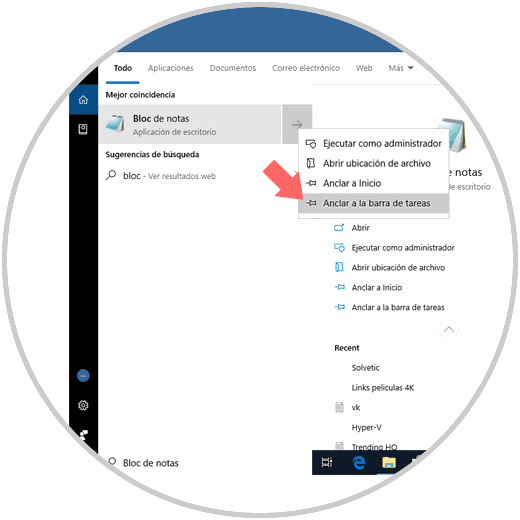
This same process applies in Windows 7 and Windows 8.
6. How to access the notebook using the command prompt or Windows PowerShell
These two are system command console thanks to which it is possible to execute numerous functions and management processes in Windows but which are also useful for accessing the notebook.
Step 1
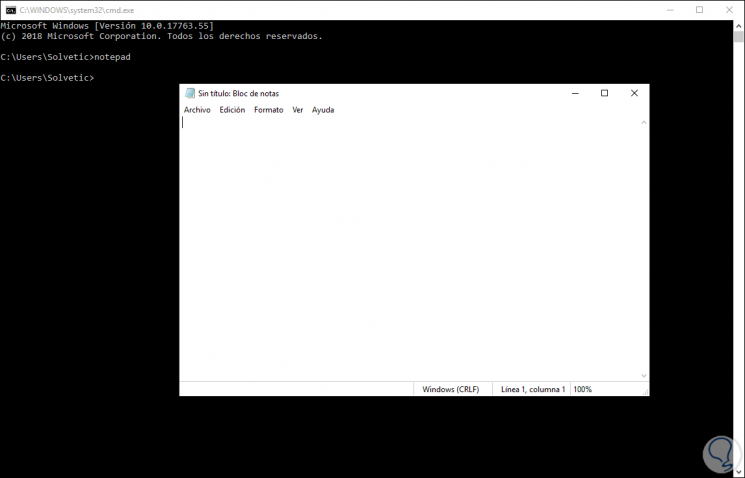
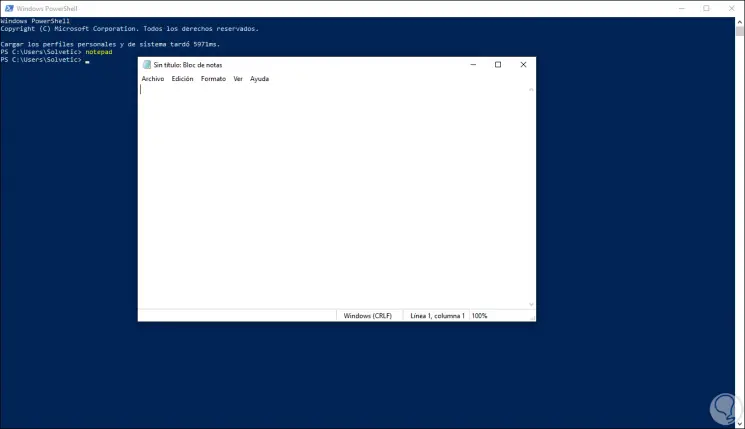
To make use of these options, we must access the command prompt or Windows PowerShell and run the following line:
notepad
Step 2
In the case of the command prompt:
Step 3
If we use Windows PowerShell:
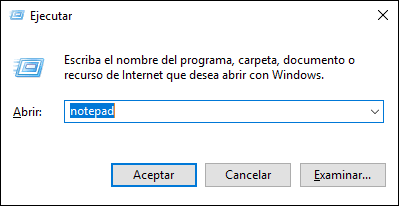
7. How to access the notebook using the Run Windows 10 command
The Execute command allows us to carry out access to applications and files in a simple way, for this we must use the combination of Windows + R keys and in the displayed window execute the following:
notepad
8. How to access the notebook using Windows 10 Task Manager
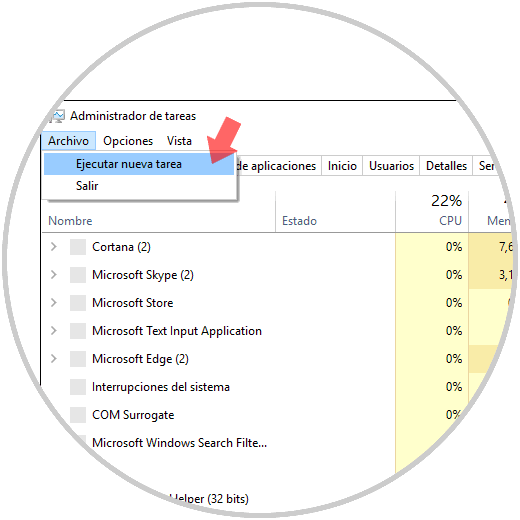
The Task Manager is one of the tools integrated in Windows through which it is possible to access detailed information on the performance of the hardware components, but also to analyze in detail services, processes and applications opened in real time.
Step 1
To access the Task Manager we can right click on the taskbar and select the Task Manager option and then go to the File menu and select the option Execute new task:
Step 2
In the pop-up window, enter notepad:
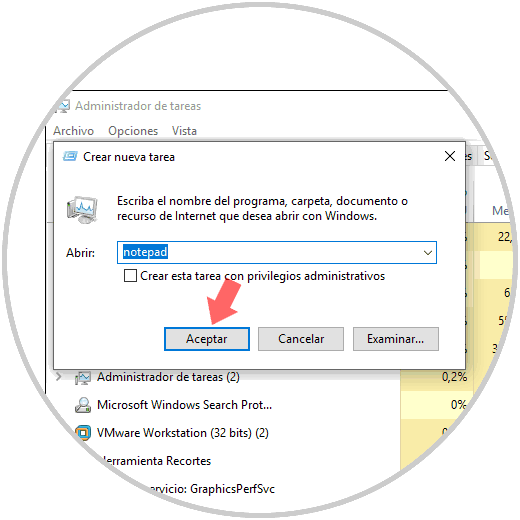
Click Accept to access the application..
In this way, we have seen the various options available to access the notebook in Windows and thus be able to perform the necessary work on it.