When managing various computers in a company, either in the support or IT management area, it is normal to need to go to each machine and perform a specific task such as installing a program, updating a driver or solving a software or hardware error..
Another common task is to connect to these computers to change, delete or add registry keys and values. What many do not know, until today, is that Windows offers us a functionality called remote registry services , which allows us to connect directly to the registry structures on another computer using regedit.
Today TechnoWikis will explain how to complete this process.
v To stay up to date, remember to subscribe to our YouTube channel! SUBSCRIBE
1. Requirements to use the remote registry service in Windows 10, 8, 7
To use Remote Registry, we basically need administrator access on both computers.
For this service to be used correctly we will need the following:
- The computer to which we are connecting must have a username and password. The password cannot be blank.
- Both computers need to have remote administration enabled in the firewall.
- Both computers must have the Remote Registry service running.
Step 1
The first requirement is simple to carry out, for this we can go to the “Start / Configuration / Accounts” path and set a password there.
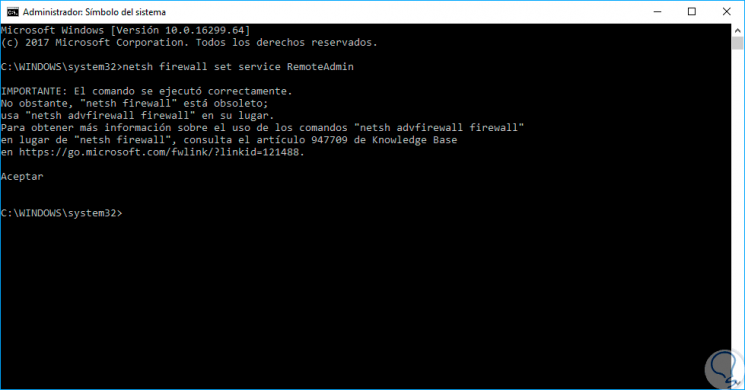
The second requirement is to enable remote administration in the Windows firewall, for this, we can go to the command prompt as administrators and there execute the following line:
netsh firewall set service RemoteAdmin
Step 2
As we see, a warning message appears stating that the command was successful, but the netsh firewall command is deprecated. We will receive this message in Windows 7, Windows 8 or Windows 10. It is not a problem, as long as it completes correctly. This command must be run on both machines.
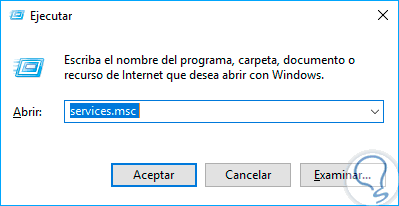
To enable the Remote Registry service we will use the following key combination and in the displayed window we will execute the command services.msc:
+ R
Step 3
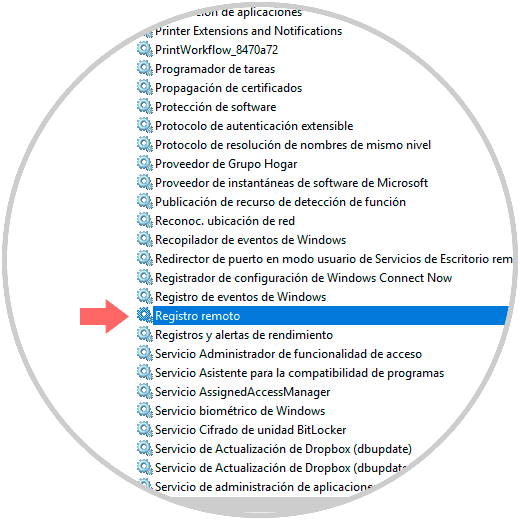
Press Enter or Accept. In the displayed window we will go to the service called "Remote registration" and we can see that it is disabled by default:
Step 4
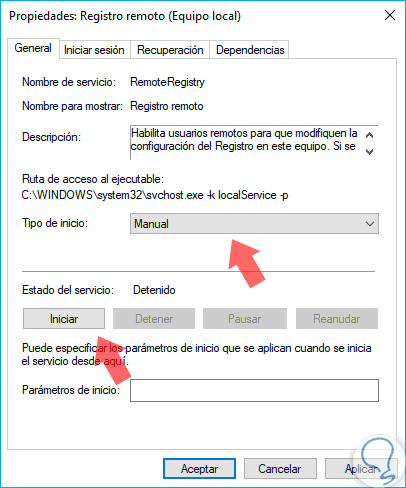
There we will right click on this service and select the "Properties" option, then, in the "Startup type" field, select the "Manual" option and click on "Start": Click on Apply and OK to save the changes. We will execute this process on both computers.
2. How to connect to the registry structure in Windows 10, 8, 7
Step 1
Once we complete this process, we will access the registry editor on the source machine using the following key combination and executing the
regedit command
.
+ R
regedit
Step 2
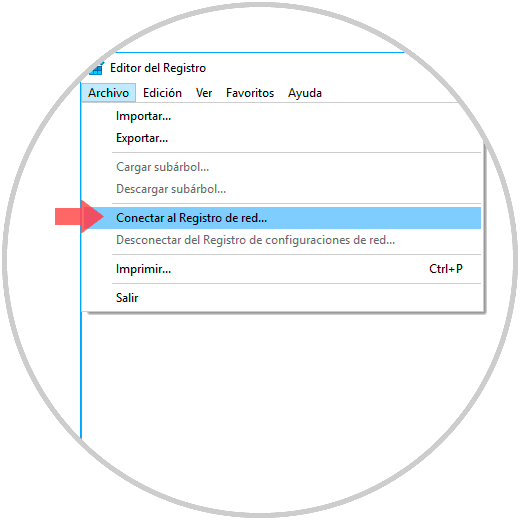
Once there, we go to the "File" menu and there we select the "Connect to the network registry" option:
Step 3
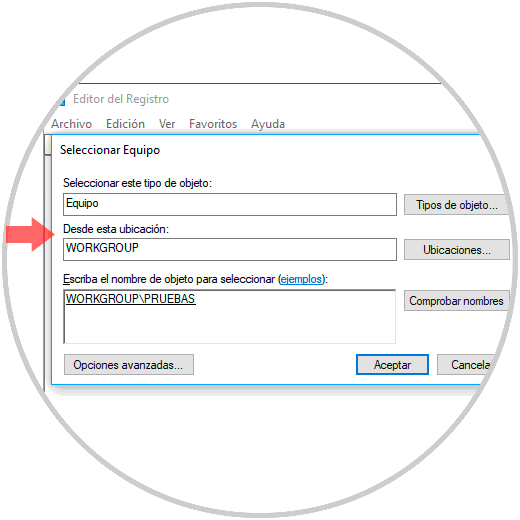
In the displayed window we must enter the NETBIOS name of the equipment to which we will connect.
Note
We can quickly perform a search for all computers on the network by clicking "Advanced Options" and then Search Now. If the computer you are connecting to has a long name, you will need to determine the NETBIOS name for the computer.
Step 4
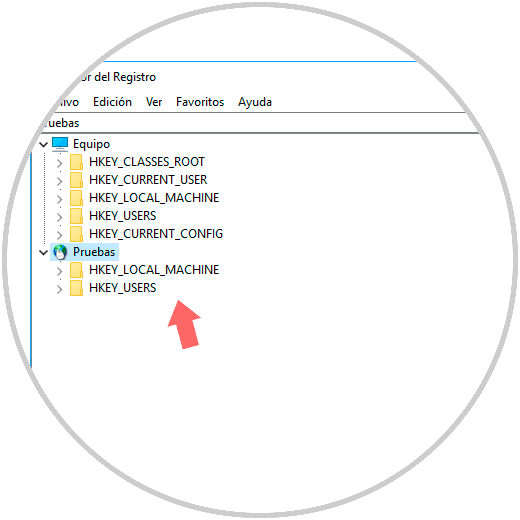
Once the name is defined, click on "Accept" and we will access the registry editor of the remote equipment:
Step 5
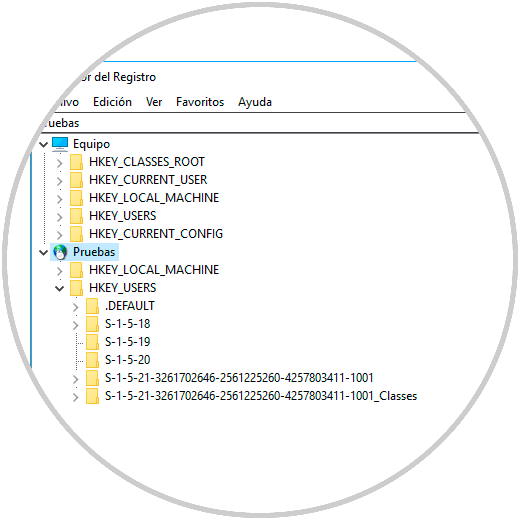
We can check that at the top are the records of the local team and below we have the name of the remote team with their respective records. In this simple way it will be possible to remotely access and edit keys without having to physically go to the computer.
