Windows 10 integrates by default a set of rules to manage energy in a special way. This is to prevent some peripherals or devices from wearing out, for example, with excessive use of hard drives or by keeping the screen active. These and other reasons may be the cause of future failures or increases in energy bills..
In this sense, the power options of the operating system come into play , within which we find the option to suspend the equipment if in some amount of time (minutes or hours) some activity is not registered. This allows that automatically when no action is detected by our Windows 10, turn off the disks and suspend the monitor to conserve its useful life.
This is functional, but for many users it can be a problem since some processes or tasks require the system to be active and we cannot always be in front of the PC. In this case, the most logical thing is to deactivate the automatic suspension in Windows 10 and TechnoWikis will explain how to do this in a functional way..
To stay up to date, remember to subscribe to our YouTube channel! SUBSCRIBE
1. Disable automatic suspension from Windows 10 Settings
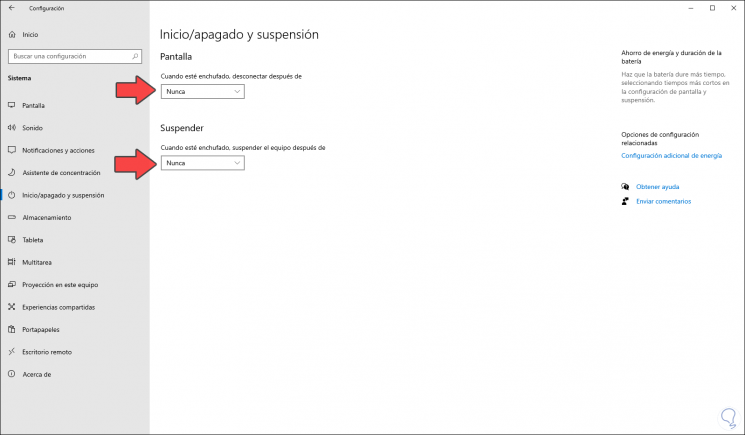
For this method we go to the Start menu and select the Configuration utility. Then we go to the "System" category and we go to the "start / stop and suspend" section. On the side we must set the values "Never" in the fields:
- Screen, "When plugged in disconnect after"
- Suspend, "When plugged in suspend the computer after"
With this we have disabled the automatic suspension in Windows 10 from Settings.
2. Disable Windows 10 Auto Sleep from Power Options
Step 1
In this case we look for “energy” in the Start search box or we can go to the following route:
- All items in Control Panel
Step 2
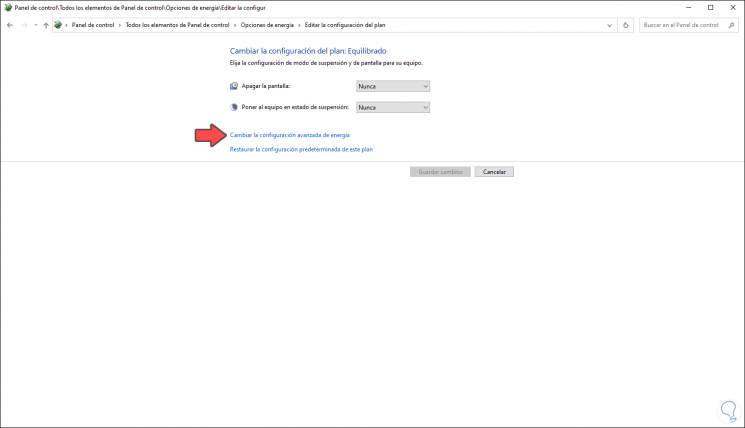
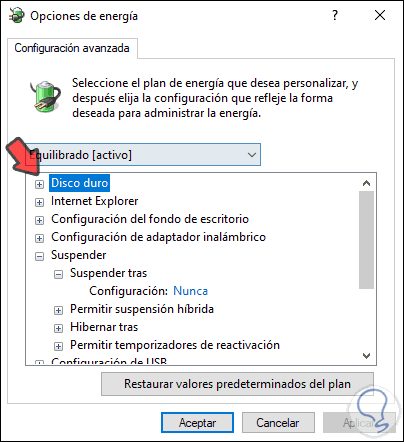
There we click on the line "Change advanced power settings" and in the displayed window we will go to the "Suspend" line and we will display the options in "Suspend after" and set the value "Never":
Step 3
Now we go to "Hard disk" and select the line "Turn off hard disk after", its default value is 20 minutes. There we must also leave the value "Never":
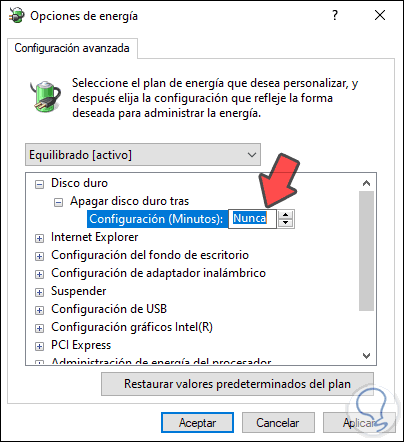
We click Apply and OK to save the changes.
With these methods it is possible to disable automatic suspension in Windows 10..