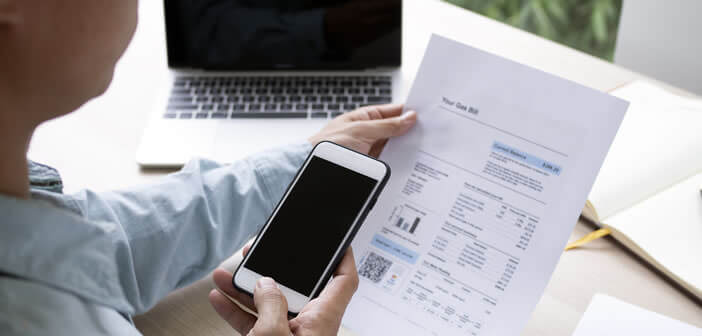
The photo app on your smartphone isn't just for taking selfies or capturing your vacation. You can also use it as a pocket scanner. The latest version of the Google Photos app offers various automatic image adjustment tools to make your documents more presentable and readable. Let's see how it works..
How to scan a document with Google Photos
If you have owned a smartphone for several years, you have certainly already tried to scan a face map, a page of a book or a brochure directly from the camera application on your device. Unfortunately the result is rarely up to your expectations.
The scans obtained generally have a certain number of defects: presence of shadows and reflections, document slightly tilted. This is explained simply because the camera application is not suitable for this type of stain..
Unlike a landscape or a portrait, scans are made to be read and not admired. This involves special photo processing (cropping, straightening, black and white switching) in order to increase the readability of the text.
It is of course possible to correct a scan and remove any imperfections with a photo editing application. However, this operation requires a solid knowledge of graphics without talking about the time lost..
Crop and adjust a document scanned with Google Photos
The Google Photos app now has a feature to automatically crop and straighten scanned documents. This has the advantage of being able to perfectly realign the scanned text. Here's how to activate it
- Take a photo of your document to be scanned using your regular photo app
- Then launch Google Photos
- Look in the list for the photo you just took
- Click on it to open it
- Tap the Edit icon
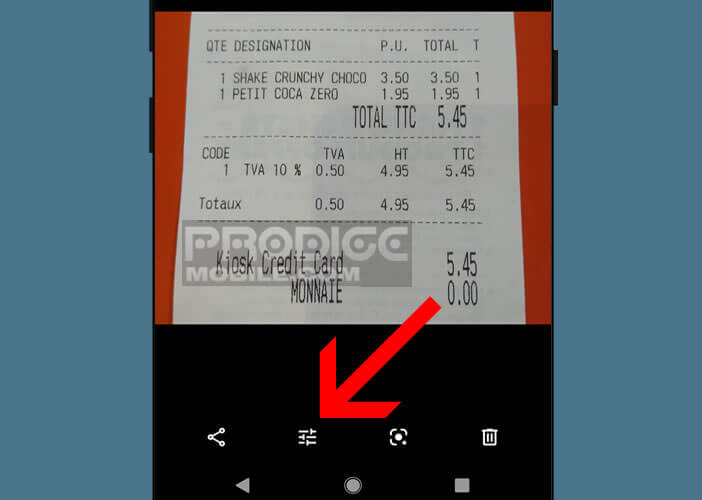
- Click the auto crop icon (composed of 9 squares)
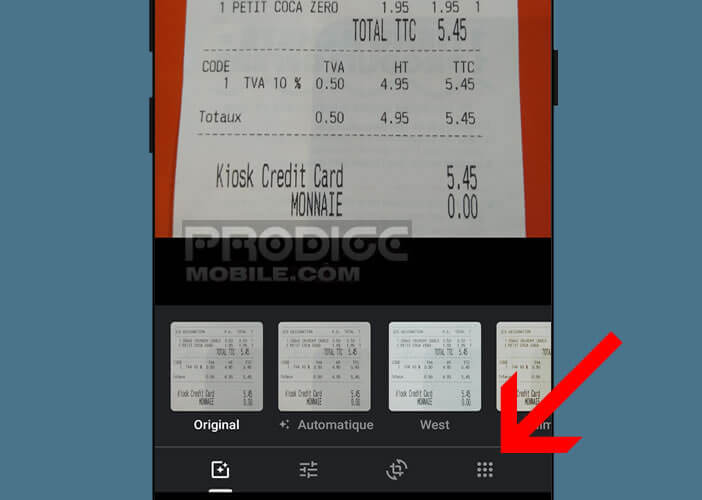
- Then select the crop document option
- Press the Ok button
- Don't forget to click on the save a copy button at the top of the window to save your changes
Note that Google Photos offers you the possibility to manually crop your scans. To do this, simply place your finger on one of the corners of the image and then move it until you get the desired result. This operation will require a little work, in particular to correct the perspective of the image. If you are a beginner, I advise you to use the automatic mode.
Also remember to pass the image in black and white. This will allow you to obtain perfectly readable text. The filters offered by Google Photos can also improve the rendering of the scanned document. Do not hesitate to make tests and go to consult the tutorial: how to scan your old photos with a mobile.
Optical character recognition
Are you looking for a solution to automatically extract the text content from your images and then copy it to a PDF or Word document? Thanks to the Lens visual recognition tool, the Google Photos application is able to identify and extract the text present in an image.
Concretely this means that you can transform any image into an editable text document. Text layout may be slightly different. For against you can then modify the text as you see fit. This will save you long hours of typing.
- Launch the Google Photos app
- Display the image containing the text to be extracted on your smartphone screen
- Zoom in if necessary on the area to be recognized
- Tap the Google Lens icon at the bottom of the screen
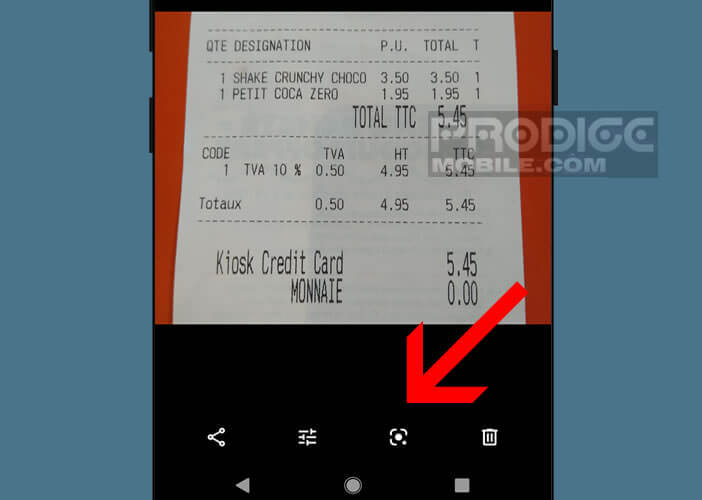
- Wait a few seconds for the app to analyze your text
- Click on the magnifying glass icon
- Then select the text function
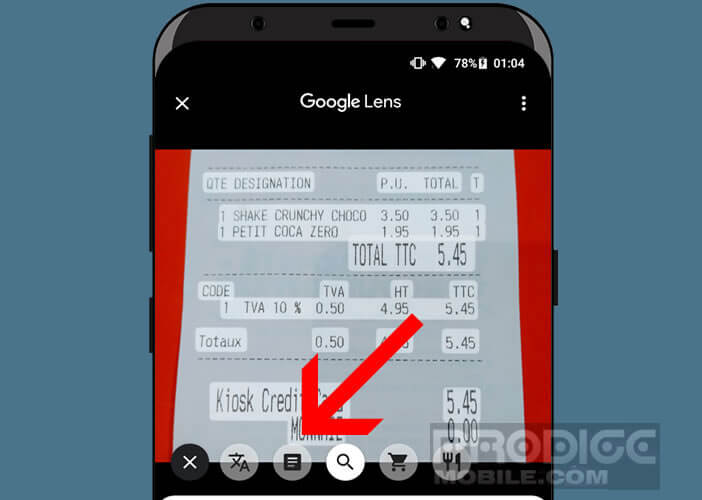
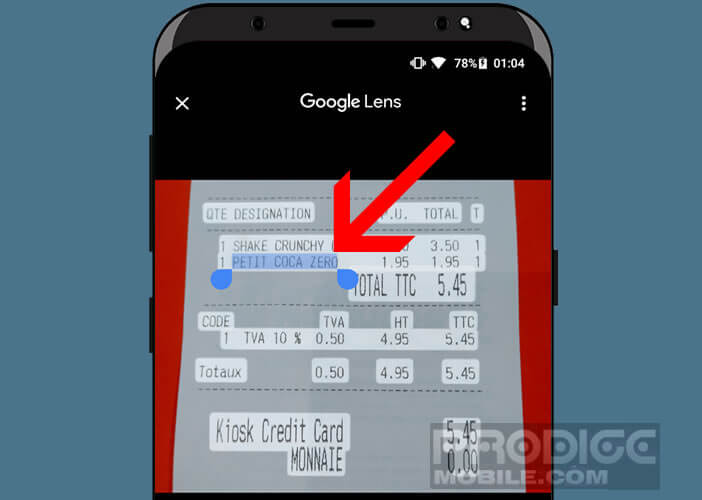
- Place your finger on the area of the text to be analyzed
- Use the cursors to select the text area to extract
- Click on the Copy text button at the bottom of the window
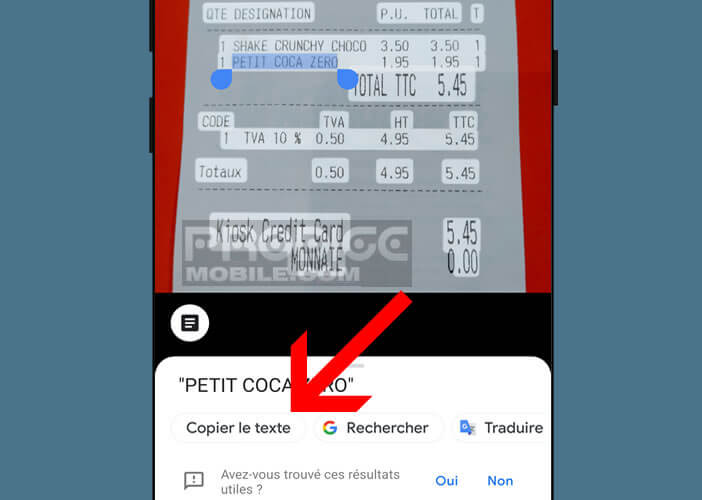
Now you just have to paste the text into the application or document of your choice. This function can be particularly useful for people wishing to manage a large number of scans.