Nowadays we use computers to perform different tasks because thanks to these devices we have the possibility to connect with different contacts through the web and its applications or social networks , to exchange information in a simple way, or to search for information thanks to the possibility of browsing the web .
Connectivity is essential to work in a complete, comprehensive and specific way in every aspect of the system and that is why Microsoft has integrated a specific functionality to connect to a second monitor (either a laptop or a desktop PC) and in this way keep the best control of the data worked..
This is ideal if we handle for example complex tables in Excel, numerous files or simply to expand our games. In Windows 10 the configuration of a second monitor is supported simply by having a wireless connection without incurring an extra expense of a physical monitor.
The process is simple and TechnoWikis will explain it to you in detail..
1. How to configure second Windows 10 monitor
Step 1
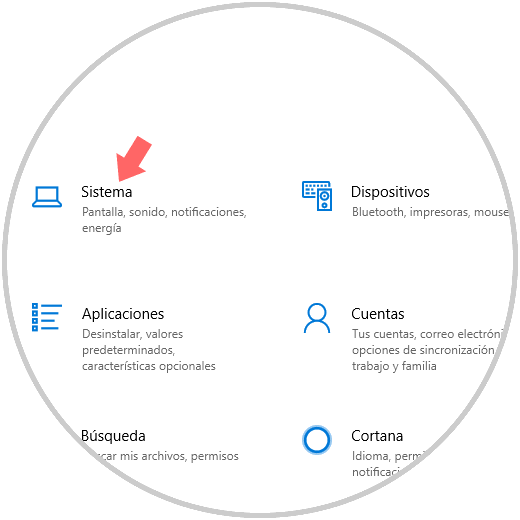
This functionality is called “Project on this equipment†and for its configuration we will go to the Start / Configuration menu, we will see the following options. There we will go to the “System†category
Step 2
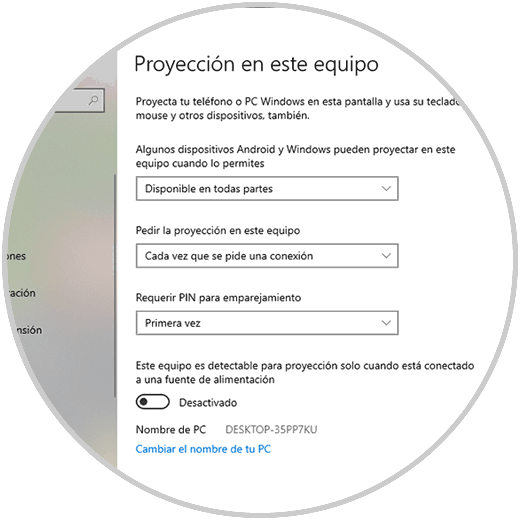
We go to the “Projection on this equipment†section where we configure the following values:
- In the field "Some Android and Windows devices can project on this equipment when you allow it" we select the option "Available everywhere", there we can choose (if applicable) the option Available only in secure networks or "Always deactivated" which It's the default option.
- In the "Request projection on this equipment" field we select the option "Every time a connection is requested" and the other option available is "Only the first time" with which the record is stored but for security it is not advisable to do so.
- In the "Require PIN for pairing" field it is a security mechanism and there we select "First time" which stores the connected equipment or we can select the "Never" or "Always" options.
- On the switch "This equipment is detectable for projection only when connected to a power source" will be deactivated since we can use the wireless projection even without being connected to the power.
Note
We do this process on the equipment that will project the screen.
Step 3
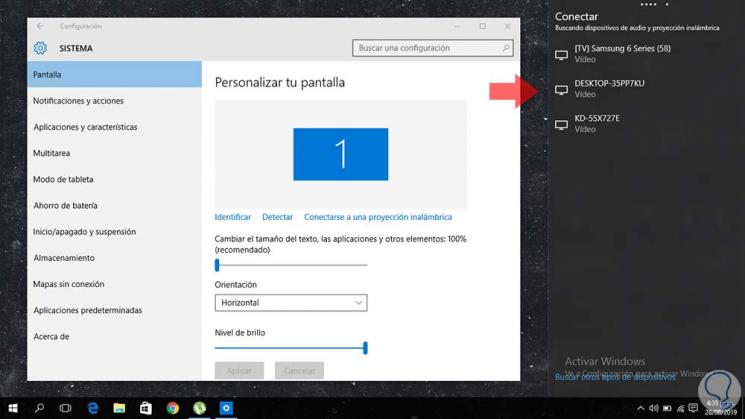
The next step is to go to the other team to establish the connection and as an essential requirement both must be on the same local network.
In the other team we go to the route:
There we click on the “Connect to a wireless projection†line, by clicking there we will see the list of available devices on the right side. There we find the equipment where the wireless projection has been configured:
Step 4
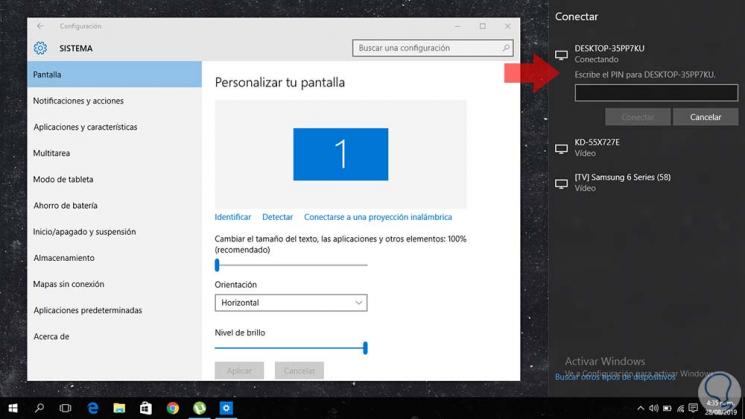
We click on this device and the following field will be activated:
Step 5
This is because we have set the option to add a PIN for pairing. This will launch a pop-up message on the laptop where we have configured the projection and there we find the name of the device that is trying to connect together with the option (in this case) for the first time:
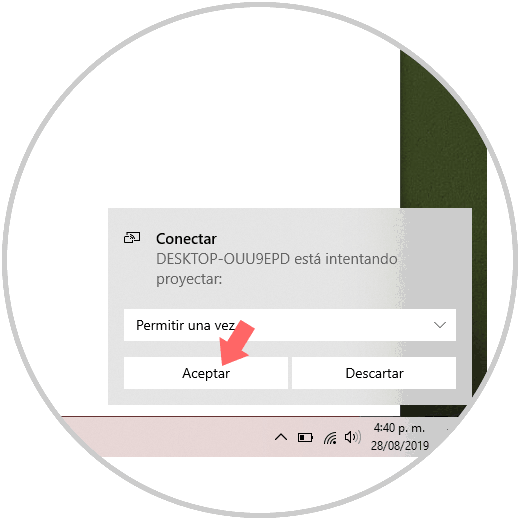
Step 6
We click on Accept and in the team to project we will see the following window:
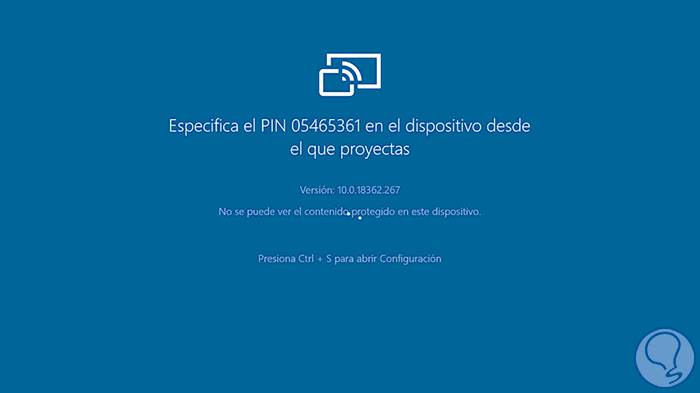
Step 7
This PIN is generated in order to enter it on the remote computer from where the screen will be projected:
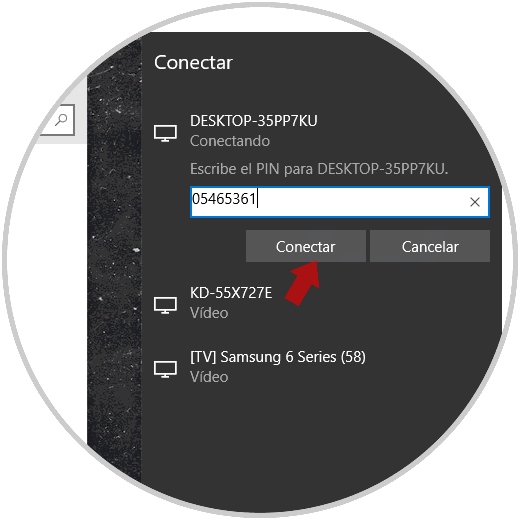
Step 8
Once entered we click on “Connect†and the process of connectivity on the main device will take place:
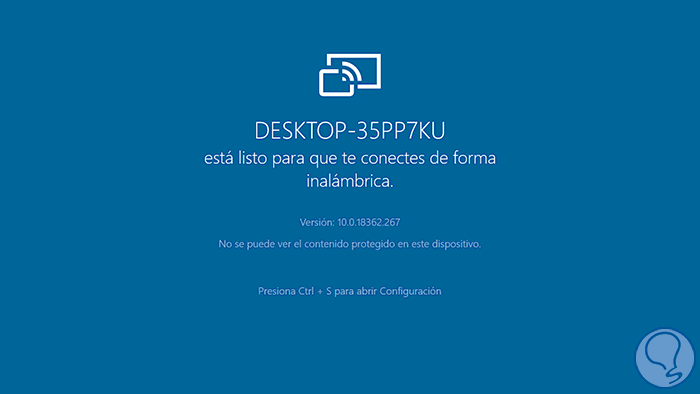
Step 9
Once this process is finished we will see the following:

From this moment the connection will be established and the device screen will be projected remotely on the selected device.
2. How to connect Android and Windows 10
As an additional point of TechnoWikis we want to explain how to connect with this functionality from Android.
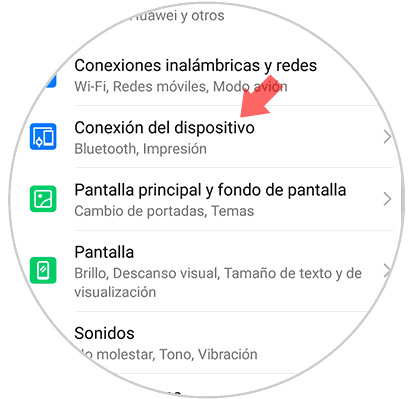
Step 1
The first step to take will be to access the phone settings and locate the “Device connection†section:
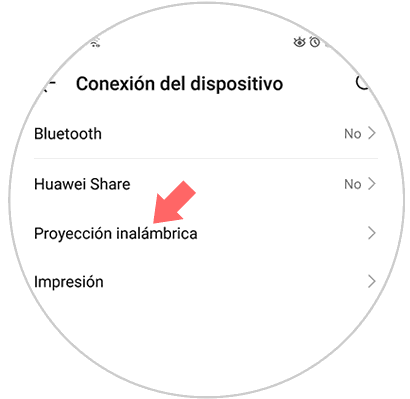
Step 2
In the next window we go to the “Wireless projection†line:
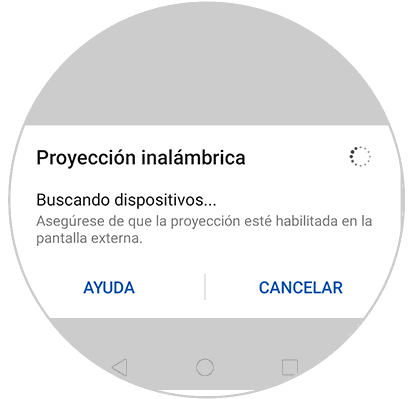
Step 3
Android will automatically start searching for devices in the area:
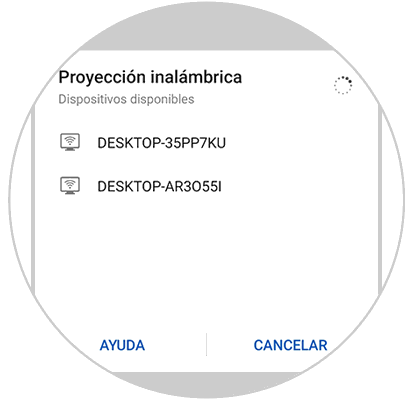
Step 4
There we will see the Windows 10 team where we have activated the screen projection:
Step 5
Click on it and it will give way to the process of connection between both devices:
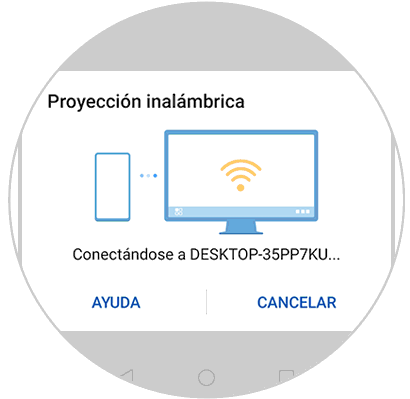
Step 6
When this process ends we can see that the connection has been correct:
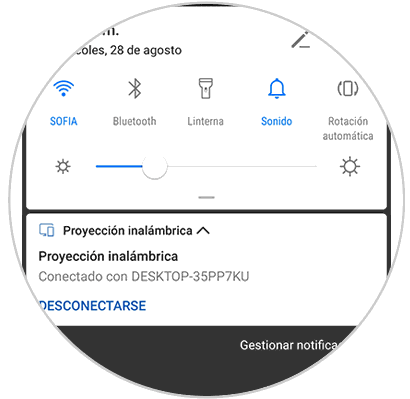
It's that simple to connect Android and Windows 10 wirelessly..
Thanks to this functionality of Windows 10 we have the ability to expand the functions of our screen and thus obtain a better visualization of the information to work.